こんにちは!
TCAはあらゆるプラットフォームで使用できるよう設計されていて、今回はApple Watch AppにTCAを導入する方法について解説します。
The Composable Architecture(略称:TCA)は、コンポジション、テスト、エルゴノミクスを考慮し、一貫した理解しやすい方法でアプリケーションを構築するためのライブラリです。SwiftUI、UIKitなどで使用でき、Appleのあらゆるプラットフォーム(iOS、macOS、tvOS、watchOS)で利用可能です。
実装内容は、TCAのCounterアプリのWatchOS版です。
swift-composable-architecture/Examples/CaseStudies/SwiftUICaseStudies/01-GettingStarted-Counter.swift
Githubにも上げているので、よろしければこちらも併せてご覧ください。
実装
1. TCAライブラリのインストール
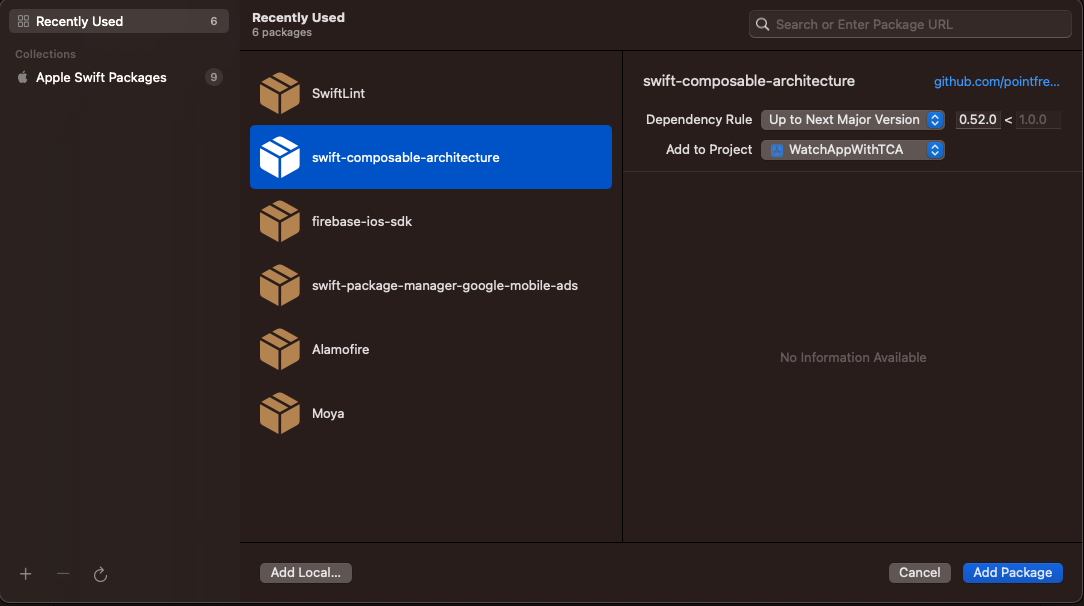
1.プロジェクト名 > PROJECTのプロジェクト名 > Package Dependencies からTCAライブラリをインストールします。
右上のの検索窓にhttps://github.com/pointfreeco/swift-composable-architectureと入力し、Add Packageをタップしてインストールしてください。

2.プロジェクト名 > TARGETSの(プロジェクト名) Watch App > Frameworks, Libraries, and Embedded Content にTCAを追加します。
こうすることでApple Watch AppでもTCAが使用できるようになります。
2. Reducerの定義
次に、StateとActionを受け取り、新しいStateを返すReducerを定義します。ここでは、Actionに応じてStateを更新するReducerを定義してみましょう。
Stateではcounterの数字を管理するcountを定義していて、
Actionではcountの増加減のアクションをそれぞれ定義しています。
struct Counter: ReducerProtocol {
  struct State: Equatable {
    var count = 0
  }

  enum Action: Equatable {
    case decrementButtonTapped
    case incrementButtonTapped
  }

  func reduce(into state: inout State, action: Action) -> EffectTask<Action> {
    switch action {
    case .decrementButtonTapped:
      state.count -= 1
      return .none
    case .incrementButtonTapped:
      state.count += 1
      return .none
    }
  }
}
3. CounterDemoViewの呼び出し定義
次に、StateとReducerを結びつけるStoreを定義します。
import SwiftUI
import ComposableArchitecture

@main
struct WatchAppWithTCAWatchAppApp: App {
    var body: some Scene {
        WindowGroup {
            CounterDemoView(store: Store(
                initialState: Counter.State(),
                reducer: Counter())
            )
        }
    }
}
4. Viewの実装
最後に、ViewでStoreを使用してStateを参照し、Actionをディスパッチする実装を行います。
CounterViewではボタンの増加減と2. Reducerの定義で定義したStateを表示しています。
CounterDemoViewでは説明文とCounterViewを定義行っていてstoreは特に活用されておらず、CounterViewに受け渡しています。
struct CounterView: View {
    let store: StoreOf<Counter>

    var body: some View {
        WithViewStore(self.store, observe: { $0 }) { viewStore in
            HStack {
                Button {
                    viewStore.send(.decrementButtonTapped)
                } label: {
                    Image(systemName: "minus")
                }

                Text("\(viewStore.count)")
                    .monospacedDigit()

                Button {
                    viewStore.send(.incrementButtonTapped)
                } label: {
                    Image(systemName: "plus")
                }
            }
        }
    }
}

struct CounterDemoView: View {
    let store: StoreOf<Counter>

    var body: some View {
        Form {
            Section {
                Text(readMe)
            }

            Section {
                CounterView(store: store)
                    .frame(maxWidth: .infinity)
            }
        }
        .buttonStyle(.borderless)
        .navigationTitle("Counter demo")
    }
}
これで、Apple Watch AppにTCAを導入する準備が整いました。
5. アプリの実行
iOSへの導入とほとんど手順は変わらなかったので、スムーズに導入ができると思います。
TCAを導入することで、アプリケーションの状態管理や副作用の管理を簡単に行うことができました。ぜひ、自分のアプリにもTCAを導入してみてください。
以上で、SwiftUIを使用したApple Watch AppにTCAを導入する記事は終了となります。ご覧いただき、ありがとうございました。
参考
