1. まず最初に
1-1. 動作確認済み環境
OS: macOS Ventura
※Windowsも基本同じですが、ターミナルのコマンドが違う場合あります。
1-2.準備事項
1-2-1. Node.js インストール
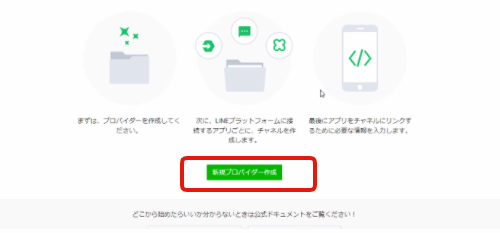
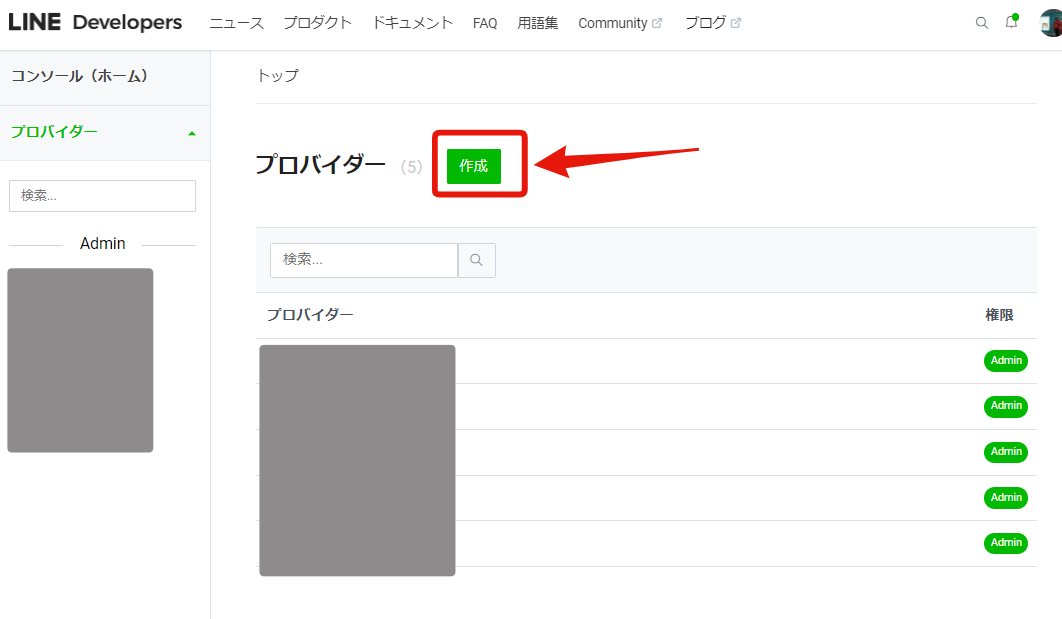
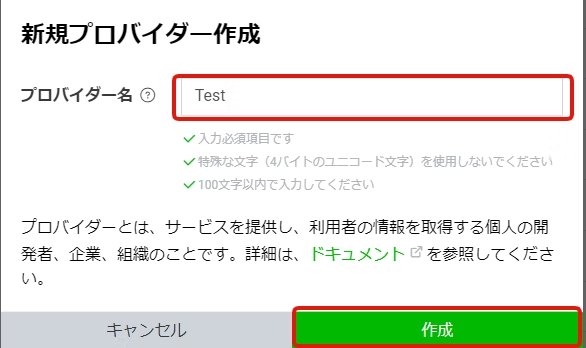
1-2-2. LINE Developers の登録
1-2-3. OpenAIの登録
2. LINE Developers
2-1. 初期設定
LINE Developersを開き、ログインします。
→ https://developers.line.biz/ja/
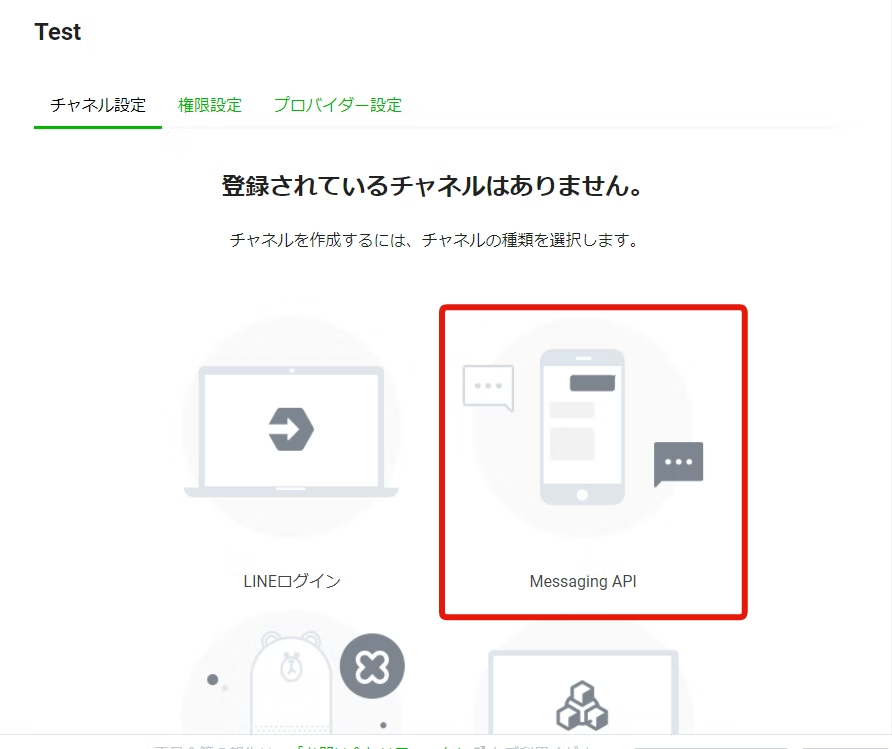
チャネルの種類:Messaging API
プロバイダー: さっき作ったやつ
会社・事業所の所在地: 入力
チャネルアイコン: 持参したアイコン画像を入れよう
チャネル名: チャットボットの名前です。
チャネル説明: チャットボットの説明
大業種:入力
小業種:入力
メールアドレス:入力
プライバシーポリシーURL :今回は入力不要
サービス利用規約URL : 今回は入力不要
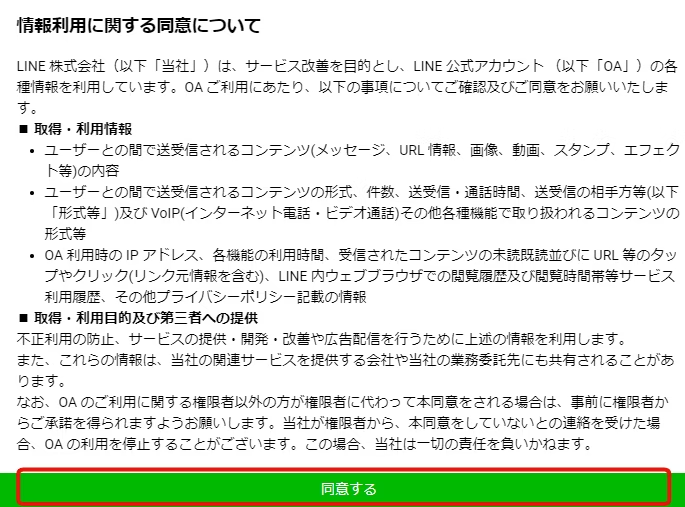
・LINE公式アカウント利用規約 の内容に同意します
・LINE公式アカウントAPI利用規約 の内容に同意します
にチェックをいれて、
作成をクリック
LINEボットの設定ができました。
2-2. Messaging APIの設定
Messaging API 設定
スマホのLINEで、このQRコードを読んでください。
LINEボットができてますね。

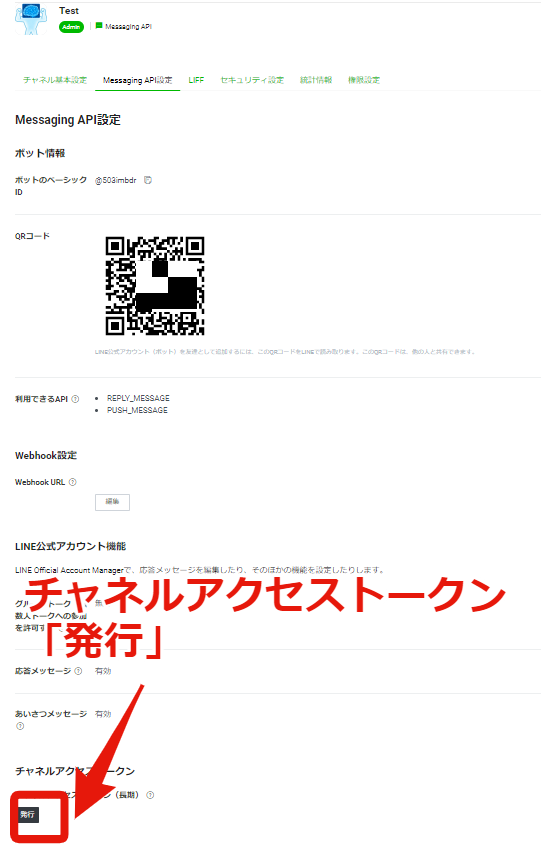
2-3. チャネルアクセストーンなど
QRコードのあるページの一番下の
「チャネルアクセストークン」>発行
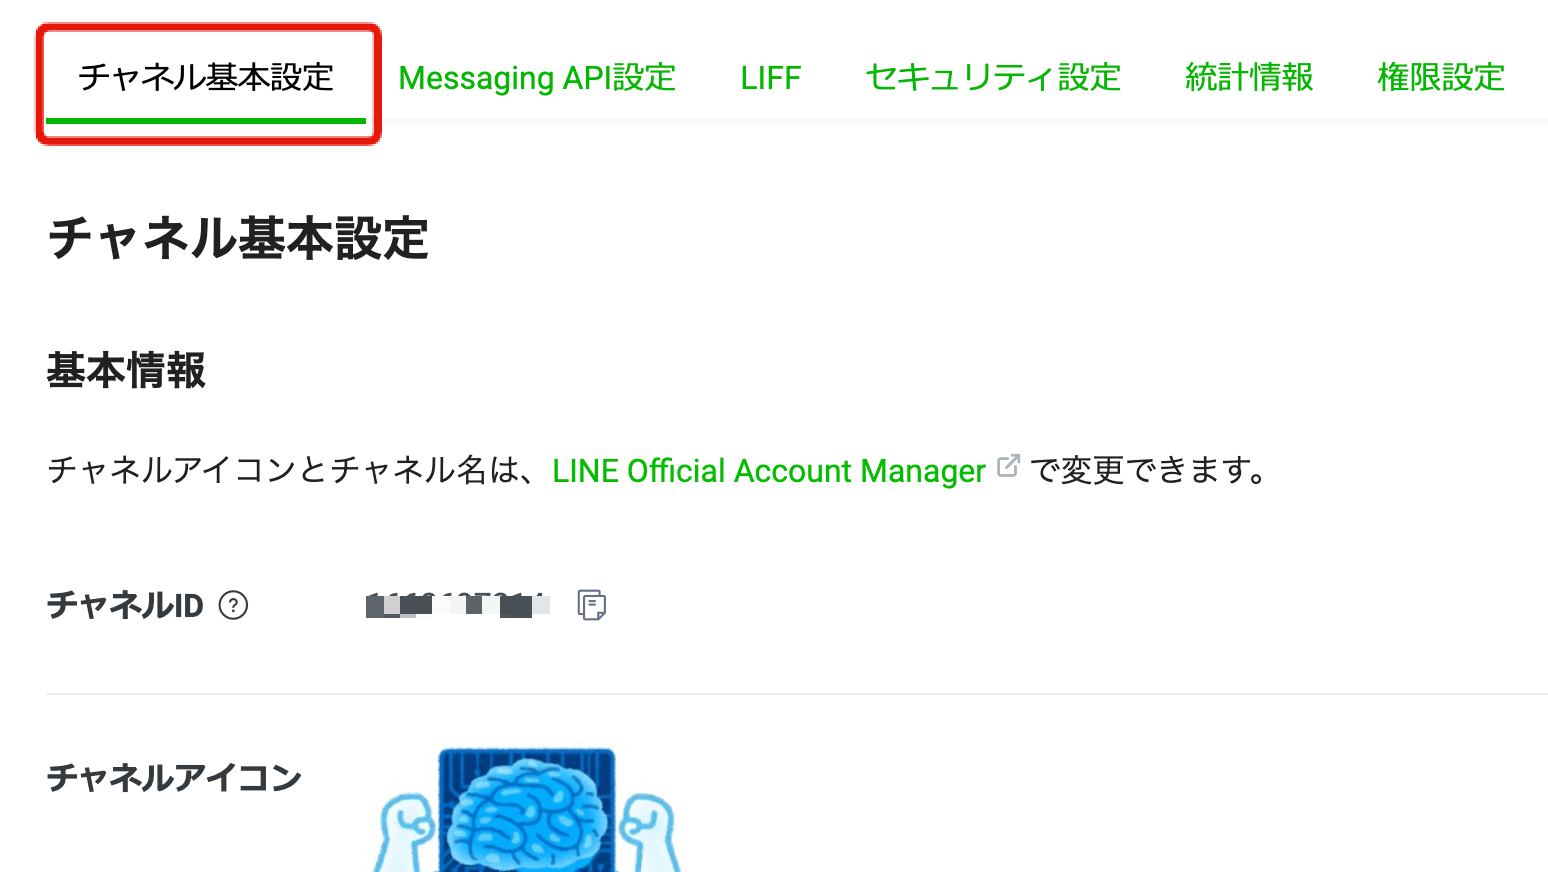
「チャネル基本設定」タブの下方にある「チャネルシークレット」をどこかに控える。

3. OpenAI
OpenAIのページへ
https://openai.com/api/
"Verify you are human"と表示されたら、ボタンをクリックします。

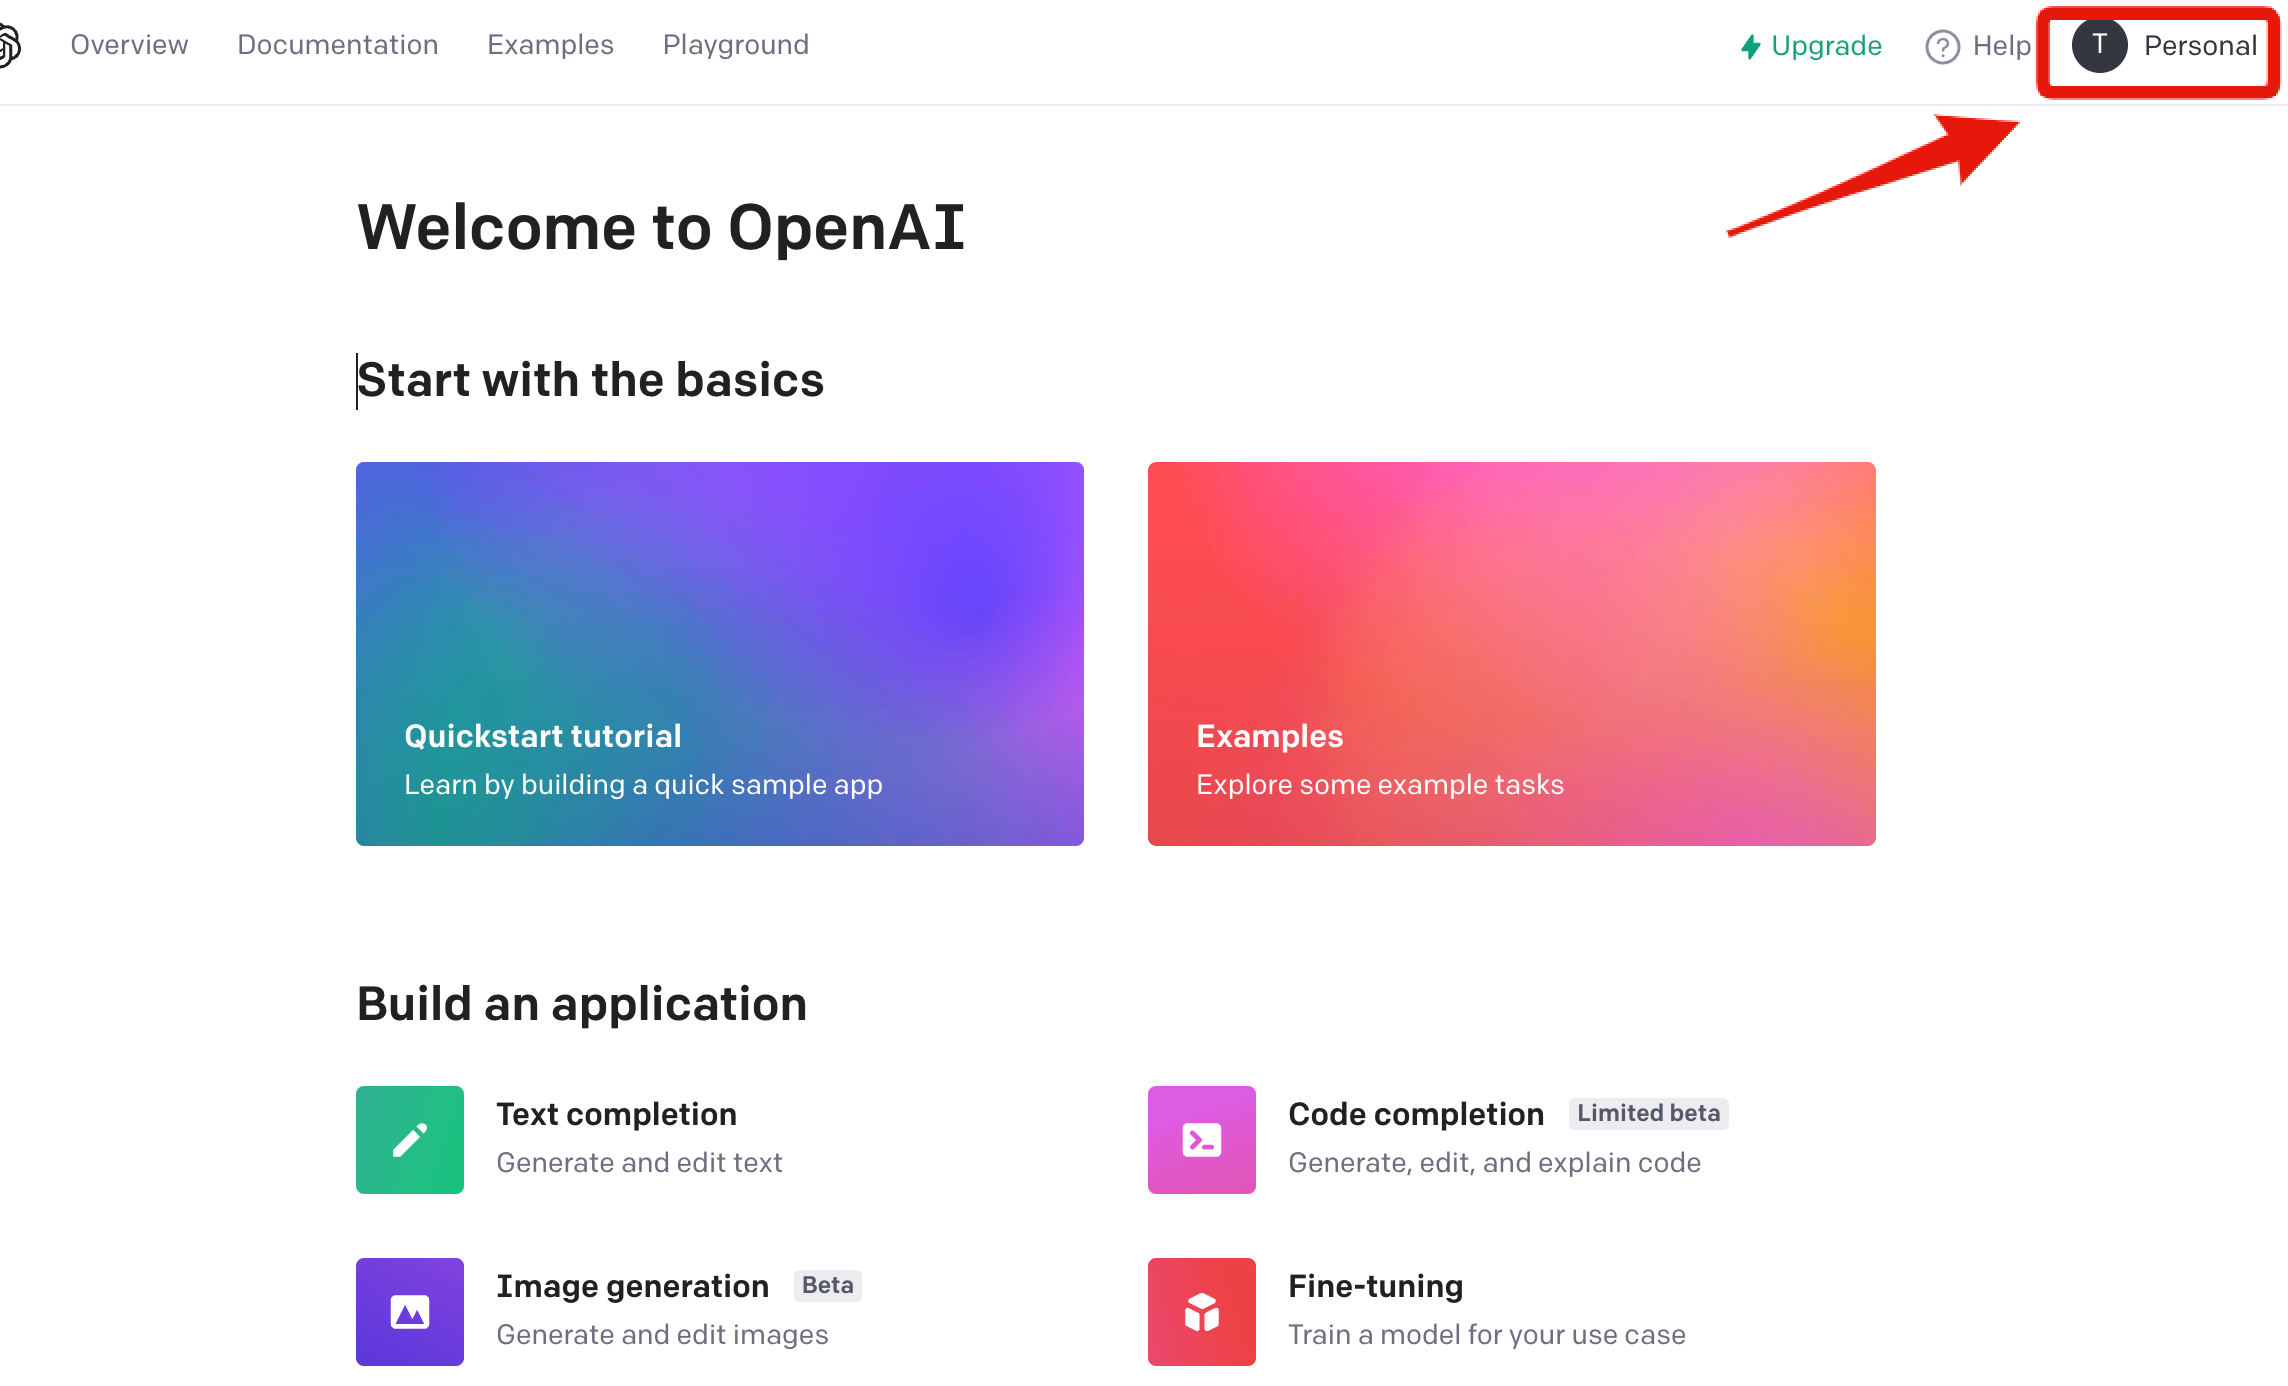
「+ Create new secret key」をクリック

APIキーが生成される。
下図の緑色のコピーボタンを押して、「OK」

このAPIキーはどこかに控えておく。
4. Node.js
ターミナル画面で以下のコマンドを入力
$ mkdir chatgpt
$ cd chatgpt
$ npm init -y
環境変数を使うため dotenvをインストール
$ npm install --save dotenv
同じフォルダに .envを作る
$ touch .env
.env に以下を入力
OPENAI_API_KEY="OpenAIのAPI"
LINE_CHANNEL_SECRET="LINE Messaging API のチャネルシークレット"
LINE_CHANNEL_ACCESS_TOKEN="LINE Messaging API のチャネルアクセストークン"
パッケージをインストール
$ npm install openai
$ npm install @line/bot-sdk express
$ npm install axios
実行プログラム app.js を作成
$ touch app.js
app.js に以下のコードを入力
'use strict';

require("dotenv").config();

const OpenAI = require('openai');
const openai = new OpenAI({
    apiKey: process.env.OPENAI_API_KEY,
  });

const express = require('express');
const axios = require('axios');
const line = require('@line/bot-sdk');
const PORT = process.env.PORT || 3000;

const config = {
    channelSecret: process.env.LINE_CHANNEL_SECRET,
    channelAccessToken: process.env.LINE_CHANNEL_ACCESS_TOKEN
};

const app = express();

app.get('/', (req, res) => res.send('Hello LINE BOT!(GET)')); //ブラウザ確認用(無くても問題ない)
app.post('/webhook', line.middleware(config), (req, res) => {


    console.log(req.body.events[0].message.text);
    const lineMes = req.body.events[0].message.text;

    const client = new line.Client(config);

    async function handleEvent(event) {
        if (event.type !== 'message' || event.message.type !== 'text') {
            return Promise.resolve(null);
        }

        const completion = await openai.chat.completions.create({
            model: "gpt-3.5-turbo",
            messages: [{ role: "user", content: lineMes  }],
        });


        const res = completion.choices[0].message.content;

        return client.replyMessage(event.replyToken,
            {
              type: 'text',
              text:  res
            }
        );
    }

    Promise
    .all(req.body.events.map(handleEvent))
    .then((result) => res.json(result));
});

app.listen(PORT);
console.log(`Server running at ${PORT}`);
5. 動作テスト
5-1. ngrok
正式にデプロイする前に、ローカルサーバーで試すためにngrokを使う。
ngrokをインストール
$ npm install -g ngrok
ngrokを起動
$ ngrok http 3000
ngrok by @inconshreveable                                                                              (Ctrl+C to quit)

Session Status                online
Account                       TATSUYA  (Plan: Free)
Update                        update available (version 2.3.41, Ctrl-U to update)
Version                       2.3.35
Region                        United States (us)
Web Interface                 http://127.0.0.1:4040
Forwarding                    http://35fe-2405-6587-a0-900-40cd-ffa7-63a9-d348.ngrok.io -> http://localhost:3000
Forwarding                    https://35fe-2405-6587-a0-900-40cd-ffa7-63a9-d348.ngrok.io -> http://localhost:3000

Connections                   ttl     opn     rt1     rt5     p50     p90
                              34      0       0.00    0.00    3.57    5.53

HTTP Requests
ここの
https://35fe-2405-6587-a0-900-40cd-ffa7-63a9-d348.ngrok.io
がローカールサーバーのアドレス。
どこかに控えとく。
なお、ngrokが起動するたびにこのアドレスは変わる。
5-2. Webhook設定(LINE Developers)
LINE Developers
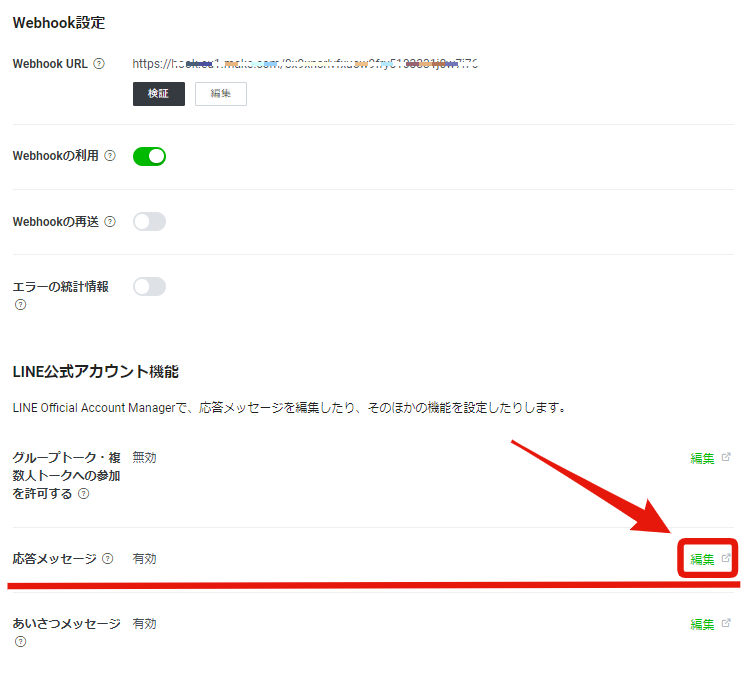
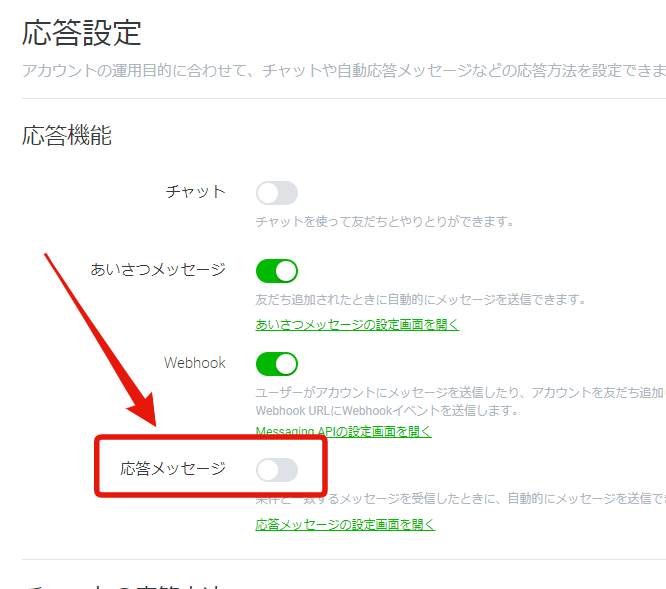
Messaging API設定 > WebhookURL > 編集
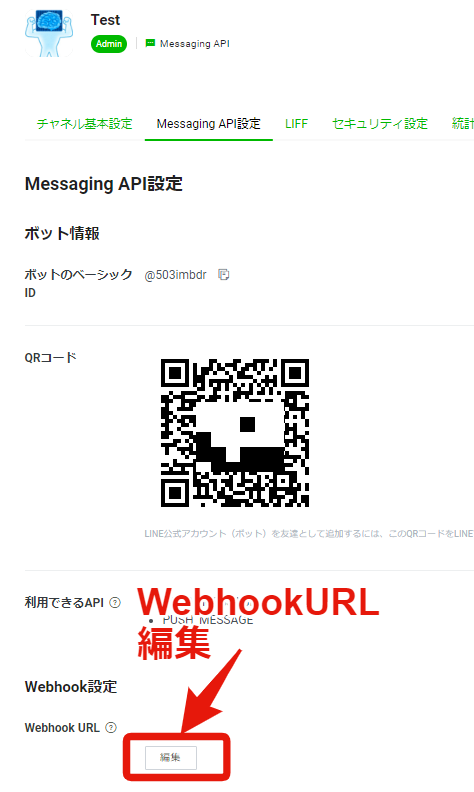
ここに先ほどのアドレスをペーストし、末尾に /webhook を付けたし、
更新ボタン

5-3. テスト
app.js を実行(ローカルサーバーを立ち上げ)する。
$ node app.js
スマホのLINEでなにか呟いて、
反応があれば、OK

なお、このままではローカルサーバーが動作しているときでないと使えません。
ずっと使いたい場合は、Herokuなどでデプロイしてください。
(参考サイト)
https://platform.openai.com/docs/api-reference/introduction


