動作確認環境
- MacOS Ventura
- Unity 2022.3.10f1
準備
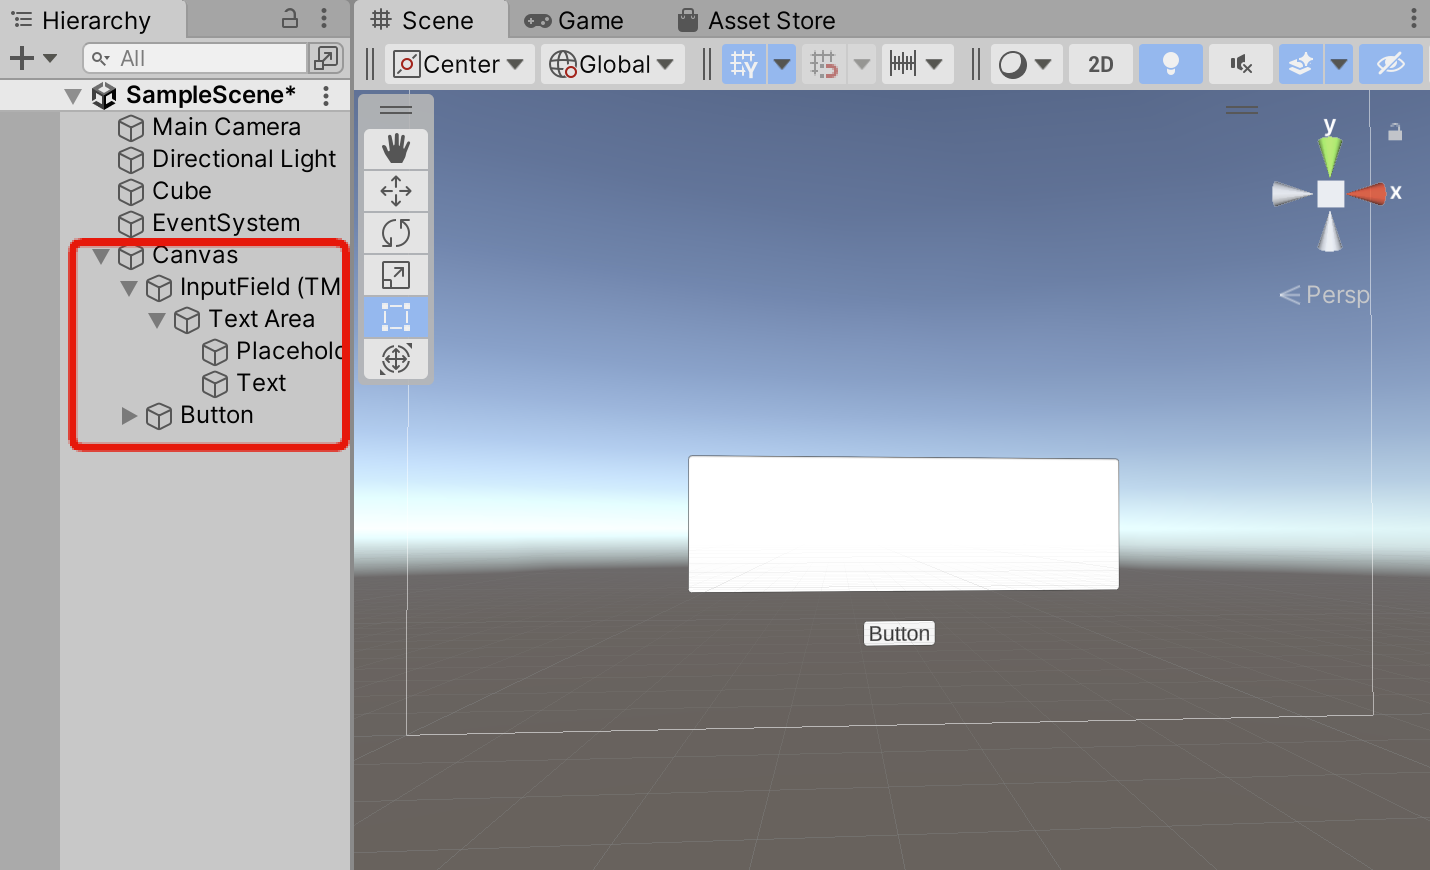
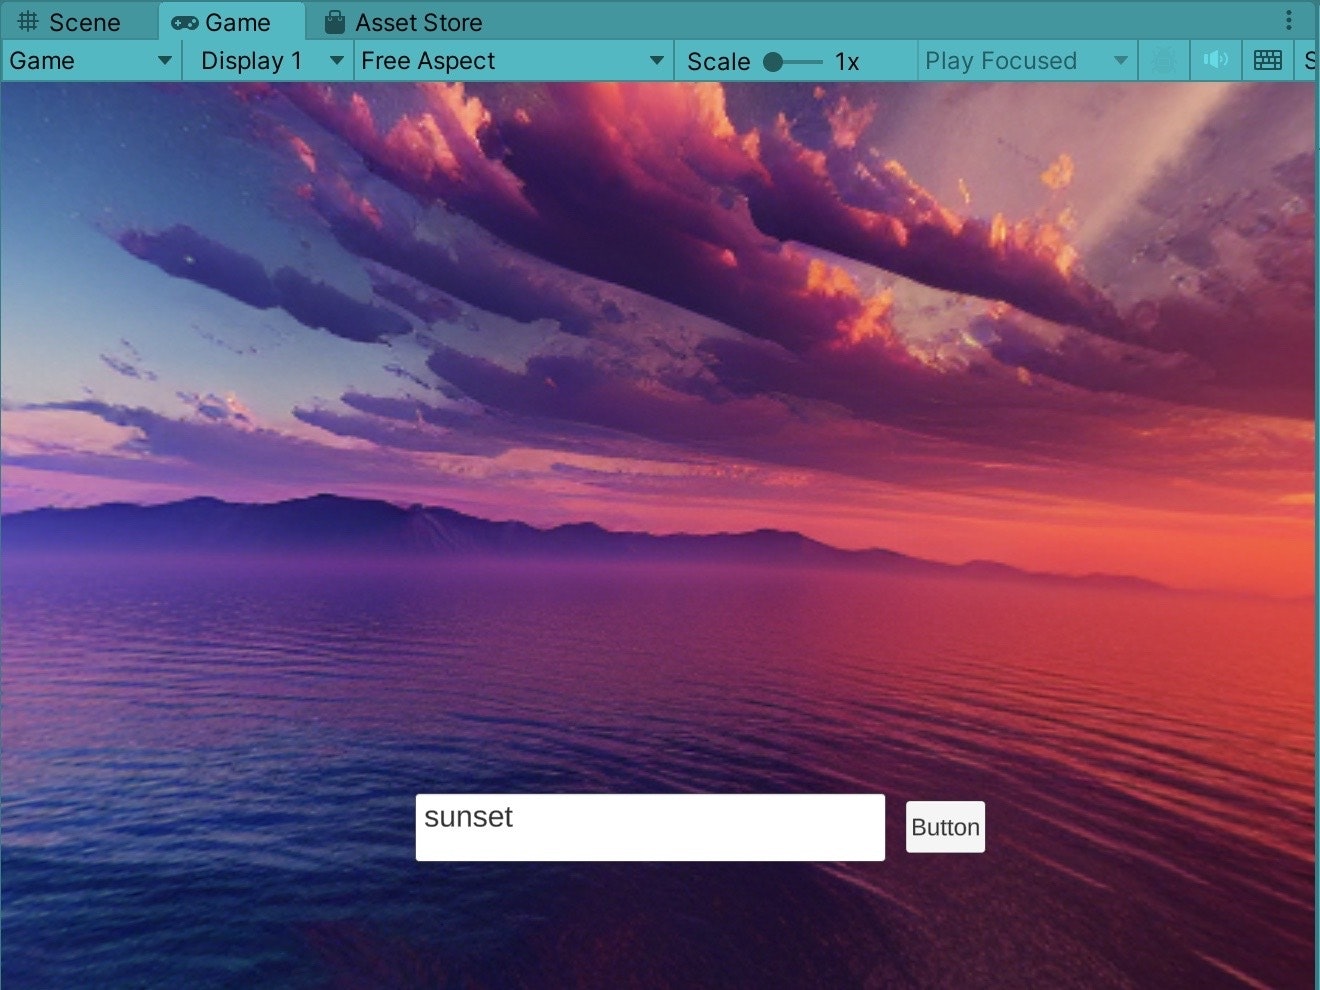
入力用のUIを作る
こんな感じでUIを作ります。
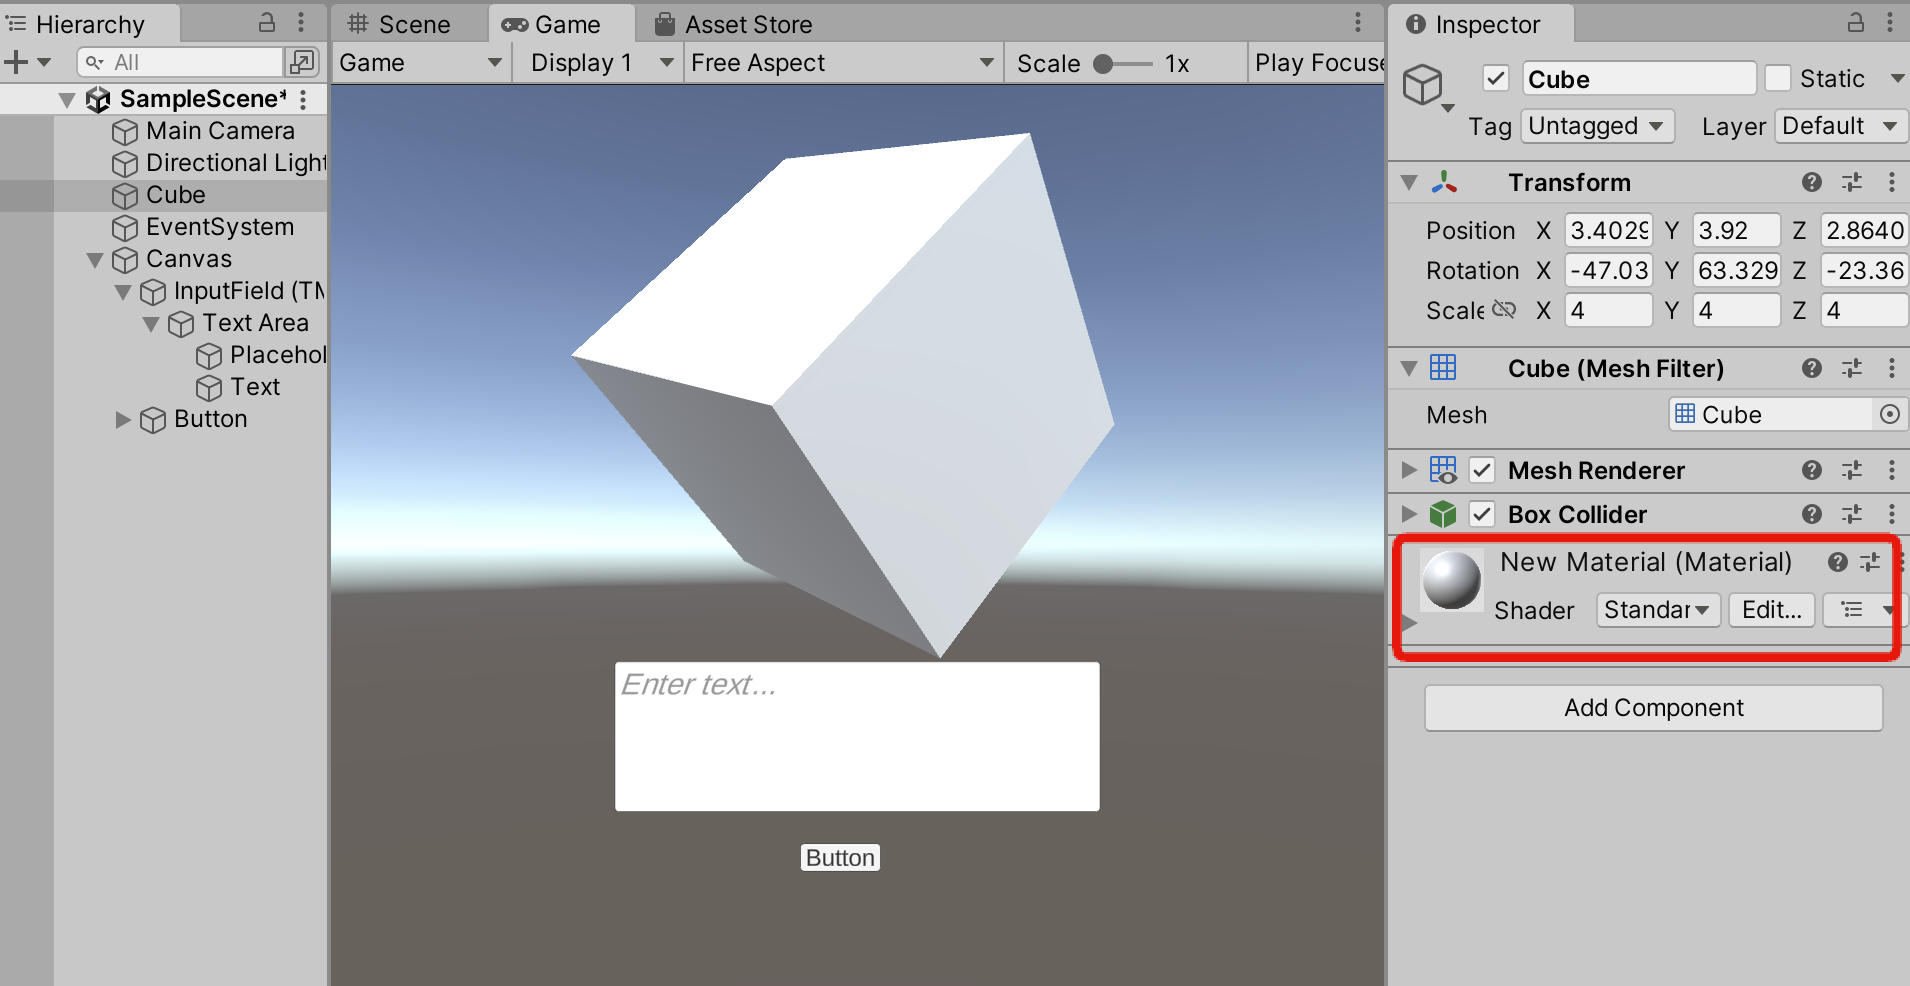
生成された画像を貼るCubeを作る
新しくCubeを作る。
Psotion、Rotation、Scale を調整
新しくマテリアルを作り、Cubeにアタッチする。
プログラム用の準備
非同期処理をするために、
以下のGithubから「Unitask」パッケージをダウンロードしてインポートする。
(ファイル名:UniTask.X.X.X.unitypackage)
https://github.com/Cysharp/UniTask/releases
コードの最初にはこれが必要
using System.Threading.Tasks;
OpenAIのAPI keyを取得する。
スクリプト
全体のスクリプトはこちら
https://gist.github.com/tatsuya1970/b9fb6de432bf86467e80bec9bfc57bec
うち、以下一部説明
OpenAIへのリクエスト
classの定義
inputPrompt.cs
//OpenAIのAPIにリクエストするJSON
    [Serializable]
    public class RequestBody
    {
        public string model;
        public string prompt;
        public int n;
        public string size;
    }
APIをたたく
inputPrompt.cs
var url = "https://api.openai.com/v1/images/generations";
RequestBody body = new RequestBody();
body.model = "dall-e-3";
body.prompt = mes;
body.n = 1;
body.size = "1024x1024";
string jsonBody = JsonUtility.ToJson(body);

//以下、OpenAIのAPIへJSONを投げる
UnityWebRequest request = new UnityWebRequest(url, "POST");
byte[] postData = System.Text.Encoding.UTF8.GetBytes(jsonBody);
request.uploadHandler = new UploadHandlerRaw(postData);
request.downloadHandler = (DownloadHandler)new DownloadHandlerBuffer();
request.SetRequestHeader("Content-Type", "application/json");
request.SetRequestHeader("Authorization", "Bearer <OPENAIのAPIキー>");
OpenAIからリクエストが返ってきたあとの処理
classを定義する。
1回APIをたたいて、返ってきたJSONを見て作成した。
inputPrompt.cs
//OpenAIのAPIからリターンのあるJSON
    [System.Serializable]
    public class ImageItem
    {
        public string revised_prompt;
        public string url;
    }
    [System.Serializable]
    public class ImageResponse
    {
        public int created;
        public ImageItem[] data;
    }
JSONをパース
inputPrompt.cs
string text = request.downloadHandler.text;

// JsonUtilityを使ってJSONデータを解析
ImageResponse response = JsonUtility.FromJson<ImageResponse>(text);
// 最初の画像のURLを取得
string imageUrl = response.data[0].url;
await DownloadAndSetTexture(imageUrl);  //画像をいったんDLしてテクスチャにする処理の関数
DownloadAndSetTexture関数
画像をいったんDLして、Cubeのテクスチャにする。
inputPrompt.cs
async Task DownloadAndSetTexture(string url)
    {
        using (UnityWebRequest www = UnityWebRequestTexture.GetTexture(url))
        {
            TaskCompletionSource<bool> tcs = new TaskCompletionSource<bool>();
            www.SendWebRequest().completed += _ => tcs.SetResult(true);
            await tcs.Task;
            if (www.isNetworkError || www.isHttpError)
            {
                Debug.Log(www.error);
            }
            else
            {
                //ダウンロードしたテクスチャを取得
                Texture2D downloadedTexture = DownloadHandlerTexture.GetContent(www);

                // マテリアルの取得とテクスチャの設定
                Material material = GameObject.Find("Cube").GetComponent<Renderer>().material;
                material.shader = Shader.Find("Unlit/Texture");
                material.mainTexture = downloadedTexture;
            }
        }
    }
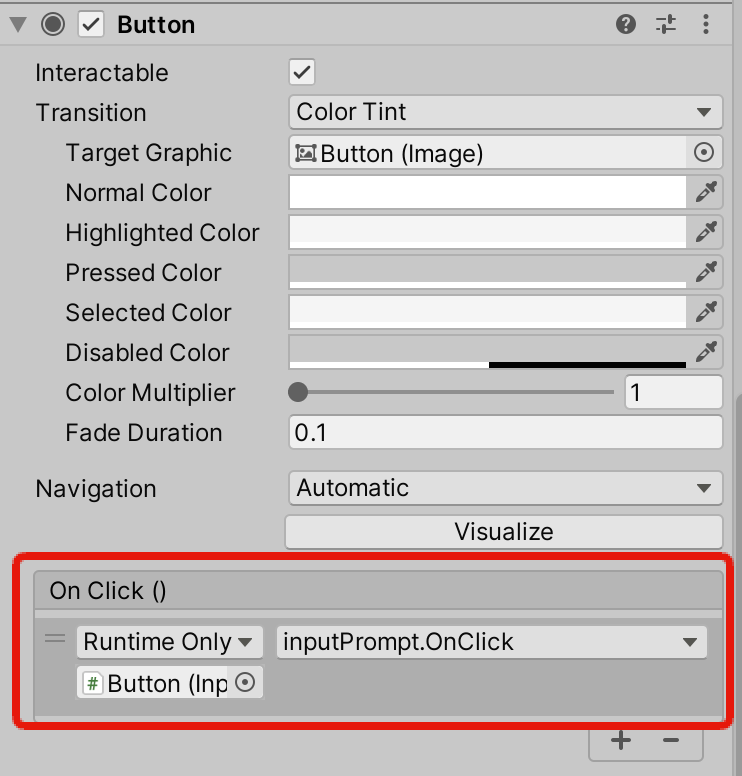
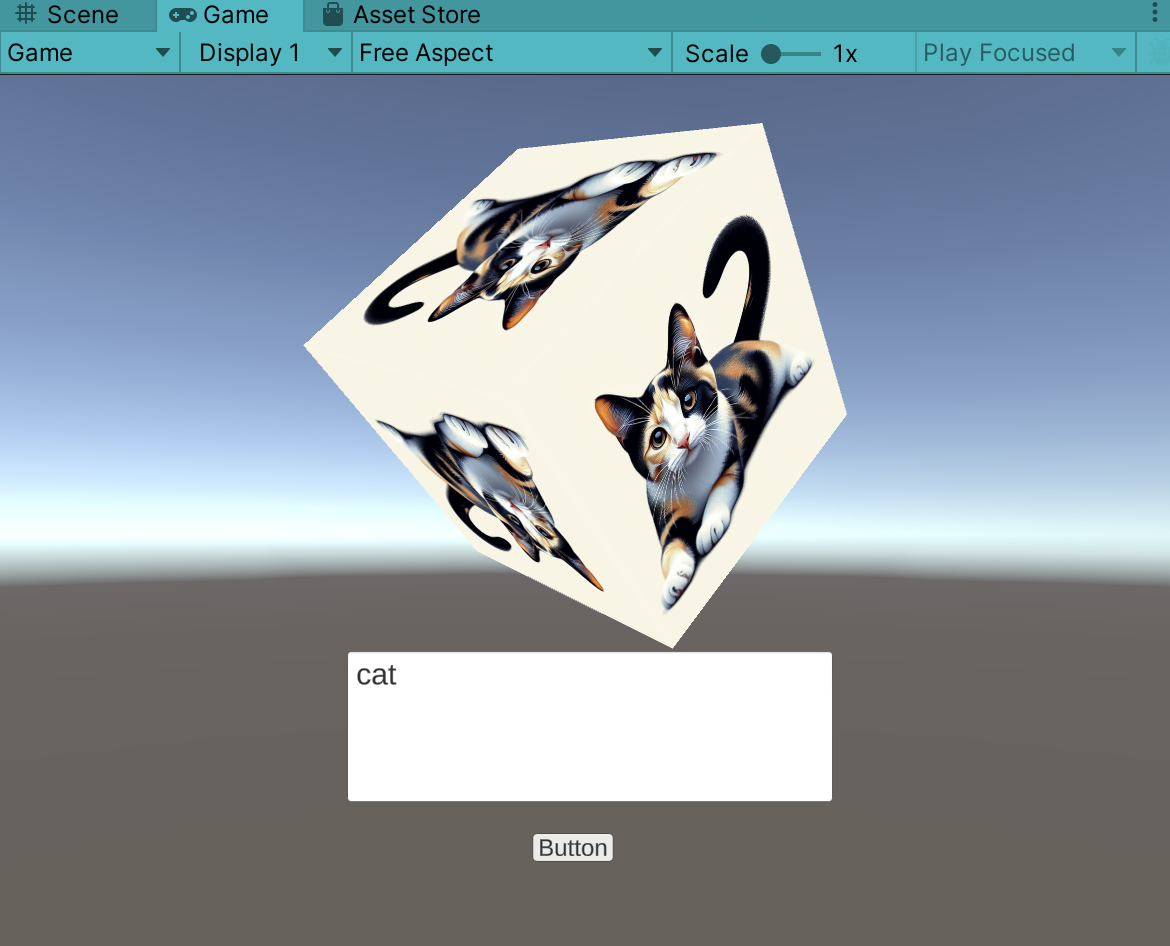
実行
スクリプトを ButtonのInspectorへアタッチし、
Button > OnClick() を以下のように設定
Run
Skyboxに反映
スクリプト
プロンプトの変更
-
Skyboxの360度画像の画像サイズは2:1だが、
DALL-E3のAPIで生成できる画像サイズは、1024x1024、1024x1792、1792x1024 の3種類なので、1792x1024にする。 -
360度画像にするために、プロンプトに以下を追加
create image suitable for use in virtual reality or panoramic viewers,
an equirectangular 360-degree panorama of <書きたい画像>
さきほどのスクリプトから以下を修正
inputPrompt.cs
string mes = inputField.text; //ユーザーが入力した内容を取得
//以下プロンプト追加
mes = "create image suitable for use in virtual reality or panoramic viewers,"
    + "an equirectangular 360-degree panorama of "
    + mes ;

var url = "https://api.openai.com/v1/images/generations";

RequestBody body = new RequestBody();
            body.model = "dall-e-3";
            body.prompt = mes;
            body.n = 1;
            body.size = "1792x1024"; //変更箇所
生成画像をSkyboxに設定するスクリプト
先ほどのDownloadAndSetTexture関数を以下のように変えるだけ。
inputPrompt.cs
async Task DownloadAndSetTexture(string url)
    {
        using (UnityWebRequest www = UnityWebRequestTexture.GetTexture(url))
        {
            TaskCompletionSource<bool> tcs = new TaskCompletionSource<bool>();
            www.SendWebRequest().completed += _ => tcs.SetResult(true);
            await tcs.Task;

            if (www.isNetworkError || www.isHttpError)
            {
                Debug.Log(www.error);
            }
            else
            {
                // ダウンロードしたテクスチャ
                Texture2D downloadedTexture = DownloadHandlerTexture.GetContent(www);

                // Skybox用のマテリアルを作成
                Material skyboxMaterial = new Material(Shader.Find("Skybox/Panoramic"));

                // テクスチャをマテリアルに設定
                skyboxMaterial.SetTexture("_MainTex", downloadedTexture);

                // Skyboxとして設定
                RenderSettings.skybox = skyboxMaterial;

                // 必要に応じてSkyboxの更新を強制
                DynamicGI.UpdateEnvironment();

            }
        }
    }
Run
厳密にシームレスではないですが、そこそこです。
参考にしたサイト