1.はじめに
Visual Studio Codeのマーケットプレイスにある「Live Sync for AWS Cloud9」を使ってVScodeで直接Cloud9を操作します。
2.Live Sync for AWS Cloud9のインストール
VScode上で「Live Sync for AWS Cloud9」をインストールします。
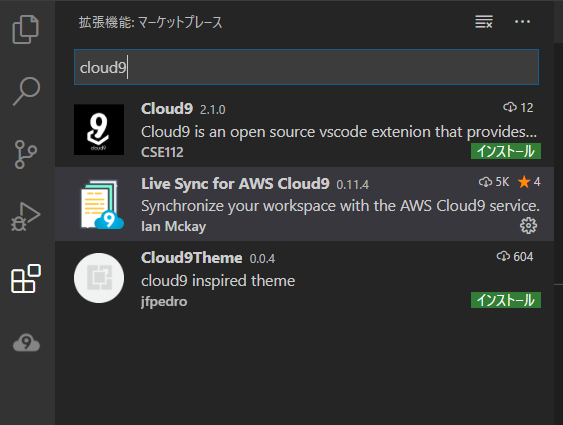
Cloud9で検索すれば出てきますので、そのままインストールします。
3.AWSでの設定
3.1 グループの作成
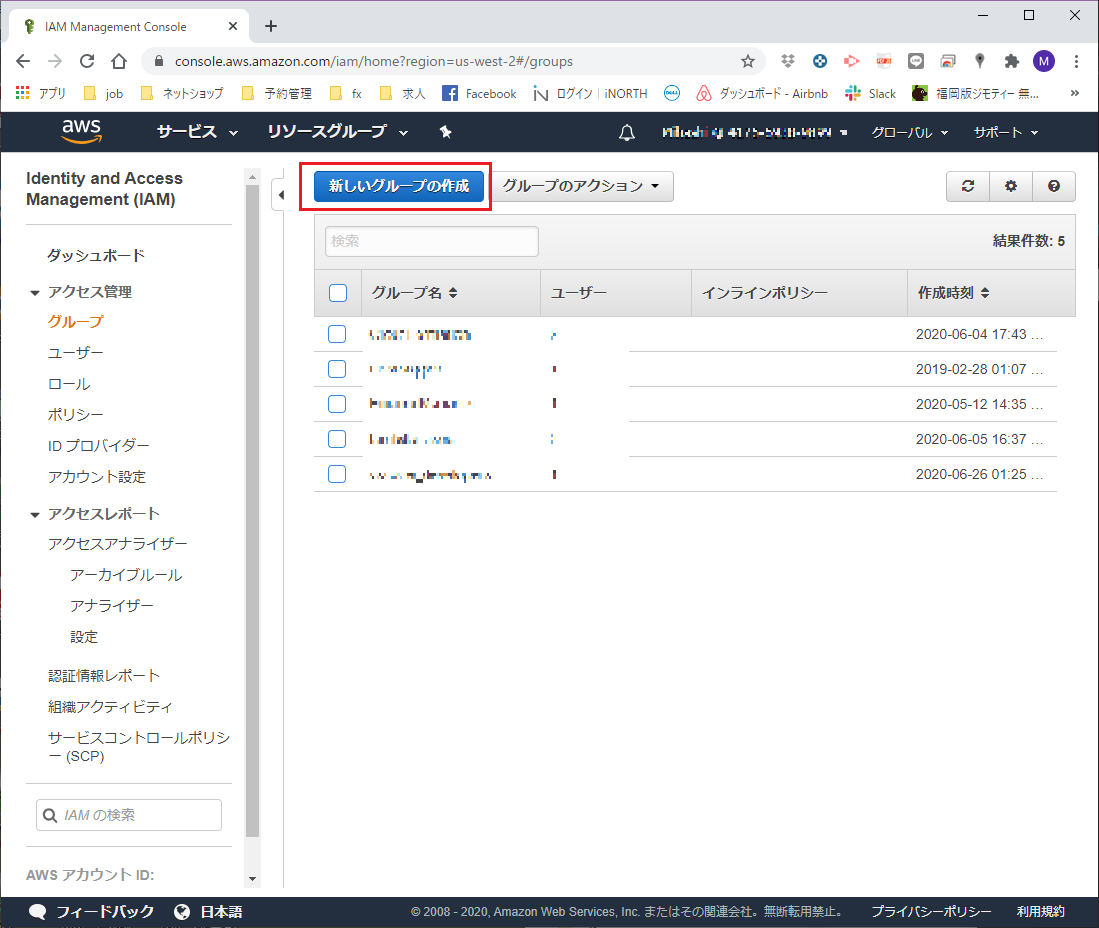
「IAM」 → 「アクセス管理」 → 「グループの設定」
新しいグループを設定し、グループ名を設定します。
例えば「vscode_user」と設定します。
ポリシーのアタッチで
・AmazonEC2FullAccess
・AWSCloud9Administrator
をチェックして「次のステップ」、確認画面で「グループの作成」
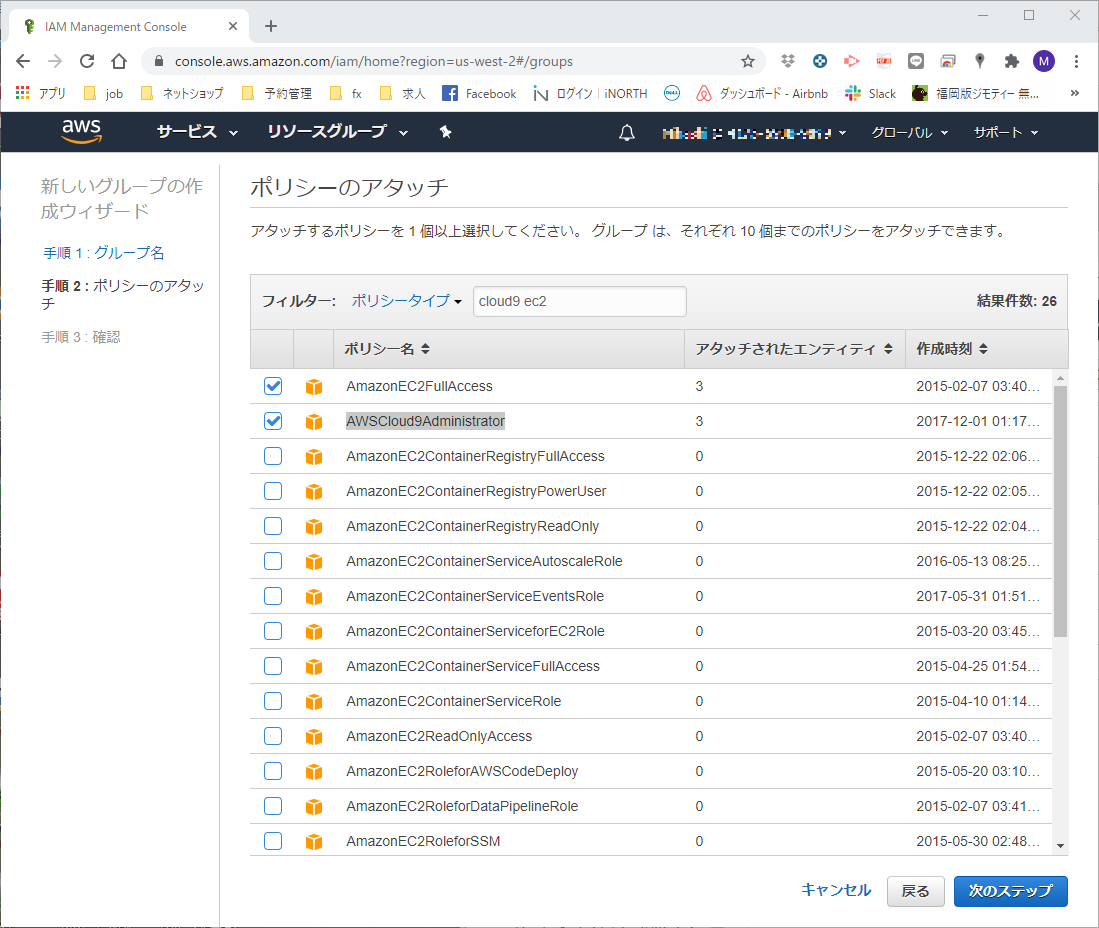
作成したグループを選択し、ユーザーを割り当てます。
「IAM」 → 「グループ」で作成したグループ名を選択 → 「グループにユーザーを追加」
3.2 アクセスキーの作成
「IAM」 → 「ユーザー」で割り当てたユーザーを選択し、認証情報のタブを選択
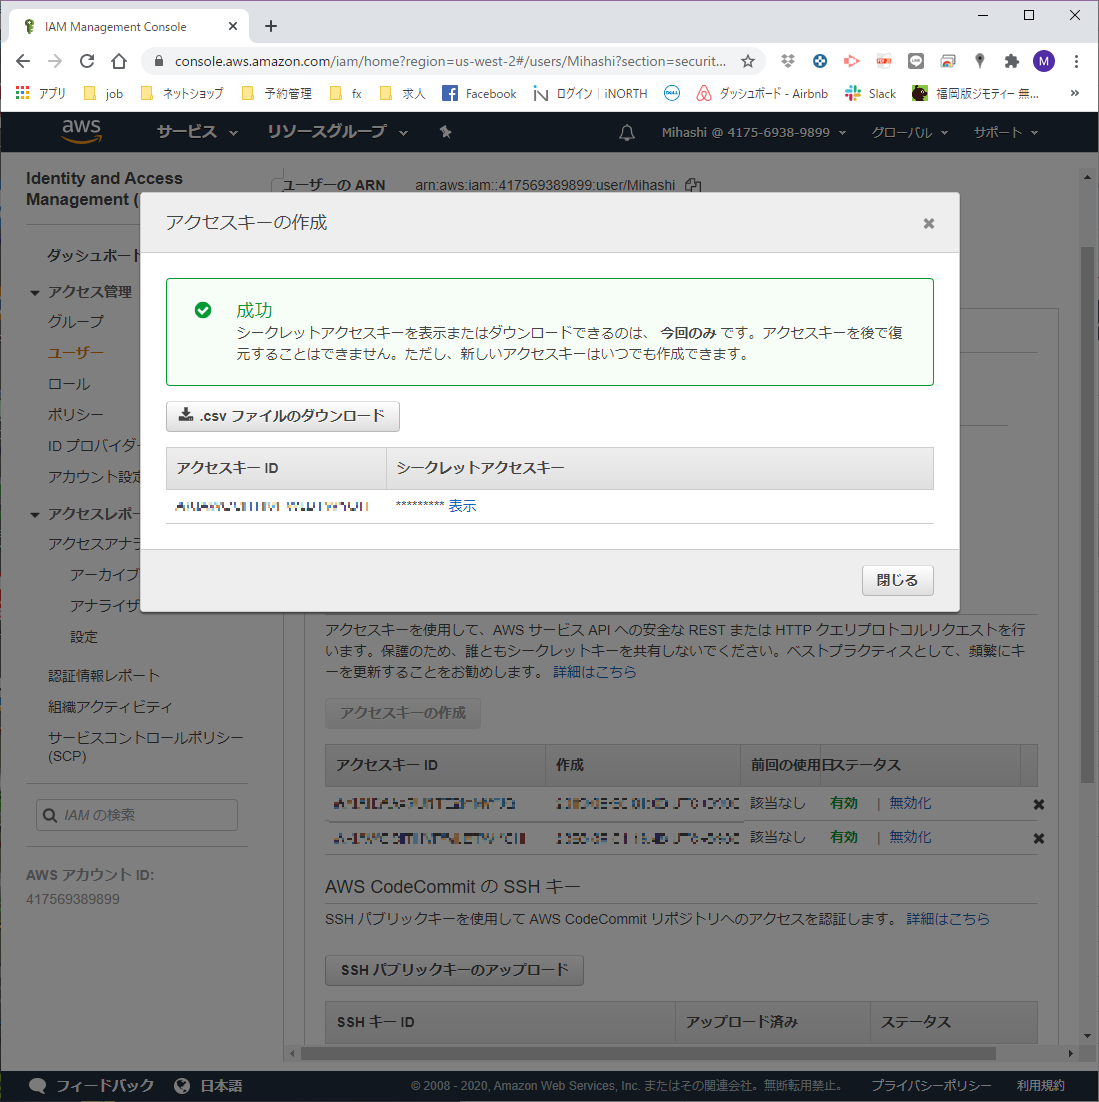
「アクセスキーの作成」ボタンを押します。
ここでアクセスキーIDとシークレットアクセスキーを取得します。
シークレットアクセスキーはこの時点でしか取得できませんのでご注意ください。
4.VSCodeでの設定
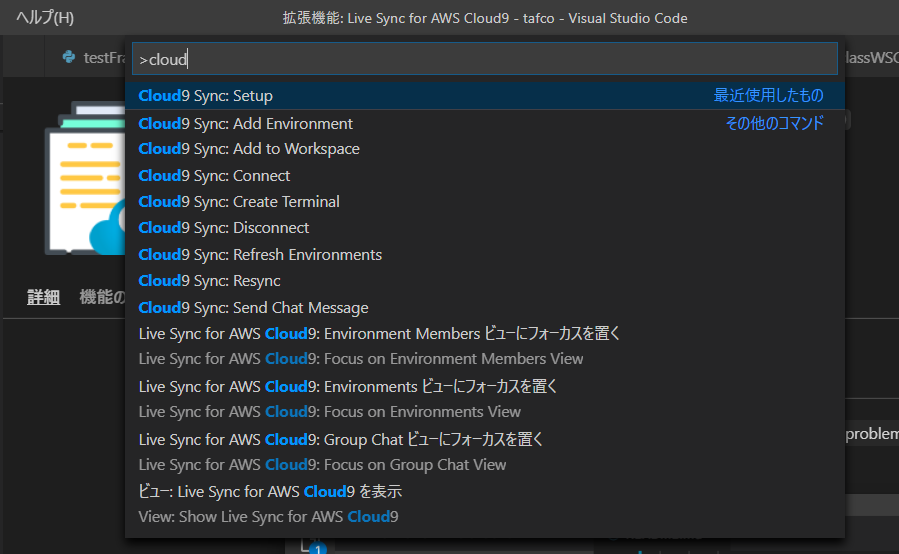
「F1」 → cloud9 Sync Setupと入力し、取得したIDとアクセスキーを設定します。
リージョンはcloud9で使っている地域を設定します。
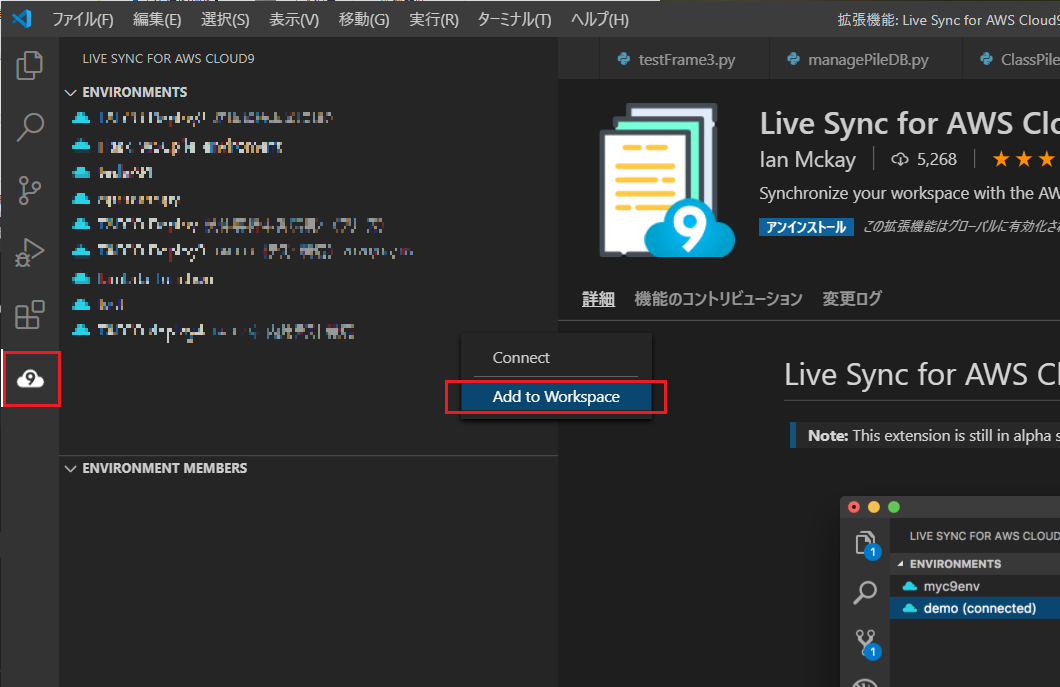
左側に追加されているCloud9のアイコンを選択して、使いたいEnviromentを選択します。
これでAWS Cluod9上のコードが直接編集できます。
