概要
以前、Jenkins&DockerでクリーンなAngular6アプリのビルド環境を構築してみた。でビルド環境をクリーンにしてみて、じゃあユニットテストもクリーンな環境でできるようにしようと思ったのでやってみたお話。
今回の対象はPythonで、PEP8で静的解析、nosetestsでユニットテストを実施し、結果をJenkins上に出力した。
前提
環境はAngular6をビルドするようにした、Jenkinsを再利用する。
| OS | Amazon Linux 2(ami-a9d09ed1) |
| Jenkins | jenkins.noarch-2.121.2-1.1 |
| Docker | docker-ce-18.06.0 |
| git | git-2.9.5 |
| Jenkins-plugin | WarningsPublisher |
| Jenkins-plugin | CoberturaPublisher |
| Jenkins-plugin | JUnitResultArchiver |
設定内容
今回利用するプロジェクトは、https://github.com/domenkozar/nose-selecttestsをフォークさせていただいた
こちら、https://github.com/tatsuakimitani/nose-selecttests
Dockerfile
Dockerfileの内容はこちら。
Dockerfile.build
FROM centos:7

# Install Python and Node.js
RUN yum install -y https://centos7.iuscommunity.org/ius-release.rpm epel-release
RUN yum install -y wget unzip iproute python36u python36u-libs python36u-devel python36u-pip nodejs npm java

# Install tools
RUN pip3.6 install pyyaml boto3
RUN pip3.6 install flake8 nose coverage

ENV EXEC_ENV=TEXT
Jenkinsfile設定
Jenkinsfileの内容はこちら。
pipeline {

    environment {
        docker_image_name = "python3-unittests"
    }

    agent {
        dockerfile {
            filename 'Dockerfile.build'
            dir '.'
            label env.docker_image_name
        }
    }

    stages {

        stage('静的解析') {
            steps {
                parallel(
                    'Pep8': {
                        dir('.') {
                            script {
                                sh 'flake8 . --select=E101,E113,E125,E129,E304,E7,F4,F8,N8 --max-line-length=120 || true'
                            }
                            step([
                                $class: 'WarningsPublisher',
                                consoleParsers: [
                                    [parserName: 'Pep8']
                                ]
                            ])
                        }
                    }
                )
            }
        }

        stage('ユニットテスト') {
            steps {
                script {
                    dir('.') {
                        sh 'nosetests -v --with-xunit --with-coverage --cover-inclusive --cover-erase --cover-tests --cover-branches  --cover-xml --cover-package=functional_tests,noseselecttests || true'
                    }
                }
                step([
                    $class: 'JUnitResultArchiver',
                    testResults: 'nosetests.xml'
                ])
                step([
                    $class: 'CoberturaPublisher',
                    autoUpdateHealth: false,
                    autoUpdateStability: false,
                    coberturaReportFile: 'coverage.xml',
                    failUnhealthy: false,
                    failUnstable: false,
                    maxNumberOfBuilds: 0,
                    onlyStable: false,
                    zoomCoverageChart: false
                ])
                archiveArtifacts 'nosetests.xml'
                archiveArtifacts 'coverage.xml'
            }
        }

    }
}
Jenkinsジョブ設定
「パイプライン」を選択する。
![FireShot Capture 060 - 新規ジョブ作成 [Jenkins] - http___52.12.207.44_8080_view_all_newJob.png](https://qiita-user-contents.imgix.net/https%3A%2F%2Fqiita-image-store.s3.amazonaws.com%2F0%2F61103%2Fb34e5aa9-3e25-8ee4-ea16-3fa25cd23c94.png?ixlib=rb-4.0.0&auto=format&gif-q=60&q=75&s=04d3ac6e2aad7e6ff147e8049abe41c0)
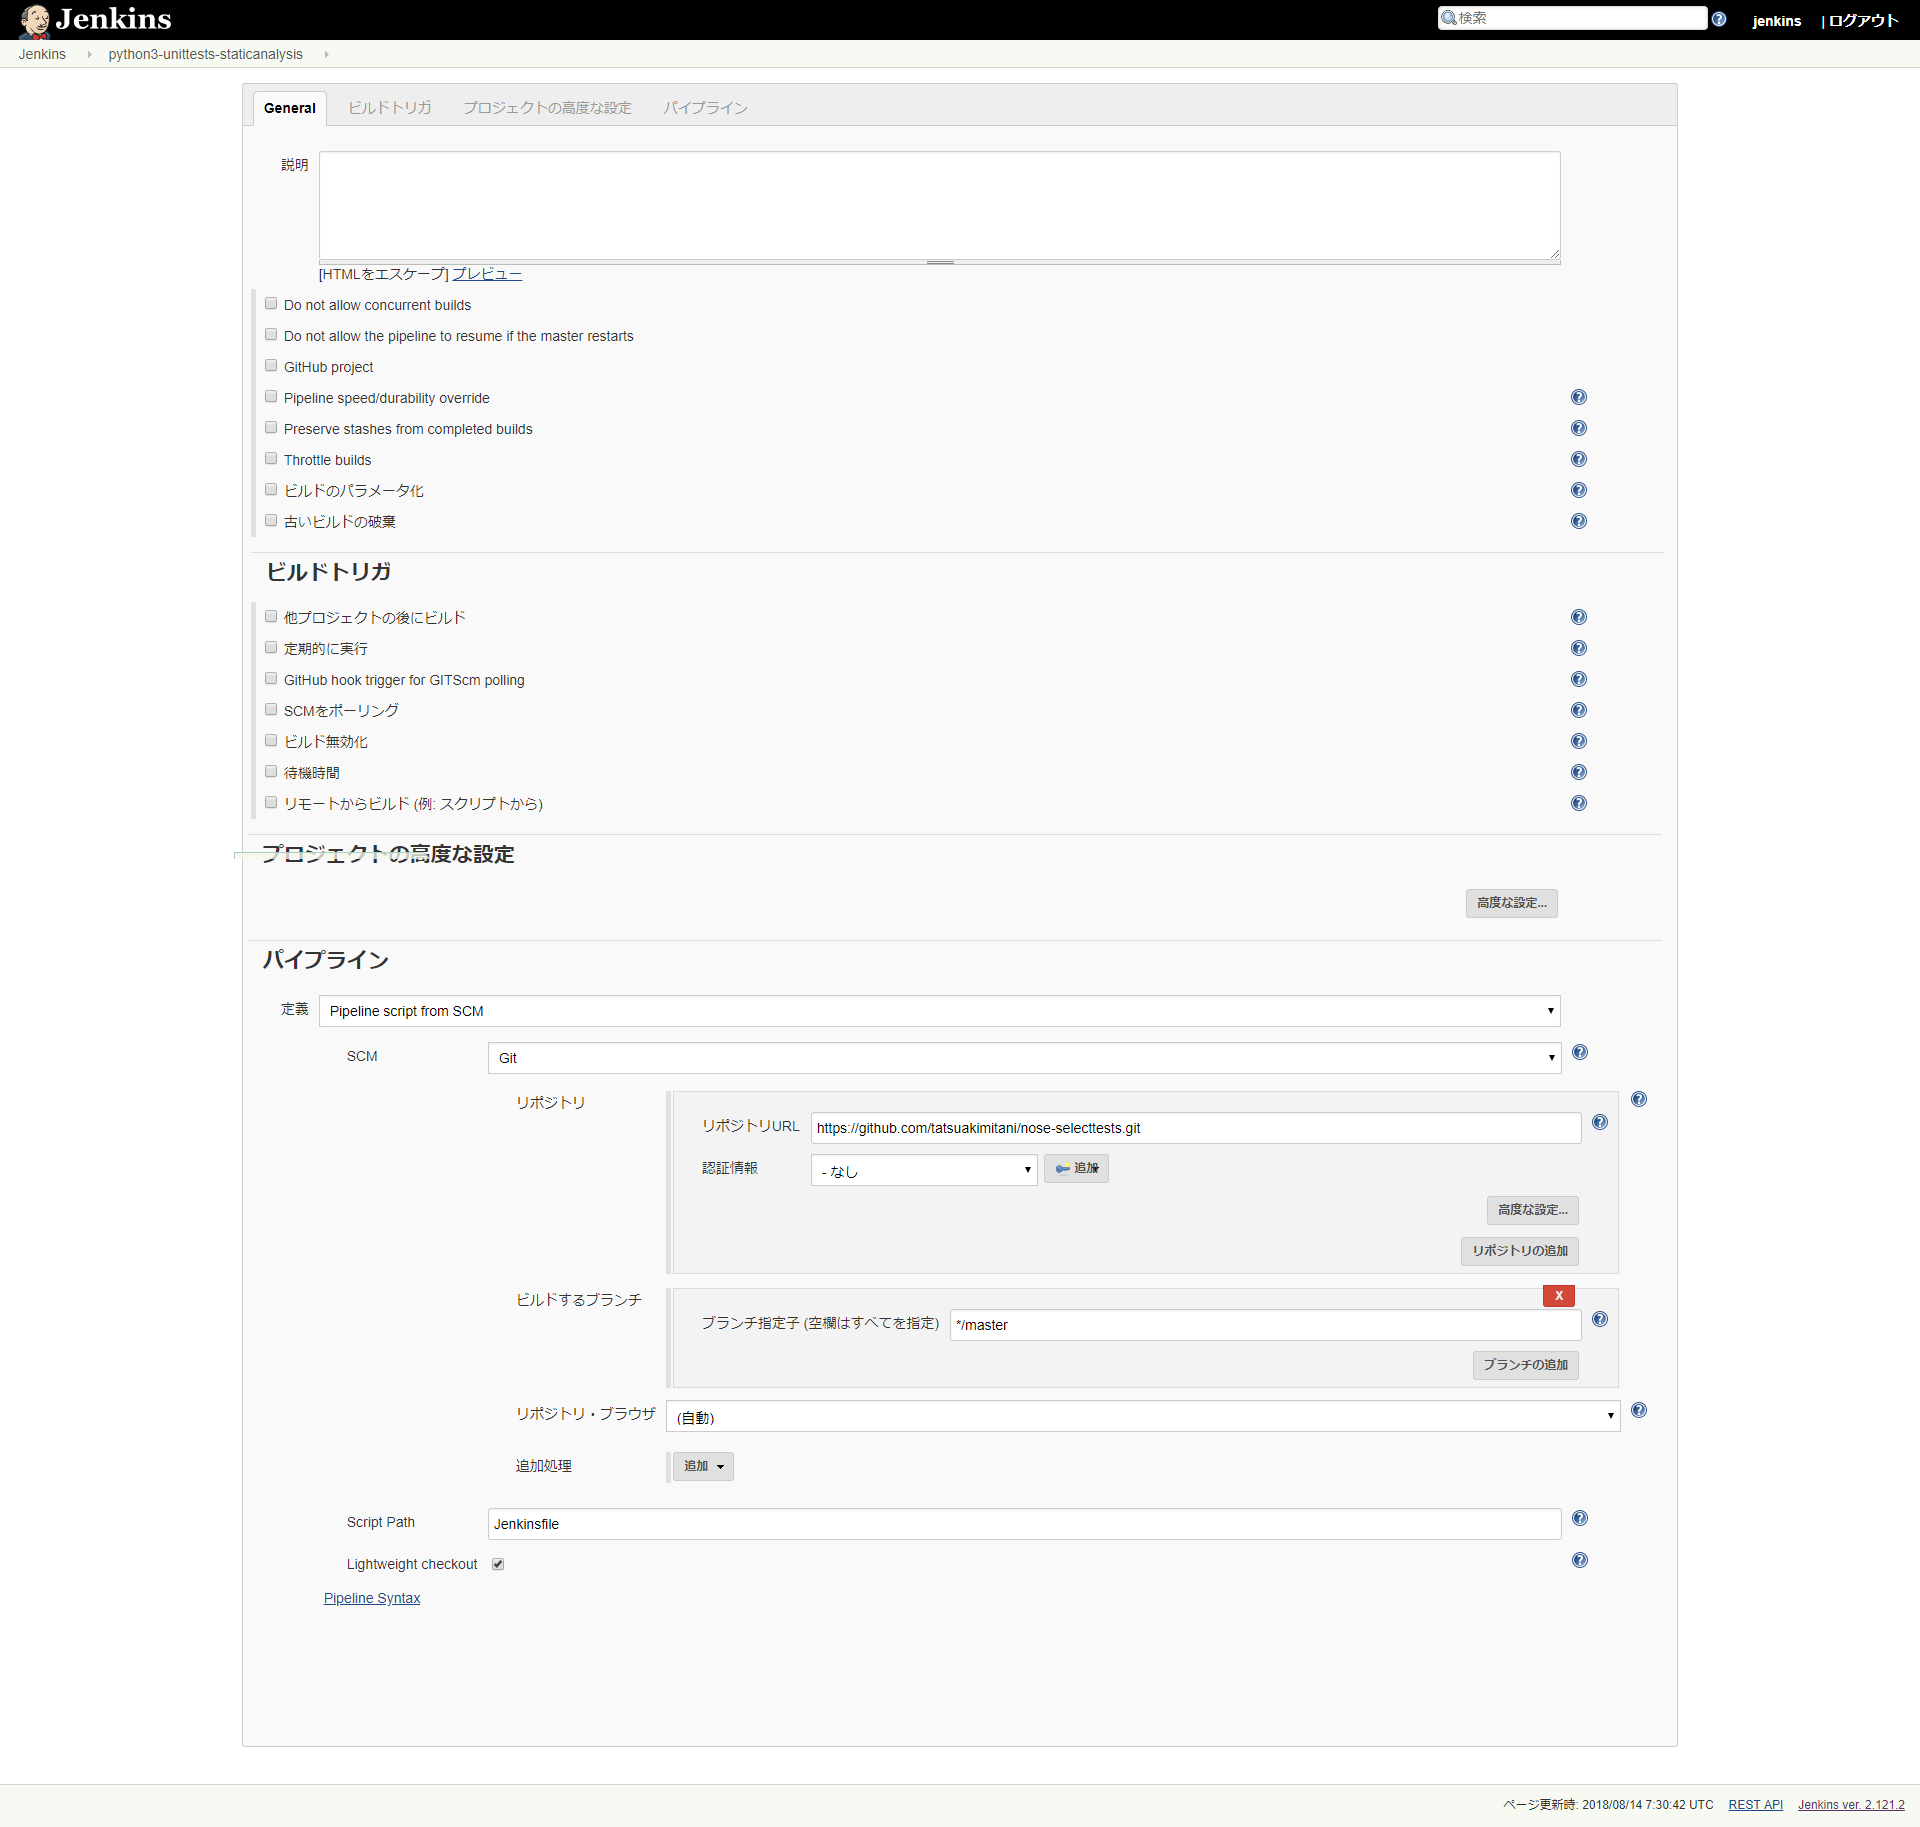
パイプライン設定で、[Pipeline script from SCM]⇒[Git]⇒[]を入力して、「完了」ボタンをクリック
ジョブ実行
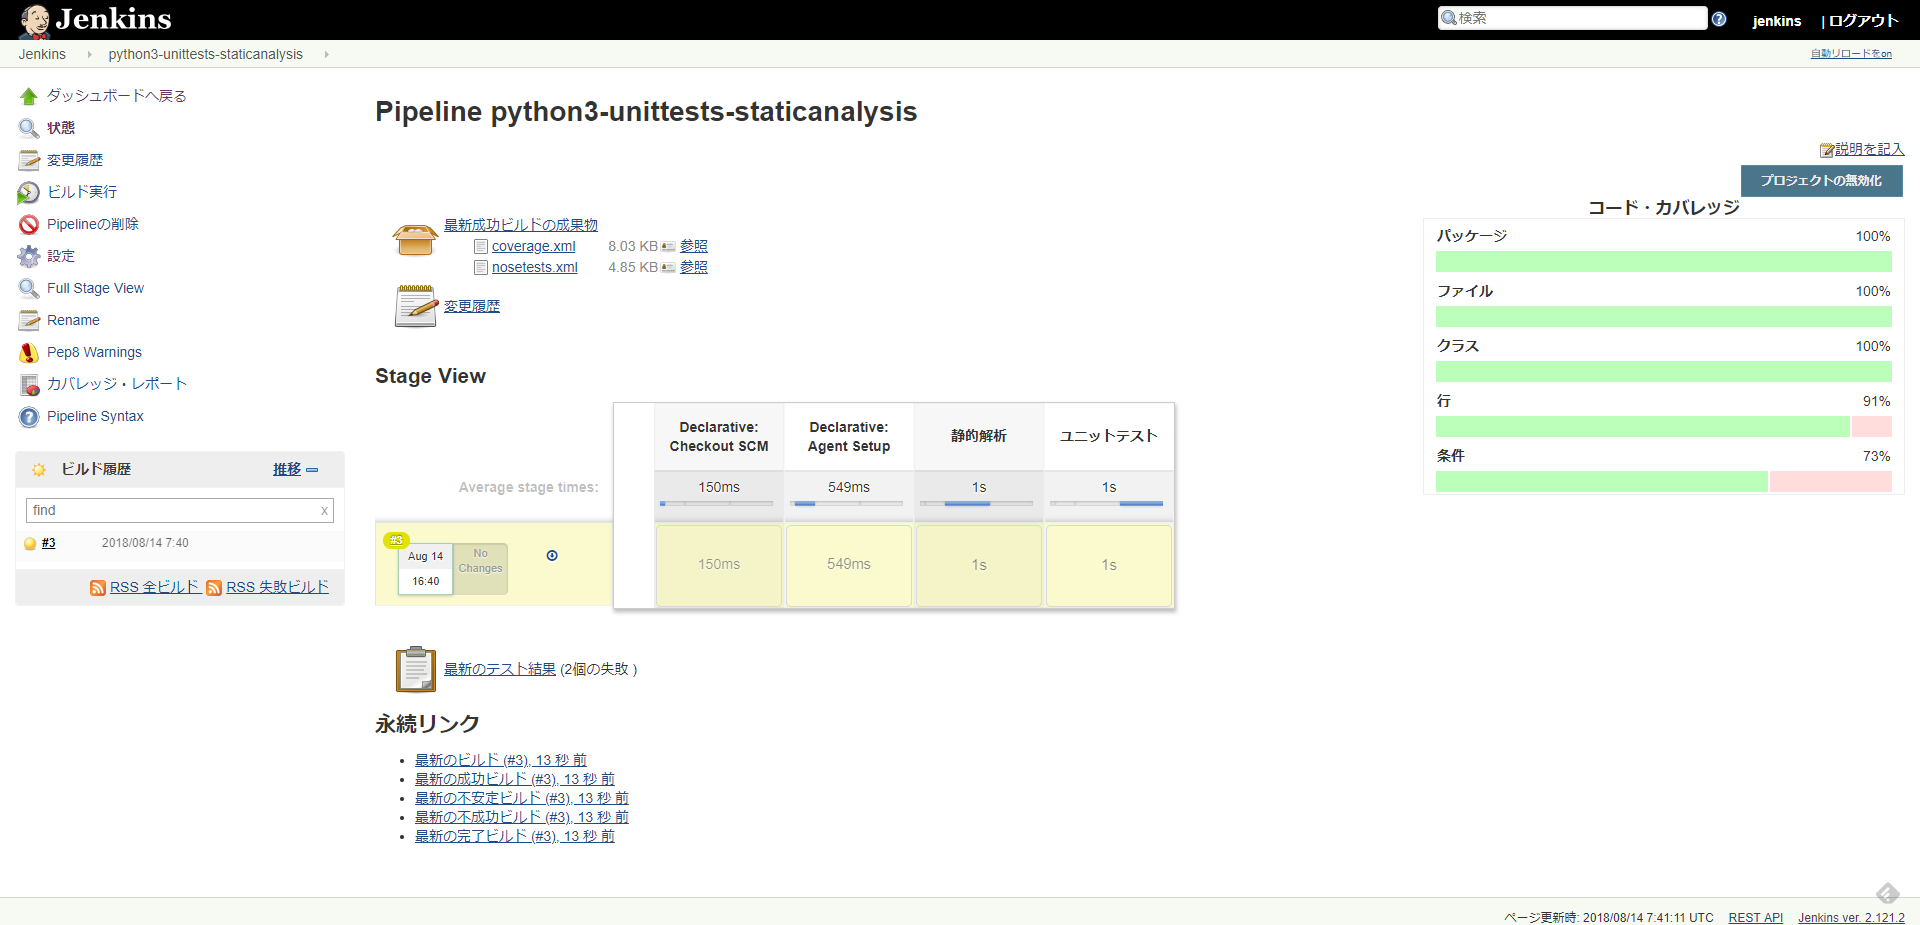
ジョブ実行を行い成功すると以下のようにパイプライン結果とカバレッジが出力される。
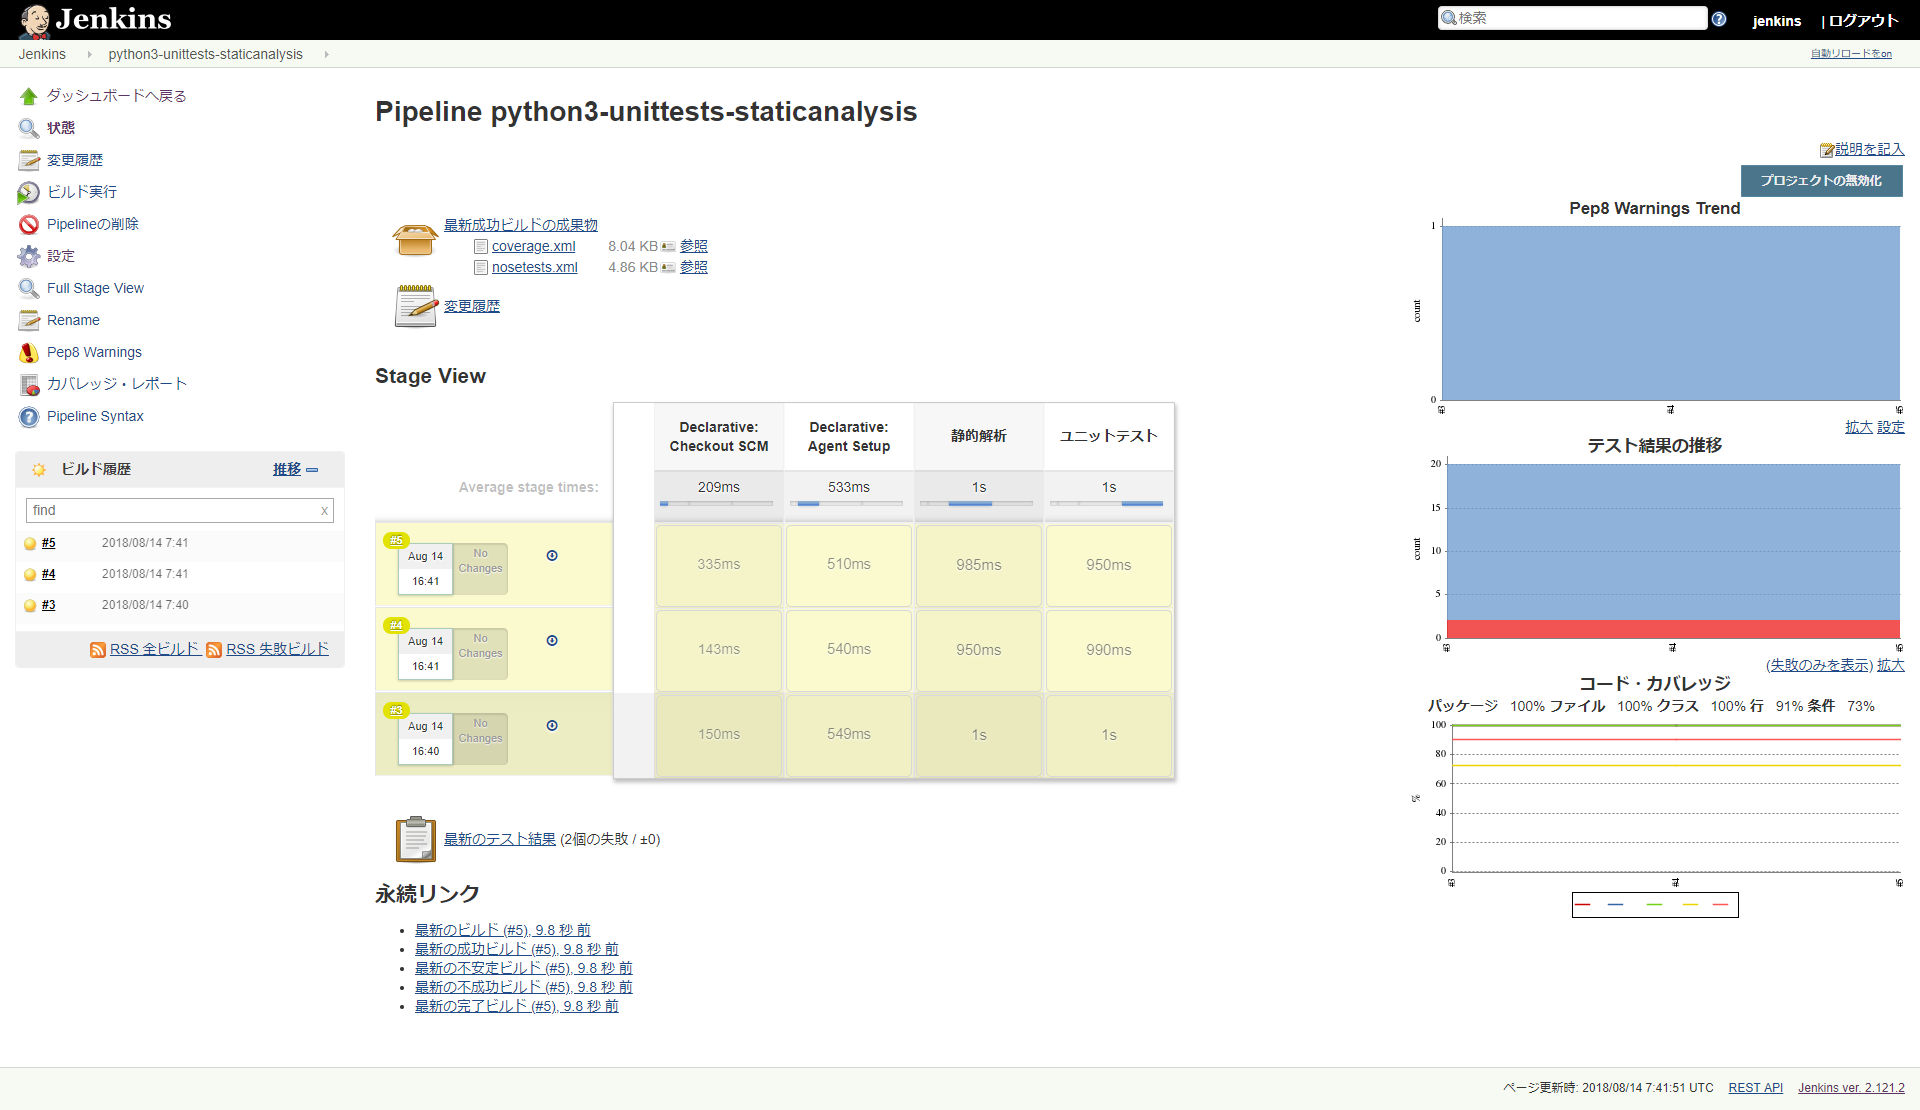
また、複数回実行すると初めてPEP8とテスト結果、カバレッジのグラフが表示が出現することが分かる。
おしまい。