毎日Flutter生活 Advent Calendar 2025 の11日目です![]()
こんにちは!tatata-keshiです![]()
FlutterのアプリケーションではデフォルトでFlutterのロゴがアプリアイコンとして設定されています。
しかし実際に何かアプリを開発して公開する場合、アプリ固有のアイコンを設定する必要がありますよね?
そこで今回は、Flutterでアプリケーションアイコンを設定する方法についてまとめました。
この記事はFlutter歴約1週間の人が書いています!間違ったことを記載していても寛大な心で教えていただけると幸いです![]()
1. 手動で設定する方法
Android
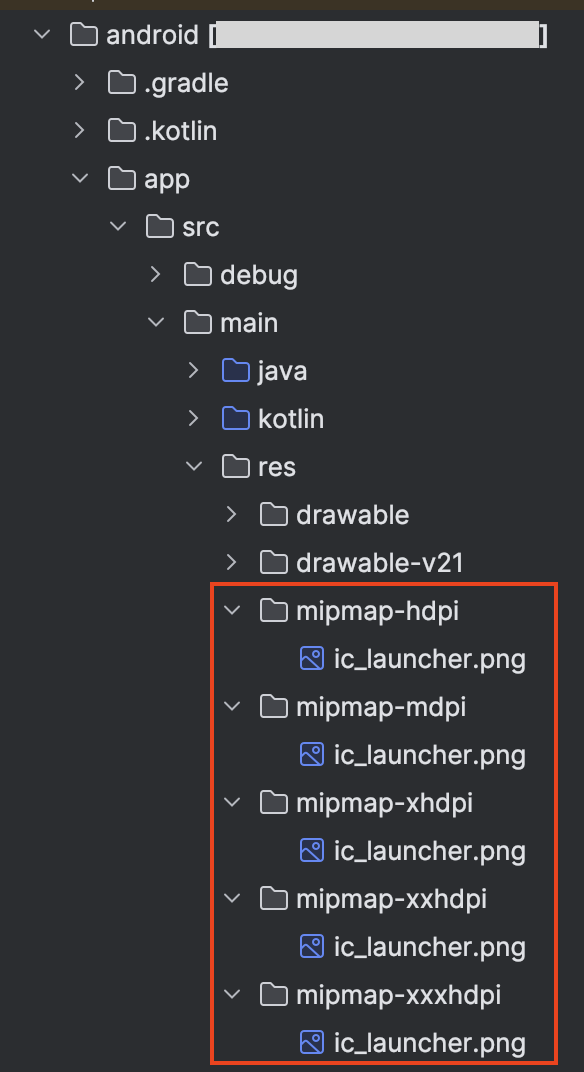
android/app/src/main/res/mipmap-* というフォルダがいくつかあるので、それぞれのフォルダ内にある画像を使用したいアイコン画像に差し替えます。
なおデフォルトではic_launcher.pngという画像が設定されています。
フォルダごとに画像サイズが異なるため差し替え前の画像サイズと同じものを設定します。
iOS
iOS版のアイコンはios/Runner/Assets.xcassets/AppIcon.appiconsetディレクトリに入っています。
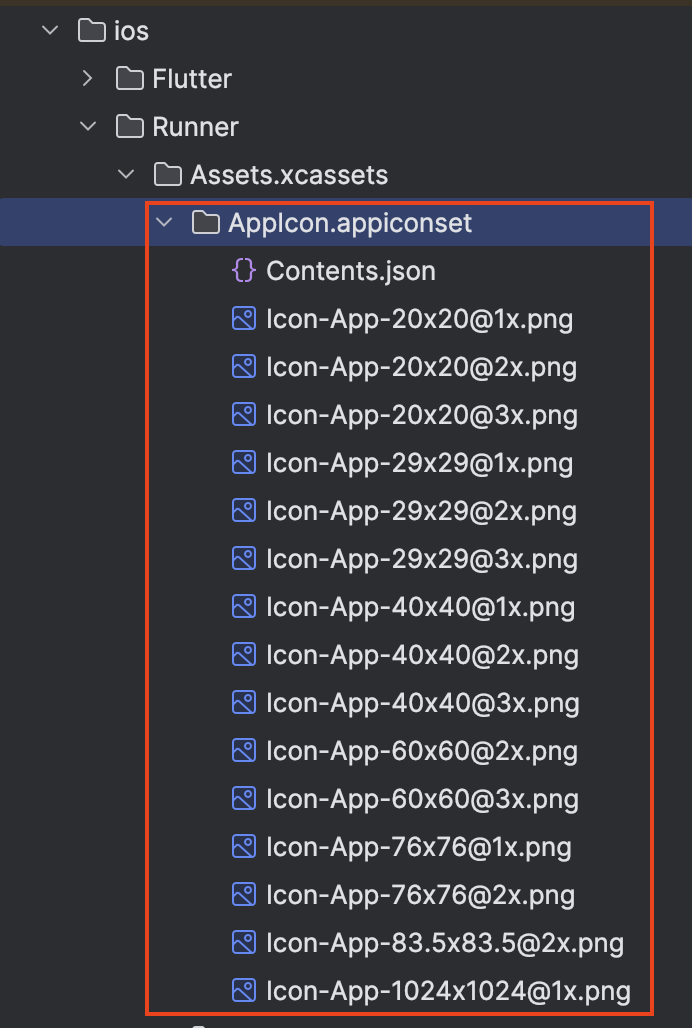
アイコンを任意のものに設定する場合は、各サイズのアイコン画像を用意しデフォルトせ設定されているアイコン画像と入れ替えます。
この時画像名は元の画像名と同じ名前にするのが推奨されています。理由として名前が変わる場合Contents.jsonの内容を整合させる必要が生じるからです。このファイルには「各サイズにおいてどの画像を使用するか」という情報が記載されています。
2. flutter_launcher_icons を使う方法(おすすめ)
手動で設定する方法では各サイズの画像を用意したりContents.jsonのような設定ファイルの整合性についても意識する必要があり大変です。
そこでおすすめの方法がflutter_launcher_iconsというパッケージを使う方法です。
インストールと初期設定
はじめにパッケージをインストールします。
flutter pub add flutter_launcher_icons
パッケージがインストールされていることが確認できたら以下のコマンドを実行します。
dart run flutter_launcher_icons:generate
このコマンドを実行することでflutter_launcher_icons.yamlというファイルが生成されます。
yamlファイルの設定
flutter_launcher_icons.yamlファイルの中身は初期状態だとこのようになっています。
# flutter pub run flutter_launcher_icons
flutter_launcher_icons:
  image_path: "assets/icon/icon.png"

  android: "launcher_icon"
  # image_path_android: "assets/icon/icon.png"
  min_sdk_android: 21 # android min sdk min:16, default 21
  # adaptive_icon_background: "assets/icon/background.png"
  # adaptive_icon_foreground: "assets/icon/foreground.png"
  # adaptive_icon_foreground_inset: 16
  # adaptive_icon_monochrome: "assets/icon/monochrome.png"

  ios: true
  # image_path_ios: "assets/icon/icon.png"
  remove_alpha_ios: true
  # image_path_ios_dark_transparent: "assets/icon/icon_dark.png"
  # image_path_ios_tinted_grayscale: "assets/icon/icon_tinted.png"
  # desaturate_tinted_to_grayscale_ios: true
  # background_color_ios: "#ffffff"

  web:
    generate: true
    image_path: "path/to/image.png"
    background_color: "#hexcode"
    theme_color: "#hexcode"

  windows:
    generate: true
    image_path: "path/to/image.png"
    icon_size: 48 # min:48, max:256, default: 48

  macos:
    generate: true
    image_path: "path/to/image.png"
今回はAndroidとiOSでアイコンを設定するため、3行目のimage_pathの値を画像のパスに書き換えて以下のコマンドを実行します。
flutter pub get
dart run flutter_launcher_icons
この状態でアプリケーションを実行するとアイコンが設定されます。
pubspec.yamlに記載する方法
今回はflutter_launcher_icons.yamlを作成してそこに設定を記述しましたが、pubspec.yamlに直接記載する方法もあります。
dev_dependencies:
  flutter_launcher_icons: "^0.14.4"

flutter_launcher_icons:
  android: "launcher_icon"
  ios: true
  image_path: "assets/icon/icon.png"
  min_sdk_android: 21 # android min sdk min:16, default 21
  web:
    generate: true
    image_path: "path/to/image.png"
    background_color: "#hexcode"
    theme_color: "#hexcode"
  windows:
    generate: true
    image_path: "path/to/image.png"
    icon_size: 48 # min:48, max:256, default: 48
  macos:
    generate: true
    image_path: "path/to/image.png"
まとめ
このようにFlutterにおいてアプリケーションアイコンを設定する場合は、パッケージを使用する方法が簡単でした。
余談ですが、アイコンを設定する際に別の箇所で詰まっていたのでその内容については別の記事で紹介しようと思います。