毎日Flutter生活 Advent Calendar 2025 の12日目です![]()
こんにちは!tatata-keshiです![]()
Flutterには、一つのコードベースからAndroidやiOSといった複数のプラットフォーム向けのアプリケーションを開発できるという強みがあります。
しかし、Flutterで用いられるMaterial DesignのウィジェットはAndroidのUIに準じているため、これをiOSで表示するとユーザー目線で違和感があります。
一方でiOSのUIに準じたCupertino DesignのウィジェットをAndroid端末で表示するのも同様に違和感を覚えます。
そのような課題を解決するため、この記事ではプラットフォームに応じて表示するUIを出し分けてネイティブなUIUXを実現する方法についてまとめました。
1. flutter_platform_widgetsについて
プラットフォームに応じてアプリケーションのUIを切り替える方法として、flutter_platform_widgetsというパッケージを使用する方法があります。
このパッケージは、MaterialウィジェットとCupertinoウィジェットの両方を抽象化し、単一のウィジェットで各プラットフォームのデザイン言語に対応させるラッパーライブラリです。
導入方法
flutter pub add flutter_platform_widgets
他にも、pubspec.yamlに直接記載してpub getを実行する方法もあります。
dependencies:
  flutter:
    sdk: flutter

  flutter_platform_widgets: ^9.0.0
これで導入は完了です。次に実際の使い方を見てみましょう。
2. 実装例
冒頭でも説明したように、flutter_platform_widgetsは単一のウィジェットでMaterialやCupertinoといったプラットフォームごとのデザイン言語に対応させるパッケージです。
ここからは実装方法について解説します。
MaterialAppをPlatformAppに置き換える
今回はデフォルトのカウントアプリをflutter_platform_widgetsで置き換えていきます。
はじめに標準のMaterialAppを、flutter_platform_widgetsが提供するPlatformAppに置き換えます。これにより、アプリ全体がプラットフォームを意識した動作をするようになります。
class MyApp extends StatelessWidget {
  const MyApp({super.key});
  @override
  Widget build(BuildContext context) {
  // MaterialAppからPlatformAppに書き換える
    return PlatformApp(
      title: 'Flutter Demo',
      home: const MyHomePage(title: 'Flutter Demo Home Page'),
    );
  }
}
Scaffoldとその子要素を書き換える
次に、Scaffoldとその子要素のウィジェットをパッケージが提供しているウィジェットに置き換えていきます。
こちらが変更前のコードです。
class _MyHomePageState extends State<MyHomePage> {
  int _counter = 0;

  void _incrementCounter() {
    setState(() {
      _counter++;
    });
  }

  @override
  Widget build(BuildContext context) {
    return Scaffold(
      appBar: AppBar(
        backgroundColor: Theme.of(context).colorScheme.inversePrimary,
        title: Text(widget.title),
      ),
      body: Center(
        child: Column(
          mainAxisAlignment: .center,
          children: [
            const Text('You have pushed the button this many times:'),
            Text(
              '$_counter',
              style: Theme.of(context).textTheme.headlineMedium,
            ),
          ],
        ),
      ),
      floatingActionButton: FloatingActionButton(
        onPressed: _incrementCounter,
        tooltip: 'Increment',
        child: const Icon(Icons.add),
      ),
    );
  }
}
そして置き換えた後のコードが以下のものになります。
class _MyHomePageState extends State<MyHomePage> {
  int _counter = 0;

  void _incrementCounter() {
    setState(() {
      _counter++;
    });
  }

  @override
  Widget build(BuildContext context) {
    return PlatformScaffold(
      appBar: PlatformAppBar(
        backgroundColor: Theme.of(context).colorScheme.inversePrimary,
        title: Text(widget.title),
      ),
      body: Center(
        child: Column(
          mainAxisAlignment: .center,
          children: [
            const Text('You have pushed the button this many times:'),
            Text(
              '$_counter',
              style: Theme.of(context).textTheme.headlineMedium,
            ),
          ],
        ),
      ),
      material: (_, __) => MaterialScaffoldData(
        // floatingActionButtonプロパティに通常のFloatingActionButtonを渡す
        floatingActionButton: FloatingActionButton(
          onPressed: _incrementCounter,
          tooltip: 'Increment',
          child: const Icon(Icons.add),
        ),
        floatingActionButtonLocation: FloatingActionButtonLocation.endFloat,
      ),

      // Cupertino (iOS) の設定 (通常、iOSではFABは使用しないため、ここでは設定しないか、別のカスタムウィジェットを指定します)
      cupertino: (_, __) => CupertinoPageScaffoldData(
        body: Stack(
          children: [
            Center(
              child: Column(
                mainAxisAlignment: MainAxisAlignment.center,
                children: [
                  const Text('You have pushed the button this many times:'),
                  Text(
                    '$_counter',
                    style: Theme.of(context).textTheme.headlineMedium,
                  ),
                ],
              ),
            ),
            // Material の endFloat 相当(右下)
            Positioned(
              right: 16,
              bottom: 16,
              child: SafeArea(
                minimum: const EdgeInsets.only(right: 0, bottom: 0),
                child: CupertinoButton.filled(
                  padding: const EdgeInsets.all(14),
                  onPressed: _incrementCounter,
                  child: const Icon(CupertinoIcons.add),
                ),
              ),
            ),
          ],
        ),
      ),
    );
  }
}
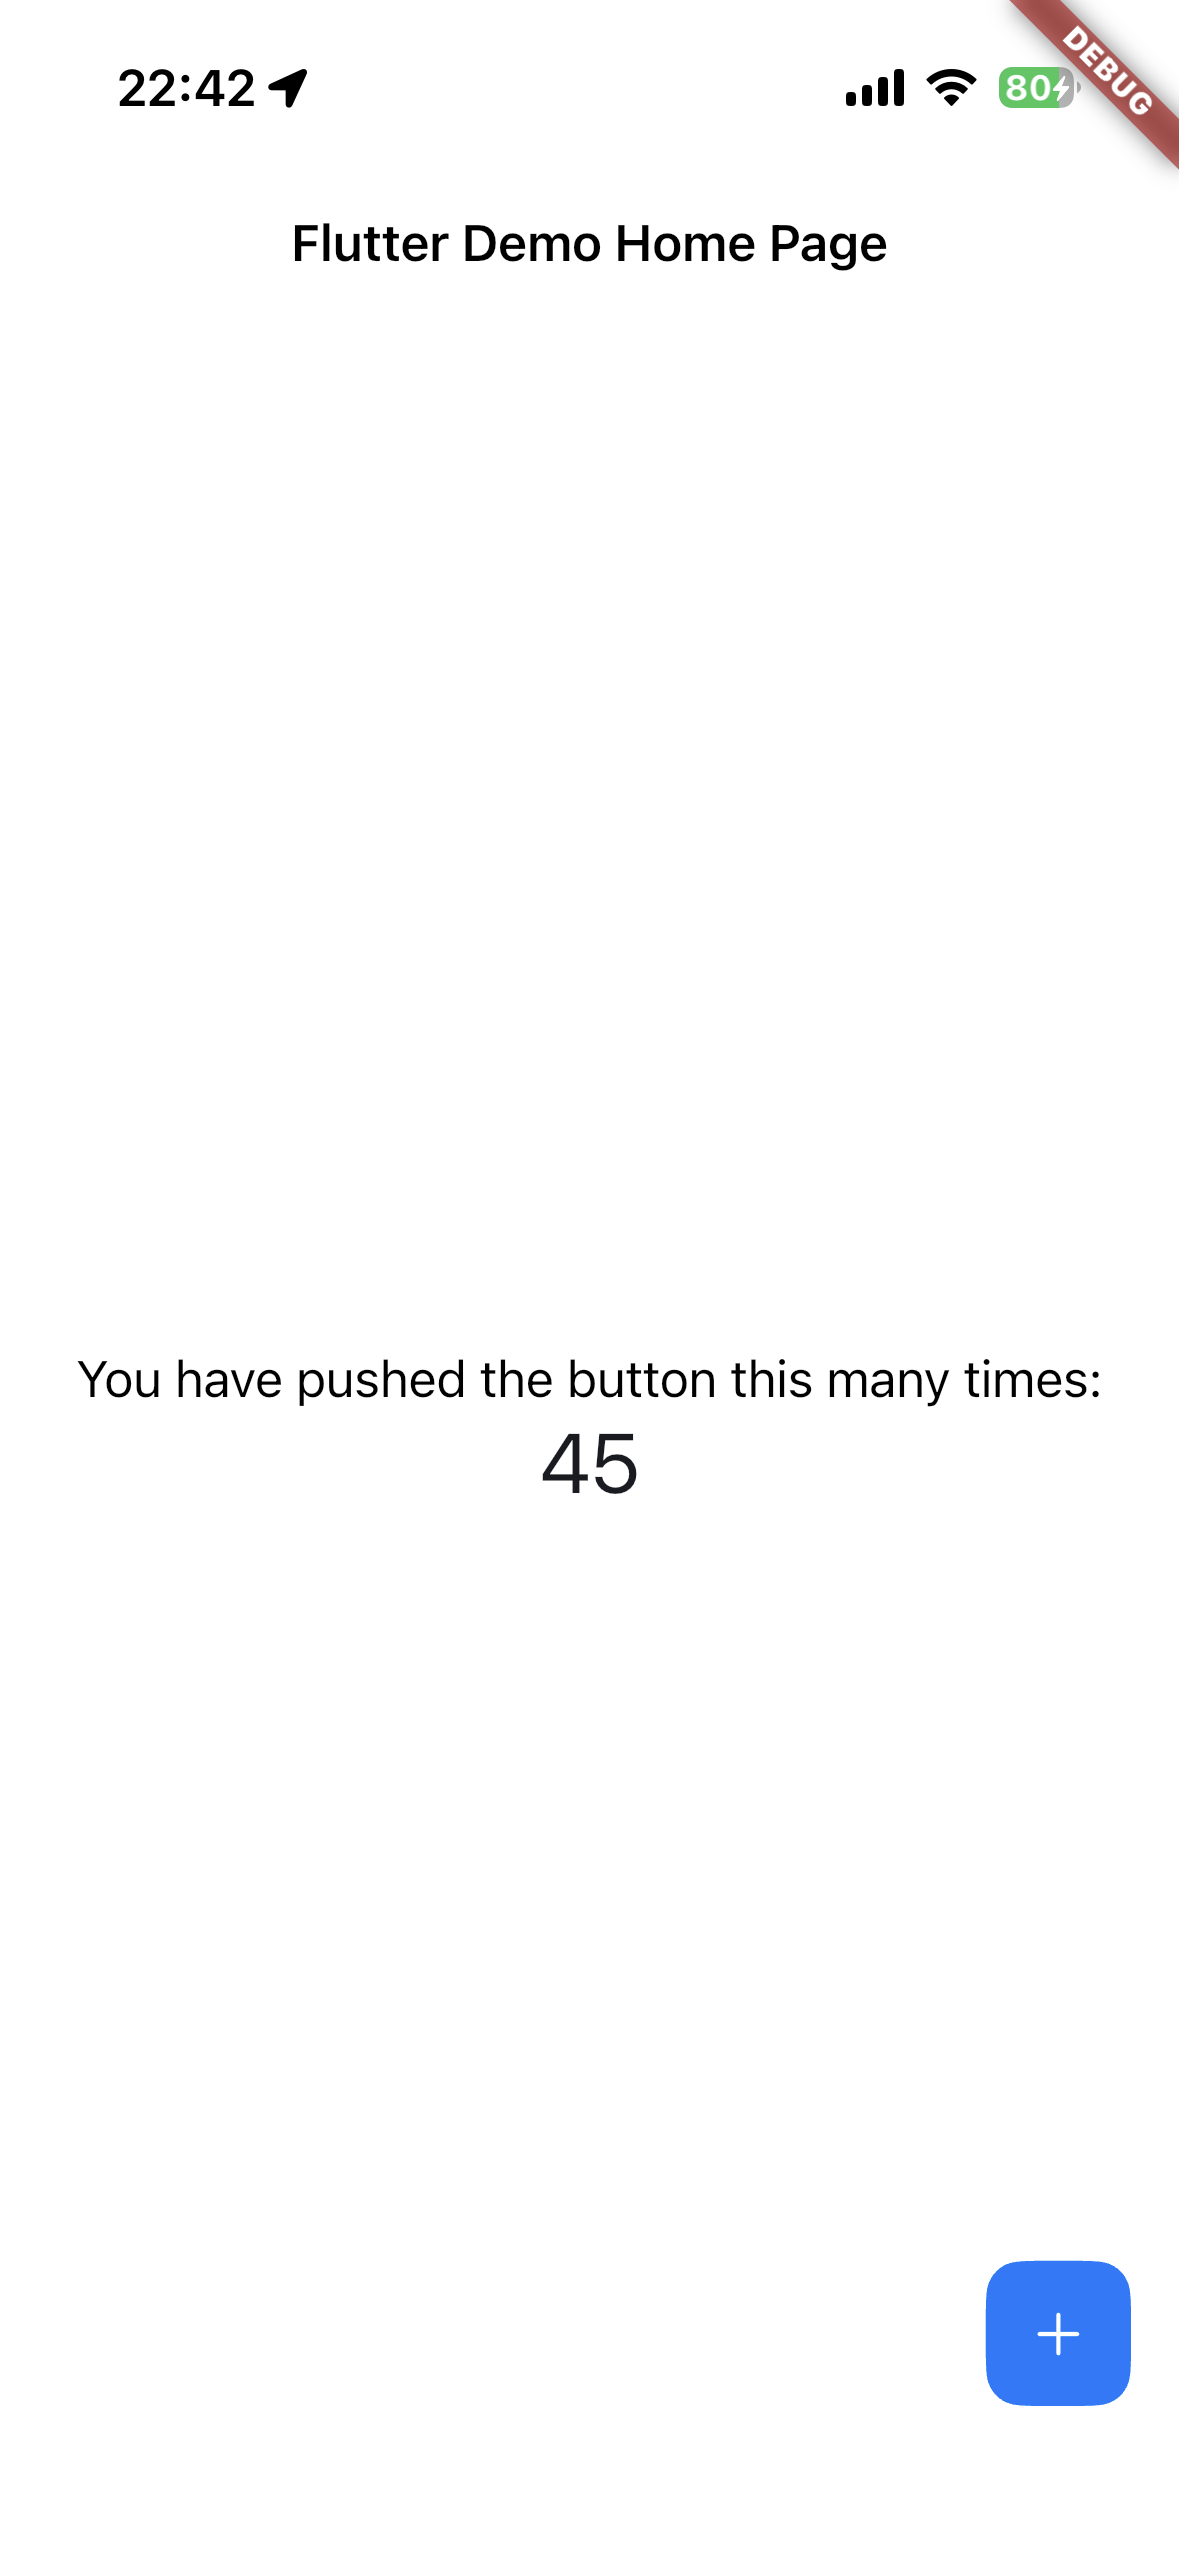
Materialと異なり、CupertinoではfloatingButtonが存在しないため少し長めの実装となってしまいます。
iOSの画面
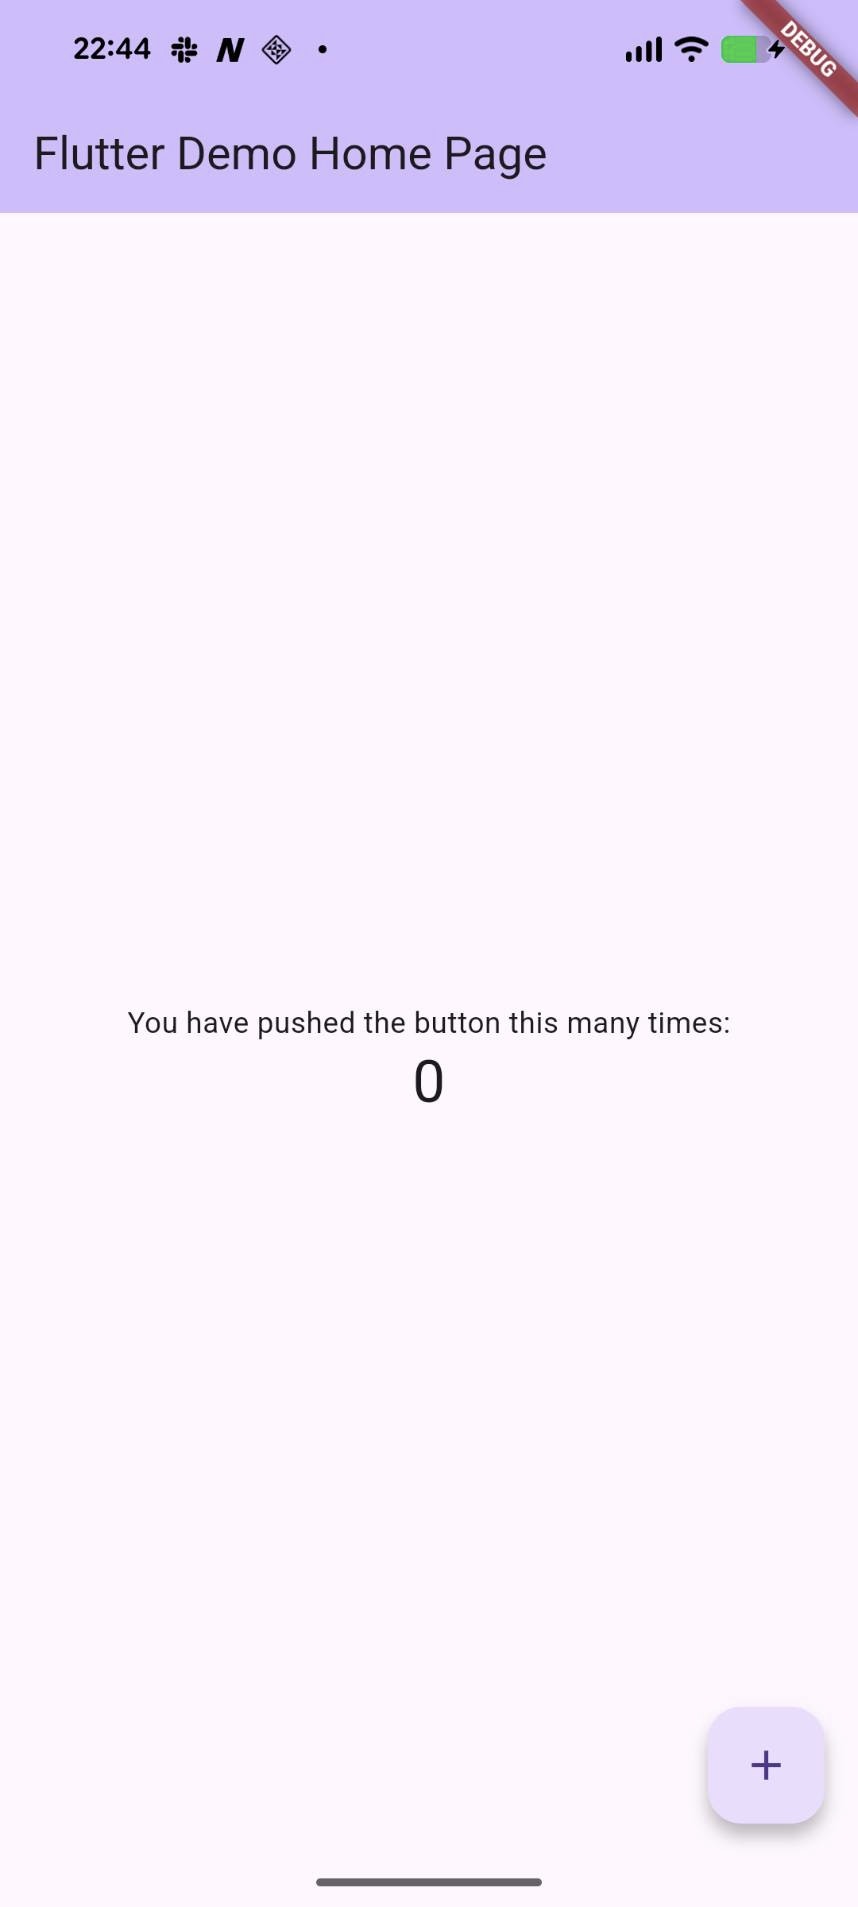
Androidの画面
まとめ
このように、flutter_platform_widgetsパッケージを用いることでAndroidとiOSそれぞれのプラットフォームでも違和感のないUIUXを提供することができます。
しかしFloatingButtonのようにMaterialには存在するがCupertinoには存在しないウィジェットもあるため、より綺麗な実装にまとめるには一工夫必要そうですね。