はじめに
これは LINE WORKS Advent Calendar 2023 の 3日目の記事です。
kintone と LINE WORKS 両方のサービスをうまく組み合わせて連携サービスを作ってみました。
コードの紹介もしようと考えていますが、サラッとできる内容となっていますので、ぜひ一緒にやっていきましょう!
▼kintoneとは
https://kintone.cybozu.co.jp/
▼LINE WORKSとは
https://line.worksmobile.com/jp/
成果物(こんなのができます)
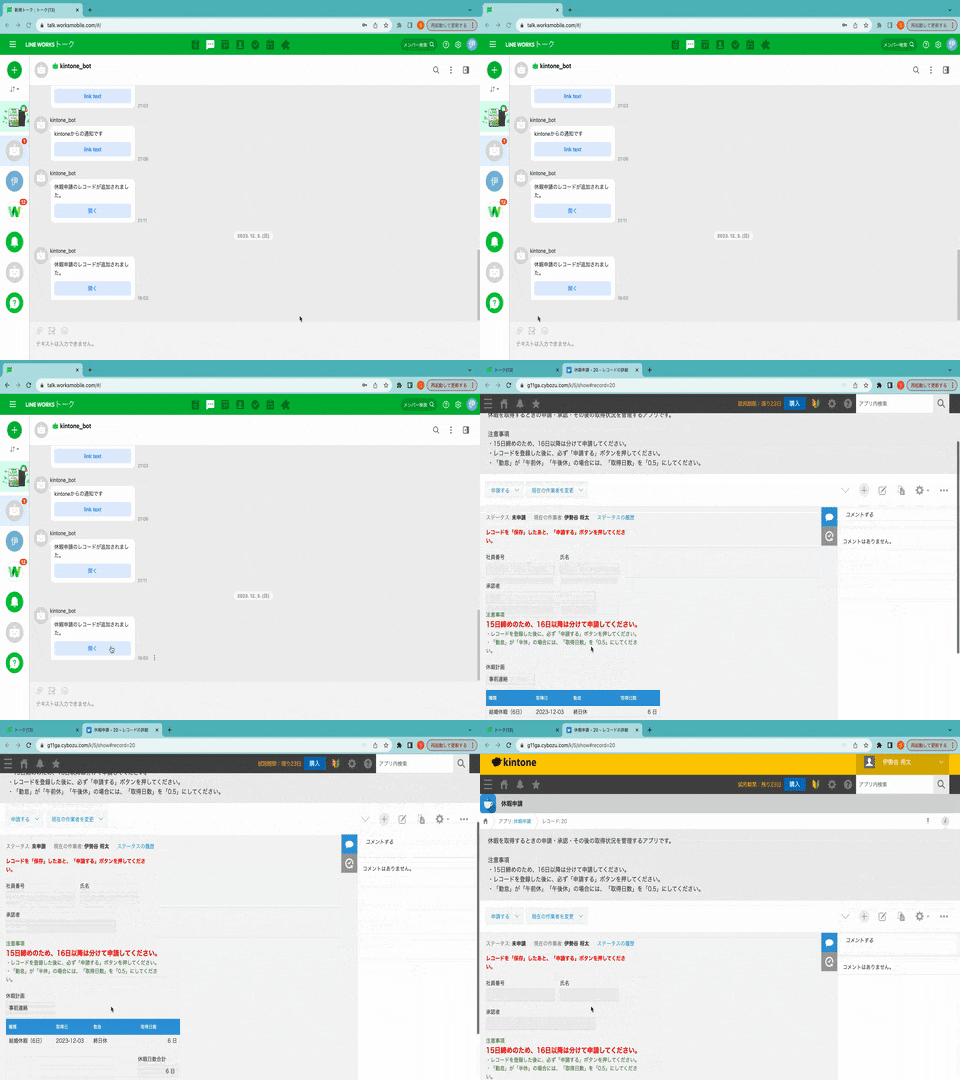
kintone のプロセス管理から、通知を飛ばし kintone レコードの情報やリンクを仕込む形です。
ざっくり連携の内容
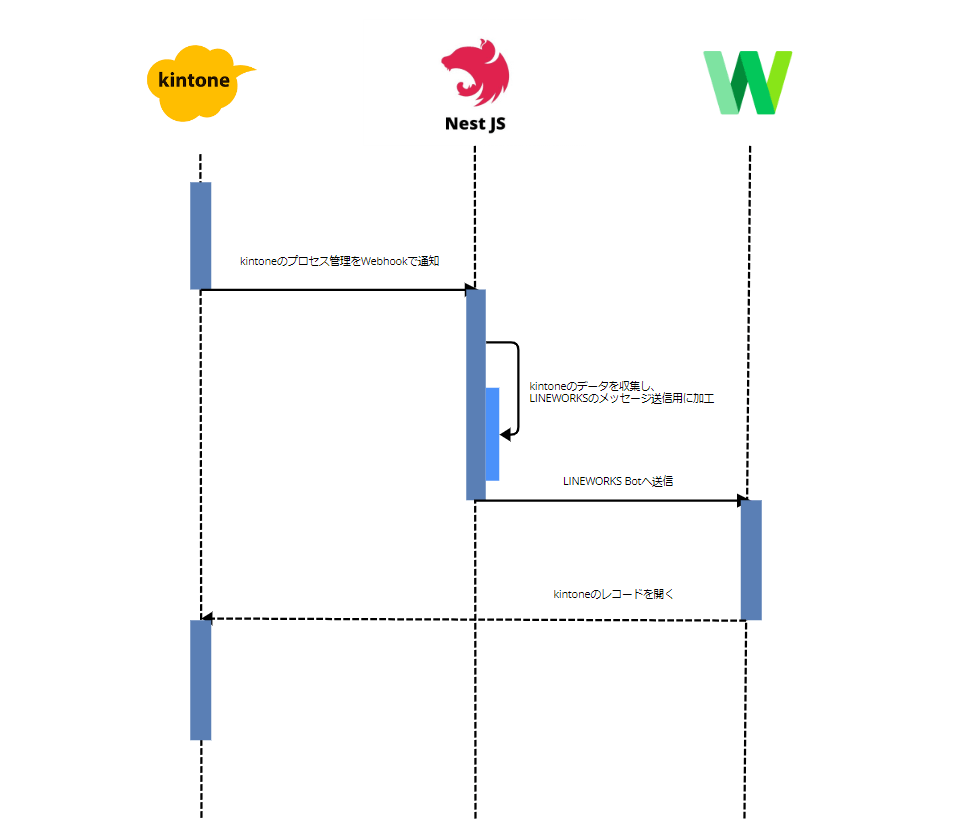
実際にどのような連携していくのか、以下のようなイメージで作っていきます。
NestJSでWebサーバーを作り、フロントエンド部分は全てkintoneとLINE WORKS上で完結するような仕組みです。
実装内容
ざっとですが、実装内容を公開していきます。
今回は kintone LINE WORKS の連携部分が伝わればと思っていますので、
NestJS に関わる深い話はしません。
modules
最初に kintone-event.module.tsを作成し、モジュールを作成します。
import { Module } from '@nestjs/common';
import { KintoneEventController } from './kintone-event.controller';
import { KintoneEventService } from './kintone-event.service';

@Module({
  imports: [],
  controllers: [KintoneEventController],
  providers: [KintoneEventService],
})
export class KintoneEventModule {}
controller
続いて kintone-event.controller.tsを作成し、ハンドラー部分を実装します。
ここで kintone のプロセス管理 WebHook の受け口を作ります。
import { Controller, Post, Req } from '@nestjs/common';
import { KintoneEventService } from './kintone-event.service';
import { Request } from 'express';

@Controller()
export class KintoneEventController {
  constructor(private readonly KintoneEventService: KintoneEventService) {}

  @Post('/lineworks')
  async post(@Req() request: Request) {
    // console.log(request.body);
    return await this.KintoneEventService.post(request.body);
  }
}
service
そして、kintone-event-service.tsを作成します。
認証情報、ボットに関わる情報は全て環境変数に定義してあります。
環境変数については後述しますが、
各種認証に関わるトークンの発行手順等は、過去の私のブログにて紹介しています。
こちらもチェックくださいませ。
https://qiita.com/taroyamada5963/items/d1181f70788f7c92ba27
// ---- 認証情報 ----
const clientId = process.env.CLIENTID;
const clientSecret = process.env.CLIENTSECRET;
const serverAccount = process.env.SERVERACCOUNT;
const privateKeyFile = process.env.PRIVATEKEYFILE;

// ---- ボット情報 ----
const botId = process.env.BOTID;
const userId = process.env.USERID;

@Injectable()
export class KintoneEventService {
  async post(body: any) {
    const accessToken = await this.getAccessToken();
    const headers = {
      Authorization: `Bearer ${accessToken}`,
    };
    try {
      const response = await axios.post(
        `https://www.worksapis.com/v1.0/bots/${botId}/users/${userId}/messages`,
        {
          content: {
            type: 'link',
            contentText: `${body.app.name}のレコードが追加されました。`,
            linkText: '開く',
            link: body.url,
          },
        },
        {
          headers,
        },
      );
      console.log(response.data);
    } catch (error) {
      console.log(error);
    }
  }
認証に関わる関数群を作っておきます。
private getServerAccountJWT() {
    const payload = {
      iss: clientId,
      sub: serverAccount,
      iat: Date.now(),
      exp: Date.now() + 3600,
    };
    const privatePem = fs.readFileSync(privateKeyFile, 'utf-8');
    const token = jwt.sign(payload, privatePem, { algorithm: 'RS256' });

    // console.debug("Server Account JWT", token);
    return token;
  }

  private async getAccessToken() {
    const jwt = this.getServerAccountJWT();

    const params = new URLSearchParams({
      assertion: jwt,
      grant_type: 'urn:ietf:params:oauth:grant-type:jwt-bearer',
      client_id: clientId,
      client_secret: clientSecret,
      scope: 'bot.message',
    });

    try {
      const response = await axios.post(
        'https://auth.worksmobile.com/oauth2/v2.0/token',
        params,
      );
      // 成功時の処理
      console.log(response.data);
      const { access_token } = response.data;

      return access_token;
    } catch (error) {
      // エラー時の処理
      if (error.response) {
        // サーバーからのエラーレスポンスがある場合
        console.error(error.response.status); // HTTPステータスコード
      }
    }
  }
}
.env
PRIVATEKEYFILE にはプライベートキーの保存場所のパスを定義しておきます。
プライベートキーの取得方法などはこちらの記事が参考になります。
https://qiita.com/kunihiros/items/54853e910ed1dff9ebdc
CLIENTID = xxxxxxx
CLIENTSECRET = xxxxxxx
SERVERACCOUNT = xxxxxxx@xxxxxx
PRIVATEKEYFILE = xxxxxxx

BOTID = xxxxxxx
USERID = xxxxxxx@xxxxxxx
kintone 側の設定
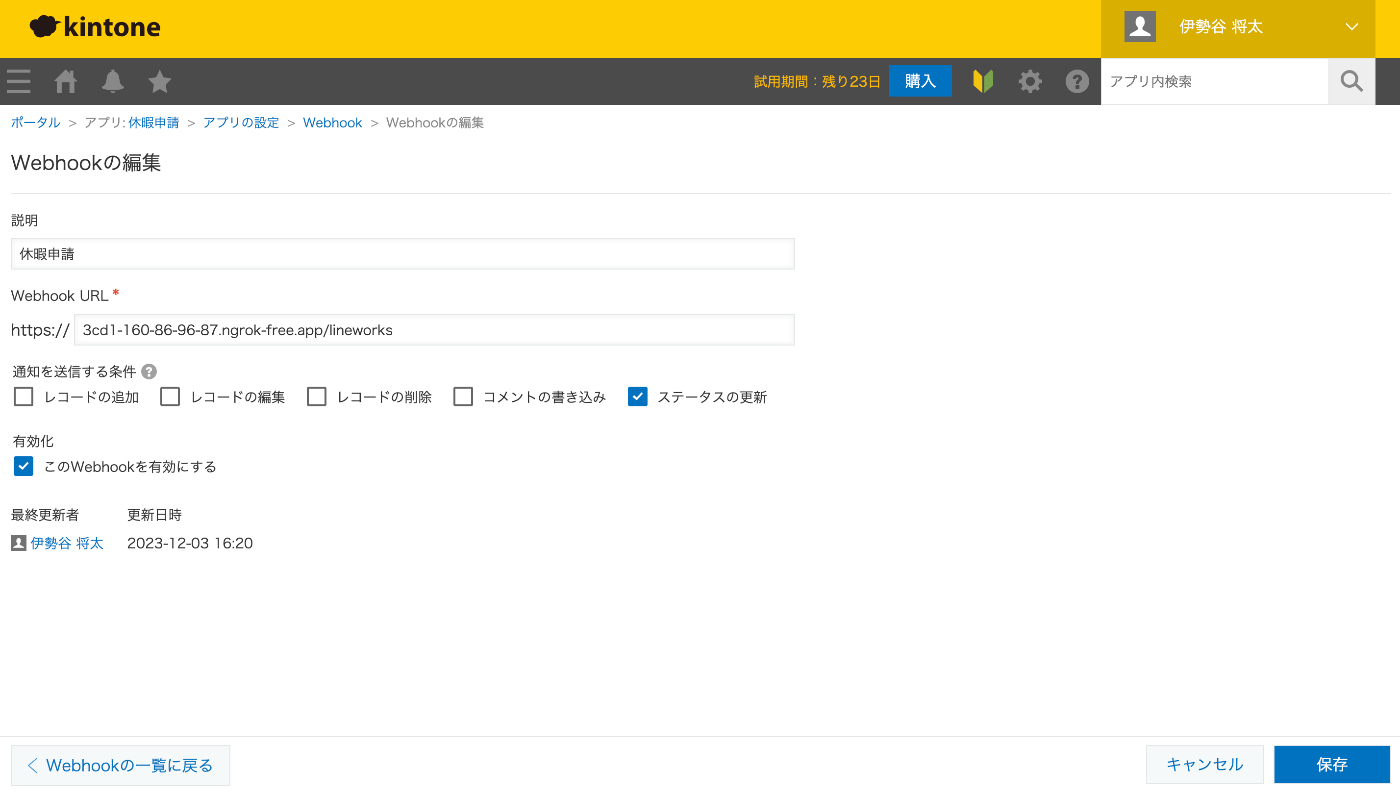
kintone のアプリの設定→Webhookにて NestJS で構築したローカルサーバーのエンドポイントを設定します。
必ず、https://から始まる必要がありますので、簡易的な方法として ngrok を使用しております。
https://ngrok.com/
実際に Bot から通知が届くのか
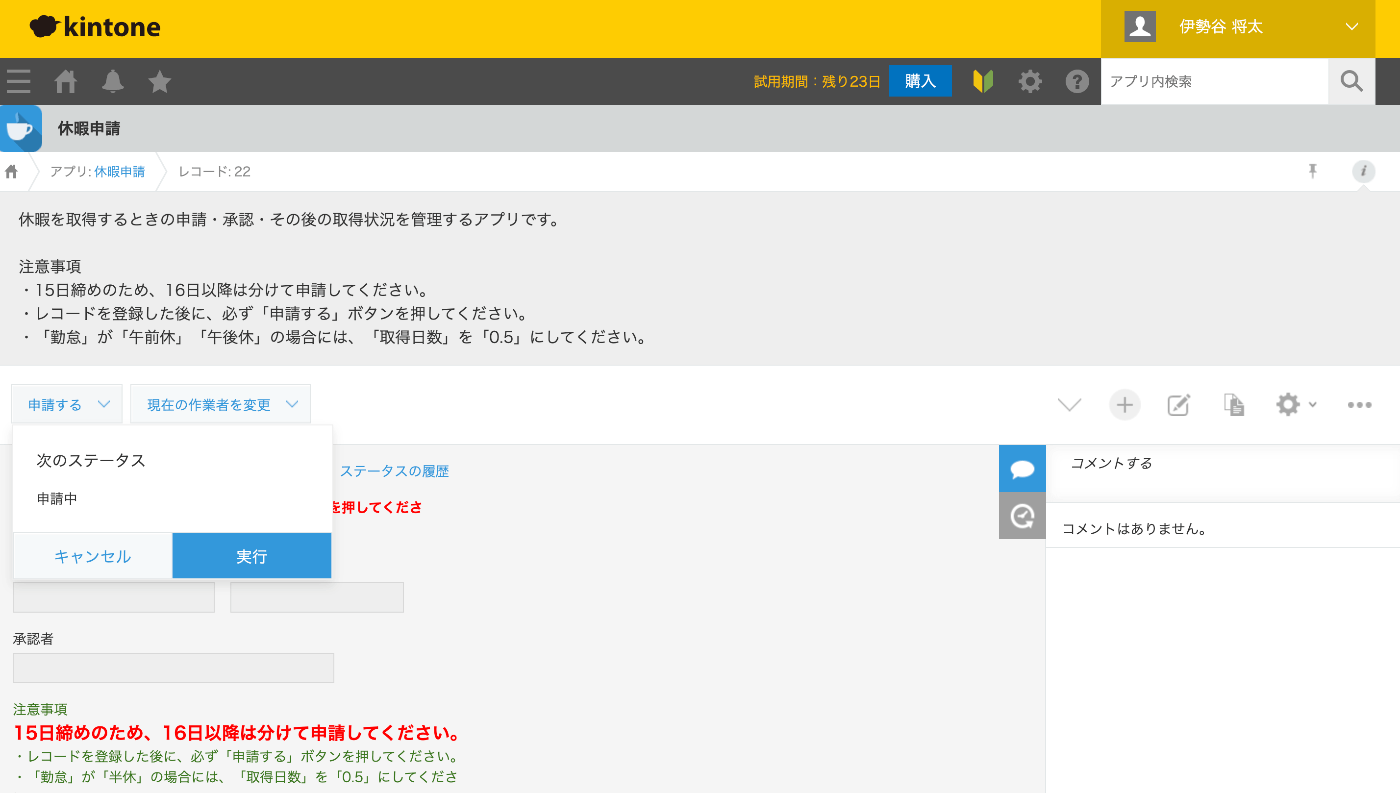
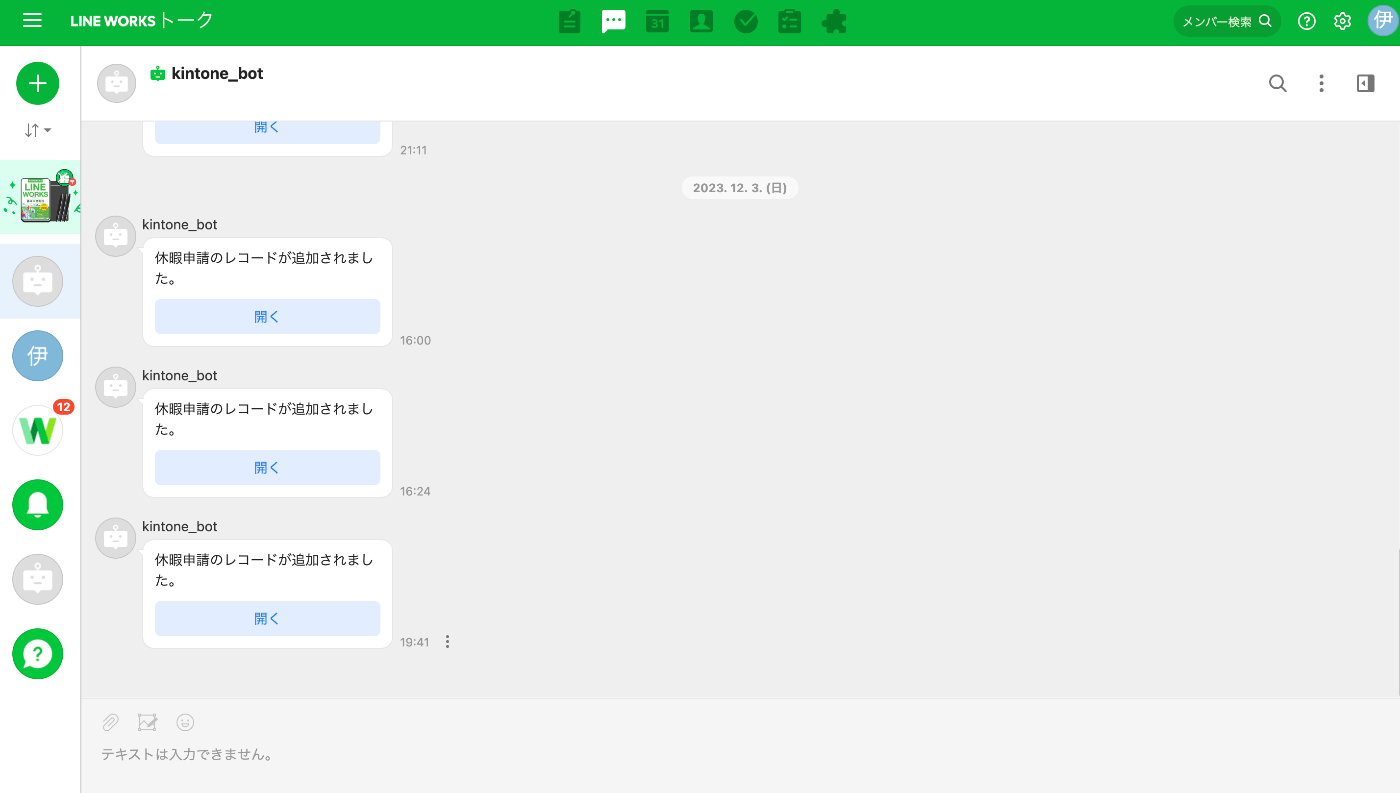
kintone の休暇申請アプリからプロセス管理で「申請」とすると、、
以下のようにBotが動き、kintone の通知を飛ばしてくれました!🥰
おわりに
LINE WORKS と kintone を連携してみました。
LINE WORKS 等のチャットツールと、kintone 等のグループウェア製品の親和性は高く、
連携することでより便利に仕事ができるのではと考えます!
連携サービスでSaaS界隈が盛り上がると良いですね。
では。
