はじめに
今回やりたいことは、以下です。
- SAP Business Application Studio(BAS)でUI5アプリ、カスタムライブラリを開発し、Cloud Foundryにデプロイする
- BTPのLaunchpadでUI5アプリを実行する
※以前以下の記事を書きましたが、こちらはABAP環境へのデプロイを想定したものでした。
【UI5】ローカル、BAS環境でカスタムライブラリを使用するには
ソースコードは以下に格納しています。
https://github.com/miyasuta/cf-library-workspace
2021年10月現在のBAS
Fiori toolsにより、ワークスペース内にあるライブラリを参照できるようになりました。以下に手順を載せておきます。
- コマンドパレットから"Fiori : Add Reference to SAP Fiori Reusable Libraries"を選択

- ライブラリを使用したいプロジェクトと、使用するライブラリを選択する
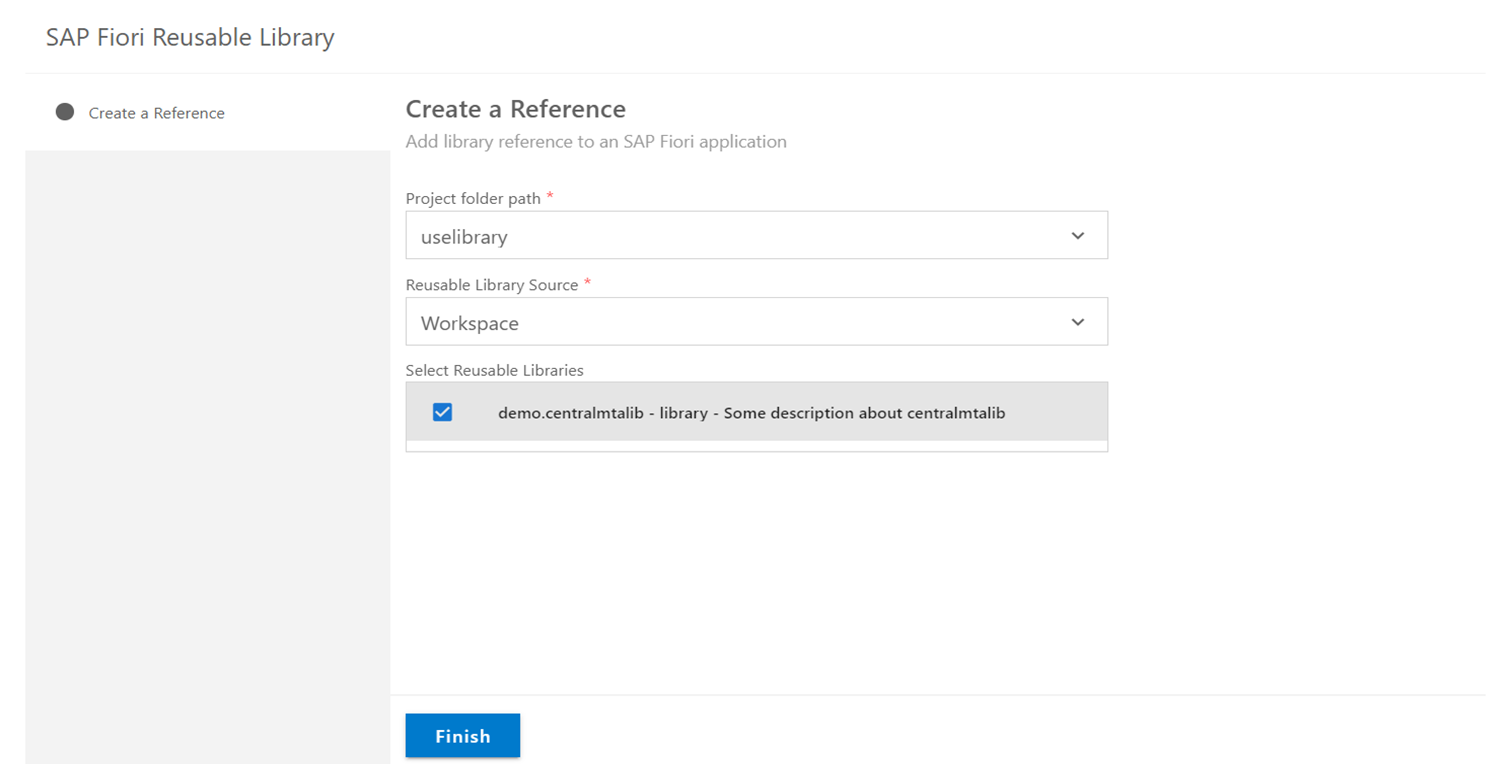
これにより、manifest.jsonでのライブラリ使用の設定と、ローカル実行用のui5.yamlの設定が追加されます。以下で設定していた内容が自動で入るということです。
3.3. ライブラリを使用
3.4. BASで実行
2021年5月現在のBAS
BASでアプリケーションを作成する際、テンプレートを選んで生成する場合が多いと思います。そのテンプレートがわりと頻繁にアップデートされるのですが、2021年5月現在、UI5にかかわる部分は以下のようになっています。
- UI5アプリを作成する場合は"SAP Fiori application"のテンプレートを使用する(Fiori elements、フリースタイル両方に対応)
- デプロイ先がCloud Foundryの場合、Managed Approuterを選択できる
Managed Approuterとは?
Cloud Foundryで動かすアプリケーションでは、認証やルーティングを行うための入り口としてApprouterというモジュールが必要でした。
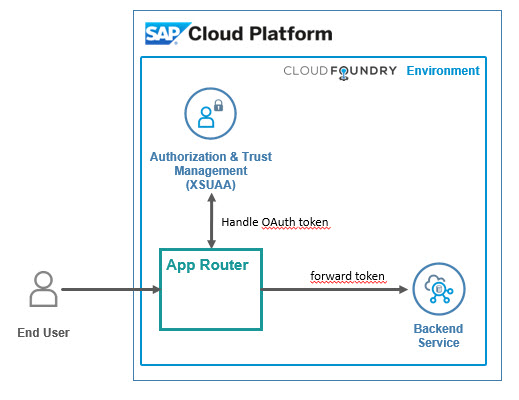
SAP Cloud Platform Backend service: Tutorial [26]: App Router (3): route to Backend serviceより引用
これまでは、MTAプロジェクトの中でApprouterを独立したコンポーネントとして作る(または既存のものを流用する)必要がありました。
Managed Approuterを使うと、SAP Launchpad serviceなどHTML5アプリケーションを実行する環境そのものがApprouterの役割を果たしてくれるので、自分でApprouterを作る必要がなくなります。今のところ、以下のサービスでHTML5アプリケーションを動かす際にManaged Approuterを使うことができます。(Help Portalより)
- SAP Work Zone
- SAP Launchpad service
- SAP Cloud Portal
Managed Approuterを使用してUI5ライブラリを開発する際の注意点
Managed Approuterを使用する場合(テンプレートでそのように選択した場合)、mta.yamlに以下のような設定が自動で入ります。以下のMTAをデプロイすると、cfapp1-destination-serviceというDestinationサービスインスタンスの中に、cfapp1_cfapp1_html_repo_hostとcfapp1_uaa_cfapp1という2つのDestinationが作られます。
modules:
- name: cfapp1-destination-content
  type: com.sap.application.content
  requires:
  - name: cfapp1-destination-service #Destinationサービスインスタンスの名前
    parameters:
      content-target: true
  - name: cfapp1_html_repo_host
    parameters:
      service-key:
        name: cfapp1_html_repo_host-key
  - name: uaa_cfapp1
    parameters:
      service-key:
        name: uaa_cfapp1-key
  parameters:
    content:
      instance:
        destinations:
        - Name: cfapp1_cfapp1_html_repo_host #Destinationその1
          ServiceInstanceName: cfapp1-html5-app-host-service
          ServiceKeyName: cfapp1_html_repo_host-key
          sap.cloud.service: cfapp1
        - Authentication: OAuth2UserTokenExchange
          Name: cfapp1_uaa_cfapp1 #Destinationその2
          ServiceInstanceName: cfapp1-xsuaa-service
          ServiceKeyName: uaa_cfapp1-key
          sap.cloud.service: cfapp1
        existing_destinations_policy: ignore
    ...
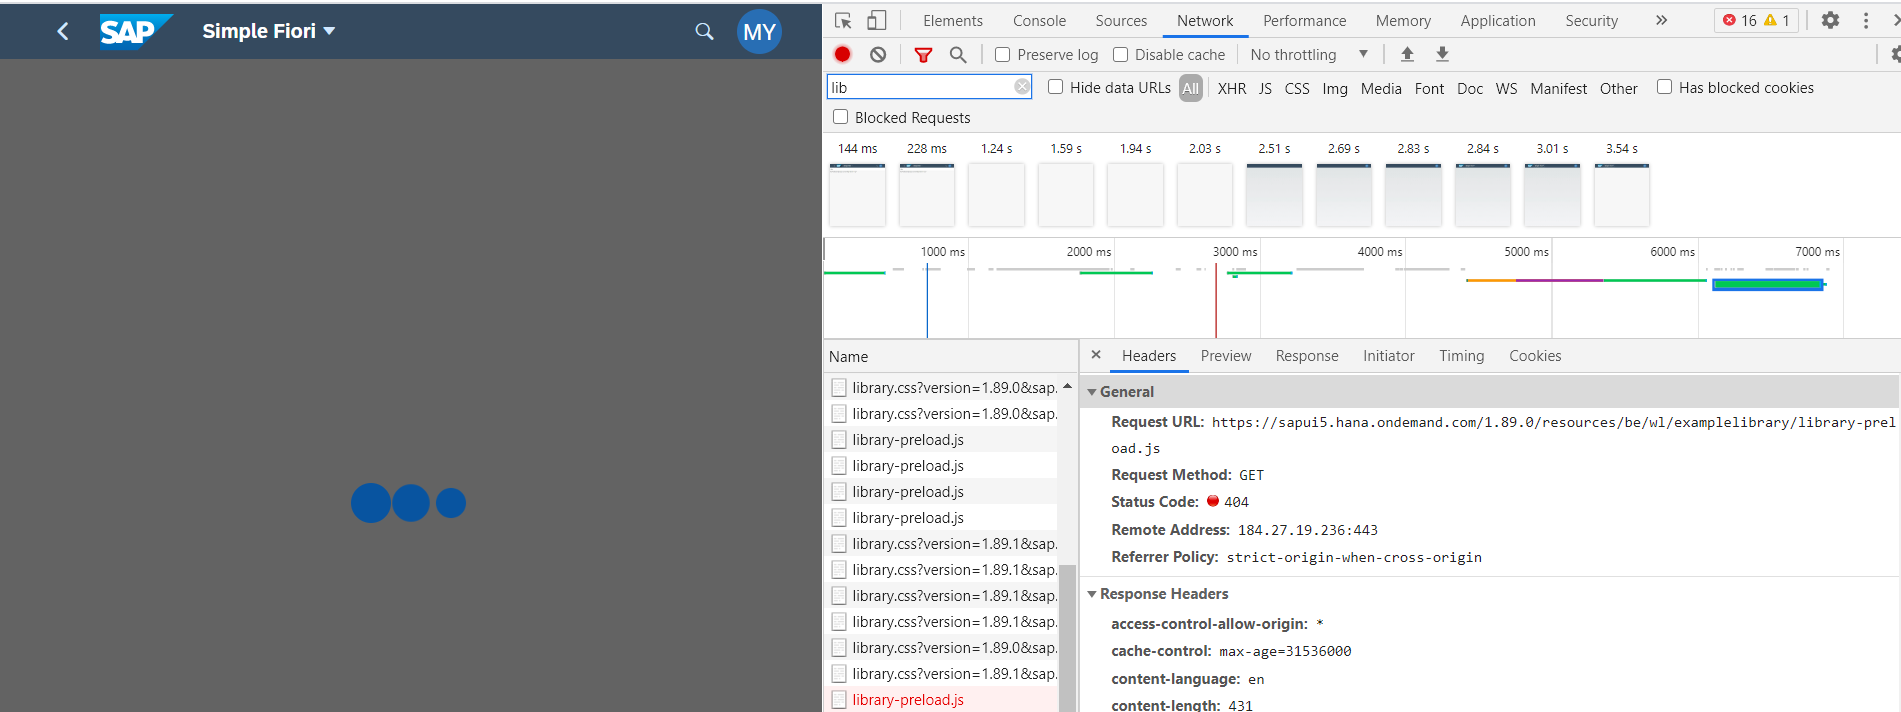
つまり、テンプレートから作成した場合、そのままではアプリごとにDestinationのサービスインスタスが分かれることになります。UI5アプリとライブラリでDestinationのサービスインスタスが分かれている場合、LaunchpadからUI5アプリを実行したときにライブラリのリソースへアクセスすることができませんでした(今後変わる可能性はあります)。
そこで、UI5アプリとライブラリで同じDestinationサービスインスタンスを使うようにします。このためには、あらかじめ共通で使うためのDestinationインスタンスを作っておき、UI5アプリとライブラリでそのインスタスを使うようにします。この考え方は以下のブログで説明されています。
Achieve Separate Lifecycles for Managed Approuter Applications with SAP Business Application Studio
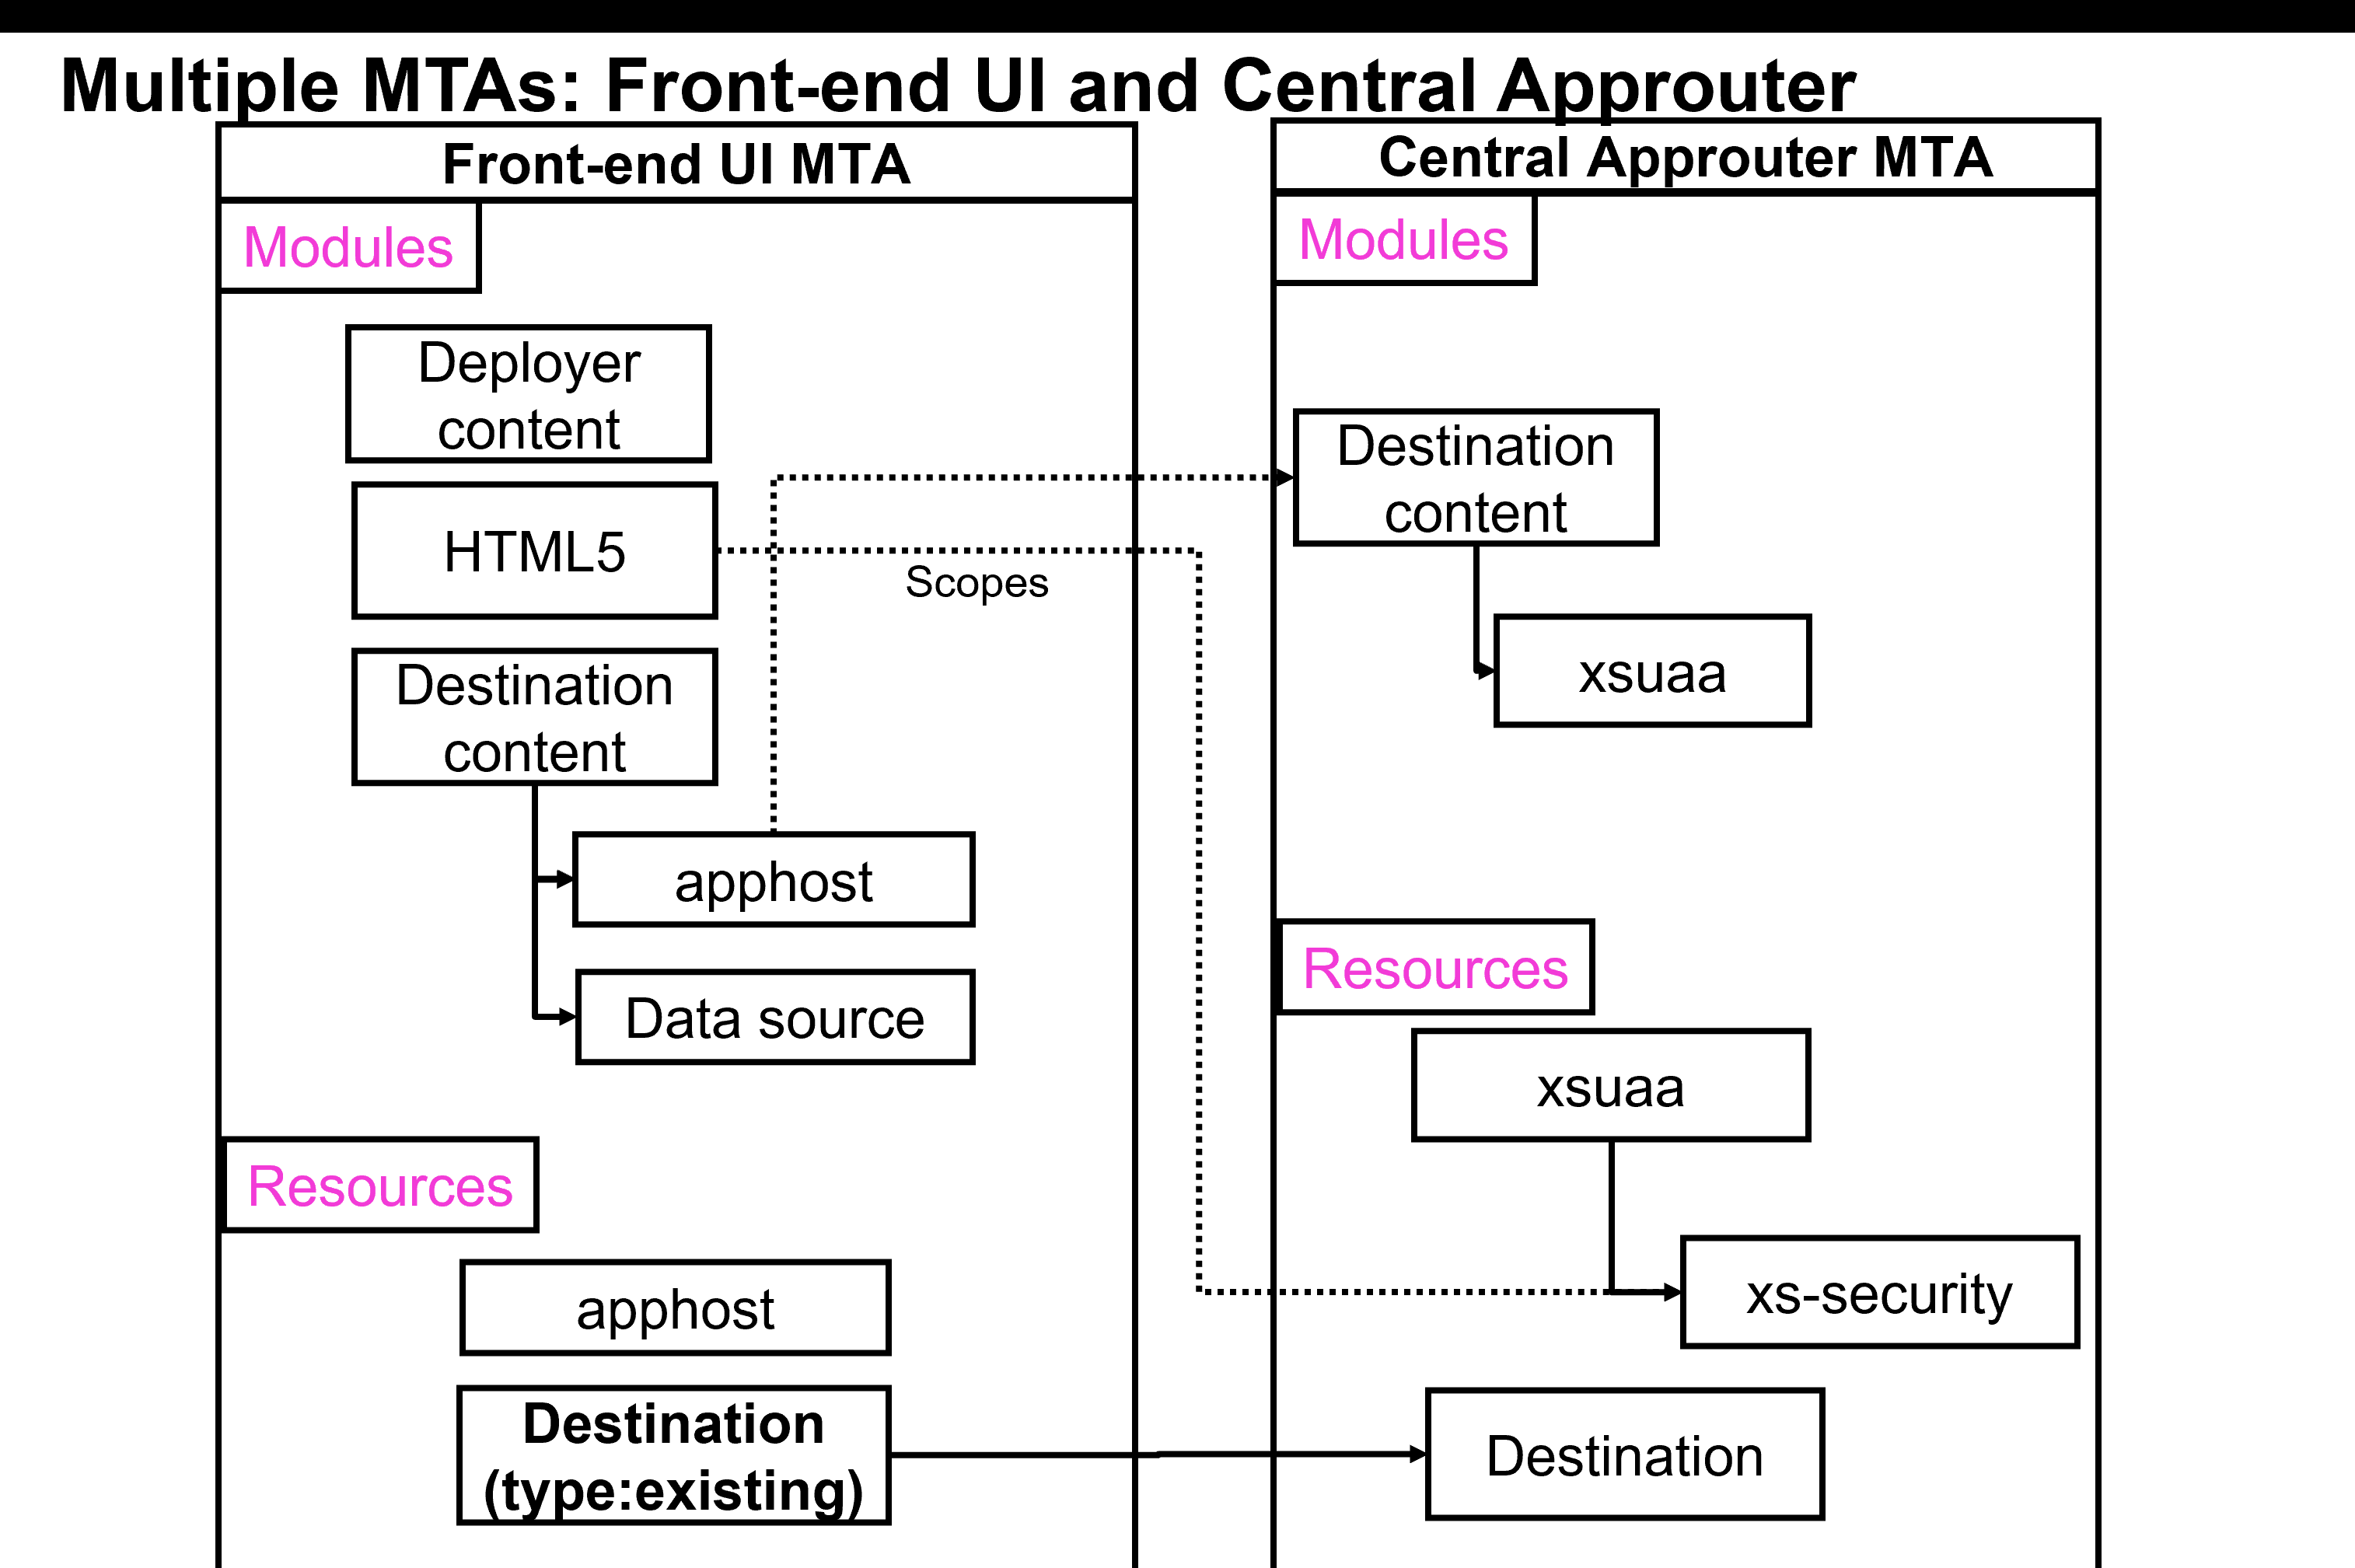
Achieve Separate Lifecycles for Managed Approuter Applications with SAP Business Application Studioより引用
ステップ
以下のステップで、BTPのLaunchpadで実行するためのUI5アプリとライブラリを作成します。
- Central Approuter用のMTAを作成
- ライブラリ用のMTAを作成
- UI5アプリ用のMTAを作成
- LaunchpadにUI5アプリを追加
1. Central Approuter用のMTAを作成
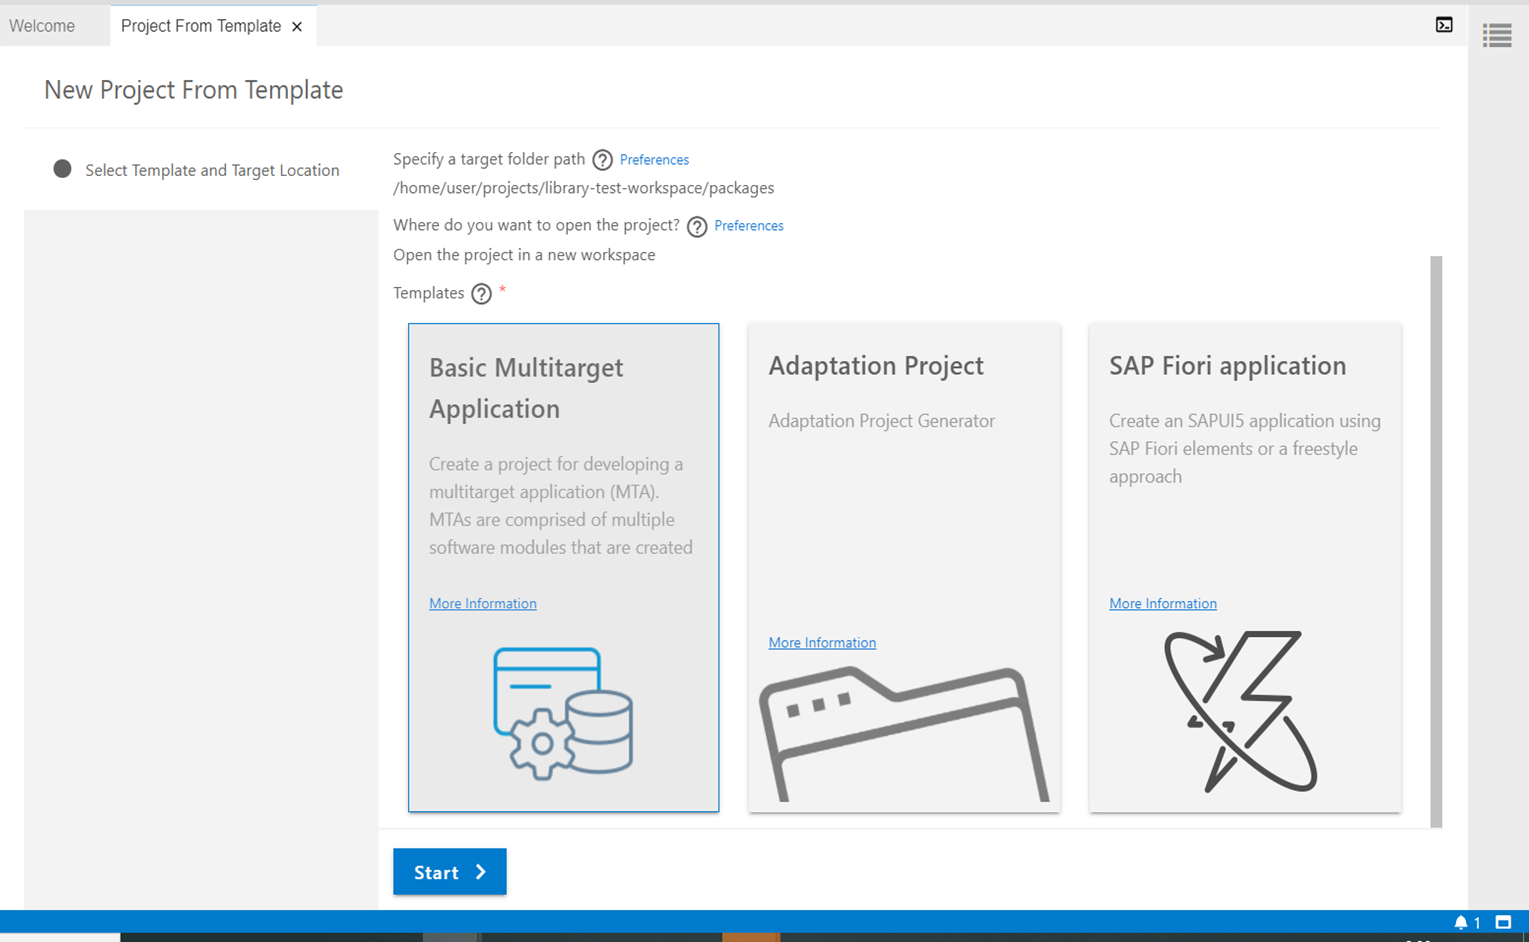
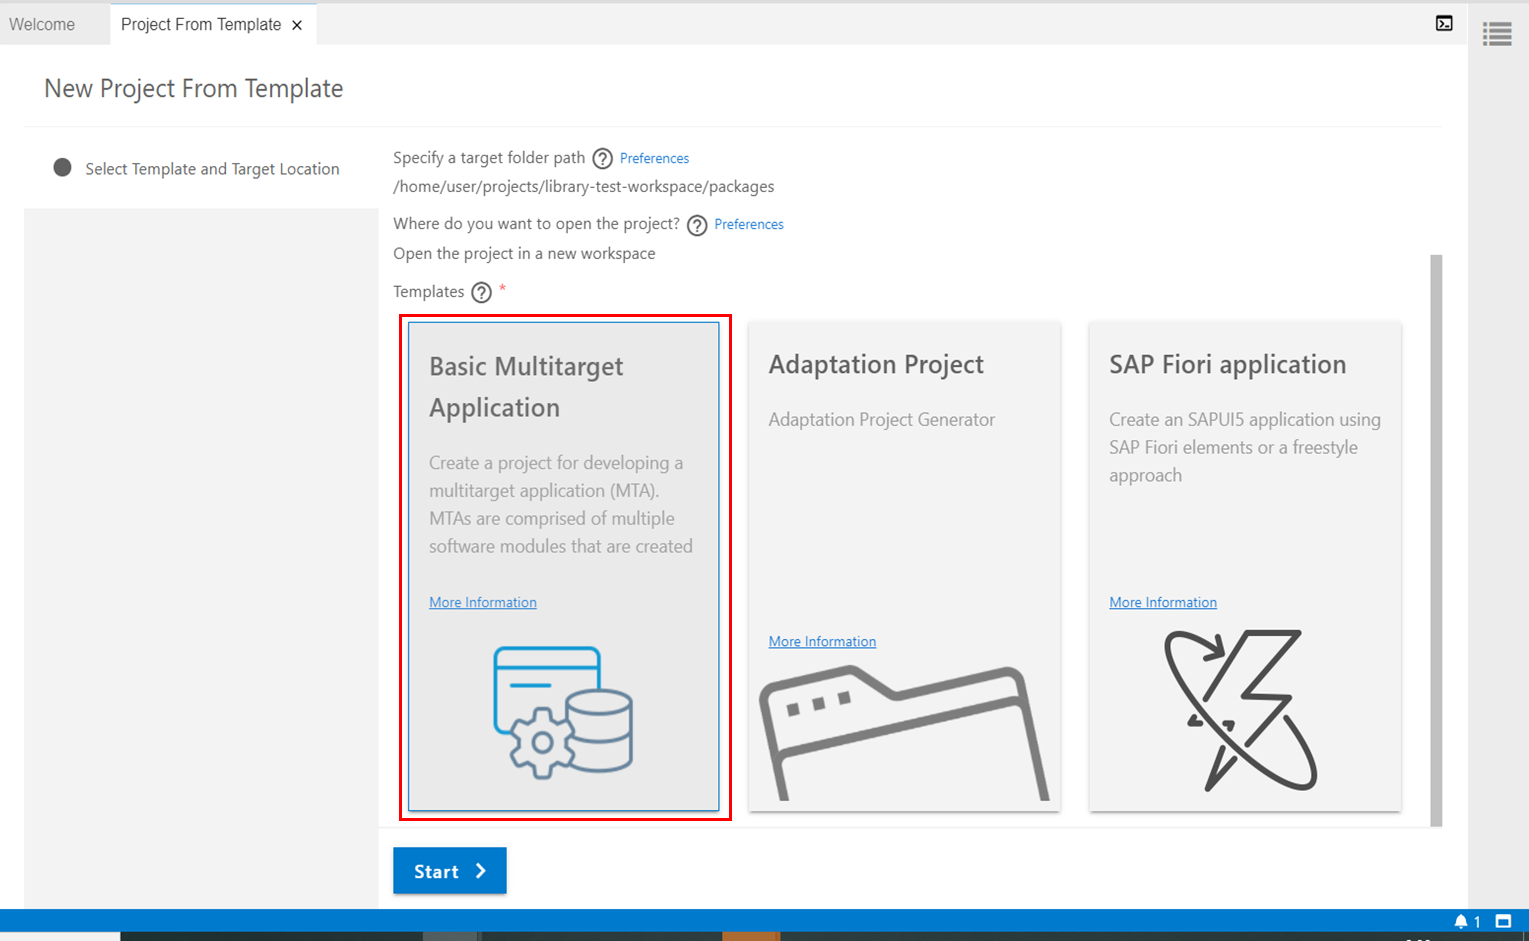
テンプレートから"Basic Multitarget Application"を選択します。
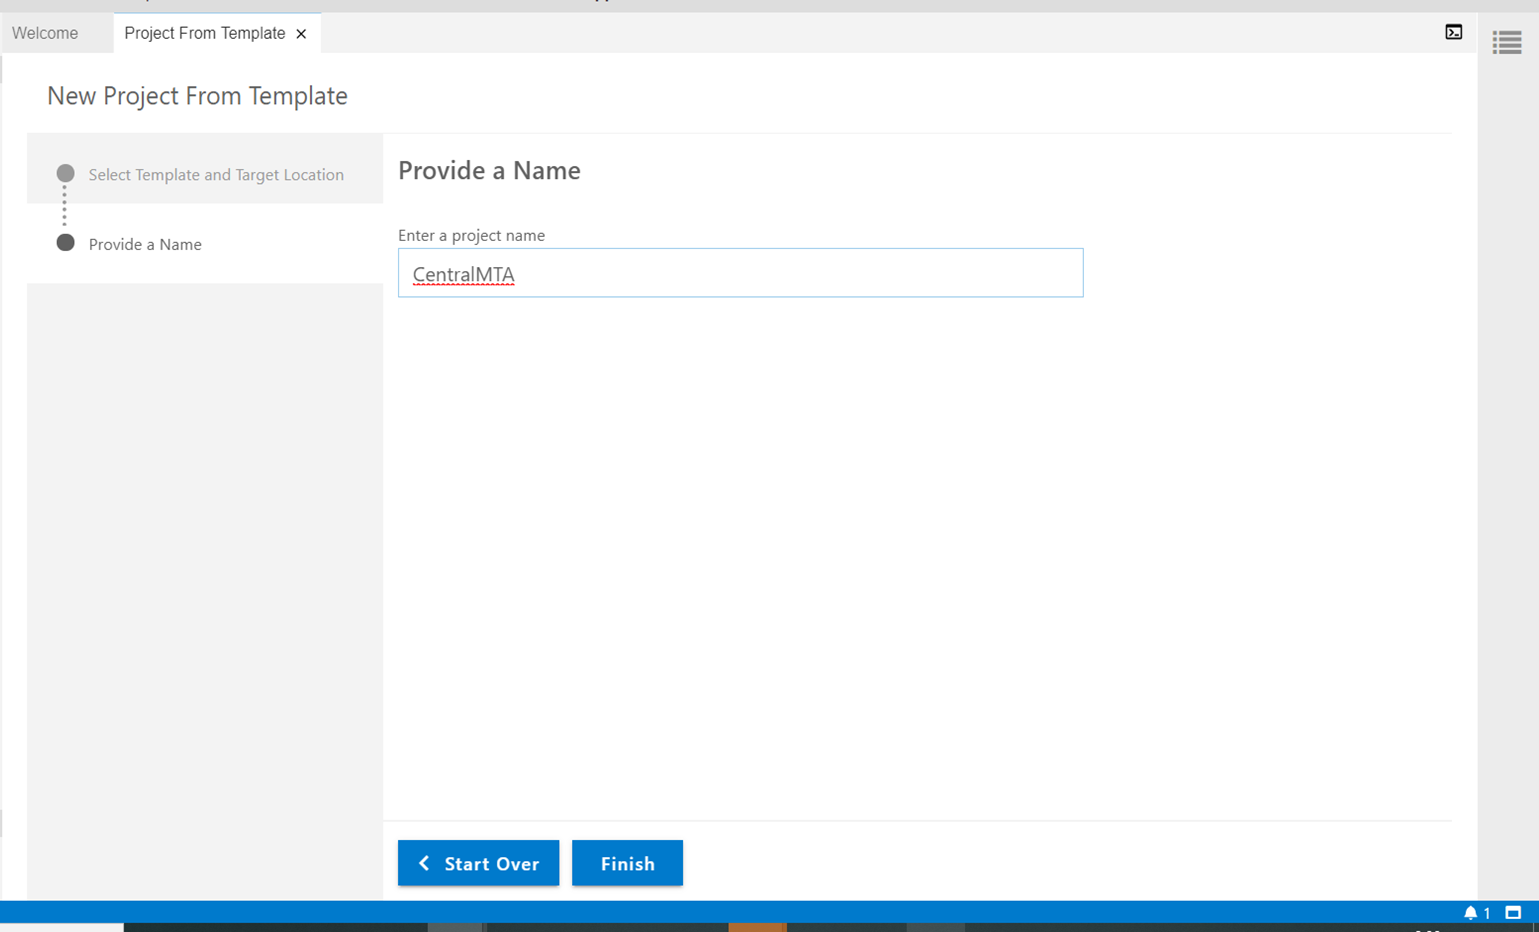
名前を付けて"Finish"を押します。
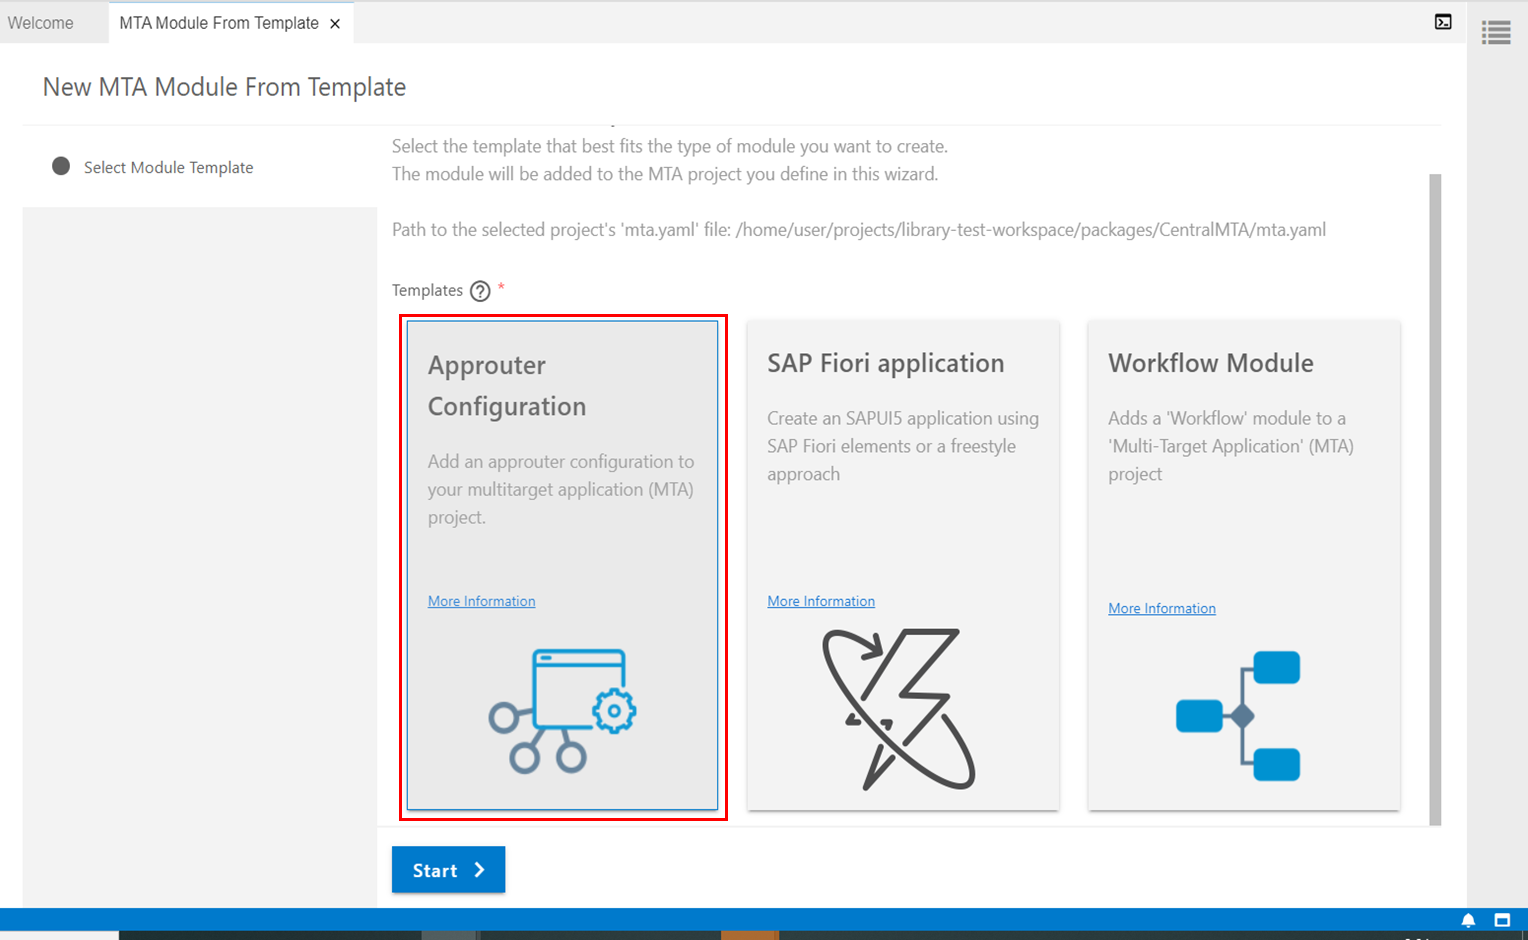
mta.yamlfileを右クリックして"Create MTA Module from Template"を選択します。

"Approuter Configuration"を選択します。
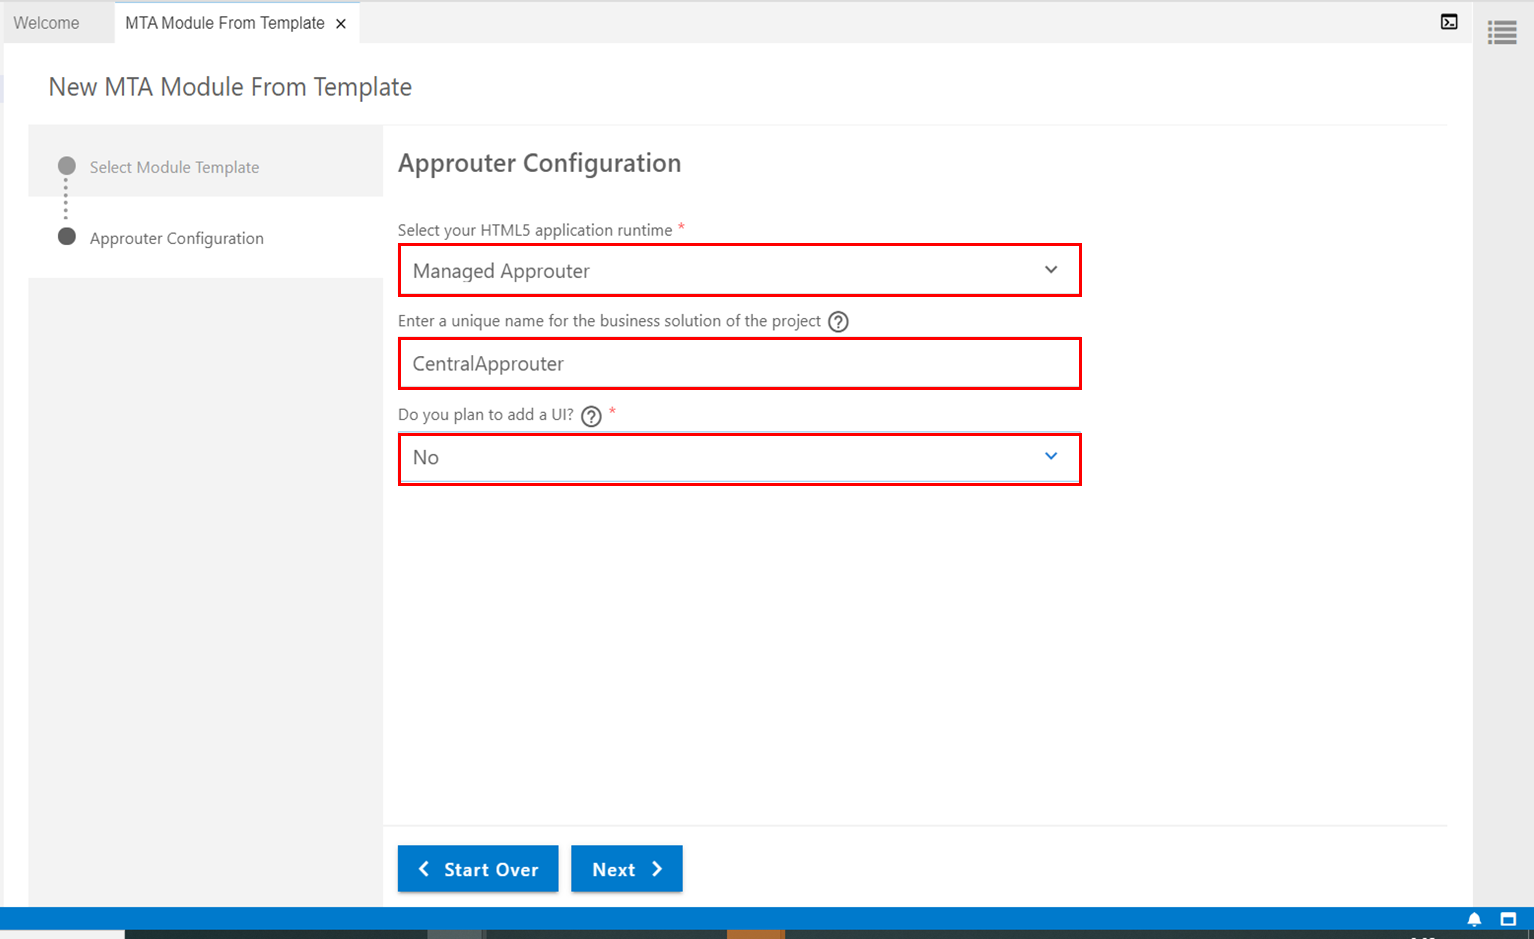
HTML5 application runtimeには"Managed Approuter"を指定します。...add a UI?には"No"を指定します。Enter a unique name...で指定する名前(ここではCentralApprouter)はUI5アプリ、ライブラリでも使用します。
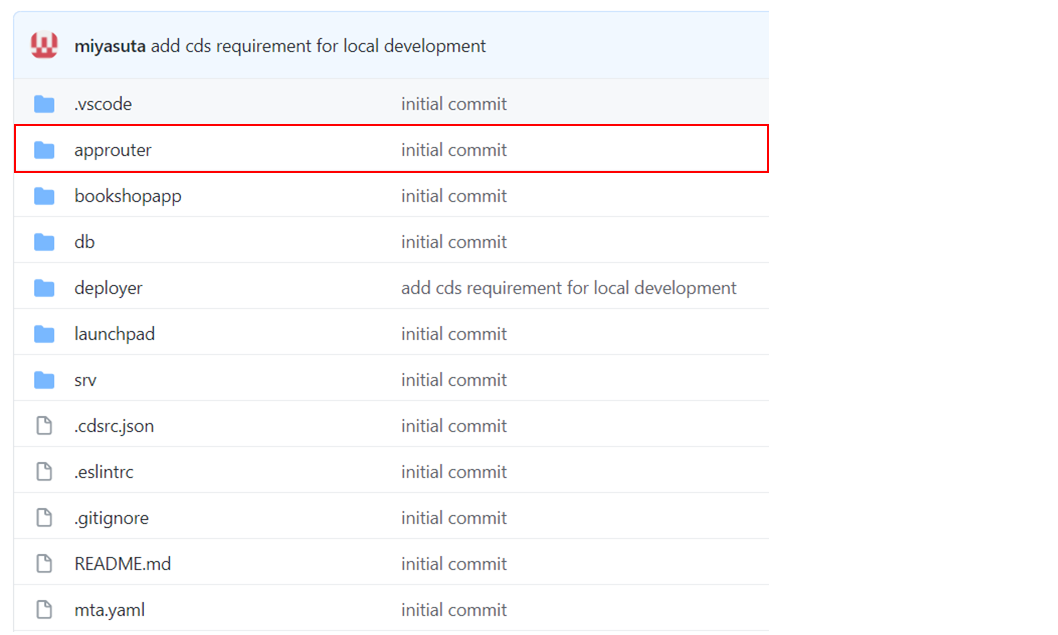
mta.yamlに以下の設定が追加されます。赤枠で囲った部分:sap.cloud.serviceとDestinationのインスタンス名を後で使うので控えておきましょう。
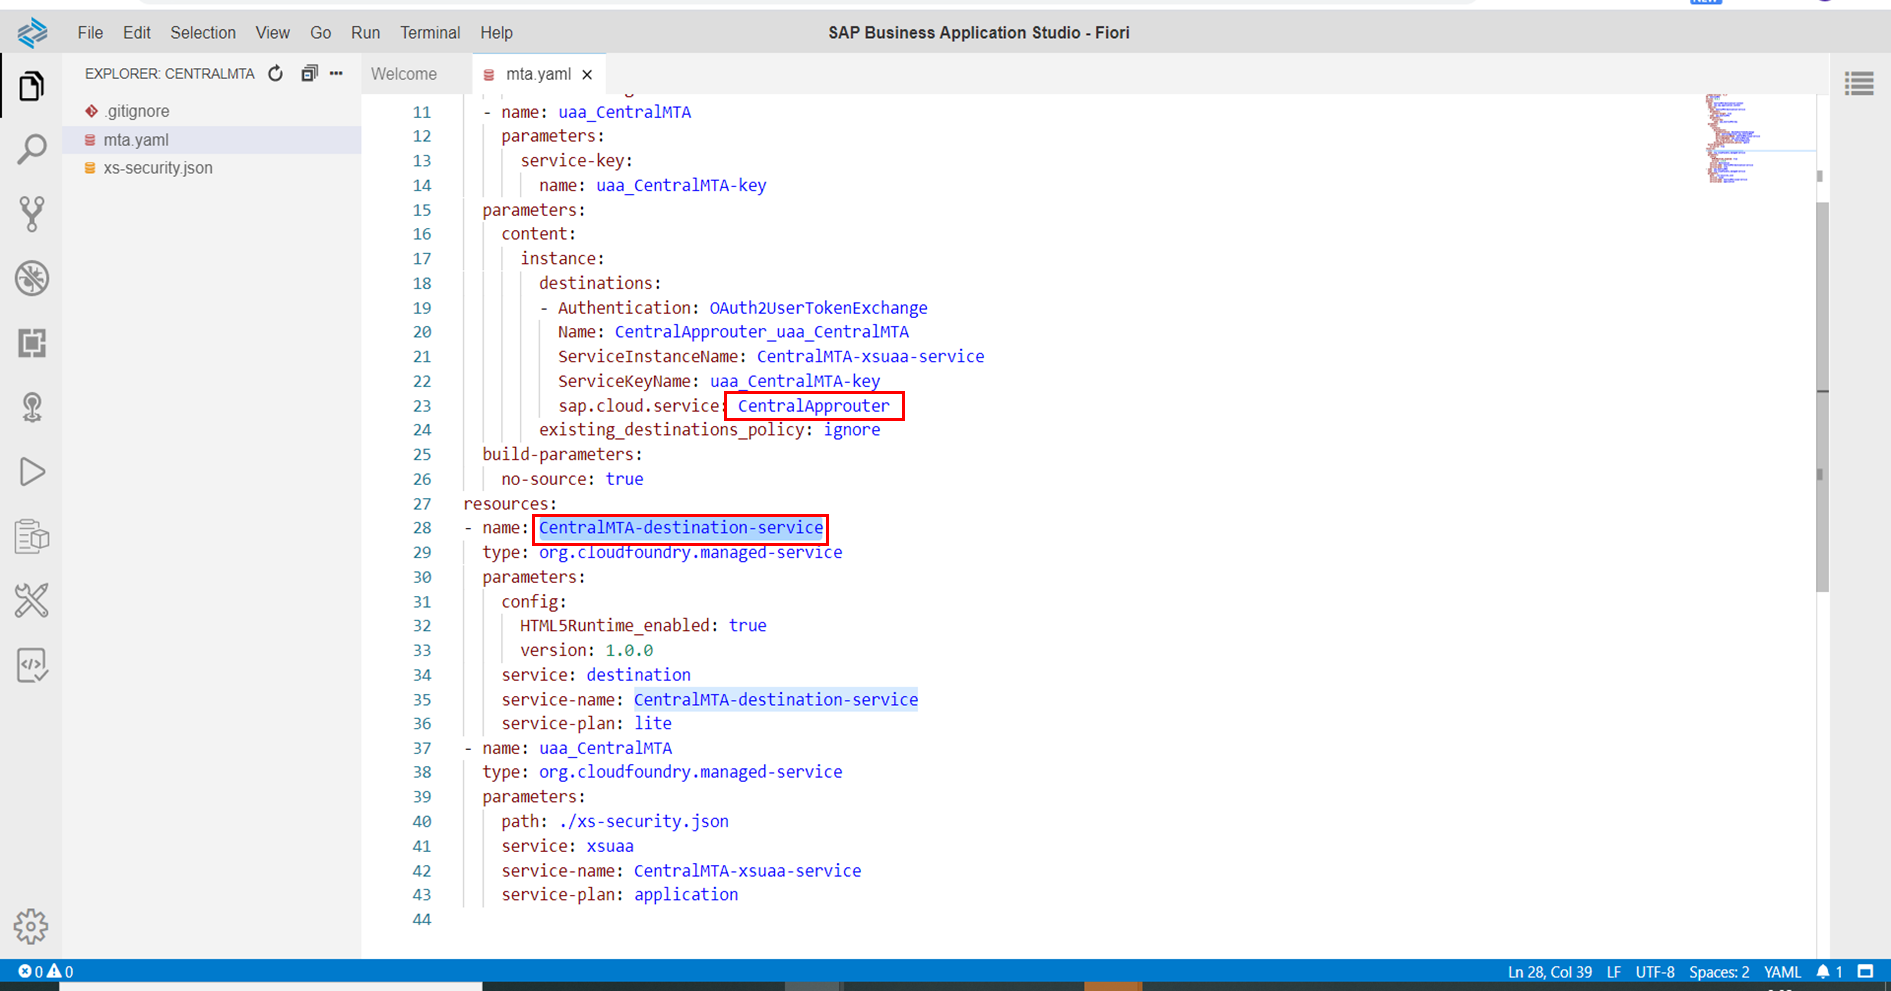
以上でCentral Approuter用のMTAは完成です。ビルド、デプロイしておきましょう。
2. ライブラリ用のMTAを作成
2.1. ライブラリ用のMTAを作成
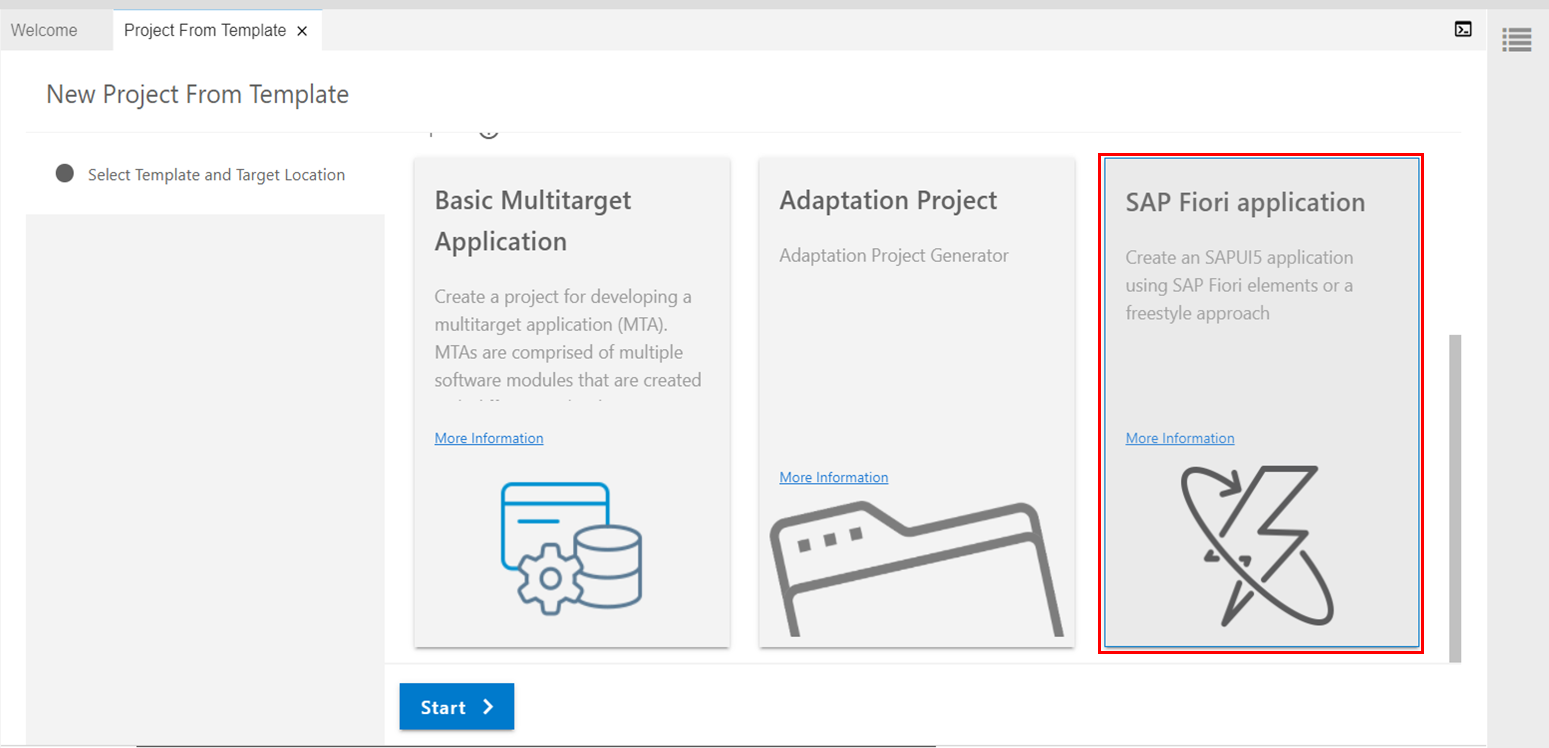
テンプレートから"SAP Fiori application"を選択します。
※現状BASではCloud Foundryに対応したライブラリのテンプレートがないので、SAP Fiori applicationのテンプレートを使用してガラを作ったあとで色々と調整をすることになります。
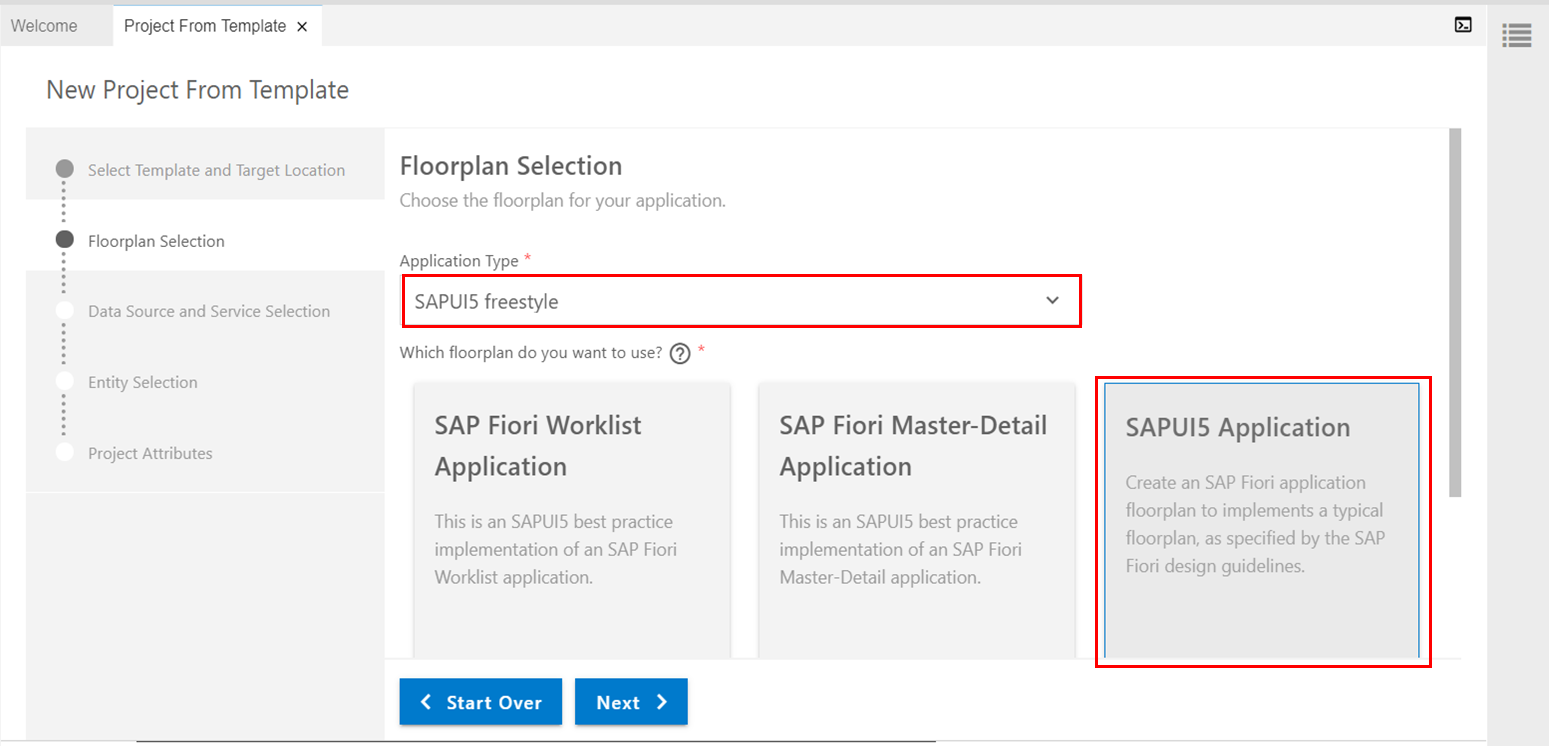
Application Typeに"SAPUI5/freestyle"、フロアプランには"SAPUI5 Application"を選択します。
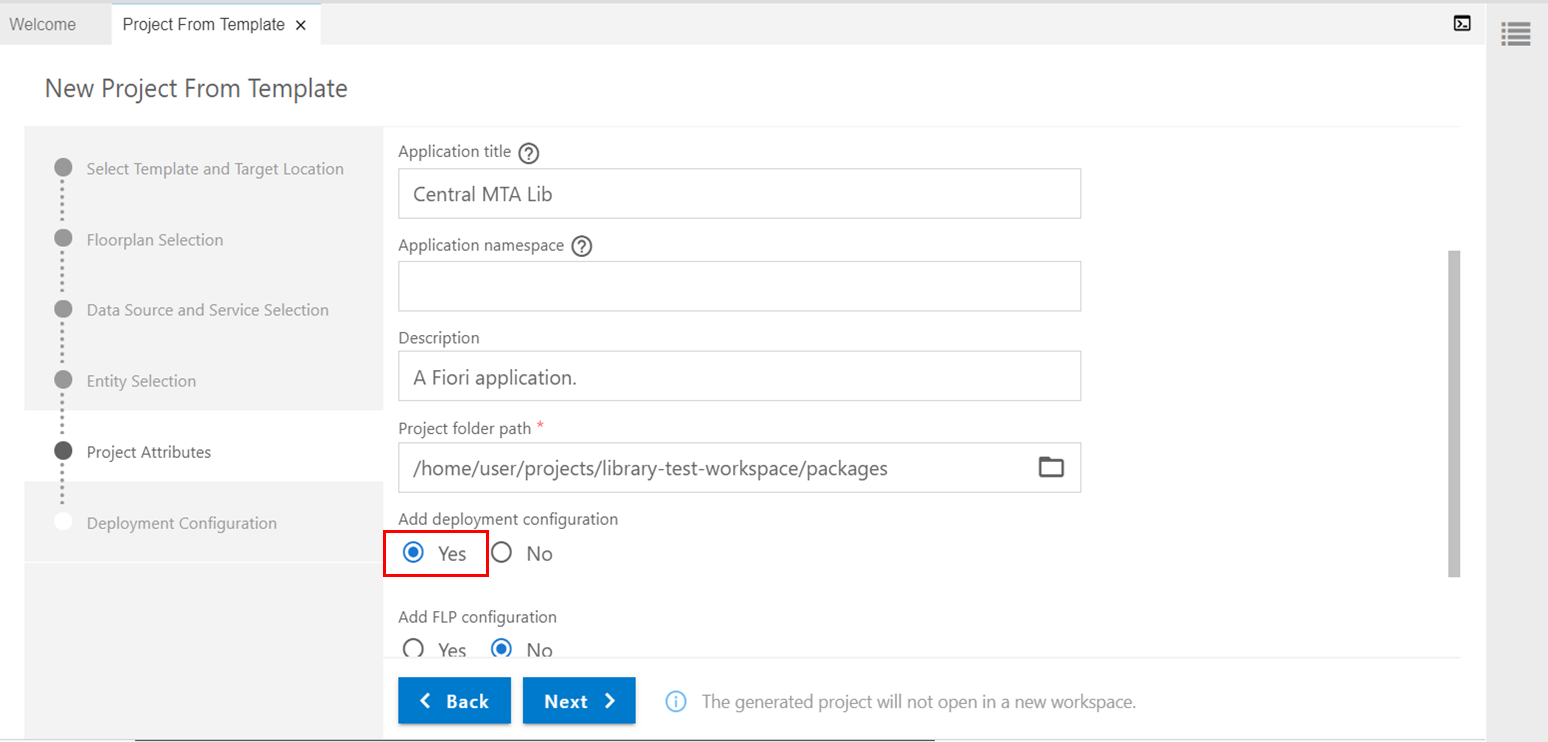
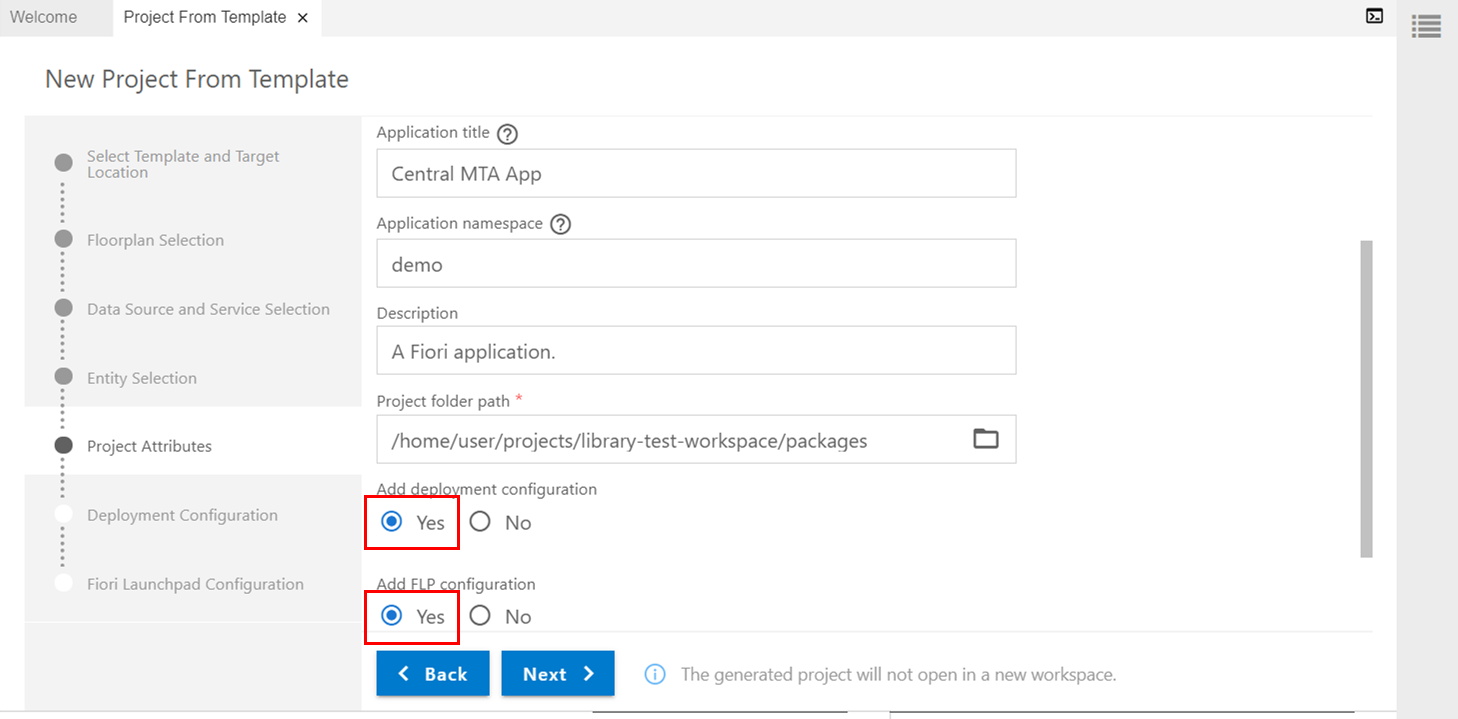
Add deployment configurationには"Yes"を選択します。
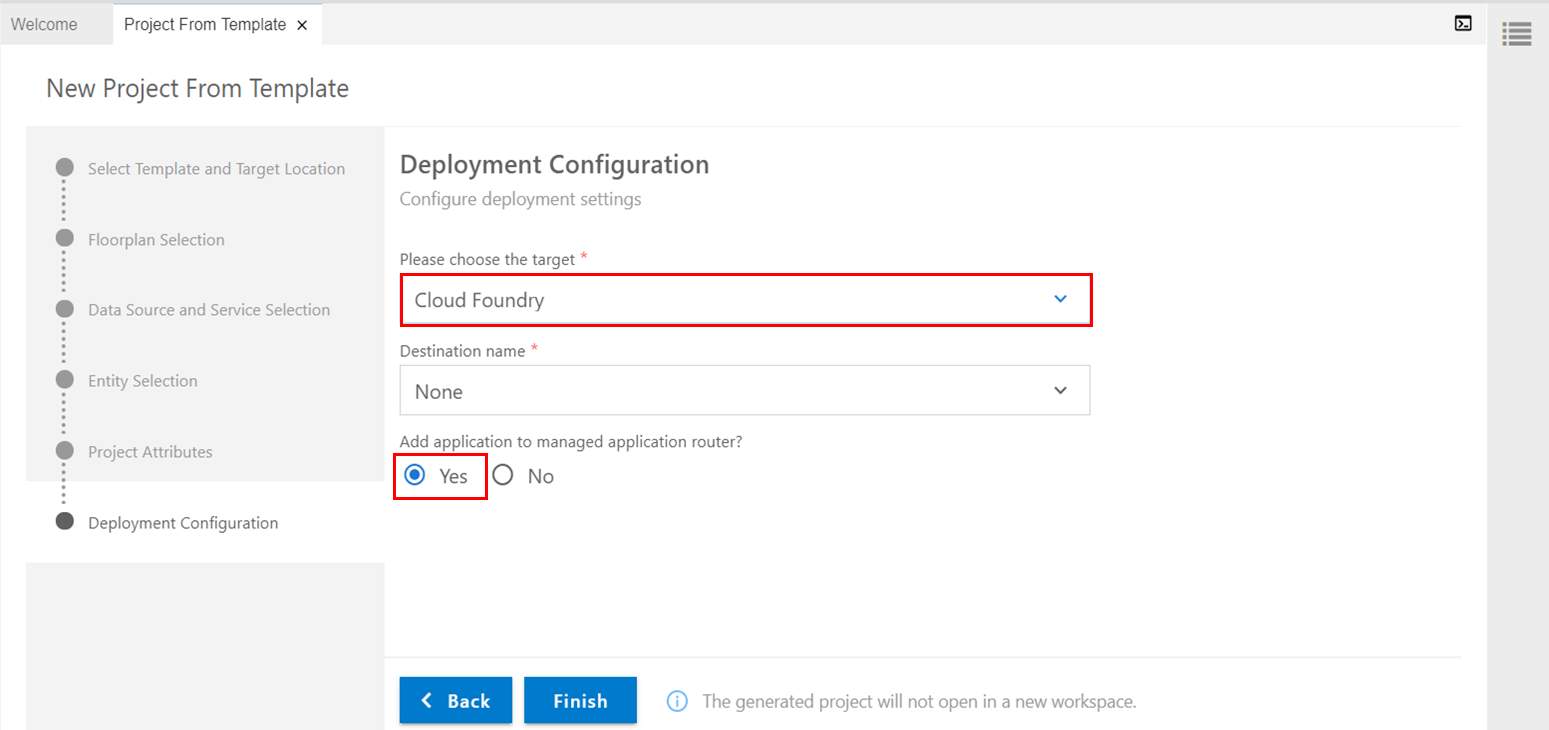
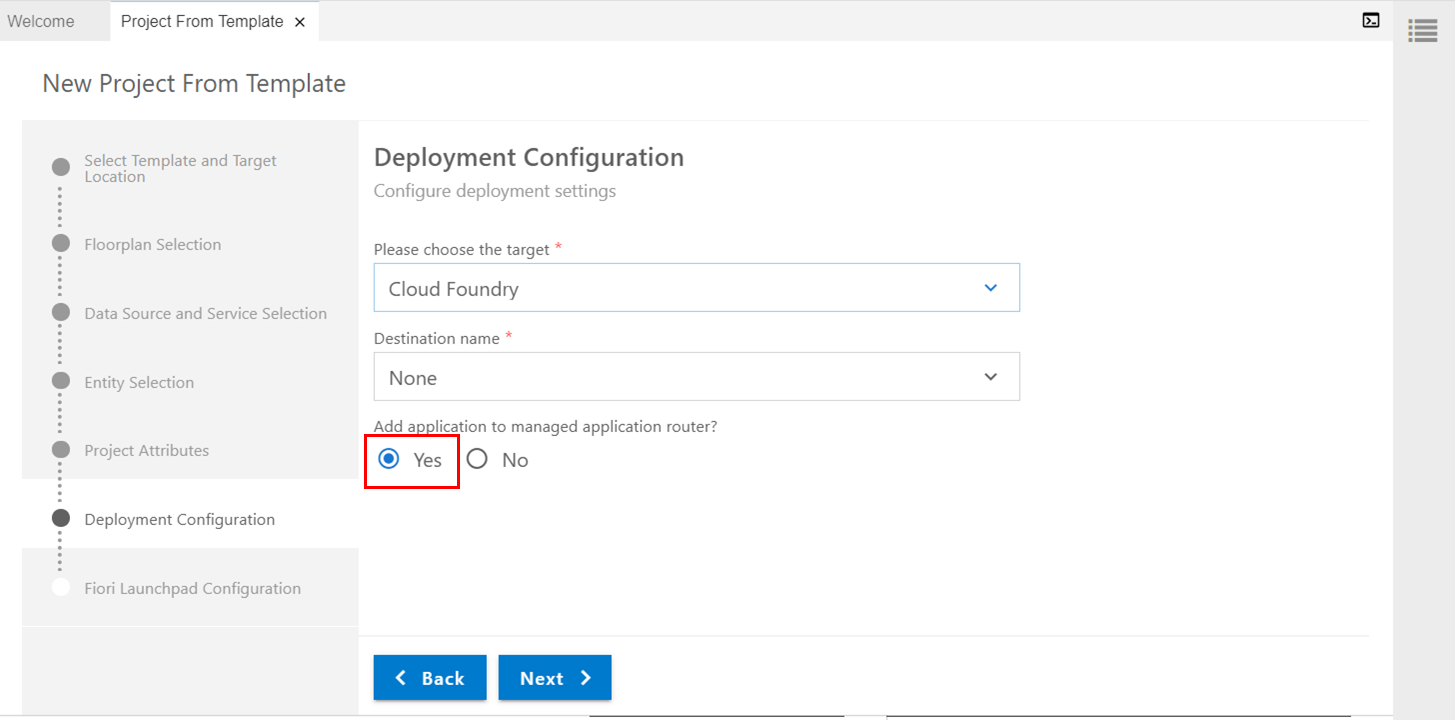
ターゲットに"Cloud Foundry"を選択し、Add application to managed application router?に"Yes"を設定します。
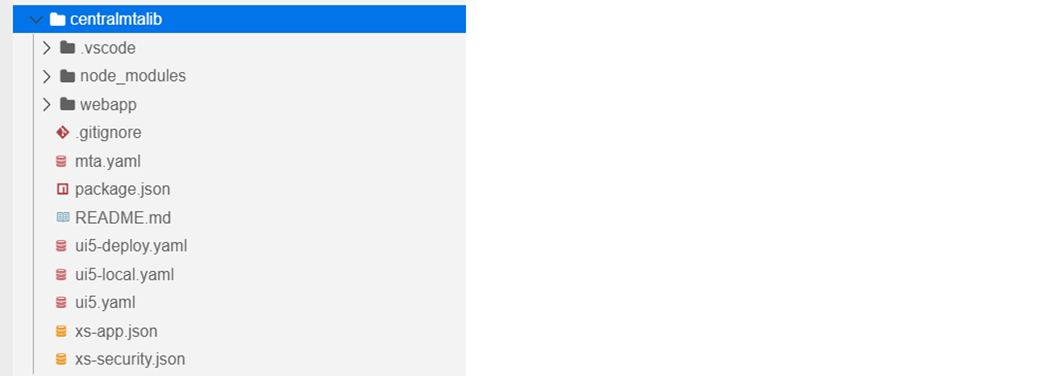
以上で、プロジェクトのガラができました。
2.2. ライブラリのガラを作成
以下の手順でライブラリを作成し、その中身を2.1.で作成したプロジェクトにマージします。
UI5ライブラリを生成するには、generator-easy-ui5を使うことができます。BASのスペースにまだインストールされていない場合は、以下のコマンドでインストールできます。
npm install -g yo generator-easy-ui5
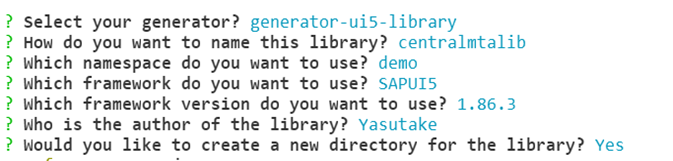
2.1.で作成したプロジェクトと同じ階層でyo easy-ui5とコマンドを打ってgeneratorを起動します。generatorの種類を選ぶところで"generator-ui5-library"を選択します。
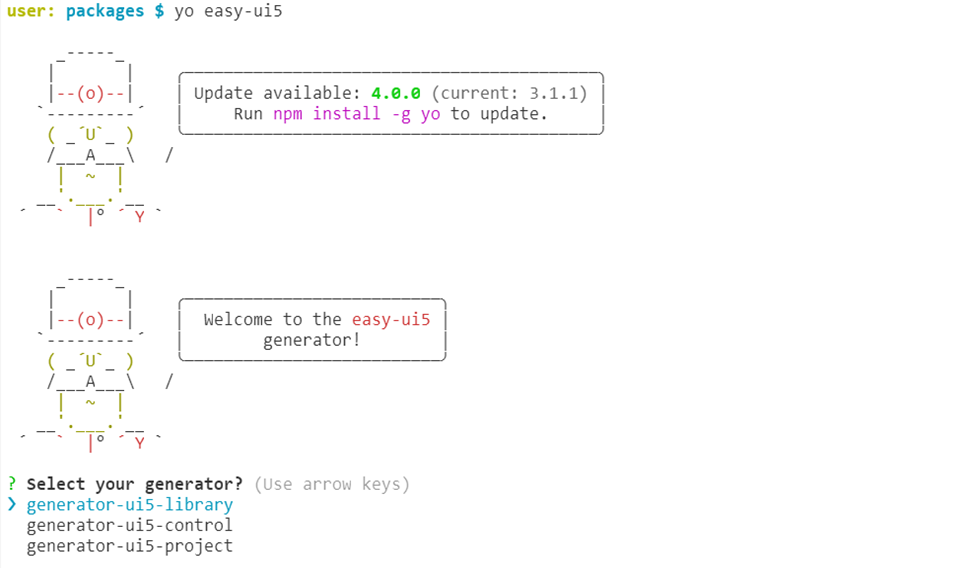
以下のように質問に答えていくと、ライブラリが生成されます。
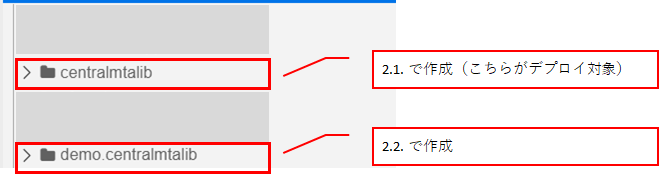
結果、2.1.で作成したMTAと2.2.で作成したライブラリが以下のように並びます。
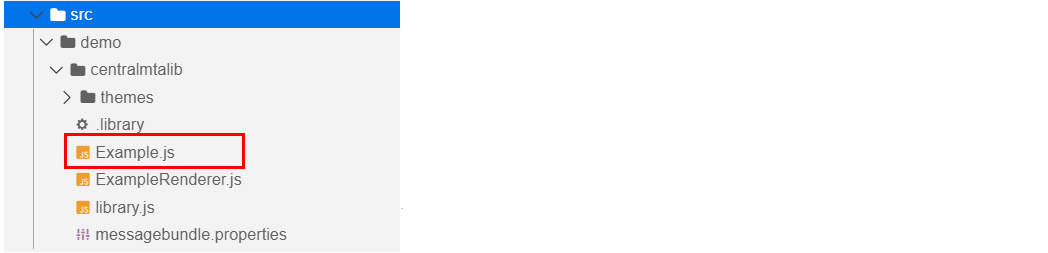
generatorで生成したライブラリは"Example"というサンプルのコントロールを持っていますので、今回はこれをそのまま使います。
2.3. ライブラリ用のMTAを調整
ライブラリ用のMTAに以下の調整を加えます。
- 不要なフォルダ、ファイルを削除
- src, testフォルダをライブラリからコピー
- ui5.yamlを調整
- ui5-local.yamlを調整
- manifest.jsonを新規作成
- package.jsonを調整
- mta.yamlを調整
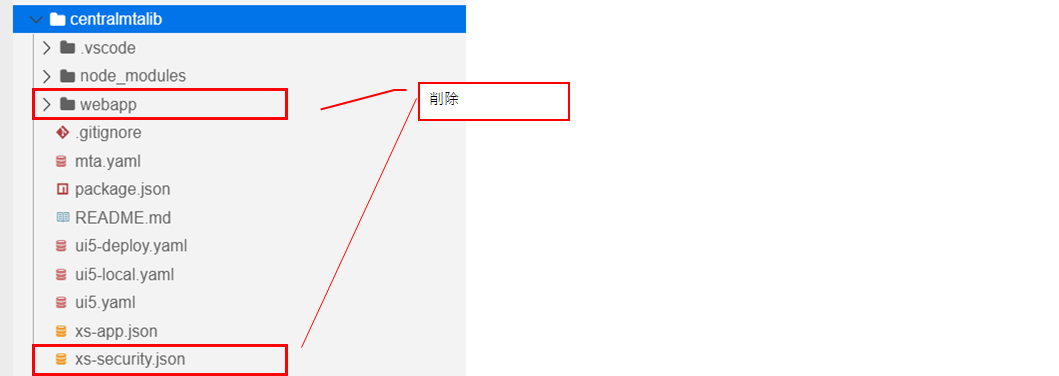
2.3.1. 不要なフォルダ、ファイルを削除
webappフォルダとxs-security.jsonは使用しないので削除します。xs-security.jsonを使用しないのは、XSUAAサービスはCentral Approuterのものを使用するからです。
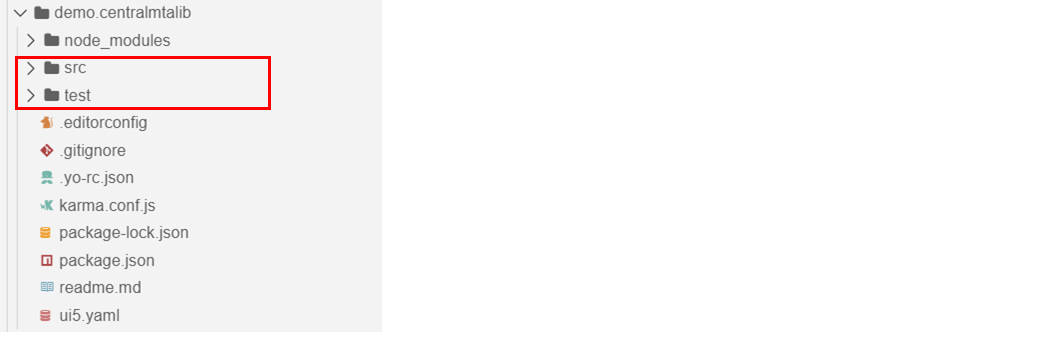
2.3.2. src, testフォルダをライブラリからコピー
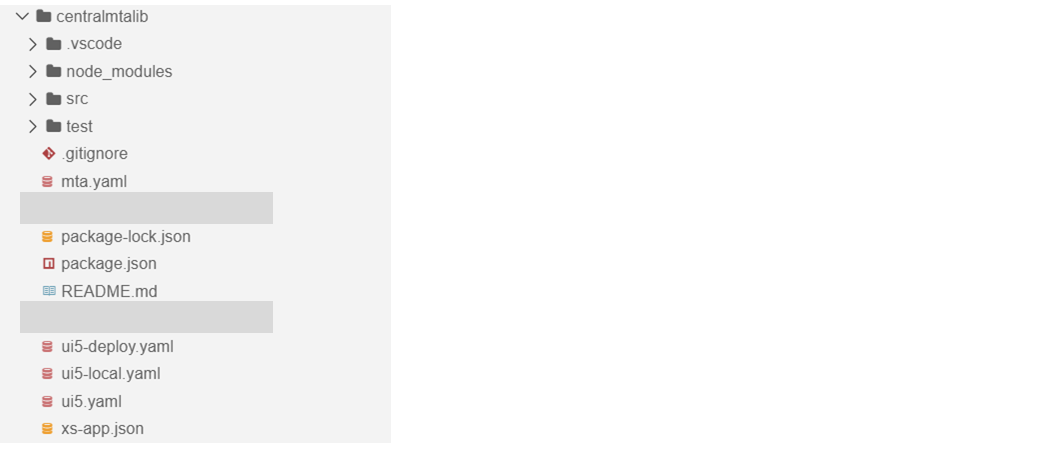
ライブラリの中にあるsrcとtestのフォルダをライブラリ用のMTAの直下にコピーします。
以下のコマンドを使うと便利です。
cp -r <コピー元ディレクトリ> <コピー先ディレクトリ>

結果、ライブラリ用のMTAは以下のようになります。
2.3.3. ui5.yamlを調整
2.2.で作成したライブラリの中にあるui5.yamlの内容で、ライブラリ用のMTAのui5.yamlを上書きします。※nameに関しては、ライブラリ用のMTAのもともとの名前と一致するようにします
specVersion: '2.2'
metadata:
  name: "centralmtalib"
type: library
framework:
  name: SAPUI5
  version: 1.86.3
  libraries:
    - name: sap.ui.core
    - name: themelib_sap_belize
    - name: themelib_sap_fiori_3
server:
  customMiddleware:
  - name: ui5-middleware-livereload
    afterMiddleware: compression
    configuration:
      extraExts: "xml,json,properties"
      path: ["src", "test"]
2.3.4. ui5-local.yamlを調整
ui5-local.yamlはローカル実行(インターネットにつながない)用の設定ファイルです。typeをapplicationからlibraryに変更します。

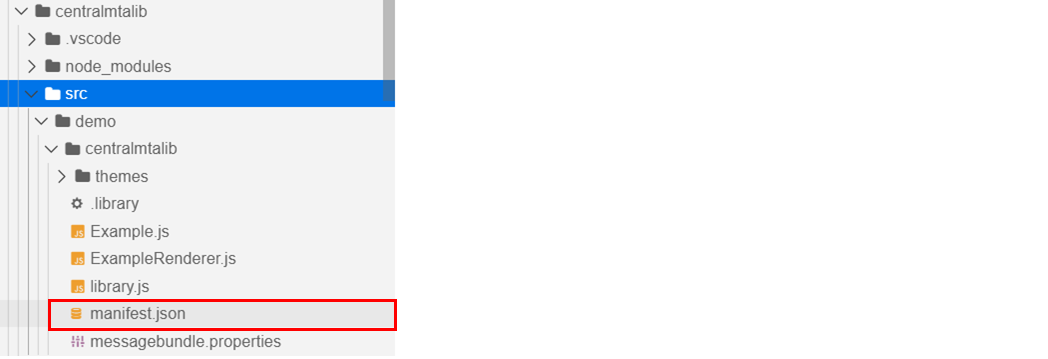
2.3.5. manifest.jsonを新規作成
srcフォルダのlibrary.jsと同じ並びにmanifest.jsonを新規作成します。
{
    "_version": "1.21.0",
    "sap.app": {
        "id": "demo.centralmtalib",
        "type": "library",
        "embeds": [],
        "applicationVersion": {
            "version": "1.0.0"
        },
        "title": "centralmtalib",
        "description": "Some description about centralmtalib",
        "resources": "resources.json",
        "offline": true
    },
    "sap.cloud": {
        "public": true,
        "service": "CentralApprouter"
    },
    "sap.ui": {
        "technology": "UI5"
    },
    "sap.ui5": {
        "dependencies": {
            "minUI5Version": "1.86",
            "libs": {
                "sap.ui.core": {
                    "minVersion": "1.86.3"
                }
            }
        },
        "library": {
            "i18n": {
                "bundleUrl": "messagebundle.properties",
                "supportedLocales": [
                    ""
                ]
            },
            "content": {
                "controls": [
                    "demo.centralmtalib.Example"
                ],
                "elements": [],
                "types": [
                    "demo.centralmtalib.ExampleColor"
                ],
                "interfaces": [],
                "css": false
            }

        }
    }
}
重要な点は以下です。sap.cloud.serviceにCentral Approuterのものと同じサービスを設定します。
    "sap.cloud": {
        "public": true,
        "service": "CentralApprouter"
    },
2.3.6. package.jsonを調整
package.jsonにはもともとローカル実行用のstartスクリプトや、デプロイ用のスクリプトが定義されています。
    "scripts": {
        "start": "fiori run --open 'index.html'",
        "start-local": "fiori run --config ./ui5-local.yaml --open 'index.html'",
        "build": "ui5 build -a --clean-dest --include-task=generateManifestBundle generateCachebusterInfo",
        "deploy": "cf deploy mta_archives/archive.mtar",
        "deploy-config": "fiori add deploy-config",
        "unit-tests": "fiori run --open test/unit/unitTests.qunit.html",
        "int-tests": "fiori run --open test/integration/opaTests.qunit.html",
        "build:cf": "ui5 build preload --clean-dest --config ui5-deploy.yaml --include-task=generateManifestBundle generateCachebusterInfo",
        "build:mta": "rimraf resources mta_archives && mbt build --mtar archive",
        "undeploy": "cf undeploy centralmtalib --delete-services --delete-service-keys"
    },
これを、以下のように変更します。(ファイルパスやzipファイルの名称は自分のプロジェクトに合わせて調整してください)
参考:Using UI5 Libraries in CF approuter
    "scripts": {
        "start": "fiori run --open 'test-resources/demo/centralmtalib/Example.html'",
        "start-local": "fiori run --config ./ui5-local.yaml --open 'test-resources/demo/centralmtalib/Example.html'",
        "build:cf": "npm run clean && ui5 build --include-task=generateManifestBundle generateCachebusterInfo && npm run flatten && npm run clean-after-flatten && cp ./xs-app.json dist  && npm run zip",
        "zip": "cd dist && npx bestzip centralmtalib.zip *",
        "flatten": "cp -r dist/resources/demo/centralmtalib/* dist && cp dist/resources/demo/centralmtalib/.library dist ",
        "clean": "npx rimraf dist",
        "clean-after-flatten": "rm -rf dist/resources dist/test-resources"
    },
これに伴い、zipファイルを作るのに必要な"bestzip"をdevDependenciesに追加します。(npm i bestzip --save-devでインストール)
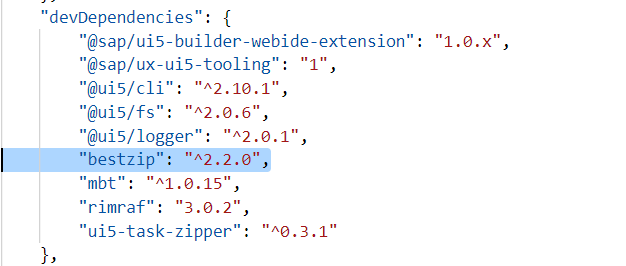
スクリプトの変更ポイントは以下です。
- start-localコマンド:ライブラリのテストページを実行するように変更
- build関係のコマンド:ライブラリが「フラット」な状態でビルドされるように変更(※)
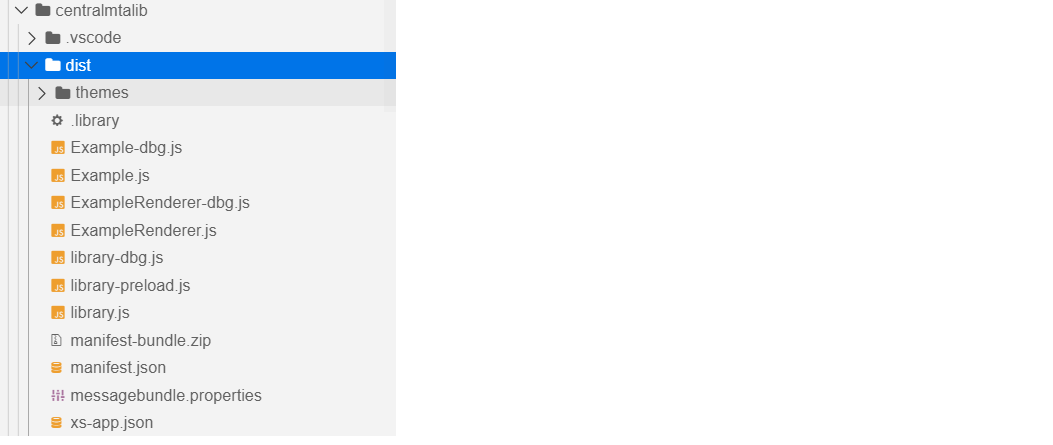
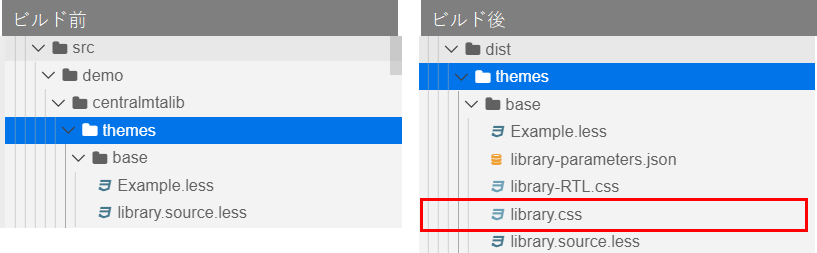
※ui5 buildコマンドで単純にビルドすると、ライブラリの場合dist/resources/<namespace>/配下にリソースが配置されます。
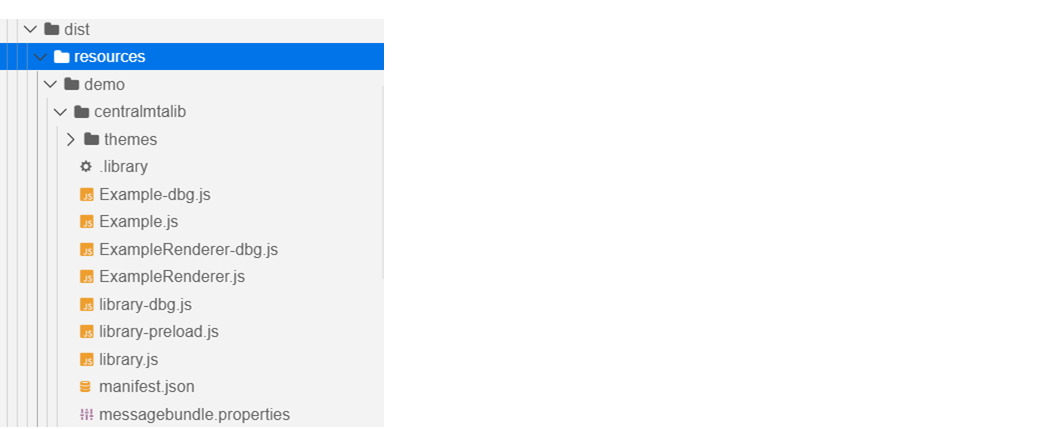
しかし、デプロイ先で動かすためには以下のようにdist直下にリソースが配置される必要があります。これはABAP環境でも、CF環境でも同様です。
2.3.7. mta.yamlを調整
mta.yamlの変更点はいくつかあります。
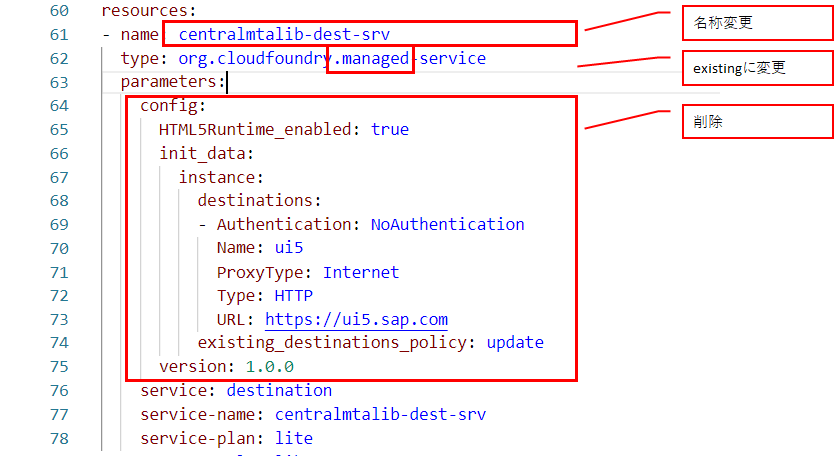
recourcesセクション
- destination serviceのnameをCentral ApprouterのDestinationインスタンス名に変更
- typeを"managed"から"existing"に変更(Central ApprouterのDestinationを使うため)
- "config"セクションを削除 -> 2021/10/16: parametersセクションを丸ごと削除!
- xsuaaのリソースを削除(Central ApprouterのXSUAAを使うため)
destinationモジュール
- destination serviceのnameをCentral ApprouterのDestinationインスタンス名に変更
- xsuaaのセクションを削除
- sap.cloud.serviceの名称をCentral Approuterのものに変更
- Authenticationのセクションを削除
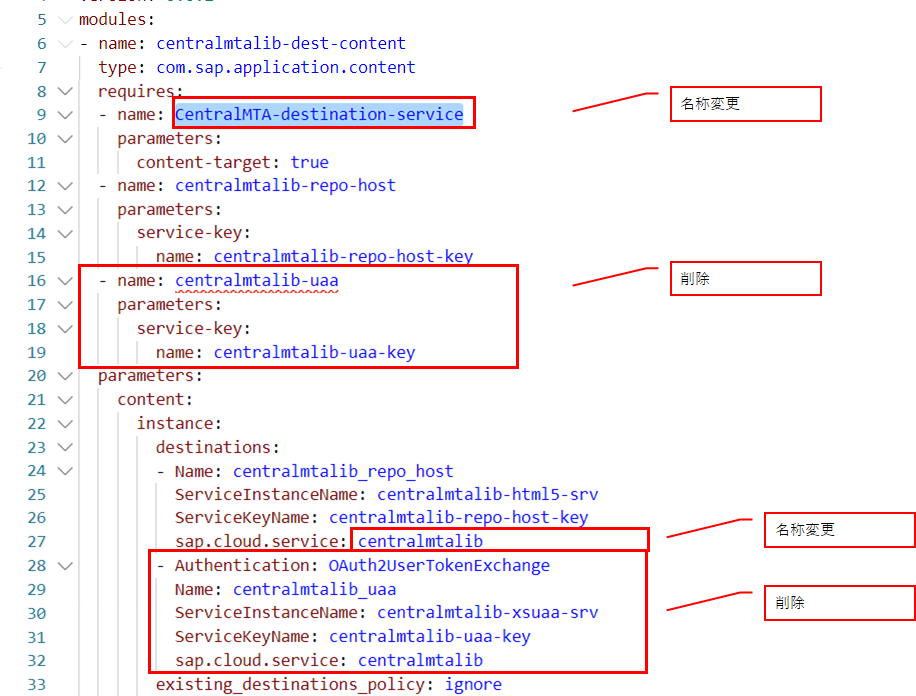
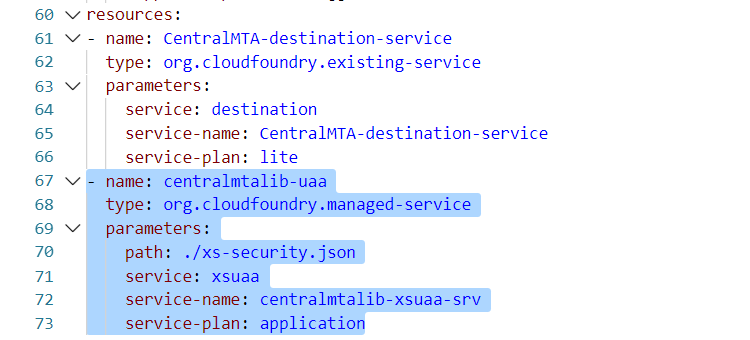
最終的に、mta.yamlは以下のようになります。
_schema-version: "3.2"
ID: centralmtalib
description: A Fiori application.
version: 0.0.1
modules:
- name: centralmtalib-dest-content
  type: com.sap.application.content
  requires:
  - name: CentralMTA-destination-service
    parameters:
      content-target: true
  - name: centralmtalib-repo-host
    parameters:
      service-key:
        name: centralmtalib-repo-host-key
  parameters:
    content:
      instance:
        destinations:
        - Name: centralmtalib_repo_host
          ServiceInstanceName: centralmtalib-html5-srv
          ServiceKeyName: centralmtalib-repo-host-key
          sap.cloud.service: CentralApprouter
        existing_destinations_policy: ignore
  build-parameters:
    no-source: true
- name: centralmtalib-app-content
  type: com.sap.application.content
  path: .
  requires:
  - name: centralmtalib-repo-host
    parameters:
      content-target: true
  build-parameters:
    build-result: resources
    requires:
    - artifacts:
      - centralmtalib.zip
      name: centralmtalib
      target-path: resources/
- name: centralmtalib
  type: html5
  path: .
  build-parameters:
    build-result: dist
    builder: custom
    commands:
    - npm install
    - npm run build:cf
    supported-platforms: []
resources:
- name: CentralMTA-destination-service
  type: org.cloudfoundry.existing-service
  parameters:
    service: destination
    service-name: CentralMTA-destination-service
    service-plan: lite
- name: centralmtalib-repo-host
  type: org.cloudfoundry.managed-service
  parameters:
    service: html5-apps-repo
    service-name: centralmtalib-html5-srv
    service-plan: app-host
parameters:
  deploy_mode: html5-repo
  enable-parallel-deployments: true
2.4. BASでライブラリをテスト
ライブラリのテスト用ページを実行するには、以下のコマンドを入力します。
npm run start-local
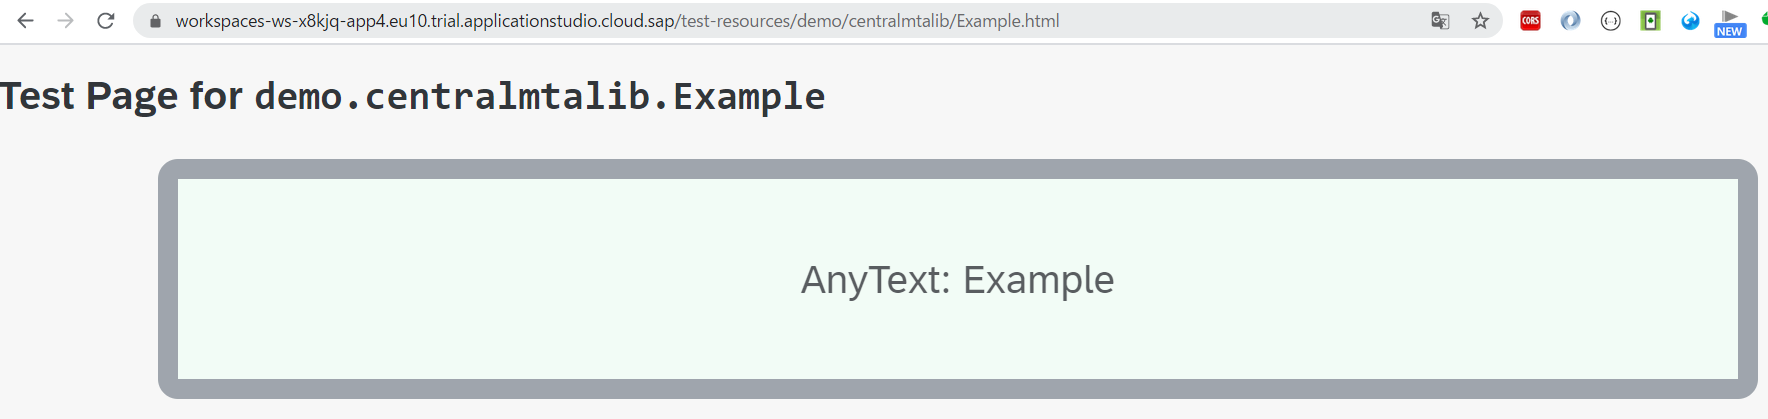
package.jsonで設定した通り、このコマンドは以下のhtmlファイルを開きます。
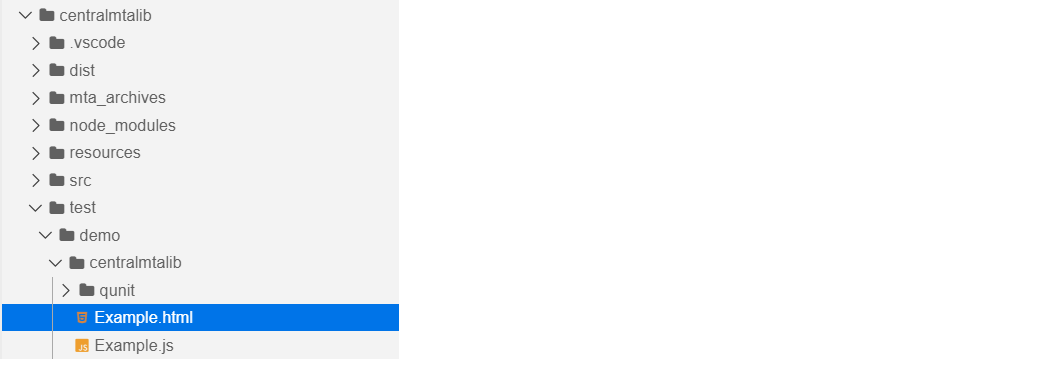
以下の画面が出ればOKです。
2.5. Cloud Foundryにデプロイ
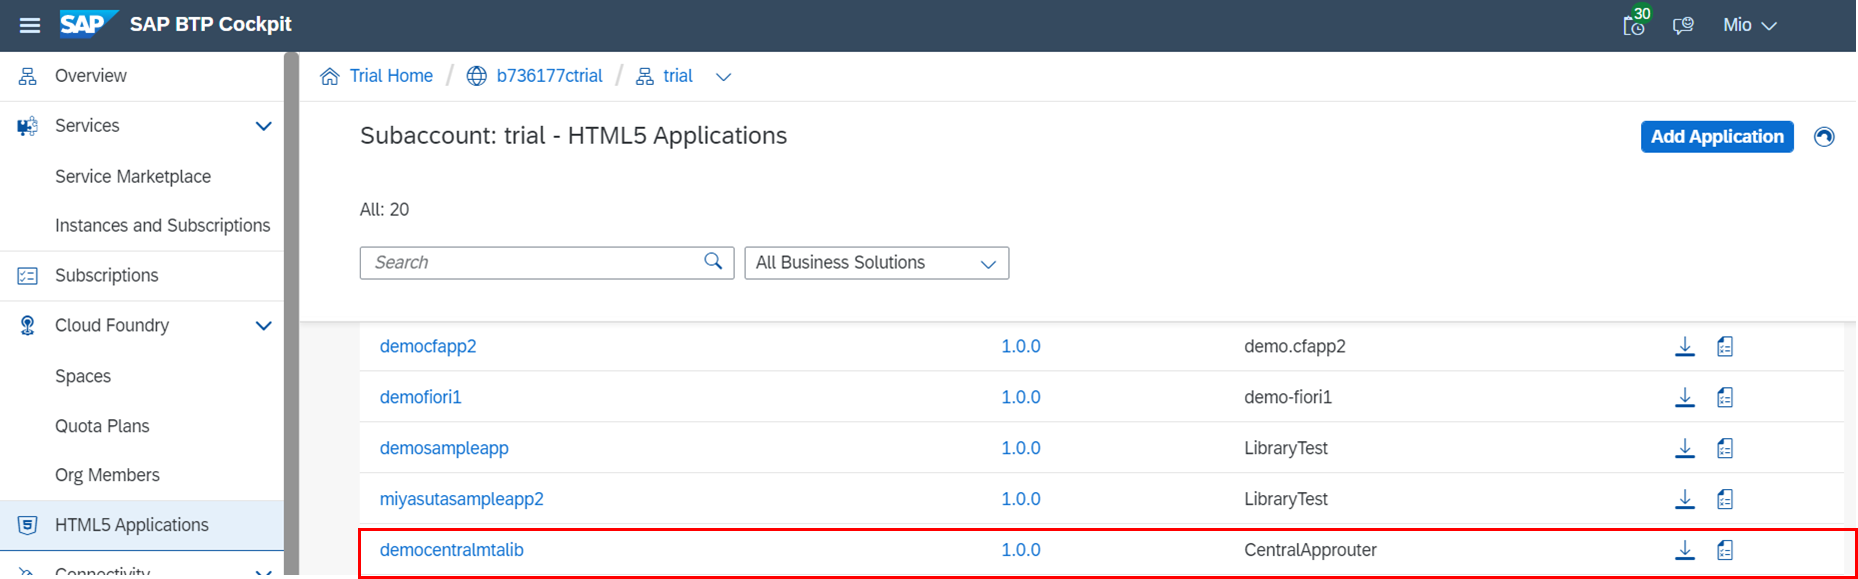
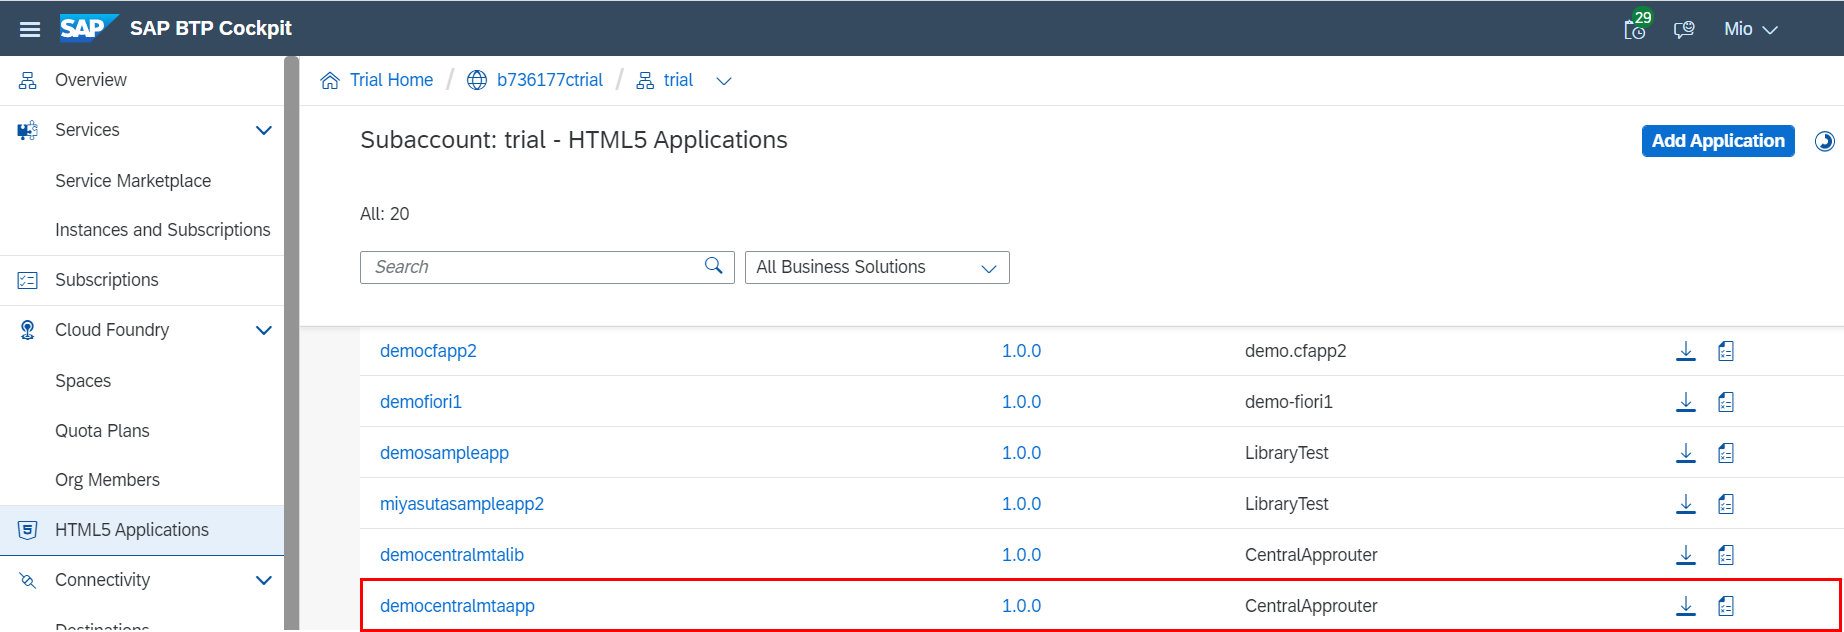
MTAをビルド、デプロイします。BTPコックピットのHTML5 ApplicationsにデプロイしたHTML5コンテンツが出てくればOKです。
3. UI5アプリ用のMTAを作成
3.1. UI5アプリ用のMTAを作成
2.1.と同様に"SAP Fiori application"のテンプレートを使用して作成します。このアプリはLaunchpadから実行するので、Add FLP configurationに"Yes"を指定します。
Deployment ConfigurationではAdd application to managed application router?に"Yes"を設定します。
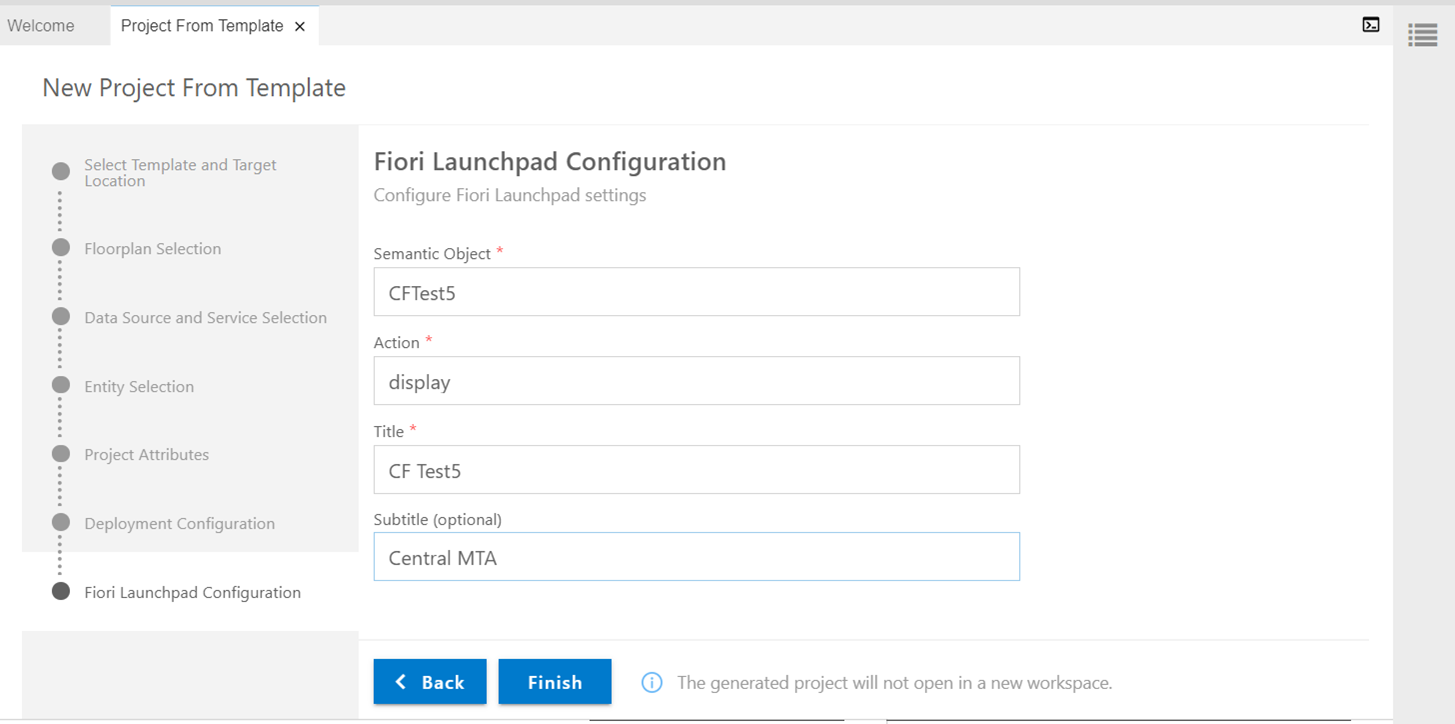
Lauchpadから実行するためにSemantic Object、Action、タイルの設定をします。
3.2. Central Approuterを使うための調整
Central Approuterを使うため、以下の調整を入れます。
- manifest.jsonを調整
- mta.yamlを調整
3.2.1. manifest.jsonを調整
sap.cloud.serviceにCentral Approuterのものと同じサービスを設定します。
    "sap.cloud": {
        "public": true,
        "service": "CentralApprouter"
    },
3.2.2. mta.yamlを調整
2.3.7. mta.yamlを調整と同様の調整をします。
3.3. ライブラリを使用
manifest.jsonのdependenciesに使用するライブラリを追加します。
    "sap.ui5": {
        ...,
        "dependencies": {
            "minUI5Version": "1.66.0",
            "libs": {
                "sap.ui.core": {},
                "sap.m": {},
                "sap.ui.layout": {},
                "demo.centralmtalib": {} //追加
            }
        },
Viewにライブラリのコントロールを追加します。
<mvc:View
    controllerName="demo.centralmtaapp.controller.App"
    xmlns:mvc="sap.ui.core.mvc"
    displayBlock="true"
    xmlns="sap.m"
    xmlns:demo="demo.centralmtalib"
>
	<Shell id="shell">
		<App id="app">
			<pages>
				<Page id="page" title="{i18n>title}">
					<content>
                        <demo:Example text="Sample" color="Default"></demo:Example>
                    </content>
				</Page>
			</pages>
		</App>
	</Shell>
</mvc:View>
3.4. BASで実行
BASでライブラリを使用したUI5アプリを実行するためには、UI5アプリからライブラリのリソースにアクセスする必要があります。そのために、fiori-tools-servestaticというミドルウェアを使います。
参考:BAS - Consume Library in an App
【前提】
・ライブラリはビルド済であること
・ライブラリのプロジェクトとUI5のプロジェクトが同じDevスペースにあること
UI5アプリのui5.yamlに以下の設定を追加します。fiori-tools-servestaticは、pathで指定されたリソースへのアクセスを、srcで指定したローカルのリソースにリダイレクトします。
  - name: fiori-tools-servestatic
    afterMiddleware: compression
    configuration:
      paths:
        - path: /resources/demo/centralmtalib/themes
          src: "../centralmtalib/dist/themes/"
        - path: /resources/demo
          src: "../centralmtalib/src/demo/"
上記では以下の設定をしています。
- "themes"フォルダ(テーマに関連するCSSファイルが入っている)にアクセスする場合はライブラリのビルド済のdistフォルダを見る
- それ以外のライブラリのリソースはビルド前のsrcフォルダを見る
なぜテーマとそれ以外で参照先が分かれているかというと、CSSファイルはdistフォルダにしかないからです。一方で、テーマ以外のライブラリのリソースをdistから参照しようとするとうまくいきませんでした。(おそらく「フラット」な構造にしている関係で?)
実行するには、以下のコマンドを入力します。
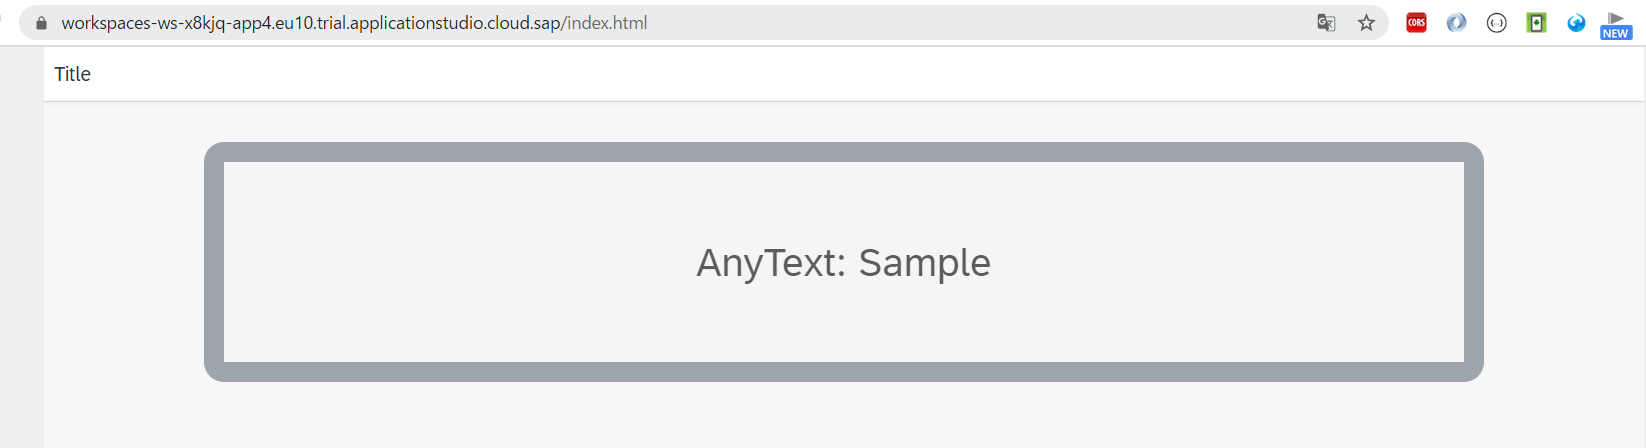
npm run start
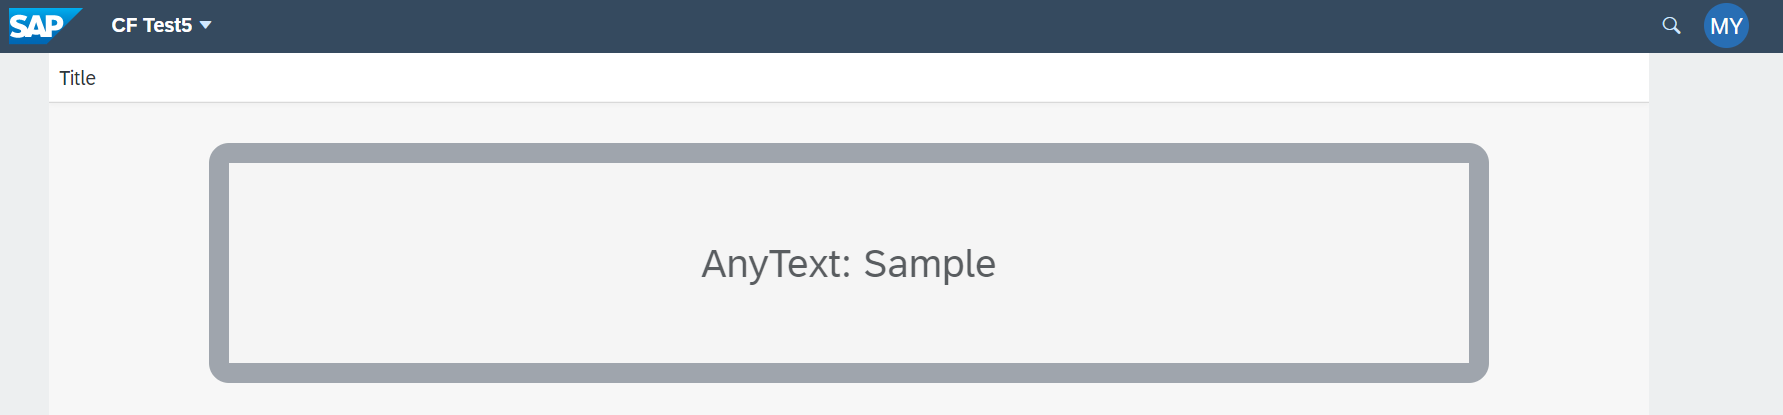
以下の画面が出ればOKです。
3.5. Cloud Foundryにデプロイ
MTAをビルド、デプロイします。BTPコックピットのHTML5 ApplicationsにデプロイしたHTML5コンテンツが出てくればOKです。
4. LaunchpadにUI5アプリを追加
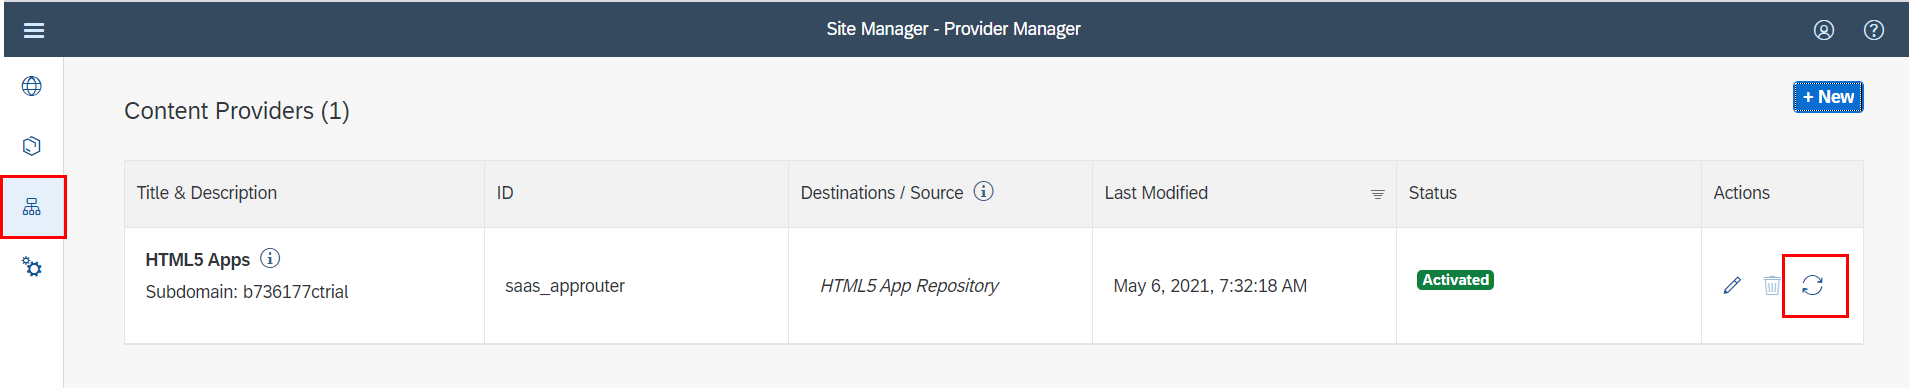
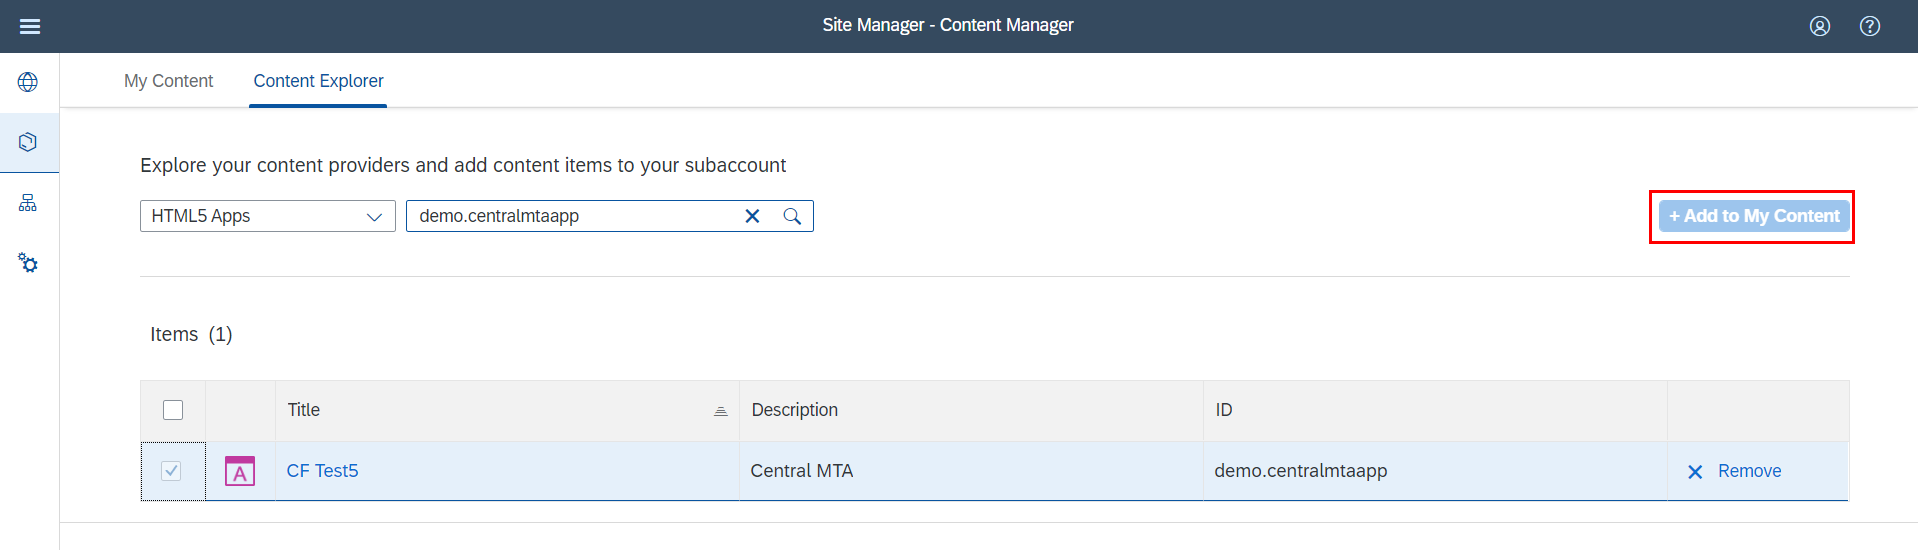
Provider Managerを開き、HTML5 Appsをリフレッシュしてコンテンツを最新化します。
Content Explorerで、UI5アプリを選択して追加します。(以下の画面ではすでに追加済)
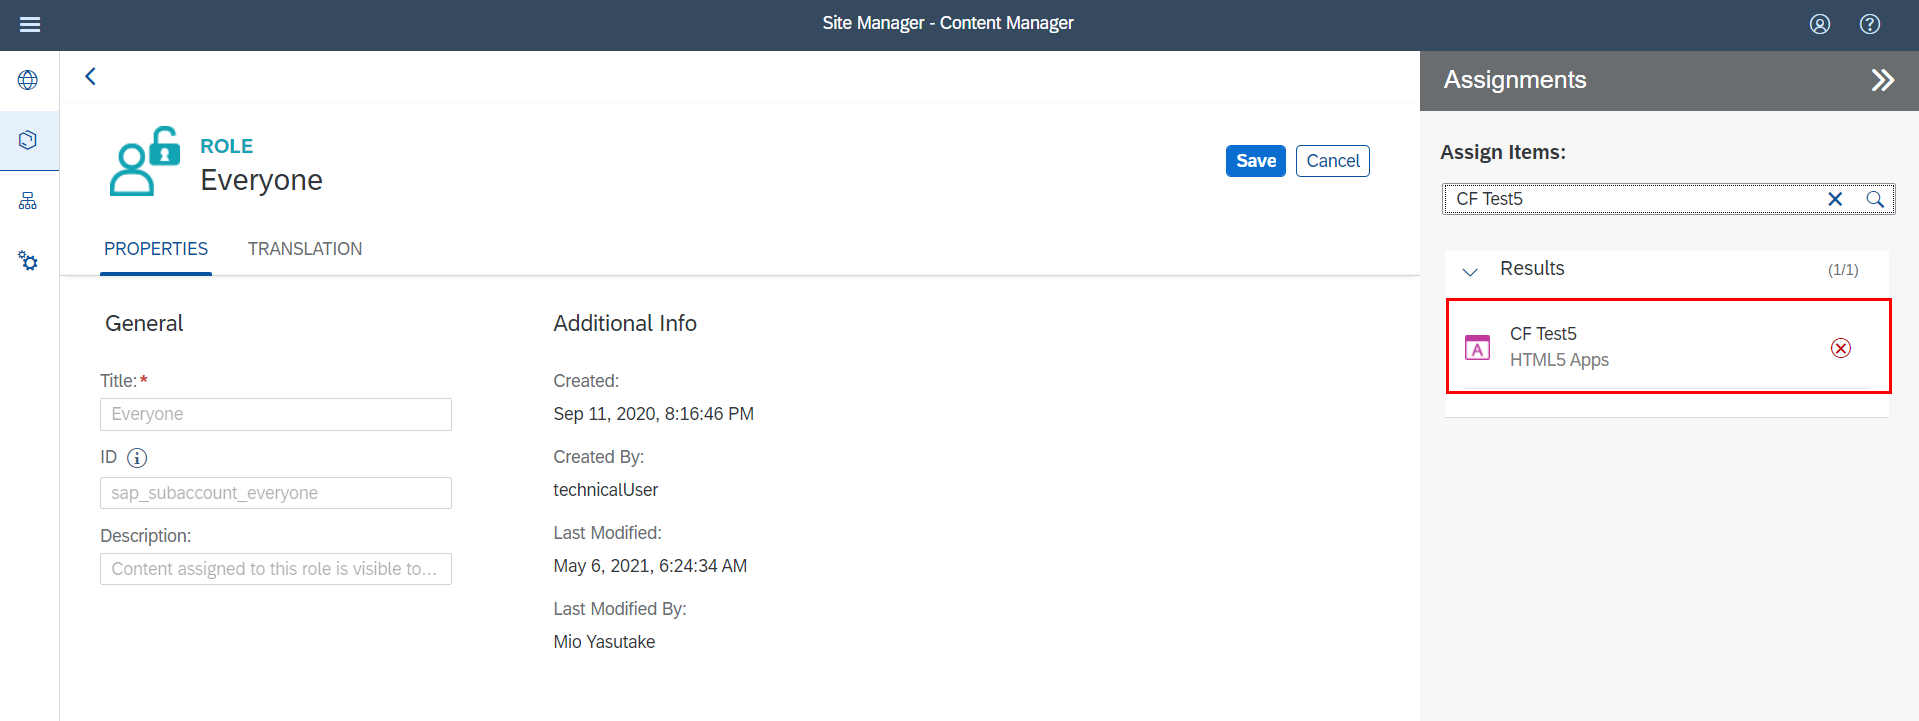
Content Managerで"Everyon"ロール(または任意のロール)にUI5アプリを追加します。
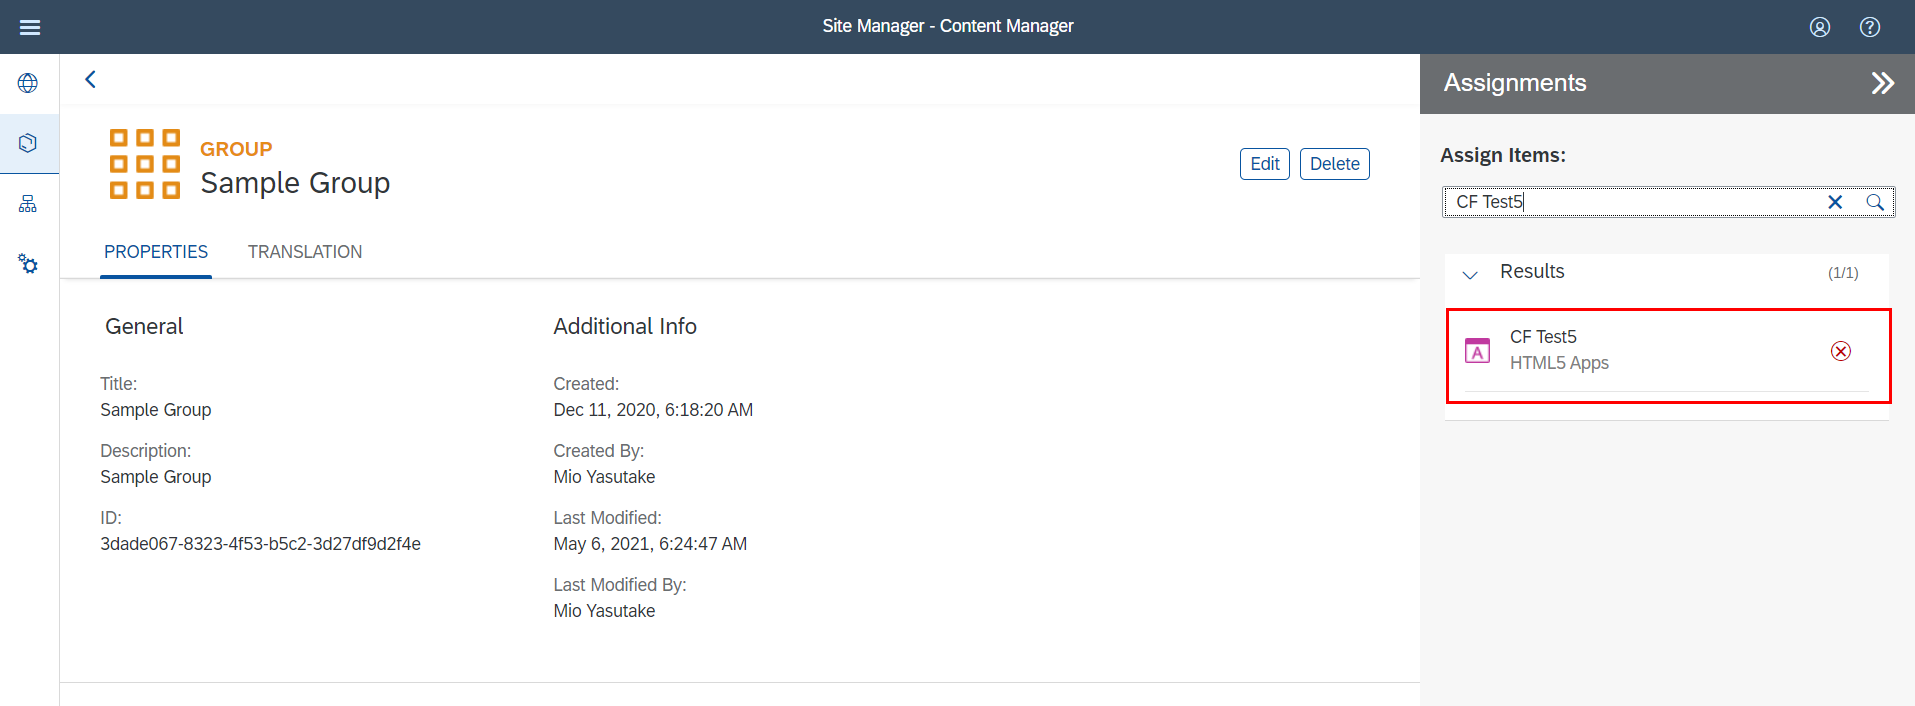
任意のグループにUI5アプリを追加します。
以上で、Launchpadにタイルが追加されました。
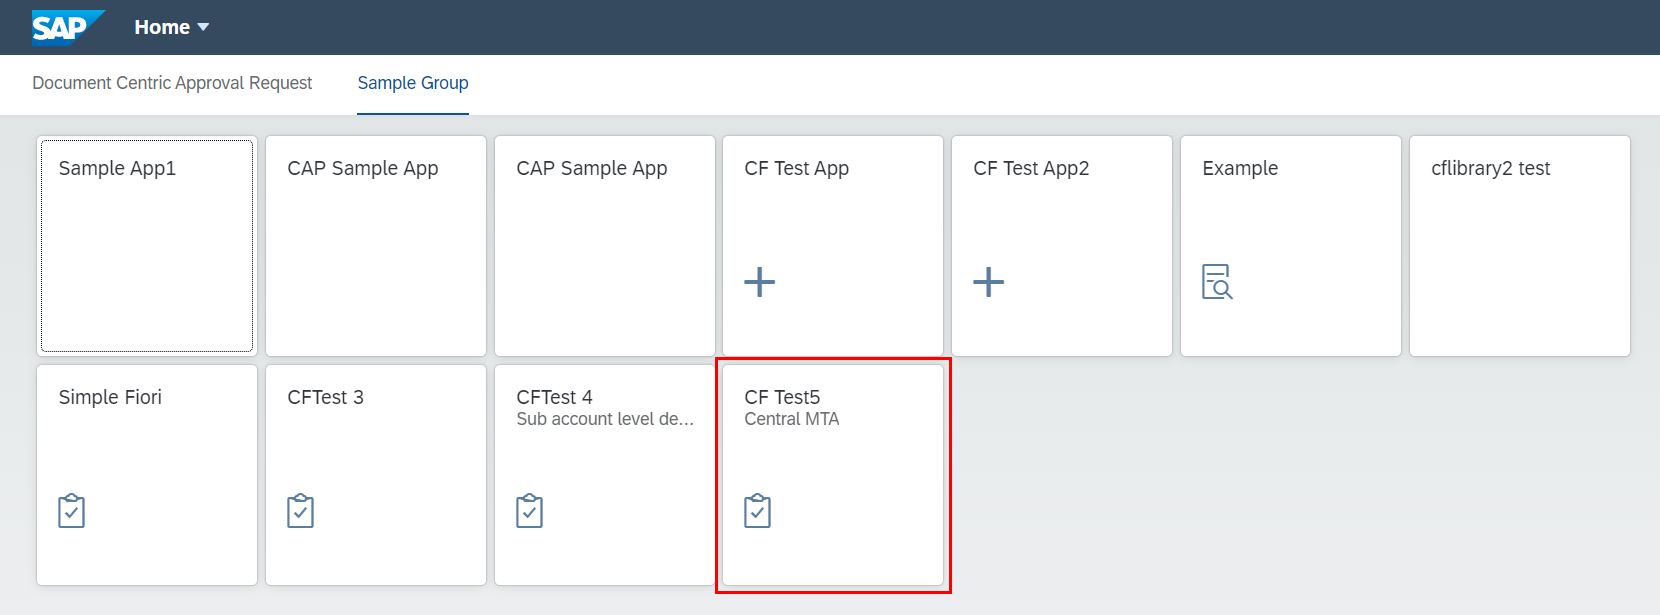
ライブラリが読み込めています。
まとめ
- BTPのLauchpadからUI5のライブラリを使用する場合、使用側のアプリとライブラリで共通のDestinationのサービスインスタスを使う必要がある
- BASでローカル実行する場合、fiori-tools-servestaticを使うことで同じDevスペースにあるライブラリのリソースにアクセスできる
参考
- Serverless SAP Fiori Apps on SAP BTP, Cloud Foundry environment:Managed Approuterについて
- Using UI5 Libraries in CF approuter:CFでUI5ライブラリを使用する(※)
- Achieve Separate Lifecycles for Managed Approuter Applications with SAP Business Application Studio:Central Approuterの考え方
※この記事が書かれた当時、BASのテンプレートで作成するとサブアカウントレベルのdestinationが作成された。サブアカウントレベルのdestinationを使用する場合、Central Approuterを使わずにライブラリにアクセスできる。