やりたいこと
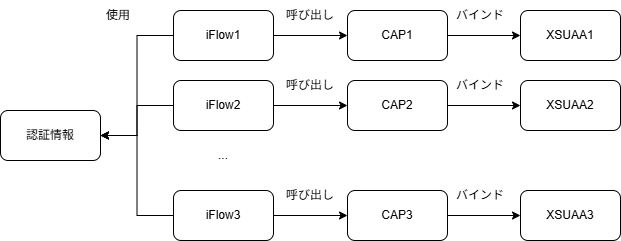
Cloud IntegrationのiFlowからCAPのアプリケーションを呼び出します。CAPはそれぞれ固有のXSUAAサービスインスタンスにバインドされています。そのようなiFlowが複数あるとき、CAPを呼び出すための認証情報を個別に管理するのは大変です。この記事では、一つの認証情報で複数のCAPアプリケーションを呼び出す方法を実践してみます。
方法
XSUAAのサービスインスタンスを作成するとき、他のXSUAAサービスインスタンスで発行されたJWTトークンを信頼するように設定することができます。
以下の図では"Client App"がiFlowに相当し、"Provider App"がCAPに相当します。
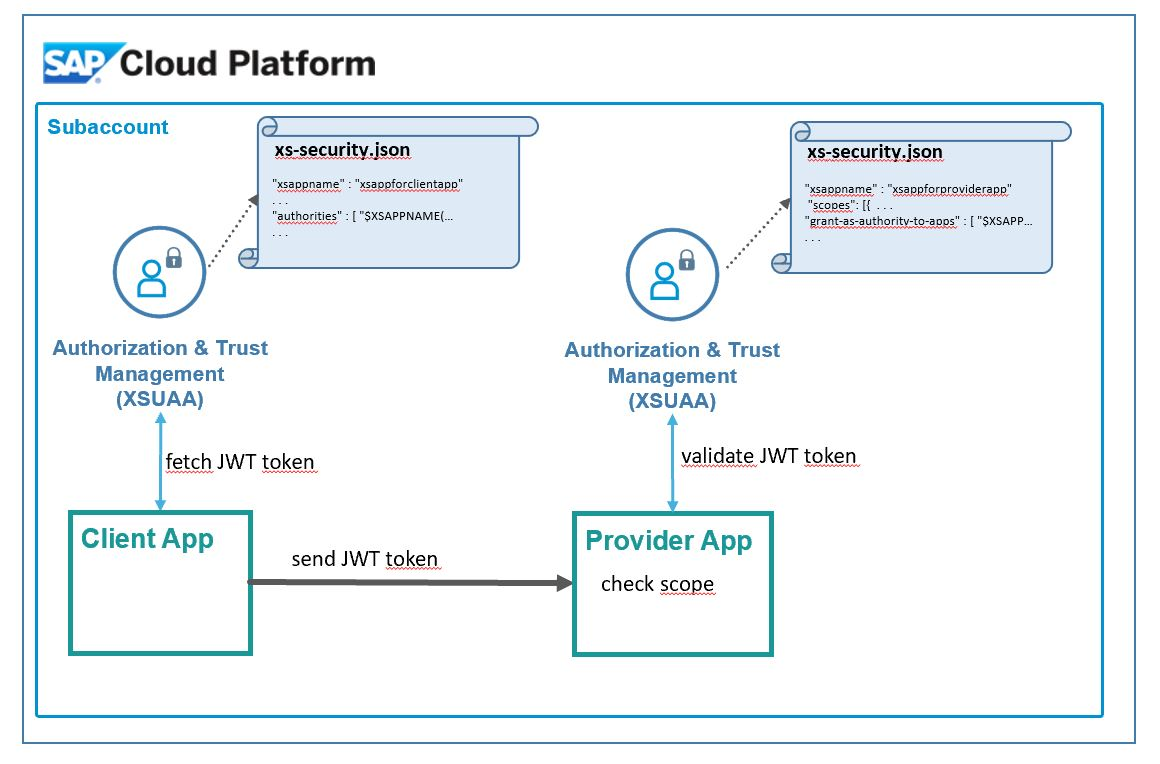
引用:How to call protected app | from external app || as external user ||| with scope
以下ではCAPとiFlowで使用するXSUAAサービスインスタンスをそれぞれどのように登録するかを説明し、そのあとCloud Integrationで動作確認をおこないます。
1. CAPの設定
1.1. サービスの設定
BooksというエンティティをiFlowから呼び出せるようにします。アノテーション@requires: [...] で必用なロールを指定します。
using my.bookshop as my from '../db/schema';

@requires: 'authenticated-user'
service CatalogService {
    @requires: ['CpiRead','Viewer'] // for iFlows
    @readonly
    entity Books as projection on my.Books;

    @requires: 'Vierwer' // for human users
    @readOnly
    entity BooksforUsers as projection on my.Books;
}
Cloud Integrationから呼び出すエンティティとそれ以外のエンティティで権限を分けるのが安全です。
1.2. xs-security.jsonの設定
上記の状態でcds compile srv --to xsuaa > xs-security.jsonというコマンドを実行すると以下のxs-security.jsonが生成されます。
{
  "scopes": [
    {
      "name": "$XSAPPNAME.CpiRead",
      "description": "CpiRead"
    },
    {
      "name": "$XSAPPNAME.Vierwer",
      "description": "Vierwer"
    }
  ],
  "attributes": [],
  "role-templates": [
    {
      "name": "CpiRead",
      "description": "generated",
      "scope-references": [
        "$XSAPPNAME.CpiRead"
      ],
      "attribute-references": []
    },
    {
      "name": "Vierwer",
      "description": "generated",
      "scope-references": [
        "$XSAPPNAME.Vierwer"
      ],
      "attribute-references": []
    }
  ]
}
他のXSUAAで発行されたJWTトークンに"CpiRead"のスコープを付与するため、scopesのセクションにgrant-as-authority-to-appsという設定を追加します。指定方法は$XSAPPNAME(application, <付与する対象のxsappname>)という形式です。
{
  "scopes": [
    {
      "name": "$XSAPPNAME.CpiRead",
      "description": "CpiRead",
      "grant-as-authority-to-apps": [
        "$XSAPPNAME(application, xsuaa-cpi)"
      ]
    }
2. Cloud IntegrationのためのXSUAAサービスインスタンスの作成
新たに以下のxs-security.jsonファイルを作成します。他のXSUAAサービスインスタンスから付与されたスコープを使用するため、"authorities":["$ACCEPT_GRANTED_AUTHORITIES"]を指定します。
{
  "xsappname" : "xsuaa-cpi",
  "tenant-mode" : "dedicated",
  "authorities":["$ACCEPT_GRANTED_AUTHORITIES"]
}
$ACCEPT_GRANTED_AUTHORITIESだと許可されたスコープをすべて使用する設定となります。特定のスコープのみ使用する場合、以下のように指定します。
構文: "authorities":["$XSAPPNAME(application,<スコープを許可したアプリケーションのxsappname>).<スコープ>"]
例: "authorities":["$XSAPPNAME(application,cap-grant-authority).CpiRead"]
xs-security.jsonを作成したら、Cloud Foundryにデプロイし、サービスキーを登録します。
cf create-service xsuaa application xsuaa-cpi -c xs-security.json
cf create-service-key xsuaa-cpi cpi-key
3. テスト
Cloud Integrationで使用する前に、REST Clientを使用してテストしてみます。
### CAPのURL
@server=xxxxtrial-dev-cap-grant-authority-srv.cfapps.us10-001.hana.ondemand.com
### Cloud IntegrationのためのXSUAAサービスから取得した認証情報
@clientid=sb-xsuaa-cpi!t462905
@clientsecret=xxxx
@url=https://xxxxtrial.authentication.us10.hana.ondemand.com/oauth/token

### GET Token
# @name GetToken_POST
POST {{url}}
Content-Type: application/x-www-form-urlencoded

grant_type=client_credentials&client_id={{clientid}}&client_secret={{clientsecret}}

### Books
GET {{server}}/odata/v4/catalog/Books
Authorization: Bearer {{GetToken_POST.response.body.access_token}}

### Books for Users
GET {{server}}/odata/v4/catalog/BooksforUsers
Authorization: Bearer {{GetToken_POST.response.body.access_token}}
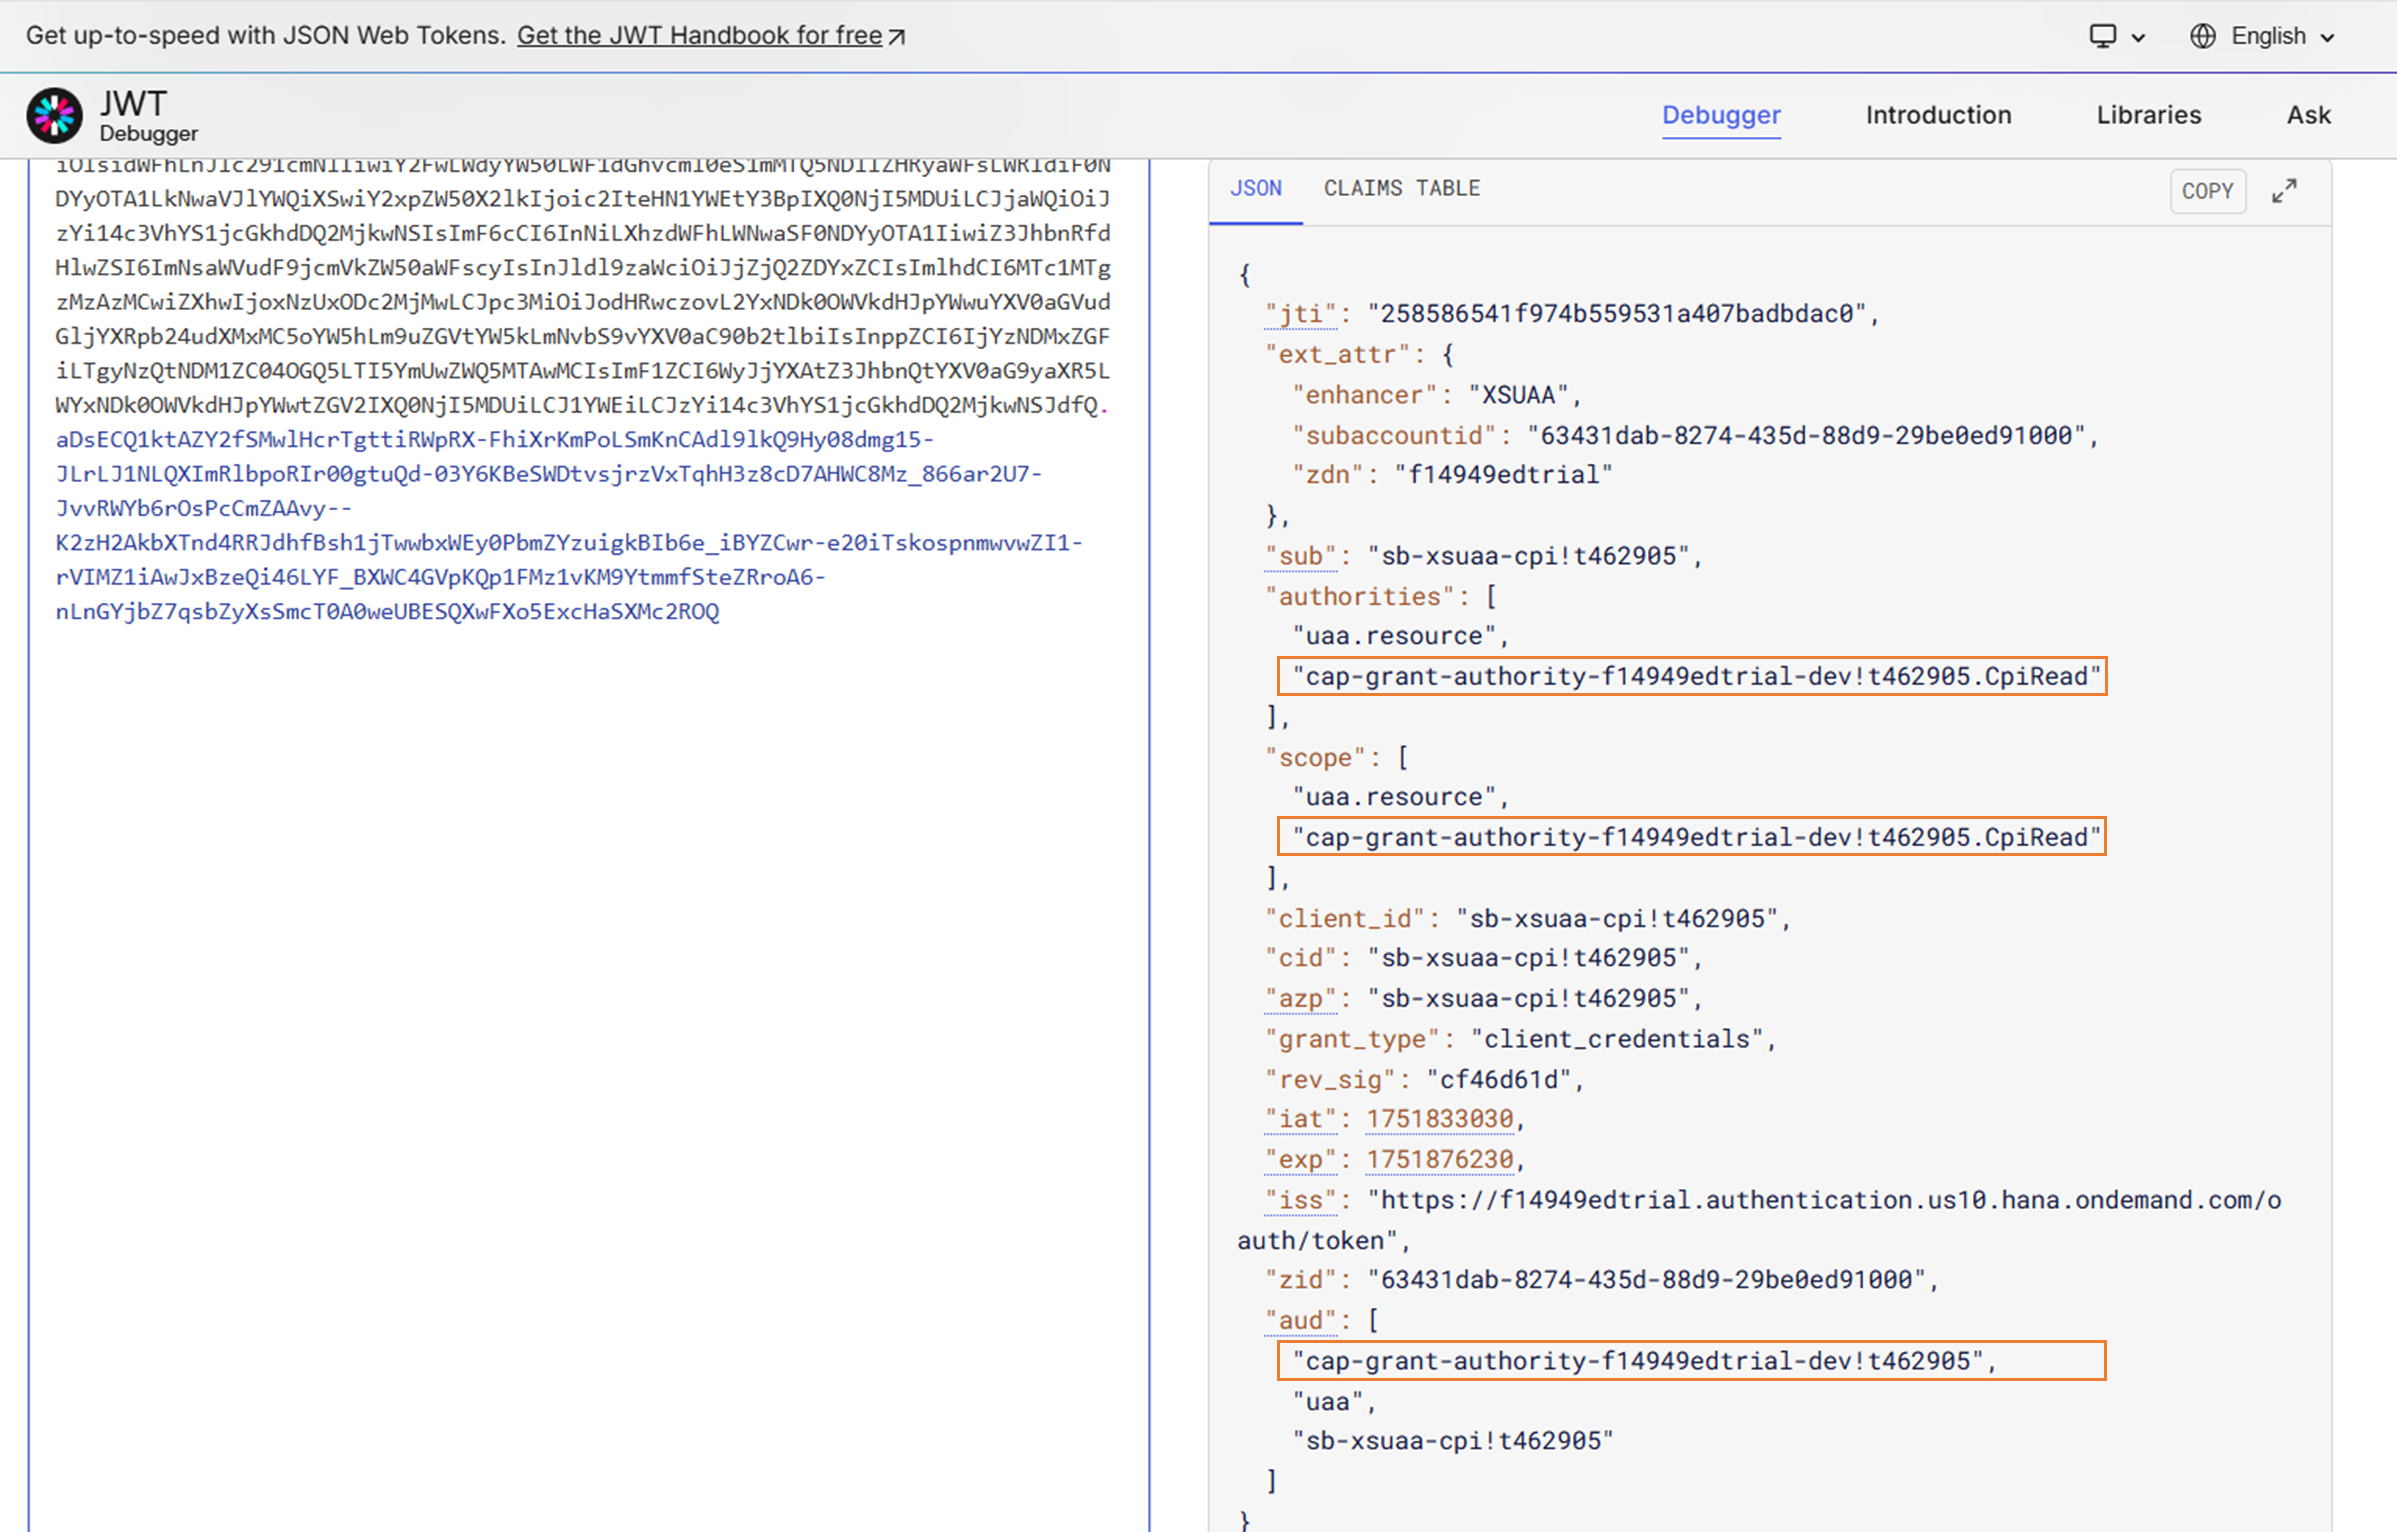
まず、"GET Token"のリクエストで取得したトークンをJWT Decoderで見てみると、authoritiesとscopeにCAPから付与されたスコープが含まれています。また、audにCAPにバインドされたXSUAAサービスインスタンスのクライアントIDが含まれています。
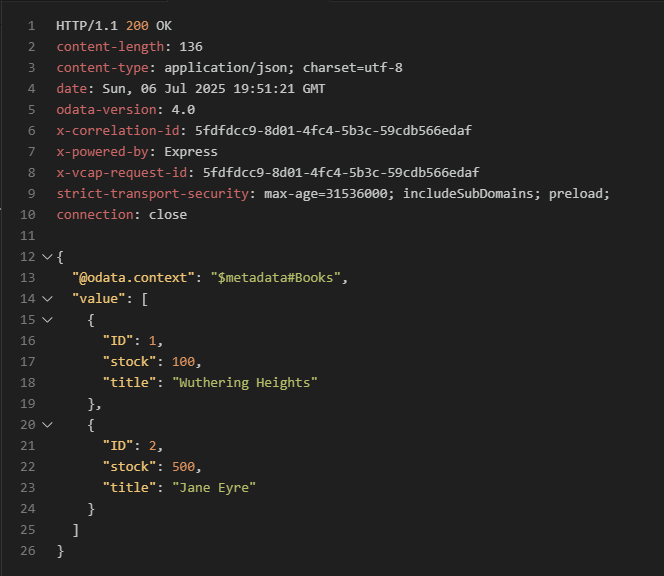
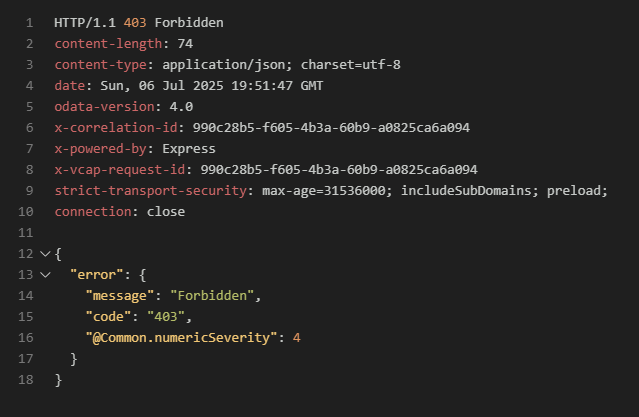
このトークンを使ってリクエストを実行すると、Booksエンティティは取得できますが、BooksforUsersエンティティは403エラーとなり取得できません。
Books
BooksforUsers
4. Cloud Integrationから呼び出し
4.1. Security Materialの登録
Cloud IntegrationのためのXSUAAサービスインスタンスのキーから取得した認証情報を登録します。

4.2. iFlowの登録
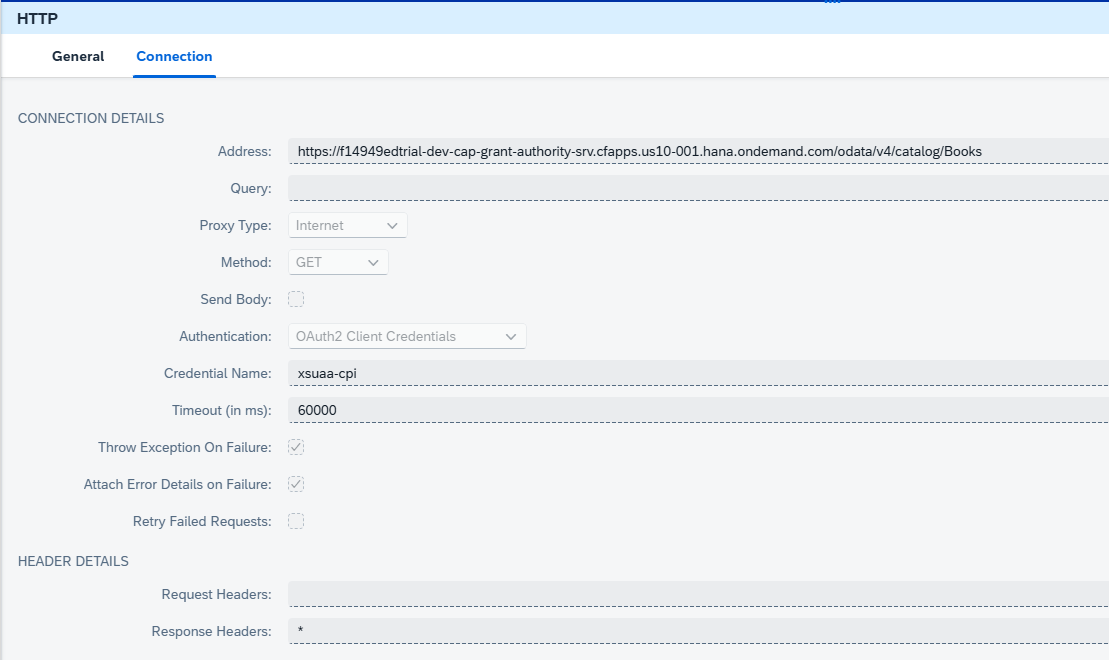
以下のような簡単なiFlowを登録します。

HTTP Receiver Adapterの"Credential Name"に前のステップで登録したSecurity Materialの名前を指定します。
4.3. iFlowのテスト
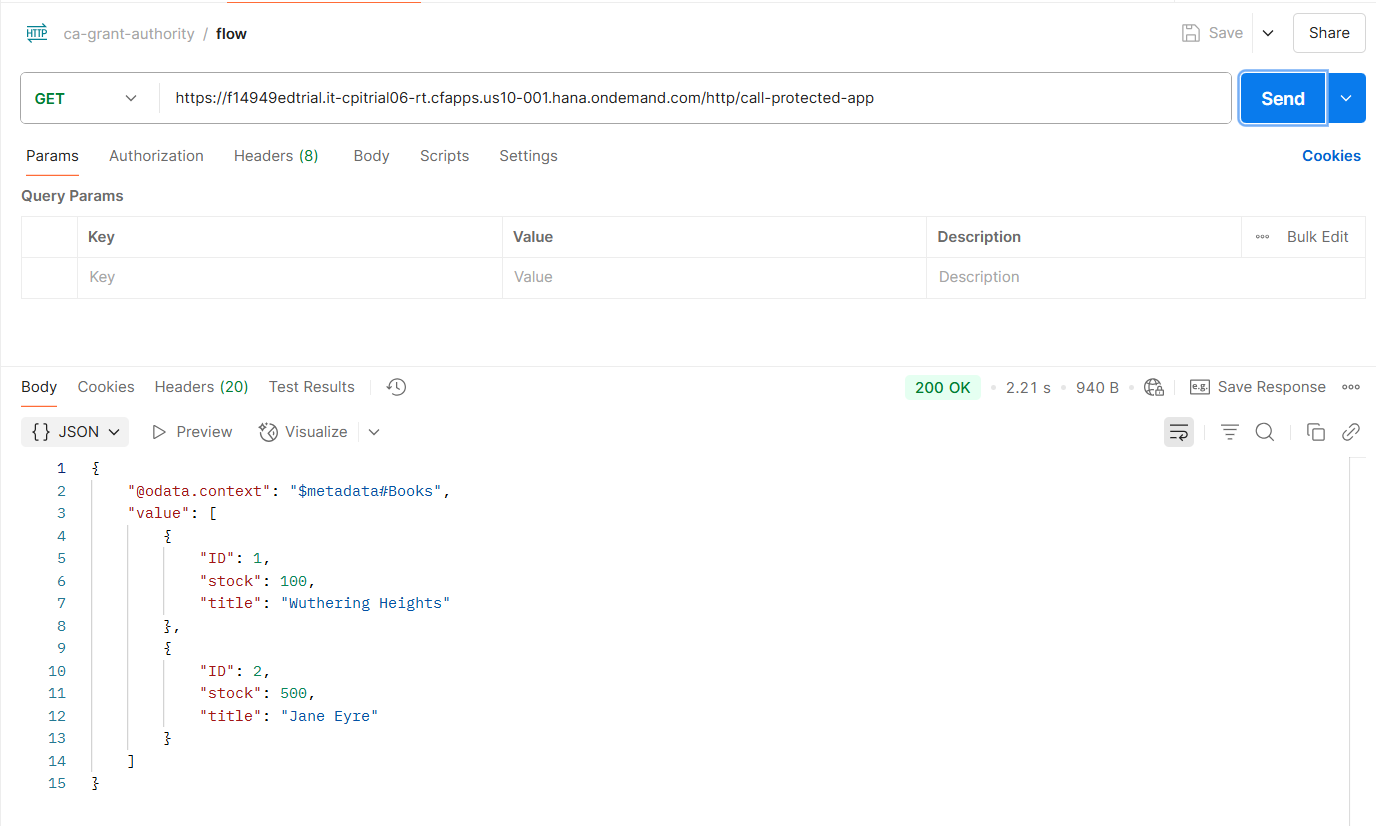
PostmanからiFlowを呼び出し、正常にレスポンスが返ってくることを確認します。
サービスキーの更新について
Security Materialに登録したサービスキーは複数のCAPアプリケーションを呼び出せる、かなり強い権限を持っています。安全のため、サービスキーは定期的に更新したほうがよいでしょう。更新のステップは以下のようになります。
- 新しいサービスキーを登録
- Security Materialを更新
- 古いサービスキーを削除