やりたいこと
CSVファイルを受け取り、リモートAPI呼び出しで追加の項目を取得し、元のCSVフォーマットに項目を追加して返します。

CSVファイルには複数行あり、リモートAPI呼び出しはレコードごとに実行する必要があります。そこでSplitterでレコードごとに分割してAPIを呼び出し、Gatherで処理結果をまとめて、そのあと最終的なCSVファイルを出力します。
以下がインプットとアウトプットのサンプルです。
ProductID,ProductName
1,Chai
2,Chang
3,Aniseed Syrup
ProductID,ProductName,SupplierID
1,Chai,1
2,Chang,1
3,Aniseed Syrup,1
作成したフロー
以下のフローを作成しました。上のフローがメインの処理で、下のフロー(ローカルプロセス)では1行ずつのレコードを処理します。

1. メインのフロー
1.1. CSV to XML Converter
HTTPリクエストで受け取ったCSVデータをXMLに変換します。これは、後続の処理でXMLのほうが扱いやすいためです。

XML Schemaには以下のスキーマを(ChatGPTに依頼して)作成し、アップロードしました。
<?xml version="1.0" encoding="UTF-8"?>
<xs:schema xmlns:xs="http://www.w3.org/2001/XMLSchema"
           elementFormDefault="qualified">

  <xs:element name="root">
    <xs:complexType>
      <xs:sequence>
        <xs:element name="Product" maxOccurs="unbounded" minOccurs="1">
          <xs:complexType>
            <xs:sequence>
              <xs:element name="ProductID" type="xs:integer"/>
              <xs:element name="ProductName" type="xs:string"/>
            </xs:sequence>
          </xs:complexType>
        </xs:element>
      </xs:sequence>
    </xs:complexType>
  </xs:element>

</xs:schema>
インプットのCSVは以下のXMLに変換されます。
<?xml version='1.0' encoding='UTF-8'?>
<root>
	<Product>
		<ProductID>1</ProductID>
		<ProductName>Chai</ProductName>
	</Product>
	<Product>
		<ProductID>2</ProductID>
		<ProductName>Chang</ProductName>
	</Product>
	<Product>
		<ProductID>3</ProductID>
		<ProductName>Aniseed Syrup</ProductName>
	</Product>
</root>
1.2. Iterating Splitter
後続処理をProductの単位でおこなうため、Iterating Splitterを使用します。以下が一度に処理されるレコードの例です。
	<Product>
		<ProductID>1</ProductID>
		<ProductName>Chai</ProductName>
	</Product>
Iterating Splitterを以下のように設定します。Parallel Processingにチェックを入れることで並列処理が可能になりますが、今回は使用していません。

SplitterにはGeneral SplitterとIterating Splitterがあります。対象のノードの上位の階層(今回のケースでは<root>)も維持したまま分割したい場合はGeneral Splitter、上位の階層が不要な場合はIterating Splitterを使用します。
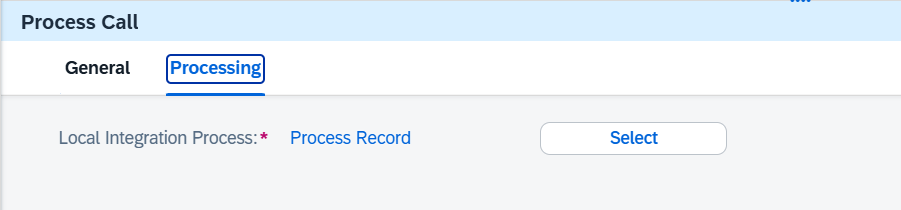
1.3. Process Call
事前に定義したローカルプロセス(Process Recordという名前)を呼び出すためのステップです。
1.4. Gather
ローカルプロセスから返ってくるデータは以下の形式になっています。
<?xml version="1.0" encoding="UTF-8"?>
<Product>
	<ProductID>1</ProductID>
	<ProductName>Chai</ProductName>
	<SupplierID>1</SupplierID>
</Product>
<?xml version="1.0" encoding="UTF-8"?>
<Product>
	<ProductID>2</ProductID>
	<ProductName>Chang</ProductName>
	<SupplierID>1</SupplierID>
</Product>
<?xml version="1.0" encoding="UTF-8"?>
<Product>
	<ProductID>3</ProductID>
	<ProductName>Aniseed Syrup</ProductName>
	<SupplierID>1</SupplierID>
</Product>
Gatherステップで分割されたレコードを再び1つにまとめます。Aggregation AlgorithmにCombine at XPathを指定することで、結合元になるノード(Combine from source (XPath))とその上位になるノード(Combine at target (XPath))を選択できます。

結果は以下のようになります。

1.5. XML to CSV Converter
XMLをCSV形式に戻します。Path to Source Element in XMLには繰り返し現れる要素(ここでは/Products/Product)を指定します。
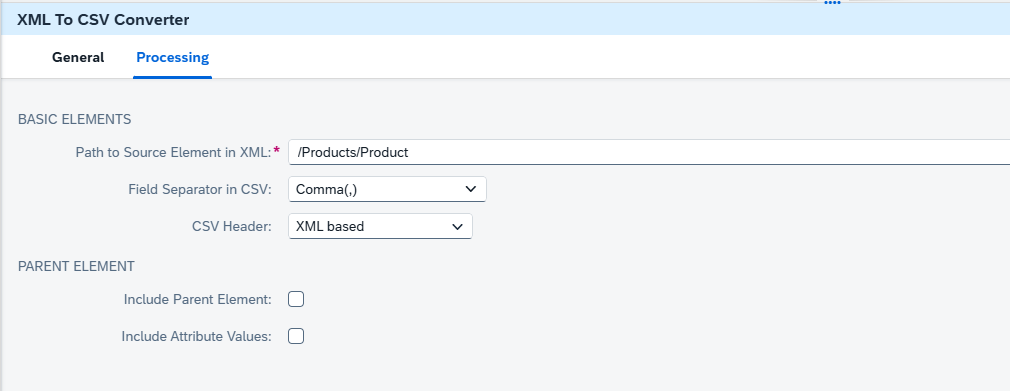
//Productではうまくいきませんでした。ここでは明示的にパスを指定する必要があります。
1.6. Content Modifier
レスポンスヘッダにContent-Type: text/csvを設定します。

2. ローカルプロセス
2.1. Content Modifier
リモートAPIを呼び出す前に、もともとのボディをoriginalBodyという名前でExchange Propertyに退避します。また、API呼び出し時に使用するためProductIDをproductIdという名前で設定します。

2.2. HTTP Adapter
リモートAPI(ここではNorthwindのOData V4 API)にアクセスして、ProductIDをキーにSuplierIDを取得します。

以下のようなレスポンスが返ってきます。
{
    "@odata.context": "https://services.odata.org/V4/Northwind/Northwind.svc/$metadata#Products(SupplierID)/$entity",
    "@odata.etag": "W/\"1,2\"",
    "SupplierID": 1
}
2.3. Groovy Script
Groovy Scriptで退避しておいたボディとAPIからのレスポンスを合わせたXMLを作成します。APIから取得する項目が増えても対応できるようにしています。
import com.sap.gateway.ip.core.customdev.util.Message
import groovy.xml.*
import groovy.json.JsonSlurper

Message processData(Message message) {

    // Propertyから originalBody を取得
    def originalBody = message.getProperty("originalBody") as String
    def productXml = new XmlParser().parseText(originalBody)

    // Body から JSON を取得
    def jsonText = message.getBody(String)
    def json = new JsonSlurper().parseText(jsonText)

    // originalBody に JSON のキー/値を追加
    json.each { key, value ->
        // ODataのメタ系キー(@odata...)はスキップ
        if(!key.startsWith("@")) {
            // 子要素を追加
            productXml.appendNode(key, value?.toString())
        }
    }

    // XMLをシリアライズ
    def xmlString = XmlUtil.serialize(productXml)
    // タグ間の改行・空白を除去
    xmlString = xmlString.replaceAll('>\\s+<', '><')

    message.setBody(xmlString)

    return message
}
出力は以下のようになります。
<?xml version="1.0" encoding="UTF-8"?>
<Product>
	<ProductID>3</ProductID>
	<ProductName>Aniseed Syrup</ProductName>
	<SupplierID>1</SupplierID>
</Product>