はじめに
SwiftUIでImageやTextに枠線や角丸を適用する方法を書きます。
UIKitで言う所のUIImageViewやUIButtonに枠線や角丸を適用する方法のSwiftUI版です。
環境について
| Mac OS | Xcode |
|---|---|
| 10.15 Beta | Xcode 11.0 beta 3 |
| macOS Monterey (12.0 Beta) | Xcode 13.0 |
画像を表示する
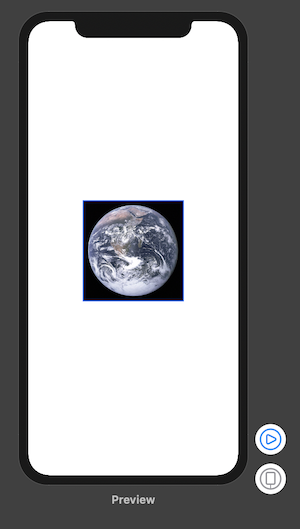
Imageを配置して画像(地球)を読み込みます。
(参考画像の URL: https://ja.wikipedia.org/wiki/%E5%9C%B0%E7%90%83)
実行すると画像が表示されます。
Assets.xcassetsにはearth_imageでセットします。
import SwiftUI

struct ContentView : View {
    var body: some View {
        // String型でイメージファイルを指定する
        Image("earth_image")
            // リサイズを宣言する
            .resizable()
            // 幅 200, 高さ 200 に設定する
            .frame(width: 200, height: 200)
    }
}

枠線
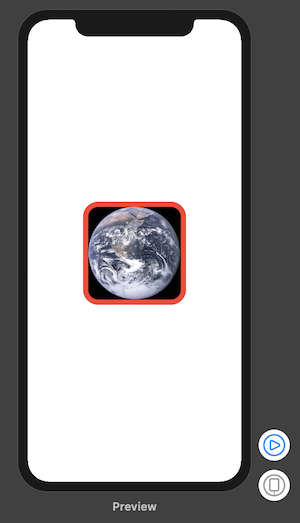
枠線を適用します。ここでは枠線の色を赤にします。
import SwiftUI

struct ContentView : View {
    var body: some View {
        // String型でイメージファイルを指定する
        Image("earth_image")
            // リサイズを宣言する
            .resizable()
            // 幅 200, 高さ 200 で描画する
            .frame(width: 200, height: 200)
            // 赤色の枠線を10pxで描画する
            .border(Color.red, width: 10)
    }
}

角丸
次に角丸を適用します。
Xcode 13.0
2021/10/13 現在
.border(Color.red, width: 10, cornerRadius: 30)が使えなくなってましたので、次のように書きます。
エラー内容: Extra argument 'cornerRadius' in call
(@koogawa さんのご指摘により修正)
struct ContentView : View {
    var body: some View {
        // String型でイメージファイルを指定する
        Image("earth_image")
            // リサイズを宣言する
            .resizable()
            // 幅 200, 高さ 200 で描画する
            .frame(width: 200, height: 200)
            // 赤色の枠線を10pxで30px分の角丸にして描画する
            .overlay(
                RoundedRectangle(cornerRadius: 30)
                    .stroke(Color.red, lineWidth: 10)
            )
    }
}
Xcode 11.0 (最新版だとエラーになります)
struct ContentView : View {
    var body: some View {
        // String型でイメージファイルを指定する
        Image("earth_image")
            // リサイズを宣言する
            .resizable()
            // 幅 200, 高さ 200 で描画する
            .frame(width: 200, height: 200)
            // 赤色の枠線を10pxで30px分の角丸にして描画する
            .border(Color.red, width: 10, cornerRadius: 30)
    }
}

角丸が適用されました。この状態では画像の上に枠線が描画されているように見えます。
角丸に合わせて画像にも枠線を描画させるとします。
Xcode 13.0
struct ContentView : View {
    var body: some View {
        // String型でイメージファイルを指定する
        Image("earth_image")
            // リサイズを宣言する
            .resizable()
            // 幅 200, 高さ 200 で描画する
            .frame(width: 200, height: 200)
            // 赤色の枠線を10pxで30px分の角丸にして描画する
            .overlay(
                RoundedRectangle(cornerRadius: 30)
                    .stroke(Color.red, lineWidth: 10)
            )
            // Imageに対して角丸を描画する
            .cornerRadius(30)
    }
}
Xcode 11.0 (最新版だとエラーになります)
struct ContentView : View {
    var body: some View {
        // String型でイメージファイルを指定する
        Image("earth_image")
            // リサイズを宣言する
            .resizable()
            // 幅 200, 高さ 200 で描画する
            .frame(width: 200, height: 200)
            // 赤色の枠線を10pxで描画する
            .border(Color.red, width: 10, cornerRadius: 30)
            // Imageに対して角丸を描画する
            .cornerRadius(30)
    }
}

これで画像が角丸付きの線に対応して角丸になりました。
今回はImageを例に枠線、角丸を適用しましたが、Textでも同様の処理で実装できます。