UiPathでライブラリに引数を設定して呼び出し、処理結果を取得する
前回の記事「UiPathでライブラリを直接呼び出す」と「UiPathでライブラリに引数を設定して呼び出す」の拡張編です。
UiPathのプロジェクトファイルに格納されたDLLに対して、引数を設定して呼び出し、処理結果を方法を紹介します。
開発のきっかけ
最近では当たり前ですが、昔はUiPathでカスタムライブラリを作成するには、
Visual StudioでDLLを作成し、Nuget ExplorerなどでDLLをnuget化して利用しかありませんでした。
UiPathでデバッグするにも、Immediate Panelがなかったり、現時点でもComやラムダ式をデバッグしたり
解析することができませんでした。
お約束事項(免責事項)
この記事は2020年6月時点の情報を基に作成しております。
記事の内容は私個人の見解であり、所属する組織の公式見解ではありません。
カスタムライブラリ
前回の記事で使用したサンプルのカスタムライブラリを使用します
ソース内容
前回のソースと同じものです。
今回は、Test3のメソッドを使用します。
using System.Windows;

namespace UiPathCustomLibrary
{
    public static class TestClass
    {
        public static void Test1()
        {
            MessageBox.Show("Hello World");
        }
        public static void Test2(string message)
        {
            MessageBox.Show(message);
        }

        public static int Test3(int a, int b)
        {
            return a + b;
        }
    }
}
UiPathのプロジェクト構成
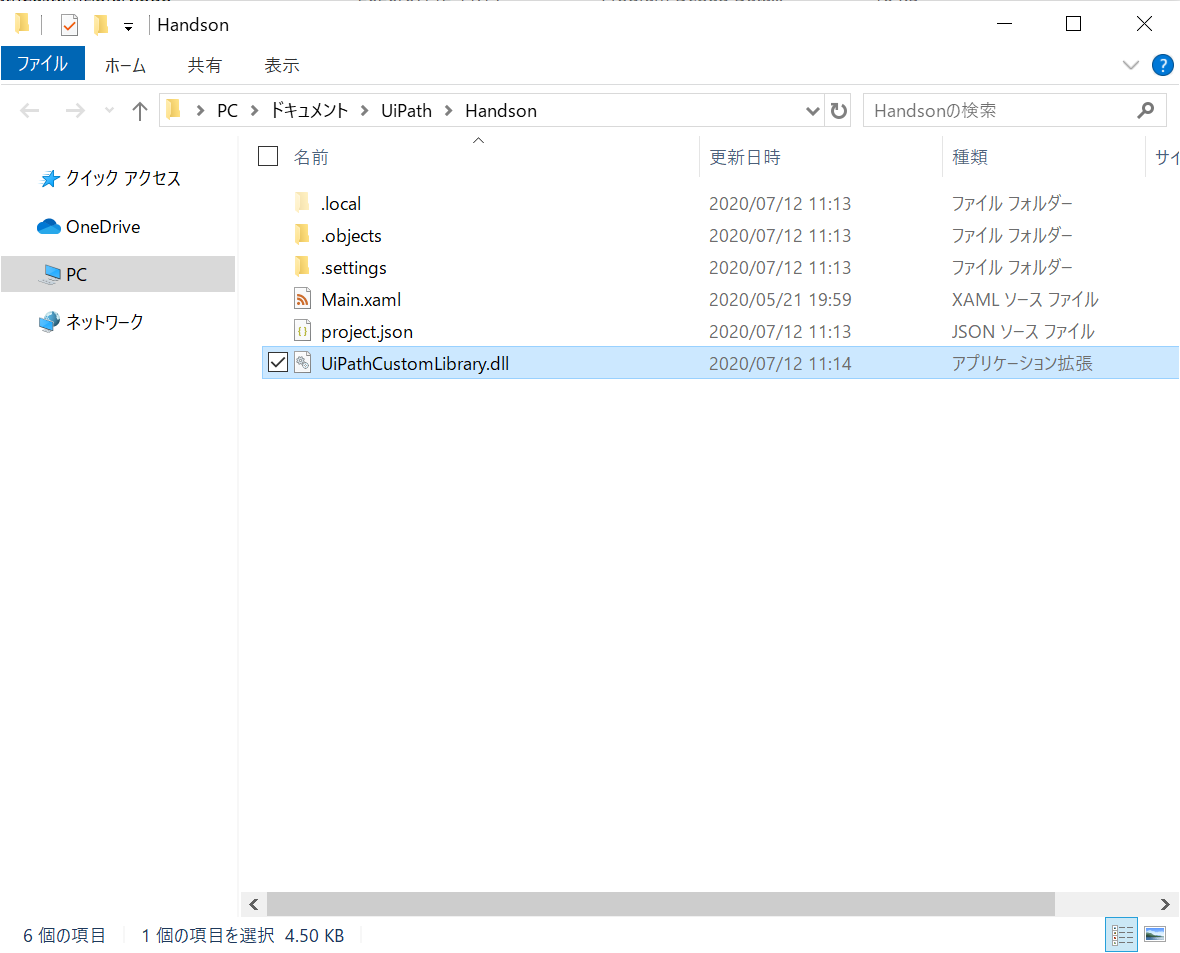
こちらも、前回と同様の構成を想定しております。
カスタムライブラリのサンプル(UiPathCustomLibrary.dll)はプロジェクト直下に格納しています。
UiPathの実装
基本的には、前回と同様の実装です。変更点は以下の3つです。
- 「7.変数の値を設定」で、使用するメソッド名を「Test3」に変更し、
- 「7.変数の値を設定」で、引数に「{1,2}」の2つを設定します。
- 「11.処理の呼び出し」で取得した処理結果を表示を追加します。
1. アセンブリ変数の作成
2. 型を変更
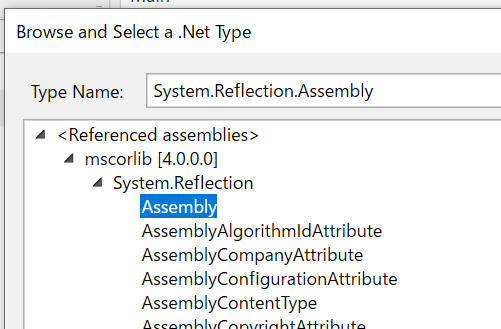
asmの型をBrowse for Types...を選択します。

3. 型名
Type NameにSystem.Reflection.Assemblyを入力し、Asssemblyを選択します。

4. Assignの追加
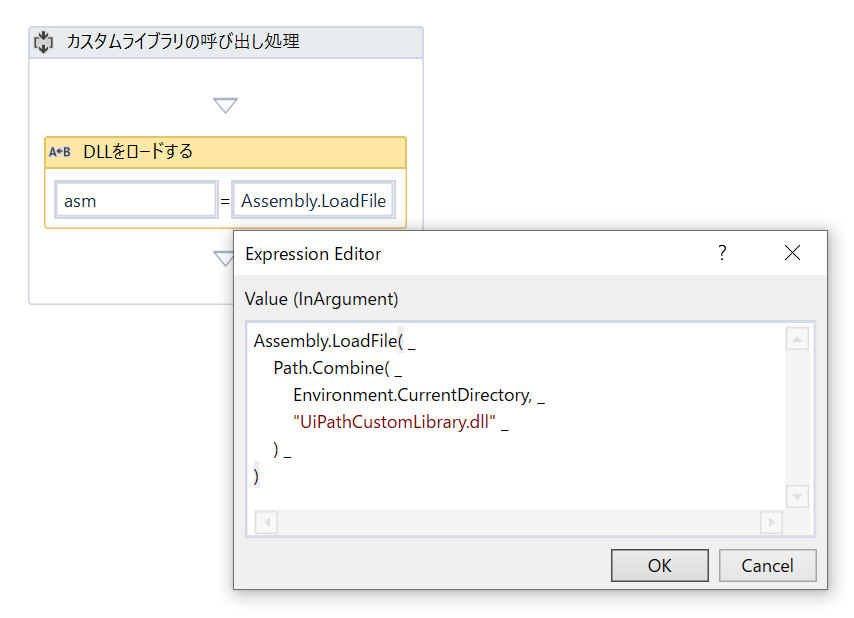
Assign(代入)アクティビティを追加し、左辺にasmを設定します。

5. Assignの値を設定
Assignの右辺に以下の値を設定します。
Assembly.LoadFile( _
    Path.Combine( _
	    Environment.CurrentDirectory, _
		"UiPathCustomLibrary.dll" _
	) _
)
これで、DLLをロードすることができました。
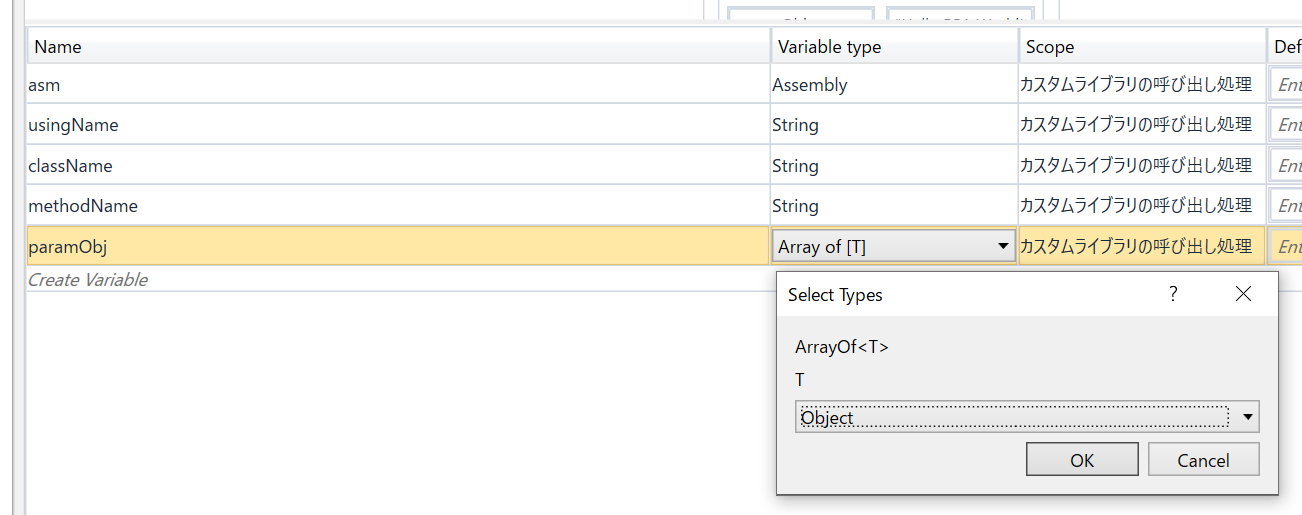
6. 変数の追加
実行するメソッドの変数を追加します
- 名前空間(
usingName) :String - クラス名(
className) :String - メソッド名(
methodName) :String - 引数(
paramObj) :System.Object[]orObject[]
7. 変数の値を設定
変数に値をそれぞれ設定します。
- usingName = "UiPathCustomLibrary"
- className = "TestClass"
- methodName = "Test3"
- paramObj = {CType(1, Object), CType(2, Object)}
8. 実行結果の変数を追加
実行結果を設定する変数 resultObj を追加し、変数の型をObjectに変更します。
9. Assignの追加
実行と実行結果を設定するAssignを追加します。
10. 処理の呼び出し
resultObjの値に、以下の値を設定します
asm _
    .GetType( usingName + "." + className ) _
    .GetMethod(methodName) _
	.Invoke(Nothing, paramObj)
11. 処理結果の出力
WriteLineアクティビティを追加し、resutObjの値を出力します。
- Text :
"処理結果(resutlObj) = " + resultObj.ToString
UiPathの実行
実行するとTest3の処理結果が、Outputパネルに出力されます。
終わりに
本投稿では、メソッドに引数を設定して呼び出し、処理結果を取得する方法をご紹介しました。
もし、よければLGTMをお願いします。


