はじめに&BOCCOとは?
どうも、たくろーどんです。
BOCCOとは、ユカイ工学から開発した家族をつなぐコミュニケーションロボットのBOCCOです。
BOCCOに話しかけると、それが音声メッセージとして送信され、スマートフォンからはテキストか音声でメッセージを送信することができます。
子供、両親、祖父母などのスマートフォンの操作ができない家族とも簡単にコミュニケーションをとることができる、そんなコミュケーションロボットです。

BOCCOには開発者向けに、BOCCOに自由な言葉をしゃべらせたりデータを取得したりすることができるようにAPIが公開されています。
BOCCO API 概要 | BOCCO API Documentation
その公開されているBOCCO APIをつかって普段遊んでみています。
やってみたこと
今回試してみたことですが、C#でWindowsアプリケーションをつくる方法を理解しつつあるので、タスクトレイで動くWindowsアプリケーションをつくってそこからBOCCO APIをたたき、BOCCOを発話させてみました。
BOCCO APIをつかうための下準備
下記のリンクから、BOCCO APIに申し込んでおきます。
BOCCO API 概要 | BOCCO API Documentation
そのあと、手順にあるようにチュートリアルからアクセストークンとルームIDを取得しておきます。
動作環境や使用したもの
- windows 10 64bit
- Visual Studio 2019
- .NET framework 4.7.2
- System.Net.httpclient
- BOCCO
Windowsアプリケーションの作成
下準備
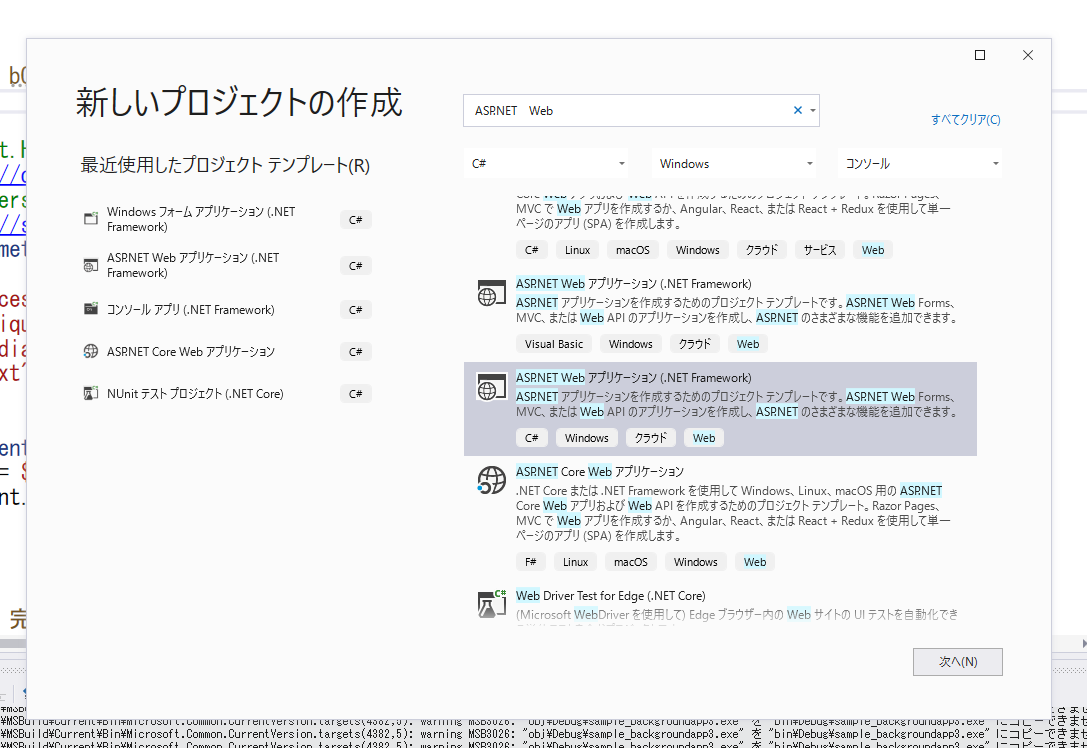
「新しいプロジェクト」から「ASP.NET Webアプリケーション(.NET Framework)」を選択し、アプリケーションをつくりはじめます。
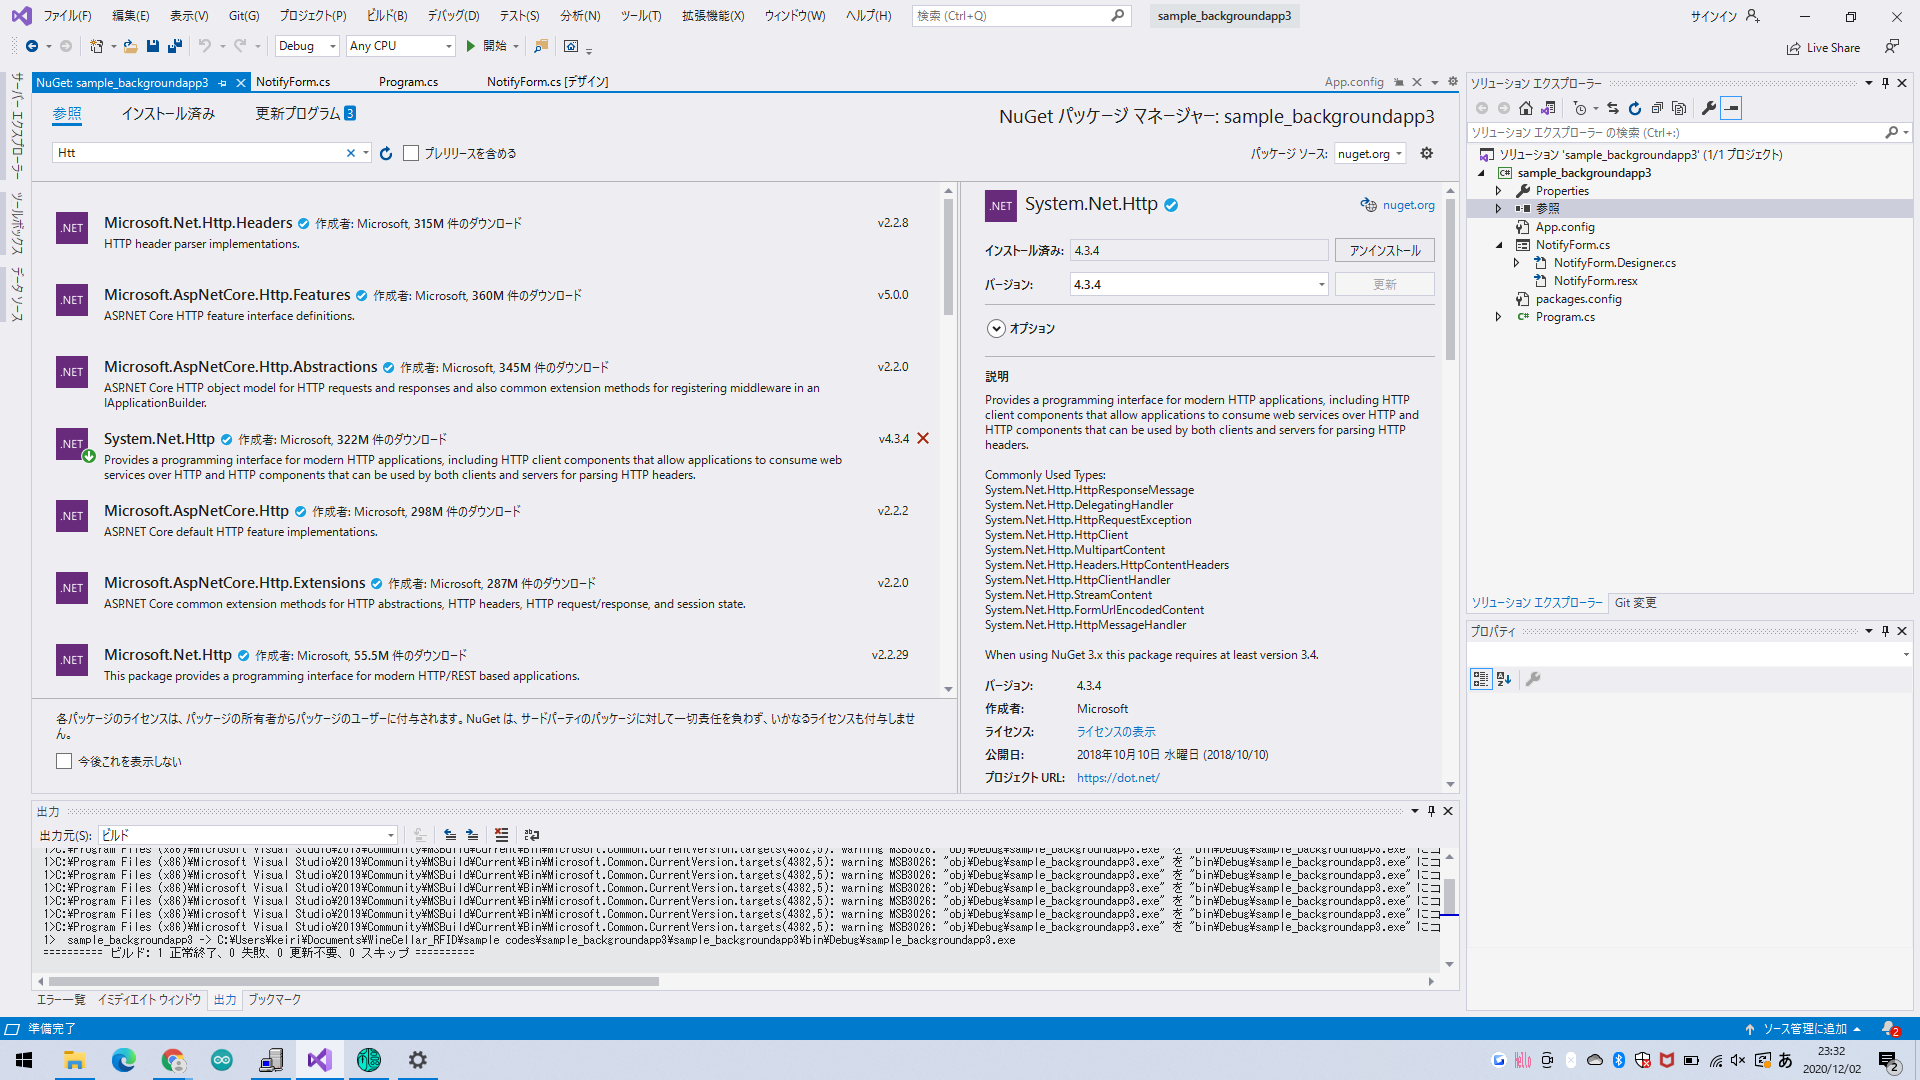
そして、「Nugetパッケージの管理」から「System.Net.httpclient」をインストールしておきます。
「参照」の検索欄から調べると見つかります。
プログラム
ASP.NET WebアプリケーションではGUIが表示されますが、今回はタスクトレイにのみアプリケーションを表示したいのでprogram.cs部分を下記のように変更します。
using System;
using System.Collections.Generic;
using System.Linq;
using System.Threading.Tasks;
using System.Windows.Forms;

namespace sample_backgroundapp3
{
    static class Program
    {
        private static NotifyForm notifyForm; // 1. Add form instance
        [STAThread]
        static void Main()
        {
            Application.EnableVisualStyles();
            Application.SetCompatibleTextRenderingDefault(false);
            notifyForm = new NotifyForm();
            Application.Run();
        }
    }
}
下記のように表記するとGUIを表示させずにアプリケーションを表示させることができます。
notifyForm = new NotifyForm();
Application.Run();
タスクトレイ部分のUIをつくる
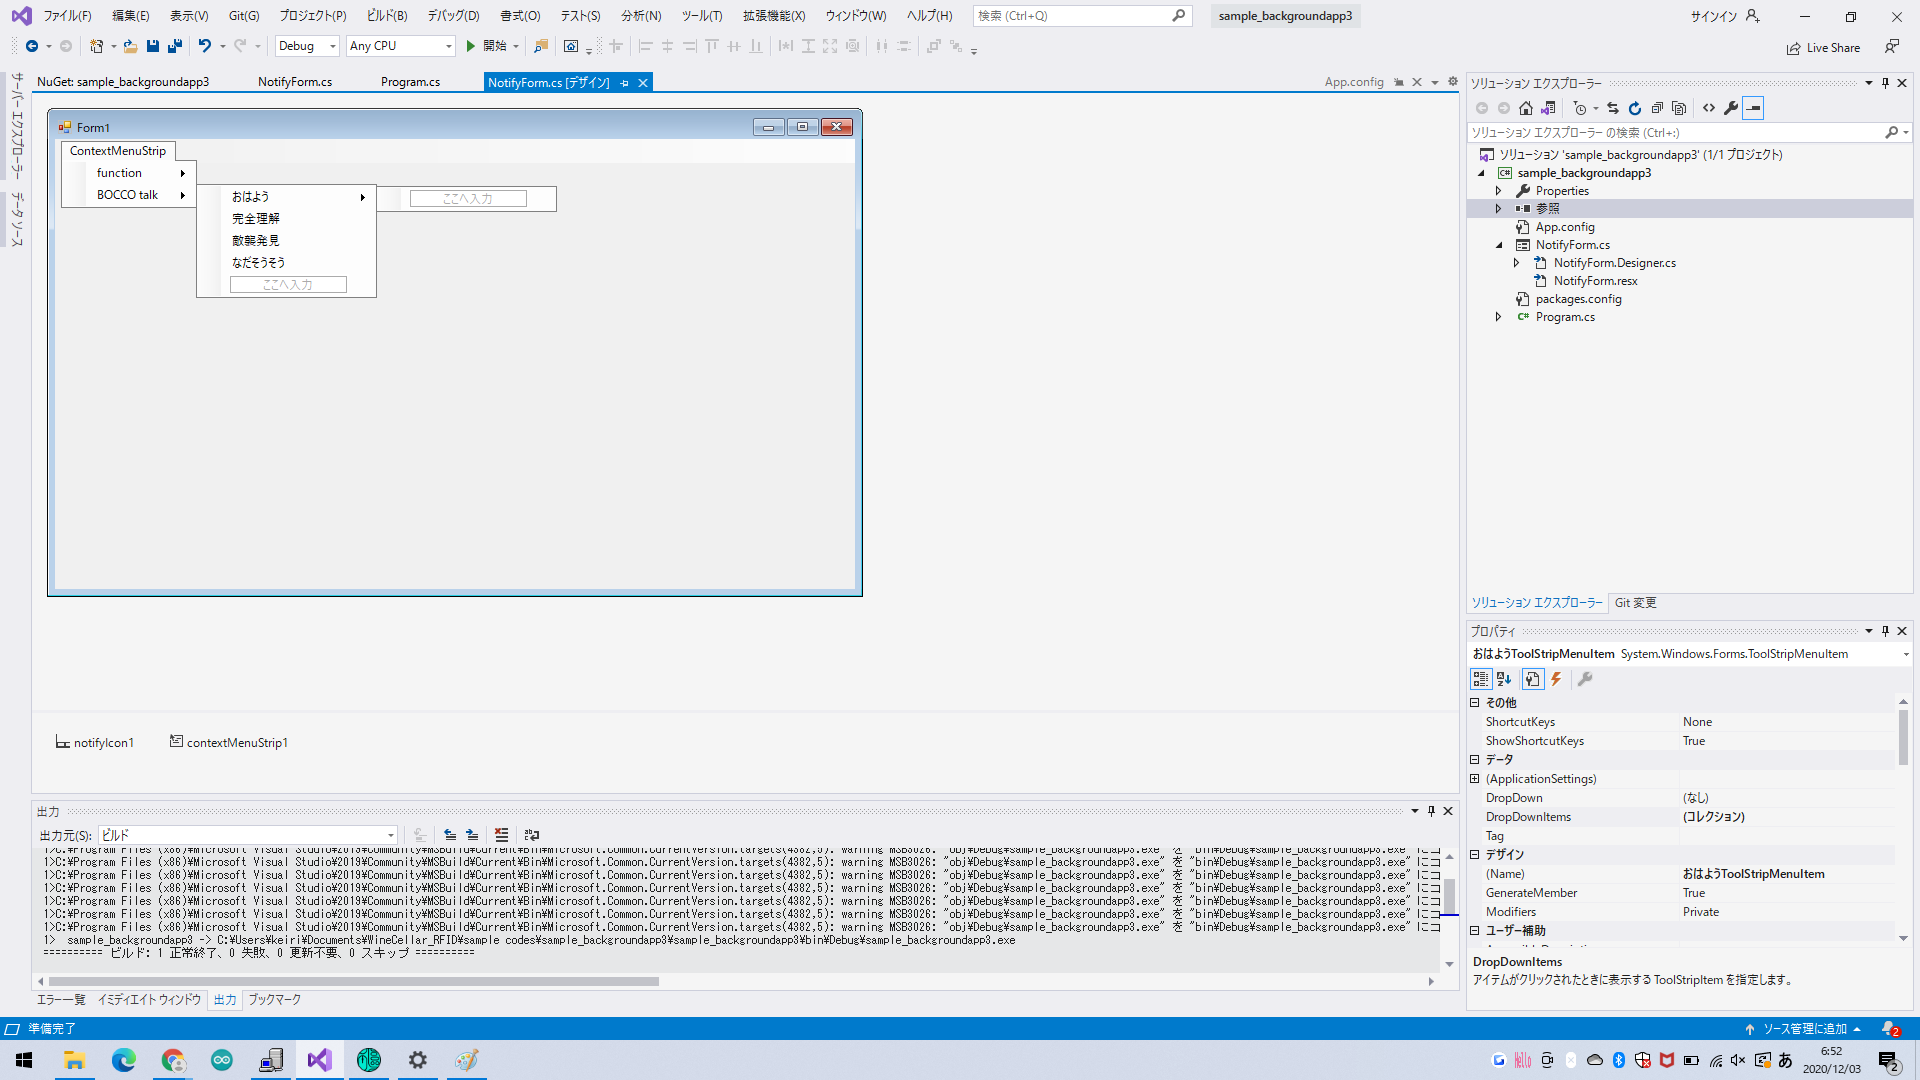
下記のようなイメージでUIをつくります。
そして、タスクトレイの「BOCCO talk」→「完全理解」とクリックすると発話するような機能を持たせます
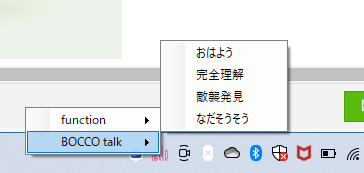
UIを変更できる画面から、
画面左にあるツールボックスから「NotifyIcon」と「ContexMenuStrip」をUI画面に追加します。
そして、「ContexMenuStrip」の選択肢を増やしていけば上記のイメージに近づきます。
タスクトレイをクリックするとBOCCO APIをたたくようにする
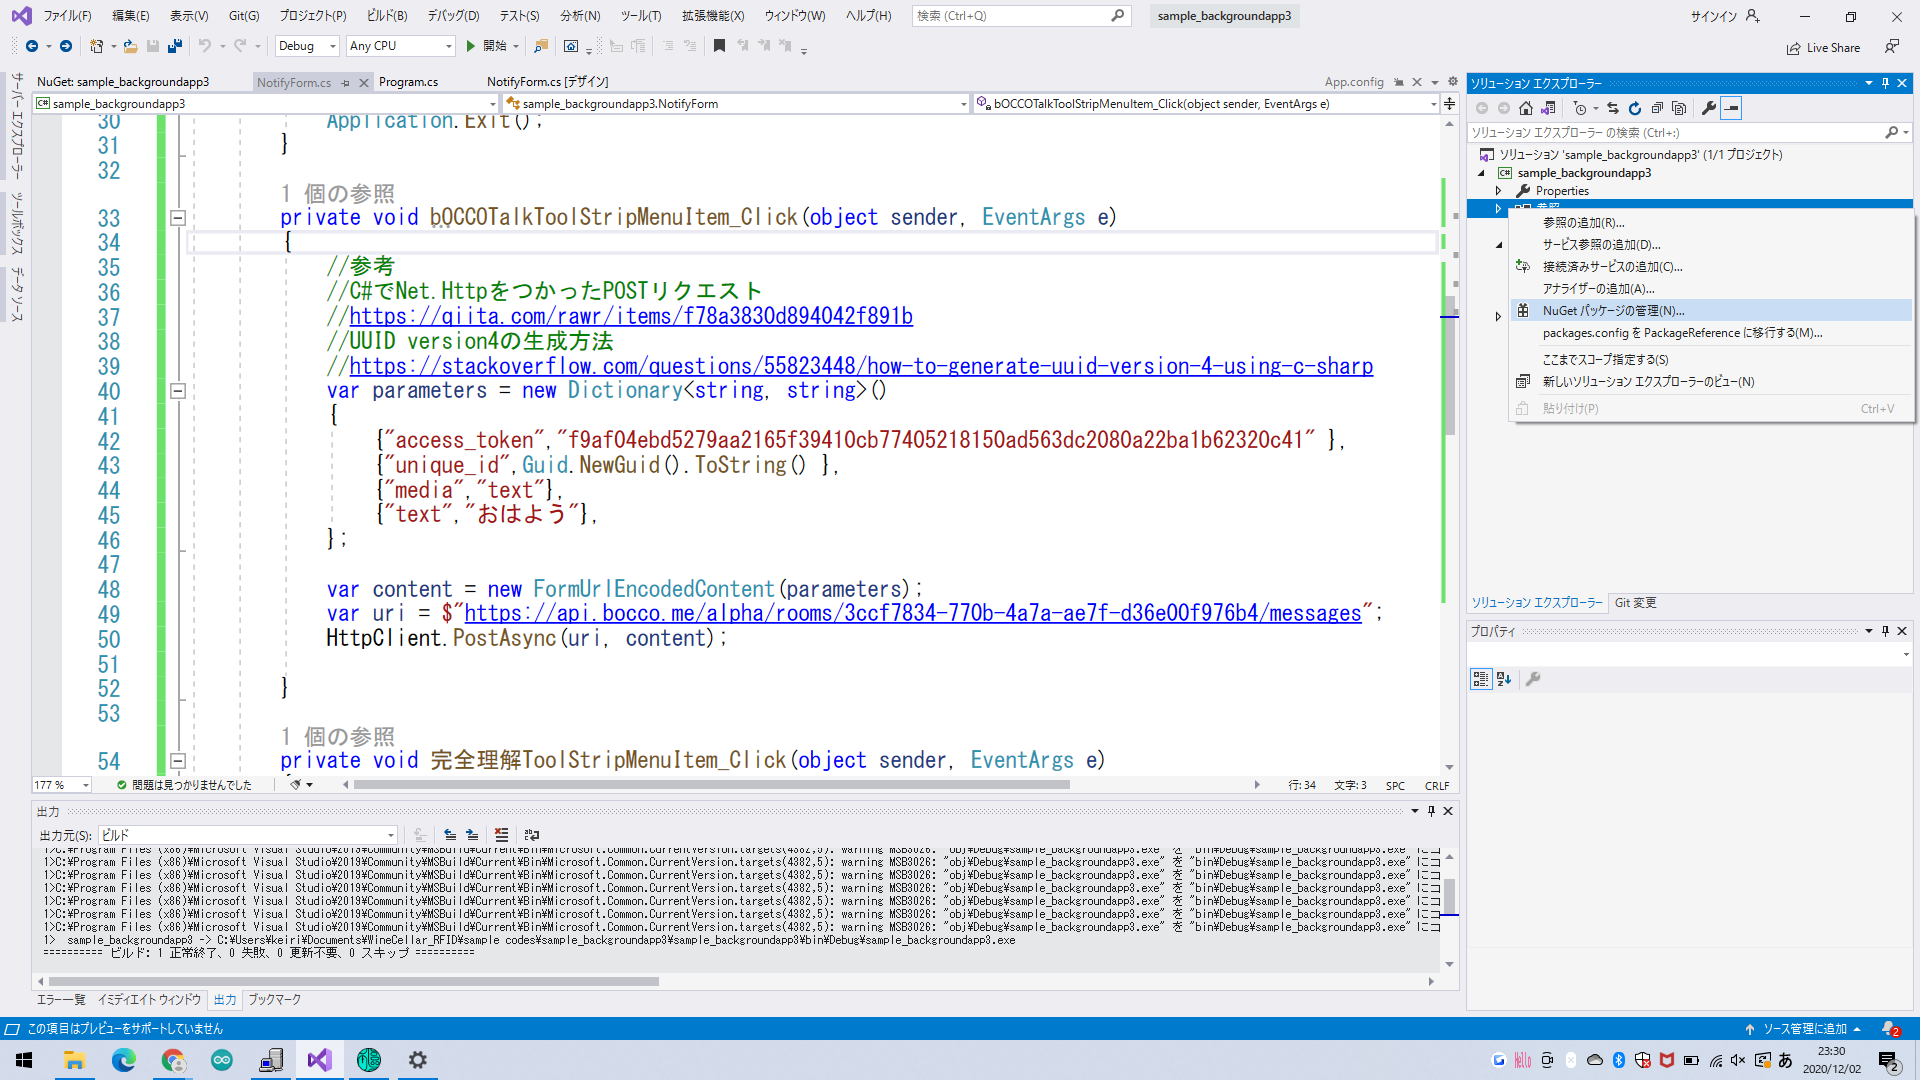
さきほど「ContexMenuStrip」で設定した任意のボタンをクリックすると、クリックしたときの処理を紐づけられるようにプログラムで処理が追加されます。例えば、「完全理解」というボタンをクリックすると、今回のプログラムでいうところの「Noifyform.cs」に下記が追加されます。
using System;
using System.Collections.Generic;
using System.ComponentModel;
using System.Data;
using System.Drawing;
using System.Linq;
using System.Text;
using System.Threading.Tasks;
using System.Windows.Forms;
using System.Net.Http;

namespace sample_backgroundapp3
{
    public partial class NotifyForm : Form
    {
        private static HttpClient HttpClient = new HttpClient();

        public NotifyForm()
        {
            InitializeComponent();
        }

        //クリックしたときの処理を記述する部分が追加される
        private void 完全理解ToolStripMenuItem_Click(object sender, EventArgs e)
        {
            var parameters = new Dictionary<string, string>()
            {
                {"access_token","xxxxxxxxx" },
                {"unique_id",Guid.NewGuid().ToString() },
                {"media","text"},
                {"text","完全理解"},
            };

            var content = new FormUrlEncodedContent(parameters);
            var uri = $"https://api.bocco.me/alpha/rooms/xxxxxxx/messages";
            HttpClient.PostAsync(uri, content);

        }
    }
}
下記のように、「完全理解」とクリックしたときの処理を記述する部分が追加されます。
そしてこの中にBOCCOを発話させるためにBOCCO APIをたたく部分を記述します。
        private void 完全理解ToolStripMenuItem_Click(object sender, EventArgs e)
        {

        }
その処理は下記のようになります。
DictionaryのなかにAPIに渡す部分を書きます。
unique_idはUUID version4を渡す必要があるので、Guid.NewGuid()で生成し、string型に変更します。
            var parameters = new Dictionary<string, string>()
            {
                {"access_token","xxxxxx" },
                {"unique_id",Guid.NewGuid().ToString() },
                {"media","text"},
                {"text","完全理解"},
            };
            //application/x-www-form-urlencodedにエンコードす
            var content = new FormUrlEncodedContent(parameters);
            var uri = $"https://api.bocco.me/alpha/rooms/xxxxxxx/messages";
            //POSTリクエスト
            HttpClient.PostAsync(uri, content);
これでPOSTリクエストを行うことができました。
こんな感じで動きます
下記の動画のように動作してくれます。
WindowsアプリケーションからBOCCO APIをたたく
今回は、Window PCのタスクトレイで動くアプリケーションを作成し、そこからBOCCOを発話させることができました。
これで何か重要な作業をWindow PCでしていてBOCCOアプリを使えない、といった時でも定型コマンドとしてBOCCOを発話させることができますね。
