これまでのおさらい
- Raspberry piにNode.jsをインストールする
- Node.jsでrequestモジュールを使ってHTTPリクエストを実行する
- Node.jsでIFTTTのWebhooksを使う(requestモジュール利用)
今回のお話
- Raspberry Piで、Node.jsからobnizを利用する。
- obnizでBME280センサーを動かす。
- BME280センサーで気温、湿度、気圧のデータを取得したら、IFTTTを使って、Google スプレッドシートにデータを書き込む。
順番にやっていきます。
Raspberry Piで、Node.jsからobnizを利用する
obnizをインストール
npm install obniz
Node.jsからObnizを使うには
const Obniz = require("obniz");
BME280センサーを動かす
コードは、このページを参考にしました。
https://karaage.hatenadiary.jp/entry/2019/10/23/073000
10KΩの抵抗を2つ入れています。
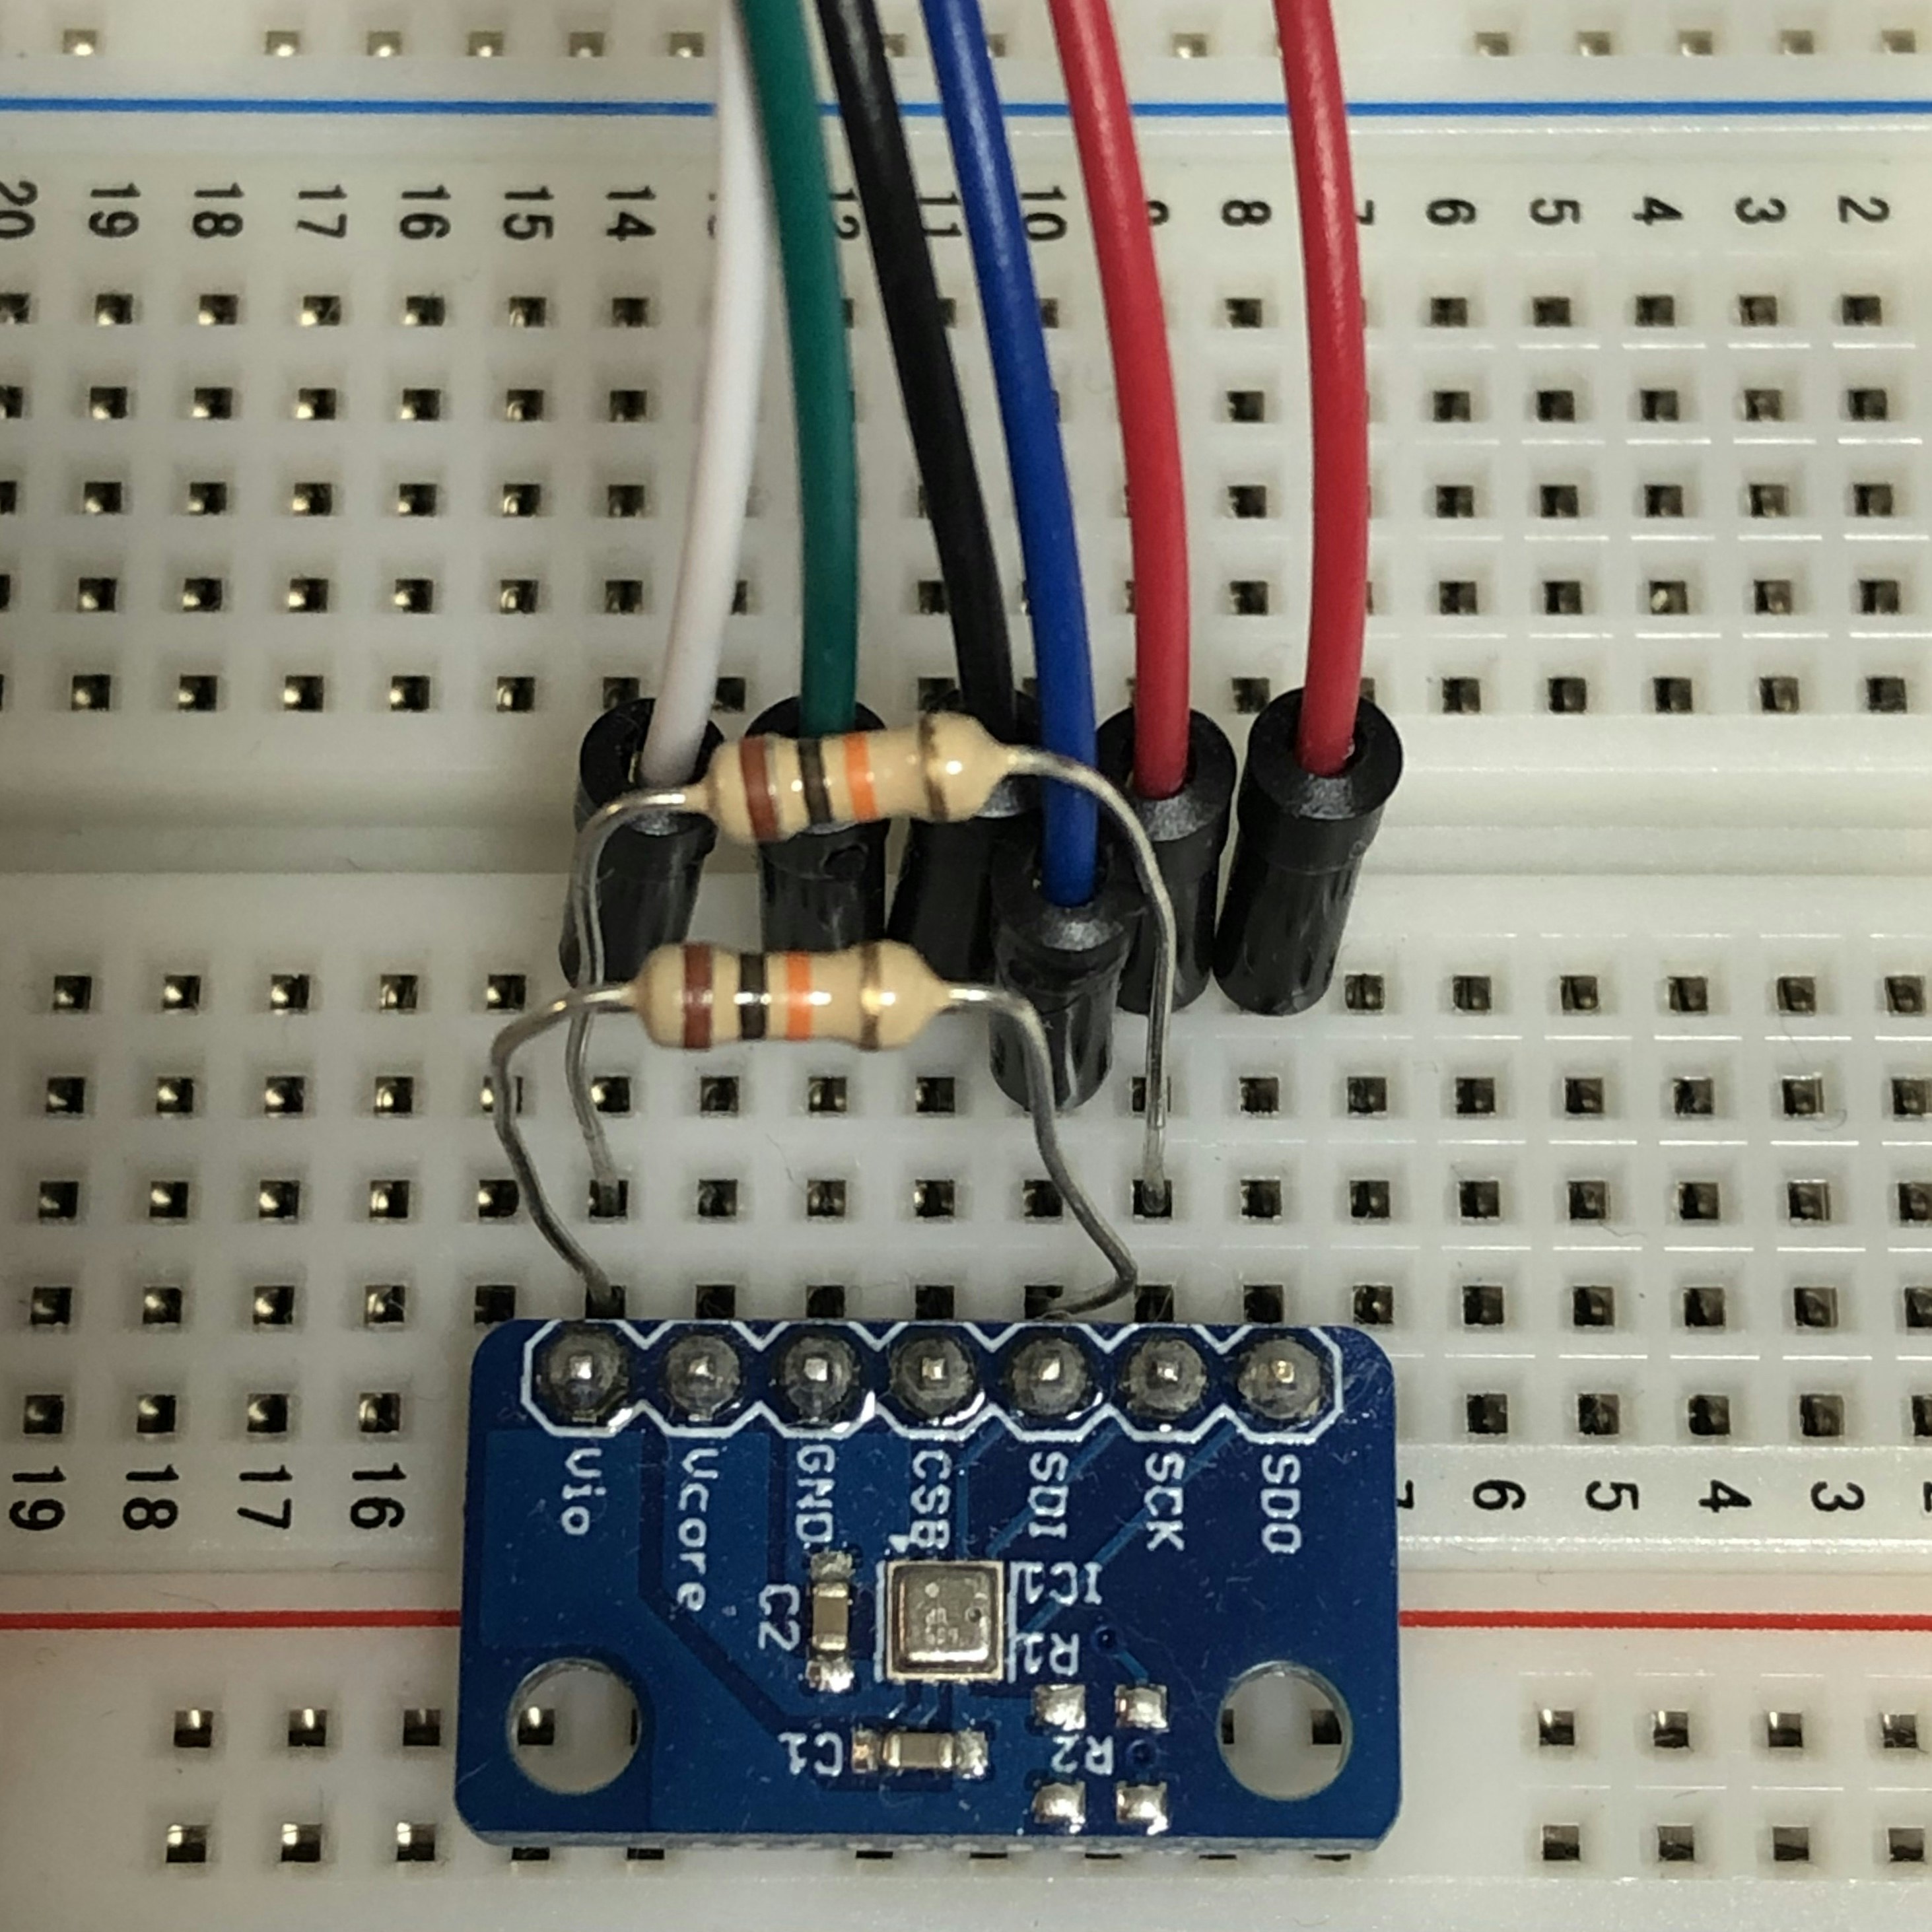
Obnizと接続します。
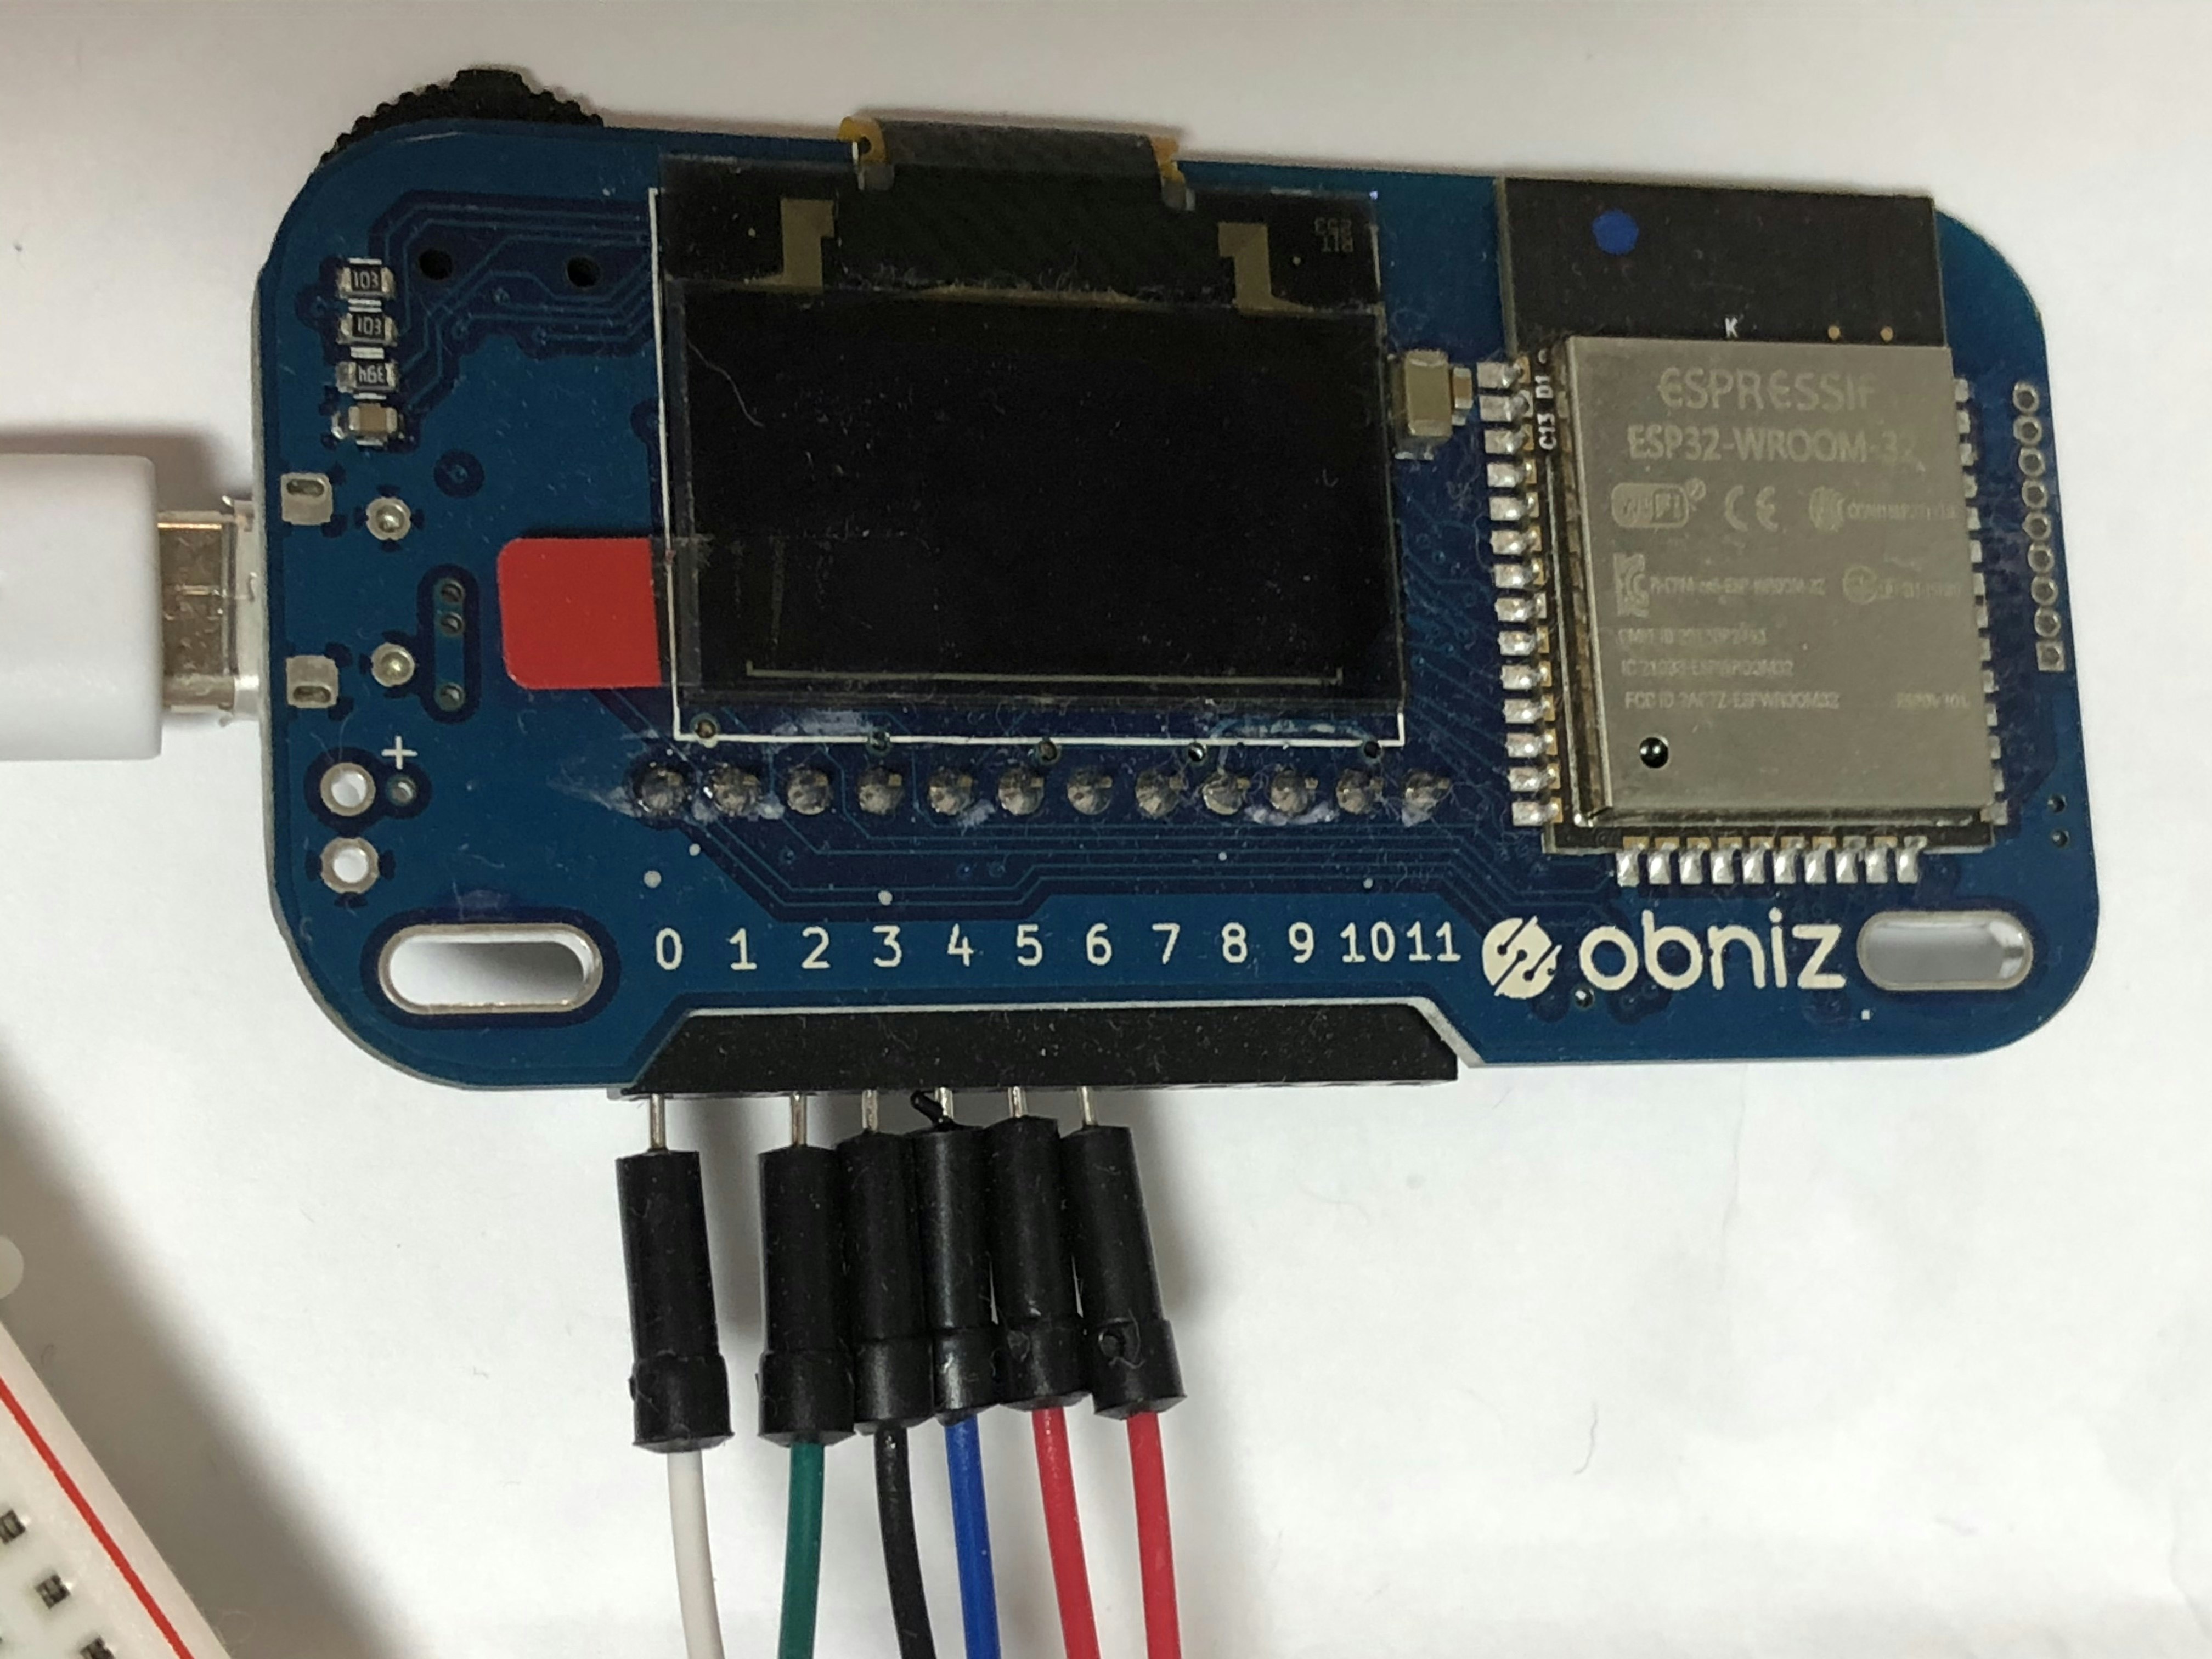
Obnizのディスプレイにデータを表示してみます。
Obnizの番号はマスクしています。
const Obniz = require("obniz"); // デバイスに接続
var obniz = new Obniz("****-****"); //Obnizの番号を指定

obniz.onconnect = async function () {

  var bme280 = obniz.wired("BME280", {vio:0, vcore:1, gnd:2, csb:3, sdi: 4, sck: 5, sdo:6 });
  await bme280.applyCalibration();
  await bme280.setIIRStrength(1);

  val = await bme280.getAllWait();

  //obniz画面表示
  obniz.display.clear();
  obniz.display.print("temperature:" + val.temperature.toFixed(1)) //気温
  obniz.display.print("humidity:" + val.humidity.toFixed(1)) //湿度
  obniz.display.print("pressure:" + val.pressure.toFixed(1)) //気圧

}
これでObnizでBME280センサーのデータ取得ができました。
Obnizの画面に、気温、湿度、気圧が表示されていると思います。
BME280センサーで気温、湿度、気圧のデータを取得したら、IFTTTを使って、Google スプレッドシートにデータを書き込む。
IFTTT経由でGoogle スプレッドシートにデータを書き込みます。
コードを追加しています。
1回データを書き込んだら、Obnizの接続を切っています。
// デバイスに接続
const Obniz = require("obniz"); // デバイスに接続
var obniz = new Obniz("****-****"); //Obnizの番号を指定
var webclient = require("request");


obniz.onconnect = async function () {
  const ifttt_event = "Record"; //イベント名
  const ifttt_secret_key = "あなたのキーを書く"; //キー
  const IFTTT_URL_GoogleSheets = 'https://maker.ifttt.com/trigger/' + ifttt_event + '/with/key/' + ifttt_secret_key;

  const bme280 = obniz.wired("BME280", {vio:0, vcore:1, gnd:2, csb:3, sdi: 4, sck: 5, sdo:6 });
  await bme280.applyCalibration();
  await bme280.setIIRStrength(1);

  val = await bme280.getAllWait();


  //obniz画面表示
  obniz.display.clear();
  obniz.display.print("temperature:" + val.temperature.toFixed(1)) //気温
  obniz.display.print("humidity:" + val.humidity.toFixed(1)) //湿度
  obniz.display.print("pressure:" + val.pressure.toFixed(1)) //気圧


  //送信データ作成
  const p1 = val.temperature.toFixed(1);
  const p2 = val.humidity.toFixed(1);
  const p3 = val.pressure.toFixed(1);

  //IFTTTリクエスト
  webclient.post({
    url: IFTTT_URL_GoogleSheets,
    headers: {
    "content-type": "application/json"
    },
    body: JSON.stringify({'value1': p1, 'value2':p2, 'value3':p3})
    }, function (error, response, body){
    console.log(body);
  });

  obniz.close();//Obniz切断
}
実行してみます。
pi@raspberrypi:~/myapp $ node BME280.js
Congratulations! You've fired the Record event
Congratulations! の行が表示されたら、成功です。
Google スプレッドシートを確認すると、取得したデータが記録されています。
今回はここまで。