POLプロダクト Advent Calender 2020の21日目です。担当の高橋です。
前回ははじめちゃん(@HHajimeW)が次元削減についてまとめてくれましたので、そちらも是非読んでみてください。
今回は最近僕の方でPOLのプロダクト開発への導入を試みている、Open API Generatorについて実際のコードを踏まえて紹介したいと思います。
Open API Generatorとは
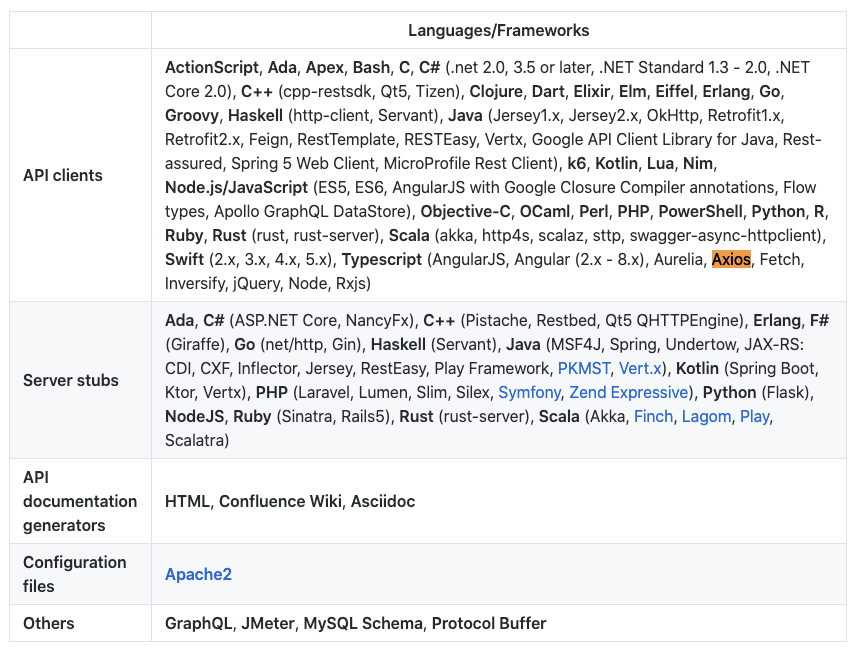
OpenAPI Generator allows generation of API client libraries (SDK generation), server stubs, documentation and configuration automatically given an OpenAPI Spec (both 2.0 and 3.0 are supported). Currently, the following languages/frameworks are supported:
openapi-generatorより引用。
Open API GeneratorはOpen API Specificationで記載されたResfful APIの仕様に基づいてコードやドキュメントを生成してくれます。以下のように多くのフレームワークをサポートしていますが、Open API Generatorの設定を変更せずデフォルト設定でコード生成すると、ビルドが通らなかったりLintでエラーになったりする場合があると思います(僕はありました)。
今回はOpenAPI3.0で記載されたPetStore APIのドキュメントを使って、Spring Boot + Kotlinのサーバーのコード、Axiosのクライアントコードを生成するまでの設定や生成されたコードについて紹介します。
Kotlin + Spring Boot + Gradle
build.gradle.kts(一部抜粋)
plugins {
    val kotlinVersion = "1.3.30"
    id("jacoco")
    id("org.springframework.boot") version "2.3.4.RELEASE"
    id("io.spring.dependency-management") version "1.0.10.RELEASE"
    id("org.openapi.generator") version "4.2.1"
    kotlin("jvm") version kotlinVersion
    kotlin("plugin.spring") version "1.3.72"
}
自動生成されたApiUtilのコンパイルが通らないので、このコメントを参考にOpen API Generatorの4.2.1を使っています。
// https://discuss.kotlinlang.org/t/kotlin-gradle-script-add-generated-kotlin-sources/17277
sourceSets {
    main {
        kotlin {
            sourceSets["main"].apply {
                kotlin.srcDir("src/main/generated")
            }
        }
    }
}
build配下を参照しても良いのですがsrc/kotlin/generatedにコードを配置したかったので、src/kotlin/generated配下をコンパイル対象に追加しておきます。
tasks.register("moveOpenApiGeneratedCode") {
    doLast {
        copy {
            from("${buildDir}/generated/.openapi-generator".toString())
            into(".openapi-generator")
        }
        copy {
            from("${buildDir}/generated/.openapi-generator-ignore".toString())
            into("./")
        }
        copy {
            from("${buildDir}/generated/src/main/kotlin".toString())
            into("src/main/generated")
        }
        copy {
            from("${buildDir}/generated/src/test/kotlin".toString())
            into("src/test/kotlin")
        }
    }
}
生成したコードをsrc/main/generated配下に移動する必要があり、それを実施するタスクを定義します。
    withType<org.openapitools.generator.gradle.plugin.tasks.GenerateTask> {
        generatorName.set("kotlin-spring")
        inputSpec.set("path/to/open-api-specification.yaml")
        outputDir.set("$buildDir/generated".toString())
        apiPackage.set("jp.co.pol.petstore.api")
        invokerPackage.set("jp.co.pol.petstore.invoker")
        modelPackage.set("jp.co.pol.petstore.model")
        additionalProperties.set(mapOf("interfaceOnly" to "true"))
        finalizedBy("moveOpenApiGeneratedKotlinCode")
    }
generatorNameはkotlin-spring、interfaceを使いたいのでinterfaceOnlyを指定しています。生成したコードを移動するタスクをfinalizedByで実行しています。
GradleのopenApiGenerateタスクを実行するとsrc/main/generated配下にコードが生成されます。

起動時に実行するクラスがinvoker配下に生成されます。
package jp.co.pol.petstore.invoker

import org.springframework.boot.runApplication
import org.springframework.context.annotation.ComponentScan
import org.springframework.boot.autoconfigure.SpringBootApplication


@SpringBootApplication
@ComponentScan(basePackages = ["jp.co.pol.petstore.invoker", "jp.co.pol.petstore.api", "jp.co.pol.petstore.model"])
class Application

fun main(args: Array<String>) {
    runApplication<Application>(*args)
}
実際の起動クラスは自動生成されたクラスを継承して実装します(DDDも試してみたかったのでそういったパッケージ構成にしています)。
@SpringBootApplication
@EnableConfigurationProperties
@ComponentScan(
    basePackages = ["jp.co.pol.petstore.application", "jp.co.pol.petstore.domain", "jp.co.pol.petstore.infrastructure", "jp.co.pol.petstore.presentation"],
    basePackageClasses = [WebMvcConfig::class]
)
class LabBaseApplication : Application() {
    companion object {
        @JvmStatic
        fun main(args: Array<String>) {
            runApplication<LabBaseRApplication>(*args)
        }
    }
}
コントローラークラスがapi配下に生成されます。実際のコントローラークラスは自動生成されたクラスを実装して作成します。
package jp.co.pol.petstore.api

import jp.co.pol.petstore.model.ModelApiResponse
import jp.co.pol.petstore.model.Pet
import org.springframework.http.HttpStatus
import org.springframework.http.MediaType
import org.springframework.http.ResponseEntity
import org.springframework.stereotype.Controller
import org.springframework.web.bind.annotation.RequestBody
import org.springframework.web.bind.annotation.RequestPart
import org.springframework.web.bind.annotation.RequestParam
import org.springframework.web.bind.annotation.PathVariable
import org.springframework.web.bind.annotation.RequestHeader
import org.springframework.web.bind.annotation.RequestMethod
import org.springframework.web.bind.annotation.RequestMapping
import org.springframework.validation.annotation.Validated
import org.springframework.web.context.request.NativeWebRequest
import org.springframework.beans.factory.annotation.Autowired

import javax.validation.Valid
import javax.validation.constraints.DecimalMax
import javax.validation.constraints.DecimalMin
import javax.validation.constraints.Max
import javax.validation.constraints.Min
import javax.validation.constraints.NotNull
import javax.validation.constraints.Pattern
import javax.validation.constraints.Size

import kotlin.collections.List
import kotlin.collections.Map

@Validated
@RequestMapping("\${api.base-path:/v2}")
interface PetApi {


    @RequestMapping(
            value = ["/pet"],
            consumes = ["application/json", "application/xml"],
            method = [RequestMethod.POST])
    fun addPet( @Valid @RequestBody body: Pet
): ResponseEntity<Unit> {
        return ResponseEntity(HttpStatus.NOT_IMPLEMENTED)
    }


    @RequestMapping(
            value = ["/pet/{petId}"],
            method = [RequestMethod.DELETE])
    fun deletePet( @PathVariable("petId") petId: kotlin.Long
, @RequestHeader(value="api_key", required=false) apiKey: kotlin.String?
): ResponseEntity<Unit> {
        return ResponseEntity(HttpStatus.NOT_IMPLEMENTED)
    }

    // 長いので他のfunctionは省略
}
またGradleのopenApiValidateタスクでOpenAPI Specificationのバリデーションが実行できます。CIで都度実行するように設定すると良さそうです。タスクで検証するドキュメントのパスを設定する必要があります。
tasks.withType<org.openapitools.generator.gradle.plugin.tasks.ValidateTask> {
    inputSpec.set("path/to/open-api-specification.yaml")
}
Axios
devDependenciesに@openapitools/openapi-generator-cliを追加します。
yarn add --dev @openapitools/openapi-generator-cli
scriptsにopenapi-generator-cliのコマンドを追加。
# package.json
{
  "scripts": {
    "generate-client": "openapi-generator-cli generate -g typescript-axios -i path/to/open-api-specification.yaml -o path/to/generated-code"
  },
  "devDependencies": {
    "@openapitools/openapi-generator-cli": "^2.1.4",
  }
}
openapitools.jsonでOpen API Generatorのバージョンを指定できます(自動生成するとjsonファイルが追加されます)。このIssueの問題を踏んだので、Typescriptのエラーが発生しないように5.0.0-beta2を指定しています。
{
  "$schema": "node_modules/@openapitools/openapi-generator-cli/config.schema.json",
  "spaces": 2,
  "generator-cli": {
    "version": "5.0.0-beta2"
  }
}
また自動生成したコードはeslintでエラーが発生してしまうので、.eslintignoreで無視するようにしておきます。
# コード生成
yarn generate-client
以下のようなコードが生成されます。
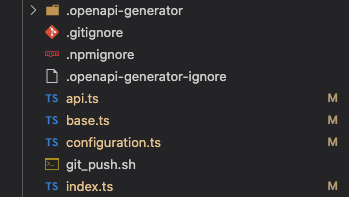
api.tsに全Restful APIの呼び出しを実行できるクラスが実装されています。APIのリクエストとレスポンスの型も生成されているので、ドキュメントさえ書けばモデルのコードを書かなくてもすむので助かります。
/**
 * PetApi - object-oriented interface
 * @export
 * @class PetApi
 * @extends {BaseAPI}
 */
export class PetApi extends BaseAPI {
    /**
     *
     * @summary Add a new pet to the store
     * @param {Pet} body Pet object that needs to be added to the store
     * @param {*} [options] Override http request option.
     * @throws {RequiredError}
     * @memberof PetApi
     */
    public addPet(body: Pet, options?: any) {
        return PetApiFp(this.configuration).addPet(body, options).then((request) => request(this.axios, this.basePath));
    }

    /**
     *
     * @summary Deletes a pet
     * @param {number} petId Pet id to delete
     * @param {string} [apiKey]
     * @param {*} [options] Override http request option.
     * @throws {RequiredError}
     * @memberof PetApi
     */
    public deletePet(petId: number, apiKey?: string, options?: any) {
        return PetApiFp(this.configuration).deletePet(petId, apiKey, options).then((request) => request(this.axios, this.basePath));
    }

    // 長いので省略
}
弊社の開発ではテスト環境、本番環境ごとにAPIサーバーのベースURLを切り替えたいので、自動生成されたAPI呼び出しクラスをそのまま使うのではなく、ファクトリークラスを使ってベースURLを切り替えられるようにしています。
// api.tsのファクトリークラス
export const PetApiFactory = function (configuration?: Configuration, basePath?: string, axios?: AxiosInstance) {
    return {
        /**
         *
         * @summary Add a new pet to the store
         * @param {Pet} body Pet object that needs to be added to the store
         * @param {*} [options] Override http request option.
         * @throws {RequiredError}
         */
        addPet(body: Pet, options?: any): AxiosPromise<void> {
            return PetApiFp(configuration).addPet(body, options).then((request) => request(axios, basePath));
        },
        /**
         *
         * @summary Deletes a pet
         * @param {number} petId Pet id to delete
         * @param {string} [apiKey]
         * @param {*} [options] Override http request option.
         * @throws {RequiredError}
         */
        deletePet(petId: number, apiKey?: string, options?: any): AxiosPromise<void> {
            return PetApiFp(configuration).deletePet(petId, apiKey, options).then((request) => request(axios, basePath));
        },
        // 長いので省略
    };
};

// 自前で実装しているapi.ts
import axios from 'axios';
import { PetApiFactory } from 'path/to/generated-code/api';
import { createApiClient } from '../../createApi';

const baseURL = process.env.API_BASE_URL;

const axiosInstance = axios.create({
    baseURL,
    timeout: 30000,
    headers: { 'X-Requested-With': 'XMLHttpRequest', Pragma: 'no-cache' },
});

export const petApiService = PetApiFactory(undefined, baseURL, axiosInstance);
おわり
以上、Open API Generatorの紹介でした。
次回はゲバさん(@guevara-net)です!