前提
- SSL証明書&秘密鍵&中間証明書は取得済み
- pfx証明書はCentOS7.4で作成
- Azure Application Gatewayを作成済み
手順概要
①SSL証明書と秘密鍵からpfx証明書を作成
⇒AzureのLBにはpfx証明書が必要です
②作成したpfx証明書をAzureポータルからアップロード
⇒リスナーの追加とルールの適用
①SSL証明書&秘密鍵&中間証明書からpfx証明書を作成
1.サーバにSSL証明書&秘密鍵&中間証明書をアップロードする。
2.下記コマンドを実行しpfx証明書を作成します。
# openssl pkcs12 -export -inkey <秘密鍵> -in <証明書> -certfile <中間証明書> -out <出力する任意のpfx証明書名>

■実行例
# openssl pkcs12 -export -inkey Privatekey.key -in Certificate.crt -certfile CA-Certificate -out HWS_Certificate.pfx
Enter Export Password: ★任意のパスワードを入力しEnter
Verifying - Enter Export Password: ★任意のパスワードを入力しEnter
※ここで入力するパスワードは後々必要です。
②作成したpfx証明書をAzureポータルからアップロード
1.Azure Portalにログインする。
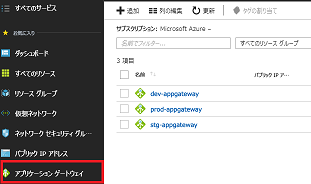
2.[アプリケーションゲートウェイ]を押下し対象のロードバランサーを選択する。
3.[リスナー]を選択する。
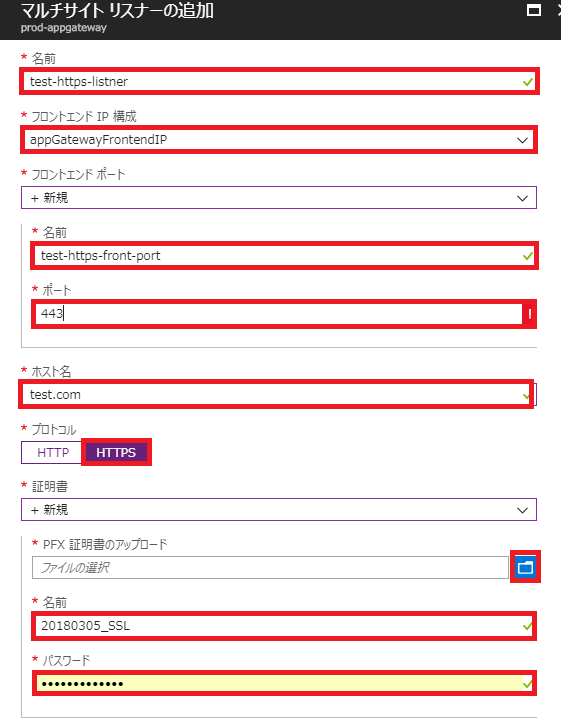
4.追加するリスナーのタイプを選択する。※今回はマルチサイト
5.必要な情報を記入して[OK]を押下する。
6.追加するルールのタイプを選択する。※今回はBasic
7.必要な情報を記入して[OK]を押下する。
httpsでの接続確認を行い完了!


