1. はじめに
15年ほど前に趣味でHTML+CSSをタグ打ちしていたくらいで、長らくWeb系の開発環境には触れていませんでしたが、「なんかカッコいい画像のプレビューできない?」的な話があったので、three.jsのサンプルcss3d periodic tableを改変して画像を配置してみました。
忘れないようにメモしておきます。
サンプルのここをいじったら、こうなるよという記事で、以下のようなものを作りました。
css3d periodic tableは以下のようなものです。

1.1. 開発環境
- Windows 10 Pro 64bit
- VS Code 1.76.2
- xampp v3.3.0
1.2. この記事が対象とする方
- JavaScriptはそこまで詳しくない
- three.jsはよくわからない
けど、カッコいい画像プレビューを作ってみたい方
2. three.js css3d periodic tableのざっくりした仕組み
- 3D表示させるHTML+CSSの要素の元となる情報を配列で用意する
- JavaScriptでHTML+CSSの要素を生成する
- 要素を3D空間に配置する
という流れになるので、それぞれの変更に必要な元になるコードを抜き出して見ていきます。
2.1. 3D表示させるHTML+CSSの要素の元となる配列
これは以下のtableで規定される配列で用意されています。
ここで配列の1行目にある'H', 'Hydrogen', '1.00794',まではHTML+CSSの要素となる情報ですが、1, 1,は3D空間上に表示させる際の位置を示しています(水素は周期表の1列目・1行目に当たる)。
			const table = [
				'H', 'Hydrogen', '1.00794', 1, 1,
				'He', 'Helium', '4.002602', 18, 1,
				'Li', 'Lithium', '6.941', 1, 2,
				'Be', 'Beryllium', '9.012182', 2, 2,
				'B', 'Boron', '10.811', 13, 2,
				'C', 'Carbon', '12.0107', 14, 2,
				'N', 'Nitrogen', '14.0067', 15, 2,
(後略)
2.2. JavaScriptでHTML+CSSの要素を生成する
JavaScriptでHTML+CSSの要素を生成するにはdocument.createElement()を使用し、後からクラスやCSSを定義します。
サンプル中でHTML+CSSを生成しているのは以下のコードになります。
					const element = document.createElement( 'div' );
					element.className = 'element';
					element.style.backgroundColor = 'rgba(0,127,127,' + ( Math.random() * 0.5 + 0.25 ) + ')';

					const number = document.createElement( 'div' );
					number.className = 'number';
					number.textContent = ( i / 5 ) + 1;
					element.appendChild( number );

					const symbol = document.createElement( 'div' );
					symbol.className = 'symbol';
					symbol.textContent = table[ i ];
					element.appendChild( symbol );

					const details = document.createElement( 'div' );
					details.className = 'details';
					details.innerHTML = table[ i + 1 ] + '<br>' + table[ i + 2 ];
					element.appendChild( details );
やっていることは以下のような流れで行っています。
-
document.createElement()で要素を生成 - 生成した要素の中身は個別に指定
- 要素を入れ子にする場合は
appendChild()で指定
上記コードで作られるソースは、水素Hなら以下のものになるはずです。
最終的にほしいHTMLのコードがわかっていれば、それほど難しい変更ではないかと思います。
<div class="element" style="background-color:rgba(0,127,127,※random)">
    <div class="number">1</div>
    <div class="symbol">H</div>
    <div class="details">Hydrogen<br>1.00794</div>
</div>
2.3. 要素を3D空間に配置
three.js css3d periodic tableでは3D空間上での配置において、設定する項目が5つあります。
- 初期配置(3D空間上にランダムに配置)
- 周期表テーブル配置
- 球体配置
- 螺旋状配置
- グリッド配置
2.3.1. 初期配置
生成したHTMLの要素はelementで定義されていますが、その要素をposition.x = Math.random()でランダムに配置しています。
画像に変更した場合でもここは特に変更する必要はない点です。
					const objectCSS = new CSS3DObject( element );
					objectCSS.position.x = Math.random() * 4000 - 2000;
					objectCSS.position.y = Math.random() * 4000 - 2000;
					objectCSS.position.z = Math.random() * 4000 - 2000;
					scene.add( objectCSS );

					objects.push( objectCSS );
2.3.2. 周期表テーブル配置
周期表テーブル配置の設定は以下の部分です。
table[ i + 3 ]とtable[ i + 4 ]で、2.1.で定義した配列の配置情報を元に配置を決めています。
配列の情報を変更する場合にはここの添字も変更する必要がありますし、画像サイズを変更する場合は、( table[ i + 3 ] * 140 )の掛け算の数値を変更することで画像間の距離を変更できます。
					const object = new THREE.Object3D();
					object.position.x = ( table[ i + 3 ] * 140 ) - 1330;
					object.position.y = - ( table[ i + 4 ] * 180 ) + 990;

					targets.table.push( object );
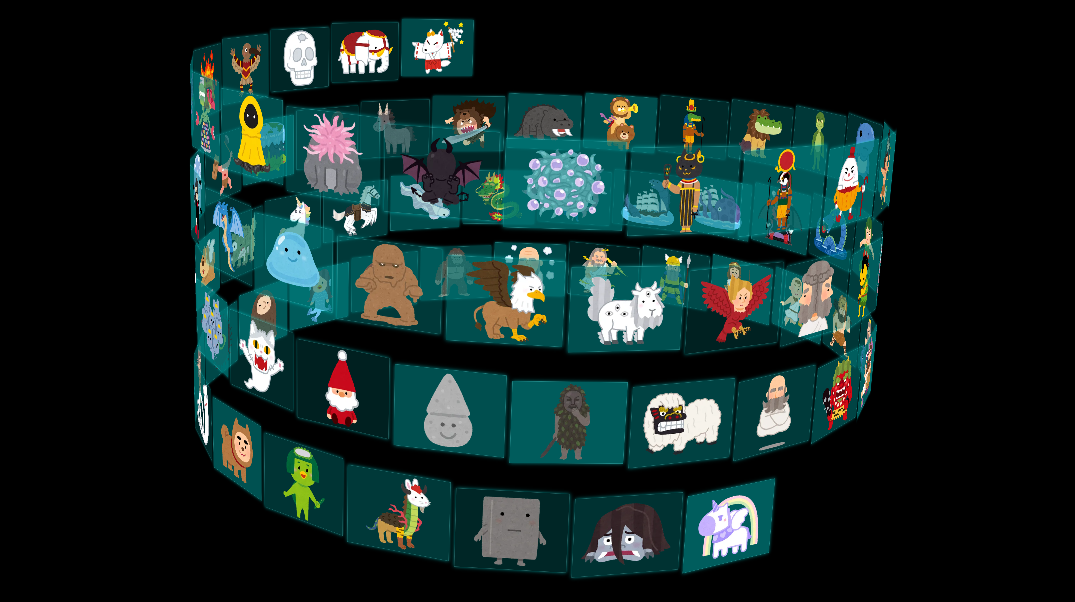
2.3.3. 球体配置
球体配置は以下の//sphere以降のコードですが、あまり変更する要素はなく、object.position.setFromSphericalCoords( 800, phi, theta );の800が球体の径に当たるくらいなので、そこを変更するくらいだと思います。
				// sphere

				const vector = new THREE.Vector3();

				for ( let i = 0, l = objects.length; i < l; i ++ ) {

					const phi = Math.acos( - 1 + ( 2 * i ) / l );
					const theta = Math.sqrt( l * Math.PI ) * phi;

					const object = new THREE.Object3D();

					object.position.setFromSphericalCoords( 800, phi, theta );

					vector.copy( object.position ).multiplyScalar( 2 );

					object.lookAt( vector );

					targets.sphere.push( object );

				}
2.3.4. 螺旋状配置
螺旋状配置は以下の//helix以降のコードで、HTML要素のサイズによって変更をしないと要素が重なります。
const theta = i * 0.175 + Math.PI;
const y = - ( i * 8 ) + 450;
object.position.setFromCylindricalCoords( 900, theta, y );
上記の3つの部分の数値はHTML要素に合わせて変更が必要になります。
				// helix

				for ( let i = 0, l = objects.length; i < l; i ++ ) {

					const theta = i * 0.175 + Math.PI;
					const y = - ( i * 8 ) + 450;

					const object = new THREE.Object3D();

					object.position.setFromCylindricalCoords( 900, theta, y );

					vector.x = object.position.x * 2;
					vector.y = object.position.y;
					vector.z = object.position.z * 2;

					object.lookAt( vector );

					targets.helix.push( object );

				}
2.3.5. グリッド配置
グリッド配置は以下の//grid以降のコードで、グリッド数などの配置の数や画像の間隔を変更する場合にはpositionの数値を変更する必要がありますが、もともとの間隔が広めなので変更なしでも問題ない場合もあります。
				// grid

				for ( let i = 0; i < objects.length; i ++ ) {

					const object = new THREE.Object3D();

					object.position.x = ( ( i % 5 ) * 400 ) - 800;
					object.position.y = ( - ( Math.floor( i / 5 ) % 5 ) * 400 ) + 800;
					object.position.z = ( Math.floor( i / 25 ) ) * 1000 - 2000;

					targets.grid.push( object );

				}
3. 画像への変更
3.1. 3D表示させる要素の情報
配置させる画像はいらすとやさんから80枚ほど用意しました。
png画像のままでは重いのでなんとなくwebpへ変換しました。
この際に画像サイズを揃えないとthree.jsできれいに配置できないので、アスペクト比は保ったまま、縦横を指定のサイズに変更するようにしています(専用ツールを別途用意するのが面倒でPythonで変換しましたが、方法は何でも良いと思いますし、CSSでサイズを揃えても良いと思います)。
import os
import glob
from PIL import Image

def resize_keeped_aspect_ratio(path: str, size: tuple):
    image = Image.open(path).convert('RGBA')
    width, height = size
    x_ratio = width / image.width
    y_ratio = height / image.height
    if x_ratio < y_ratio:
        resize_size = (width, round(image.height * x_ratio))
    else:
        resize_size = (round(image.width * y_ratio), height)
    return image.resize(resize_size, Image.LANCZOS)

image_files = glob.glob('illust/*.png')

for image in image_files:
    resezed_image = resize_keeped_aspect_ratio(image, (320,240))
    resezed_image.save(os.path.splitext(image)[0] + ".webp", "webp")
というわけで用意した画像のファイル名とテーブル配置情報を配列にまとめると以下のようになるので、もともとのtableと入れ替えます。
			const table = [
				'animal_character_kitsune_miko', 1, 1,
				'animal_zou_white_hakuzou', 1, 2,
				'body_trepanation', 1, 3,
				'character_choujin_tangatamanu', 1, 4,
				'character_cthulhu_cthugha', 1, 5,
				'character_cthulhu_cyaegha_green', 1, 6,
				'character_cthulhu_great_race_of_yith', 1, 7,
				'character_cthulhu_hastur', 1, 8,
				'character_cthulhu_moon_beast', 1, 9,
				'character_cthulhu_night_gaunts', 1, 10,
				'character_cthulhu_yog_sothoth', 2, 1,
				'character_egypt_bastet', 2, 2,
				'character_egypt_ra', 2, 3,
				'character_humpty_dumpty', 2, 4,
				'character_tarzan', 2, 5,
				'character_tenshi_angel_datenshi', 2, 6,
				'cthulhu_deep_ones', 2, 7,
				'dinosaur_dinosauroid_kyouryu_ningen', 2, 8,
				'egypt_ammut_ammit', 2, 9,
				'egypt_sebek', 2, 10,
				'fantasy_akuma_purson', 3, 1,
				'fantasy_behemoth', 3, 2,
				'fantasy_berserker', 3, 3,
				'fantasy_bicorn_unicorn', 3, 4,
				'fantasy_bird_yatagarasu', 3, 5,
				'fantasy_chikyu_heimen', 3, 6,
				'fantasy_china_keiten', 3, 7,
				'fantasy_crystal_skull', 3, 8,
				'fantasy_dracula_woman', 3, 9,
				'fantasy_dragon_wyvern', 3, 10,
				'fantasy_game_character_slime', 4, 1,
				'fantasy_golem', 4, 2,
				'fantasy_griffon', 4, 3,
				'fantasy_hakutaku', 4, 4,
				'fantasy_harpy', 4, 5,
				'fantasy_janus', 4, 6,
				'fantasy_kokopelli', 4, 7,
				'fantasy_konton', 4, 8,
				'fantasy_lamia', 4, 9,
				'fantasy_leviathan', 4, 10,
				'fantasy_maou_devil', 5, 1,
				'fantasy_ocean_kraken', 5, 2,
				'fantasy_ocean_sea_serpent', 5, 3,
				'fantasy_ryuukishi', 5, 4,
				'fantasy_ryu_doragon_asia', 5, 5,
				'fantasy_skyfish', 5, 6,
				'fantasy_sleipnir', 5, 7,
				'fantasy_unicorn_rainbow', 5, 8,
				'fantasy_zombie_dog', 5, 9,
				'fantsy_haneinu', 5, 10,
				'hebi_shiro', 6, 1,
				'monogatari_kurumiwariningyou_nezumi', 6, 2,
				'obake_bakeneko', 6, 3,
				'ofuro_sauna_tonttu_character', 6, 4,
				'ofuro_sauna_tonttu_stone', 6, 5,
				'okinawa_pa-ntou', 6, 6,
				'okinawa_shishimai', 6, 7,
				'sennin_kuchu_fuyuu', 6, 8,
				'setsubun_oni_kowai', 6, 9,
				'shinwa_bacchus', 6, 10,
				'shinwa_hades', 7, 1,
				'shinwa_hercules', 7, 2,
				'shinwa_kairos_kouun_kamisama', 7, 3,
				'shinwa_kirke_circe', 7, 4,
				'shinwa_ordin', 7, 5,
				'shinwa_zeus', 7, 6,
				'syokuji_sennin_kasumi', 7, 7,
				'uma_bigfoot', 7, 8,
				'youkai_akaheru', 7, 9,
				'youkai_amabie_mimi', 7, 10,
				'youkai_amabiko', 8, 1,
				'youkai_backbeard', 8, 2,
				'youkai_binbougami', 8, 3,
				'youkai_ittanmomen', 8, 4,
				'youkai_jinmenken', 8, 5,
				'youkai_kappa_girl', 8, 6,
				'youkai_kotobuki', 8, 7,
				'youkai_nurikabe', 8, 8,
				'youkai_otoroshi', 8, 9,
				'yumekawa_animal_unicorn', 8, 10,
			];
3.2. JavaScriptでHTML+CSSの要素を生成する
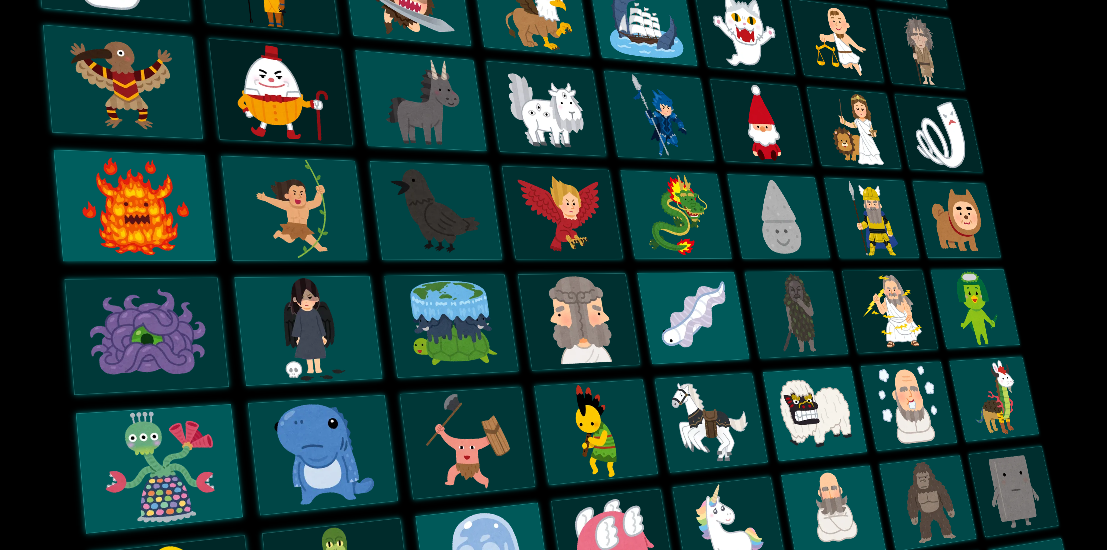
今回用意した画像は320x240のパネルとして配置することを想定しているので、CSSとJavaScriptを以下のように変更します。
CSSは必須なのは3D表示する要素のサイズです。もともと120x160のサイズなので、320x240に変更します。
またコードは示しませんが、削除するHTML要素として、number, symbol, detailsのクラスはなくなるので、CSSからも消して問題ありません。
			.element {
-				width: 120px;
+				width: 320px;
-				height: 160px;
+				height: 240px;
JavaScript部分で変更しているのは、新たにdocument.createElement( 'img' );でimg要素を生成して、srcに画像パスを指定しています。
-               for ( let i = 0; i < table.length; i += 5 ) {
+               for ( let i = 0; i < table.length; i += 3 ) {

                    const element = document.createElement( 'div' );
                    element.className = 'element';
                    element.style.backgroundColor = 'rgba(0,127,127,' + ( Math.random() * 0.5 + 0.25 ) + ')';

+                   const image = document.createElement( 'img' );
+                   image.src = './thumb/' + table[i] + '.webp';
+                   element.appendChild( image );

-                   const number = document.createElement( 'div' );
-                   number.className = 'number';
-                   number.textContent = ( i / 5 ) + 1;
-                   element.appendChild( number );

-                   const symbol = document.createElement( 'div' );
-                   symbol.className = 'symbol';
-                   symbol.textContent = table[ i ];
-                   element.appendChild( symbol );

-                   const details = document.createElement( 'div' );
-                   details.className = 'details';
-                   details.innerHTML = table[ i + 1 ] + '<br>' + table[ i + 2 ];
-                   element.appendChild( details );
上記以外にも、以下のようにelement.style.backgroundImage = 'url("thumb/' + table[i] + '.webp")';で背景に画像を指定して、element.style.backgroundSize = 'contained';で背景サイズを要素に合わせても良いと思います。
ただ今回のように透過画像で用意している場合にはimg要素の方が背景色を活かせるので良いかもしれません。
-               for ( let i = 0; i < table.length; i += 5 ) {
+               for ( let i = 0; i < table.length; i += 3 ) {

					const element = document.createElement( 'div' );
					element.className = 'element';
+                   element.style.backgroundImage = 'url("thumb/' + table[i] + '.webp")';
+                   element.style.backgroundSize = 'contained';
-                   element.style.backgroundColor = 'rgba(0,127,127,' + ( Math.random() * 0.5 + 0.25 ) + ')';
3.3. 要素を3D空間に配置
3.3.1. 初期配置
初期配置はランダム配置なので特に変更する必要はないので変えていません。
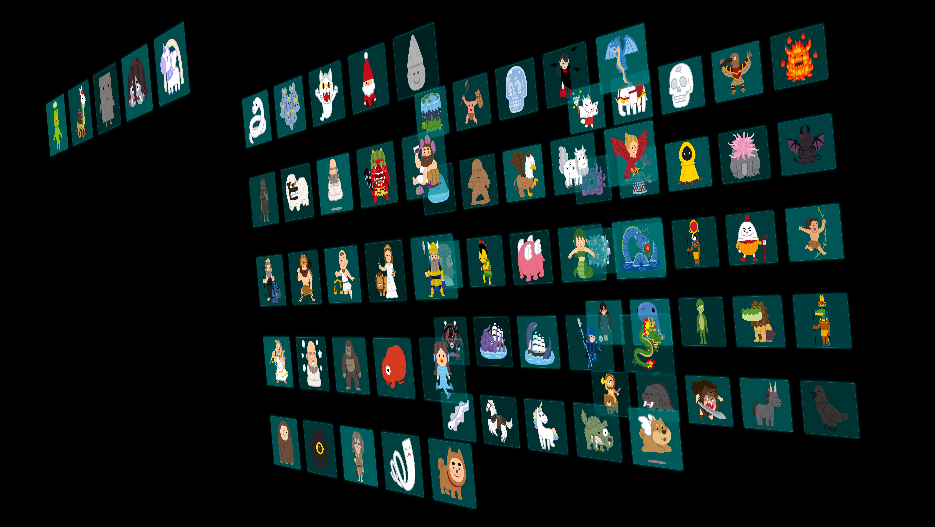
3.3.2. テーブル配置
- テーブル配置情報を書いている配列の添字変更
- 画像サイズに合わせた間隔の調整
- 全体の横の配置変更
以上3つを調整しています。
                    const object = new THREE.Object3D();
-                   object.position.x = ( table[ i + 3 ] * 140 ) - 1330;
-                   object.position.y = - ( table[ i + 4 ] * 180 ) + 990;
+                   object.position.x = ( table[ i + 1 ] * 360 ) - 1600;
+                   object.position.y = - ( table[ i + 2 ] * 280 ) + 990;

					targets.table.push( object );

				}
以下の画像がimg要素で配置した場合で、もとのサンプルにある背景透過色も活かした状態になっています。
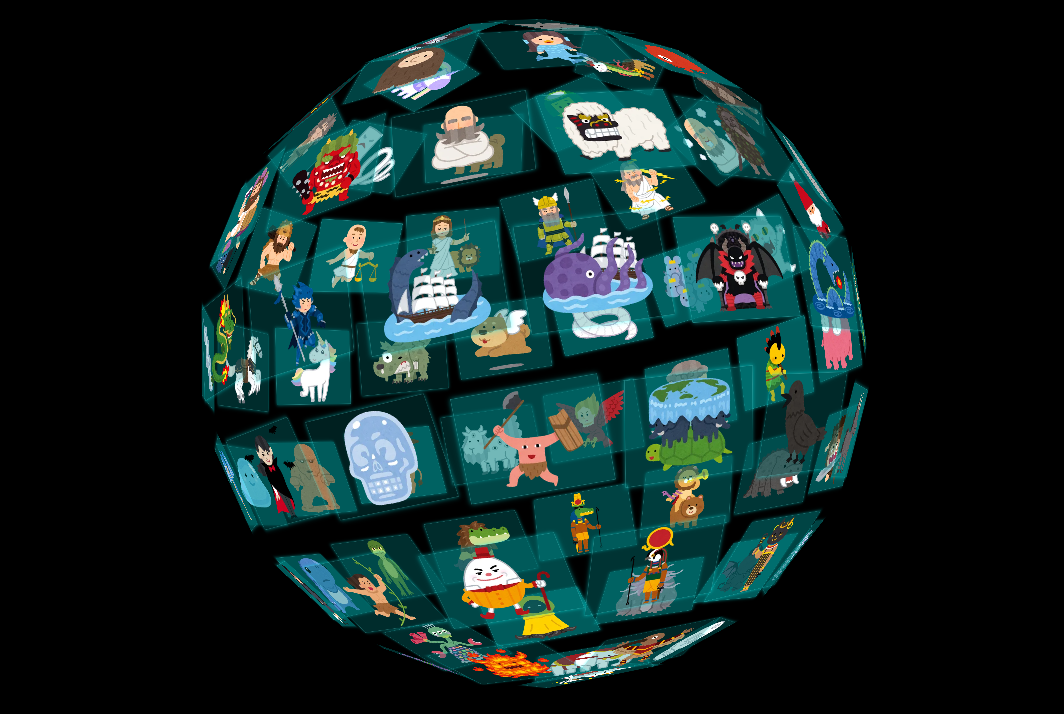
3.3.3. 球体配置
球体配置は初期状態でも破綻はしていませんが、多少画像が重なっている程度です。
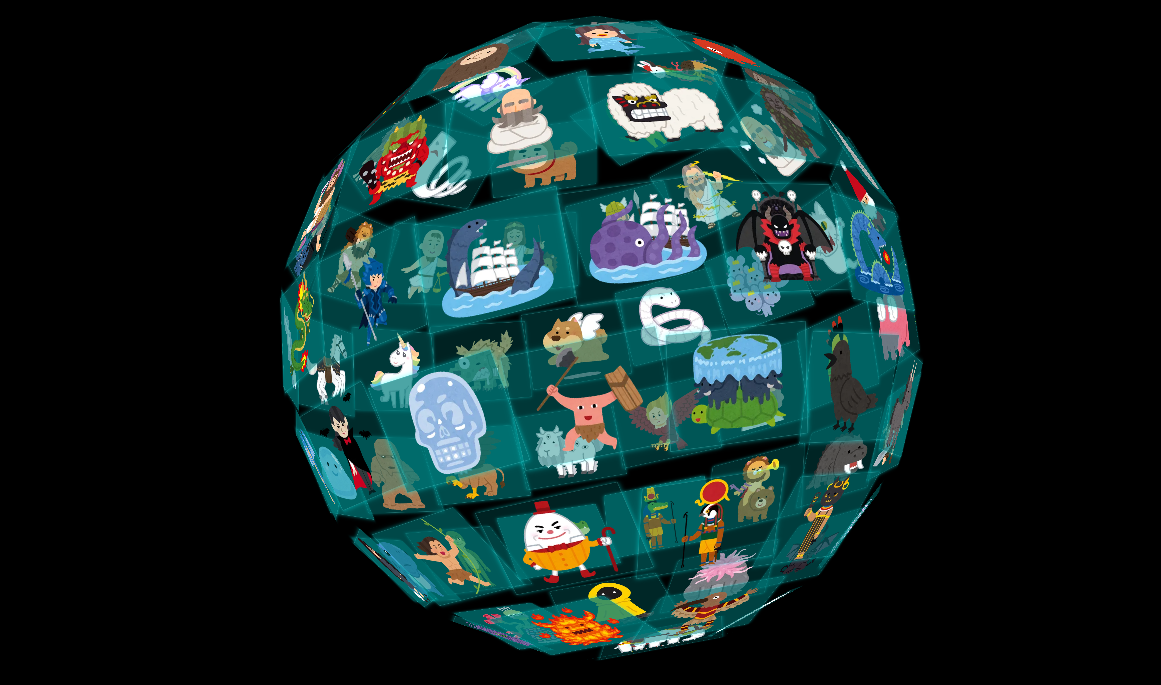
以下のようにコードを変更すると球体の径が変わるので画像が重ならないようになります。
-                   object.position.setFromSphericalCoords( 800, phi, theta );
+                   object.position.setFromSphericalCoords( 900, phi, theta );
3.3.4. 螺旋状配置
螺旋状配置は初期状態だと重なりがかなりある状態です。
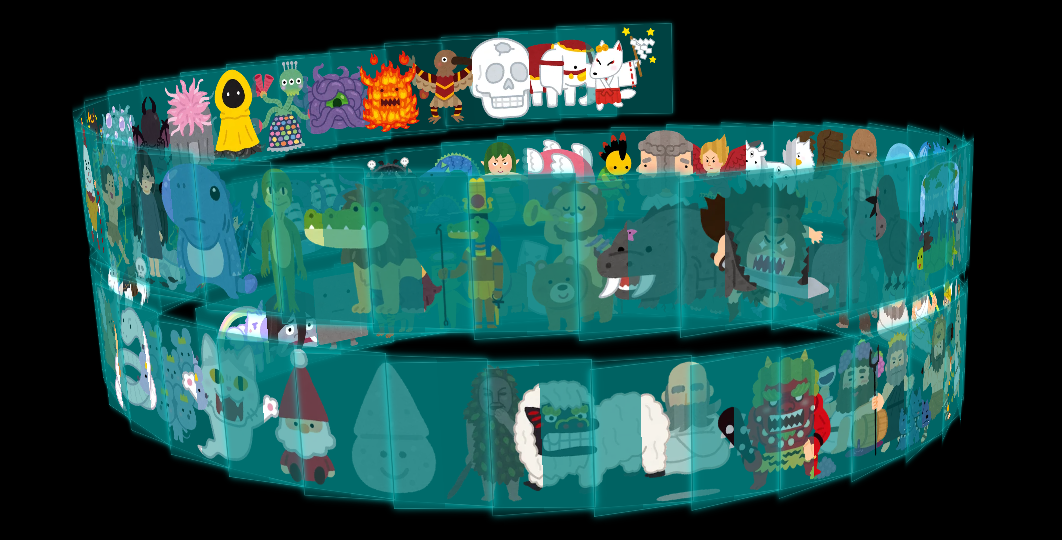
以下のように数値を変更すると、重なりが解消されます。
				// helix

				for ( let i = 0, l = objects.length; i < l; i ++ ) {

-                   const theta = i * 0.175 + Math.PI;
+                   const theta = i * 0.28 + Math.PI;
-                   const y = - ( i * 8 ) + 450;
+                   const y = - ( i * 15 ) + 600;

					const object = new THREE.Object3D();

-                   object.position.setFromCylindricalCoords( 900, theta, y );
+                   object.position.setFromCylindricalCoords( 1200, theta, y );
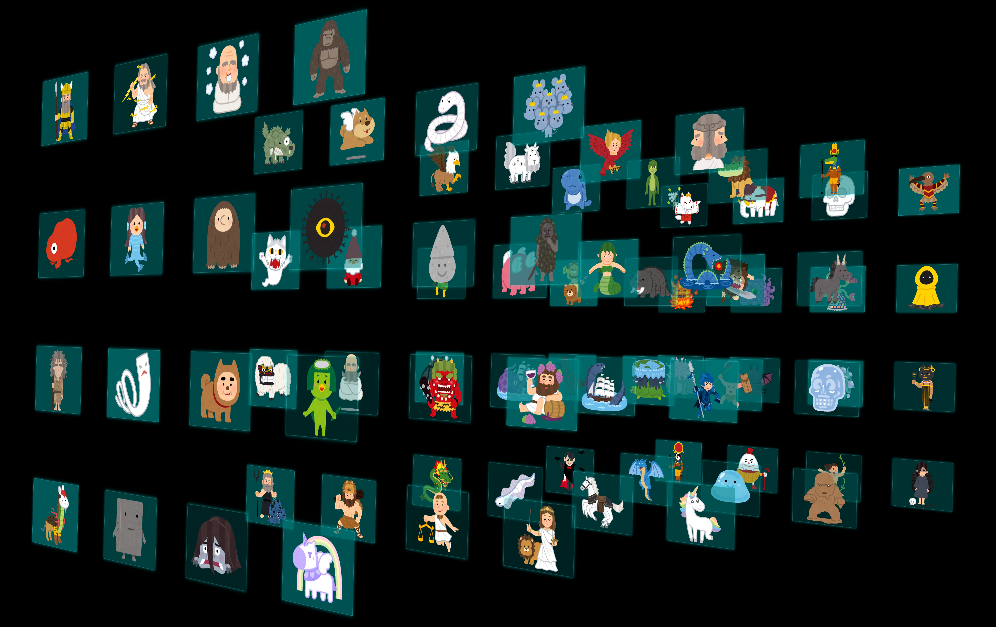
3.3.5. グリッド配置
初期の数値でも破綻した状態にはなりませんでした。
x, y, zで配置する数5x5から4x4を変えるには以下のようにi % 5をi % 4、( i / 5 ) % 5を( i / 4 ) % 4、i / 25をi / 16にします。
また* 400を* 500などにすると画像の間隔が広がります。
				// grid

				for ( let i = 0; i < objects.length; i ++ ) {

					const object = new THREE.Object3D();

-                   object.position.x = ( ( i % 5 ) * 400 ) - 800;
+                   object.position.x = ( ( i % 4 ) * 500 ) - 800;
-                   object.position.y = ( - ( Math.floor( i / 5 ) % 5 ) * 400 ) + 800;
+                   object.position.y = ( - ( Math.floor( i / 4 ) % 4 ) * 500 ) + 800;
-                   object.position.z = ( Math.floor( i / 25 ) ) * 1000 - 2000;
+                   object.position.z = ( Math.floor( i / 16 ) ) * 1000 - 2000;
4. リンクの設定
以上の変更で、くるくる画像が回せてカッコいい!!となりましたが、画像を見るには小さいですし、可能ならクリックして大きい画像を見たいなーとなりました。
そのため各画像にリンクを貼って大きい画像を開けるようにしたかったのですが、document.createElement('a');でリンクの要素をdivに内包させてもリンク先に飛ぶことができませんでした。
なにか方法はないかと色々とぐぐっても出てこず、困っていたらthree.jsのExamplesにYoutubeを表示するサンプルがあり、リンクを設定できていたのでこれを参考にしました。
このサンプルでは以下のようにiframeを用いてYouTubeを埋め込み、YouTubeのページ内のリンクが有効になっていました。
				const div = document.createElement( 'div' );
				div.style.width = '480px';
				div.style.height = '360px';
				div.style.backgroundColor = '#000';

				const iframe = document.createElement( 'iframe' );
				iframe.style.width = '480px';
				iframe.style.height = '360px';
				iframe.style.border = '0px';
				iframe.src = [ 'https://www.youtube.com/embed/', id, '?rel=0' ].join( '' );
				div.appendChild( iframe );
というわけで、iframe内にリンクを貼ったhtmlを表示させればリンクで飛べると考えられたので、コードを以下のように変更しました。
					const element = document.createElement( 'div' );
					element.className = 'element';

					const iframe = document.createElement( 'iframe' );
					iframe.style.width = '320px';
					iframe.style.height = '240px';
					iframe.style.border = '0px';
					iframe.scrolling = 'no';
					iframe.style.padding = '0px';
					iframe.src = './thumb.html?img=' + table[i];
					element.appendChild( iframe );
そしてiframeではthumb.htmlを3D表示させる状態になりますが、thumb.htmlは?img=ファイル名で動的に表示する画像を変更できるページとして、HTMLを大量に用意しなくてよいようにしました。
<html>
	<head>
		<title>thumbnail</title>
		<meta charset="utf-8">
        <link rel="stylesheet" type="text/css" href="https://unpkg.com/ress/dist/ress.min.css">
    </head>

    <body>
        <div id="element"></div>
        <script language="javascript" type="text/javascript">
            function getParam(name, url) {
                if (!url) url = window.location.href;
                name = name.replace(/[\[\]]/g, "\\$&");
                var regex = new RegExp("[?&]" + name + "(=([^&#]*)|&|#|$)"),
                    results = regex.exec(url);
                if (!results) return null;
                if (!results[2]) return '';
                return decodeURIComponent(results[2].replace(/\+/g, " "));
            }

            const element = document.getElementById("element");
            element.style.textAlign = "center";

            const imagelink = document.createElement( 'a' );
            imagelink.href = '#';
            element.appendChild( imagelink );

            const image = document.createElement("img");
            image.src = './thumb/' + getParam('img') + '.webp';
            imagelink.appendChild( image );

        </script>
    </body>
</html>
URLのパラメータ取得の関数は以下のサイトを参考にしました。
またthumb.htmlはそのままだと余計なpaddingのようなものが入るので、ress.cssを用いてスタイリングをリセットしています。
5. ソース
今回作成したソースは以下のとおりです。
HTMLソース
<!DOCTYPE html>
<html>
	<head>
		<title>three.js css3d - periodic table</title>
		<meta charset="utf-8">
		<meta name="viewport" content="width=device-width, user-scalable=no, minimum-scale=1.0, maximum-scale=1.0">
		<link type="text/css" rel="stylesheet" href="main.css">
		<style>
			a {
				color: #8ff;
			}

			#menu {
				position: absolute;
				bottom: 20px;
				width: 100%;
				text-align: center;
			}

			.element {
				width: 320px;
				height: 240px;
				box-shadow: 0px 0px 12px rgba(0,255,255,0.5);
				border: 1px solid rgba(127,255,255,0.25);
				font-family: Helvetica, sans-serif;
				text-align: center;
				line-height: normal;
				cursor: default;
			}

			.element:hover {
				box-shadow: 0px 0px 12px rgba(0,255,255,0.75);
				border: 1px solid rgba(127,255,255,0.75);
			}

			button {
				color: rgba(127,255,255,0.75);
				background: transparent;
				outline: 1px solid rgba(127,255,255,0.75);
				border: 0px;
				padding: 5px 10px;
				cursor: pointer;
			}

			button:hover {
				background-color: rgba(0,255,255,0.5);
			}

			button:active {
				color: #000000;
				background-color: rgba(0,255,255,0.75);
			}
		</style>
	</head>
	<body>

		<div id="info"><a href="https://threejs.org" target="_blank" rel="noopener">three.js</a> css3d - periodic table.</div>
		<div id="container"></div>
		<div id="menu">
			<button id="table">TABLE</button>
			<button id="sphere">SPHERE</button>
			<button id="helix">HELIX</button>
			<button id="grid">GRID</button>
		</div>

		<!-- Import maps polyfill -->
		<!-- Remove this when import maps will be widely supported -->
		<script async src="https://unpkg.com/es-module-shims@1.6.3/dist/es-module-shims.js"></script>

		<script type="importmap">
			{
				"imports": {
					"three": "../three/three.module.js",
					"three/addons/": "./jsm/"
				}
			}
		</script>

		<script type="module">

			import * as THREE from 'three';

			import { TWEEN } from 'three/addons/libs/tween.module.min.js';
			import { TrackballControls } from 'three/addons/controls/TrackballControls.js';
			import { CSS3DRenderer, CSS3DObject } from 'three/addons/renderers/CSS3DRenderer.js';

			const table = [
				'animal_character_kitsune_miko', 1, 1,
				'animal_zou_white_hakuzou', 1, 2,
				'body_trepanation', 1, 3,
				'character_choujin_tangatamanu', 1, 4,
				'character_cthulhu_cthugha', 1, 5,
				'character_cthulhu_cyaegha_green', 1, 6,
				'character_cthulhu_great_race_of_yith', 1, 7,
				'character_cthulhu_hastur', 1, 8,
				'character_cthulhu_moon_beast', 1, 9,
				'character_cthulhu_night_gaunts', 1, 10,
				'character_cthulhu_yog_sothoth', 2, 1,
				'character_egypt_bastet', 2, 2,
				'character_egypt_ra', 2, 3,
				'character_humpty_dumpty', 2, 4,
				'character_tarzan', 2, 5,
				'character_tenshi_angel_datenshi', 2, 6,
				'cthulhu_deep_ones', 2, 7,
				'dinosaur_dinosauroid_kyouryu_ningen', 2, 8,
				'egypt_ammut_ammit', 2, 9,
				'egypt_sebek', 2, 10,
				'fantasy_akuma_purson', 3, 1,
				'fantasy_behemoth', 3, 2,
				'fantasy_berserker', 3, 3,
				'fantasy_bicorn_unicorn', 3, 4,
				'fantasy_bird_yatagarasu', 3, 5,
				'fantasy_chikyu_heimen', 3, 6,
				'fantasy_china_keiten', 3, 7,
				'fantasy_crystal_skull', 3, 8,
				'fantasy_dracula_woman', 3, 9,
				'fantasy_dragon_wyvern', 3, 10,
				'fantasy_game_character_slime', 4, 1,
				'fantasy_golem', 4, 2,
				'fantasy_griffon', 4, 3,
				'fantasy_hakutaku', 4, 4,
				'fantasy_harpy', 4, 5,
				'fantasy_janus', 4, 6,
				'fantasy_kokopelli', 4, 7,
				'fantasy_konton', 4, 8,
				'fantasy_lamia', 4, 9,
				'fantasy_leviathan', 4, 10,
				'fantasy_maou_devil', 5, 1,
				'fantasy_ocean_kraken', 5, 2,
				'fantasy_ocean_sea_serpent', 5, 3,
				'fantasy_ryuukishi', 5, 4,
				'fantasy_ryu_doragon_asia', 5, 5,
				'fantasy_skyfish', 5, 6,
				'fantasy_sleipnir', 5, 7,
				'fantasy_unicorn_rainbow', 5, 8,
				'fantasy_zombie_dog', 5, 9,
				'fantsy_haneinu', 5, 10,
				'hebi_shiro', 6, 1,
				'monogatari_kurumiwariningyou_nezumi', 6, 2,
				'obake_bakeneko', 6, 3,
				'ofuro_sauna_tonttu_character', 6, 4,
				'ofuro_sauna_tonttu_stone', 6, 5,
				'okinawa_pa-ntou', 6, 6,
				'okinawa_shishimai', 6, 7,
				'sennin_kuchu_fuyuu', 6, 8,
				'setsubun_oni_kowai', 6, 9,
				'shinwa_bacchus', 6, 10,
				'shinwa_hades', 7, 1,
				'shinwa_hercules', 7, 2,
				'shinwa_kairos_kouun_kamisama', 7, 3,
				'shinwa_kirke_circe', 7, 4,
				'shinwa_ordin', 7, 5,
				'shinwa_zeus', 7, 6,
				'syokuji_sennin_kasumi', 7, 7,
				'uma_bigfoot', 7, 8,
				'youkai_akaheru', 7, 9,
				'youkai_amabie_mimi', 7, 10,
				'youkai_amabiko', 8, 1,
				'youkai_backbeard', 8, 2,
				'youkai_binbougami', 8, 3,
				'youkai_ittanmomen', 8, 4,
				'youkai_jinmenken', 8, 5,
				'youkai_kappa_girl', 8, 6,
				'youkai_kotobuki', 8, 7,
				'youkai_nurikabe', 8, 8,
				'youkai_otoroshi', 8, 9,
				'yumekawa_animal_unicorn', 8, 10,
			];

			let camera, scene, renderer;
			let controls;

			const objects = [];
			const targets = { table: [], sphere: [], helix: [], grid: [] };

			init();
			animate();

			function init() {

				camera = new THREE.PerspectiveCamera( 40, window.innerWidth / window.innerHeight, 1, 10000 );
				camera.position.z = 3000;

				scene = new THREE.Scene();

				// table

				for ( let i = 0; i < table.length; i += 3 ) {

					const element = document.createElement( 'div' );
					element.className = 'element';
					element.style.backgroundColor = 'rgba(0,127,127,' + ( Math.random() * 0.5 + 0.25 ) + ')';

					// const image = document.createElement( 'img' );
					// image.src = './thumb/' + table[i] + '.webp';
					// element.appendChild( image );

					const iframe = document.createElement( 'iframe' );
					iframe.style.width = '320px';
					iframe.style.height = '240px';
					iframe.style.border = '0px';
					iframe.scrolling = 'no';
					iframe.style.padding = '0px';
					iframe.src = './thumb.html?img=' + table[i];
					element.appendChild( iframe );

					const objectCSS = new CSS3DObject( element );
					objectCSS.position.x = Math.random() * 4000 - 2000;
					objectCSS.position.y = Math.random() * 4000 - 2000;
					objectCSS.position.z = Math.random() * 4000 - 2000;
					scene.add( objectCSS );

					objects.push( objectCSS );

					//

					const object = new THREE.Object3D();
					object.position.x = ( table[ i + 1 ] * 360 ) - 1600;
					object.position.y = - ( table[ i + 2 ] * 280 ) + 990;

					targets.table.push( object );

				}

				// sphere

				const vector = new THREE.Vector3();

				for ( let i = 0, l = objects.length; i < l; i ++ ) {

					const phi = Math.acos( - 1 + ( 2 * i ) / l );
					const theta = Math.sqrt( l * Math.PI ) * phi;

					const object = new THREE.Object3D();

					object.position.setFromSphericalCoords( 900, phi, theta );

					vector.copy( object.position ).multiplyScalar( 2 );

					object.lookAt( vector );

					targets.sphere.push( object );

				}

				// helix

				for ( let i = 0, l = objects.length; i < l; i ++ ) {

					const theta = i * 0.28 + Math.PI;
					const y = - ( i * 15 ) + 600;

					const object = new THREE.Object3D();

					object.position.setFromCylindricalCoords( 1200, theta, y );

					vector.x = object.position.x * 2;
					vector.y = object.position.y;
					vector.z = object.position.z * 2;

					object.lookAt( vector );

					targets.helix.push( object );

				}

				// grid

				for ( let i = 0; i < objects.length; i ++ ) {

					const object = new THREE.Object3D();

					object.position.x = ( ( i % 4 ) * 500 ) - 800;
					object.position.y = ( - ( Math.floor( i / 4 ) % 4 ) * 500 ) + 800;
					object.position.z = ( Math.floor( i / 16 ) ) * 1000 - 2000;

					targets.grid.push( object );

				}

				//

				renderer = new CSS3DRenderer();
				renderer.setSize( window.innerWidth, window.innerHeight );
				document.getElementById( 'container' ).appendChild( renderer.domElement );

				//

				controls = new TrackballControls( camera, renderer.domElement );
				controls.minDistance = 500;
				controls.maxDistance = 6000;
				controls.addEventListener( 'change', render );

				const buttonTable = document.getElementById( 'table' );
				buttonTable.addEventListener( 'click', function () {

					transform( targets.table, 2000 );

				} );

				const buttonSphere = document.getElementById( 'sphere' );
				buttonSphere.addEventListener( 'click', function () {

					transform( targets.sphere, 2000 );

				} );

				const buttonHelix = document.getElementById( 'helix' );
				buttonHelix.addEventListener( 'click', function () {

					transform( targets.helix, 2000 );

				} );

				const buttonGrid = document.getElementById( 'grid' );
				buttonGrid.addEventListener( 'click', function () {

					transform( targets.grid, 2000 );

				} );

				transform( targets.table, 2000 );

				//

				window.addEventListener( 'resize', onWindowResize );

			}

			function transform( targets, duration ) {

				TWEEN.removeAll();

				for ( let i = 0; i < objects.length; i ++ ) {

					const object = objects[ i ];
					const target = targets[ i ];

					new TWEEN.Tween( object.position )
						.to( { x: target.position.x, y: target.position.y, z: target.position.z }, Math.random() * duration + duration )
						.easing( TWEEN.Easing.Exponential.InOut )
						.start();

					new TWEEN.Tween( object.rotation )
						.to( { x: target.rotation.x, y: target.rotation.y, z: target.rotation.z }, Math.random() * duration + duration )
						.easing( TWEEN.Easing.Exponential.InOut )
						.start();

				}

				new TWEEN.Tween( this )
					.to( {}, duration * 2 )
					.onUpdate( render )
					.start();

			}

			function onWindowResize() {

				camera.aspect = window.innerWidth / window.innerHeight;
				camera.updateProjectionMatrix();

				renderer.setSize( window.innerWidth, window.innerHeight );

				render();

			}

			function animate() {

				requestAnimationFrame( animate );

				TWEEN.update();

				controls.update();

			}

			function render() {

				renderer.render( scene, camera );

			}

		</script>
	</body>
</html>
6. さいごに
最初にcss3d periodic tableのソースを見たときは、15年前で止まっているHTML+CSSの知識でthree.jsを読み解けるのか...と思いましたが、最近はPythonをいじっていたおかげで、思ったよりスムーズに目的の変更ができました。
(three.jsの本来の使い方などは全く無視している状態ですが)
web系の開発環境の進化は想像以上に進んでいて、フレームワークとか全くもってちんぷんかんぷんですが、やれる範囲で遊んでみようかなと思います。
7. 参考