こちらのノートブックを実際に動かします。
ノートブックのインポート
元の手順にあるように、https://github.com/facebookresearch/segment-anything-2 からGitフォルダを作成し、このノートブックをGitフォルダのsegment-anything-2/notebooksにインポートします。
このような構成になります。
クラスターの作成
以下のスペックで動作しました。
ノートブックのウォークスルー
DatabricksでのSAM2
このノートブックを正常に実行するには、まずSAM2 Github (https://github.com/facebookresearch/segment-anything-2) を設定した新しいDatabricks Gitフォルダを作成し、このノートブックを作成したGitフォルダsegment-anything-2/notebooks内のノートブックフォルダにインポートする必要があります。このノートブックのパスは、リポジトリ内のノートブックの正しい位置を前提としています。
このノートブックをGPU対応クラスターにアタッチして実行できます。
%sh pip install ../../segment-anything-2
sam2._C拡張機能のビルドをトリガー
%sh cd ../ && python setup.py build_ext --inplace
モデルチェックポイントのダウンロード
これにより、すべてのサイズがダウンロードされます。後で初期化時にどのチェックポイントと構成を使用するかを選択できます。
%sh cd ../checkpoints && ./download_ckpts.sh
サイズが大きいチェックポイントはダウンロードに失敗しました。
Cannot write to ‘sam2.1_hiera_large.pt’ (File too large).
Failed to download checkpoint from https://dl.fbaipublicfiles.com/segment_anything_2/092824/sam2.1_hiera_large.pt
%sh ls ../checkpoints
download_ckpts.sh
sam2.1_hiera_base_plus.pt
sam2.1_hiera_small.pt
sam2.1_hiera_tiny.pt
import os
import torch
import numpy as np
import matplotlib.pyplot as plt
from PIL import Image

torch.autocast(device_type="cuda", dtype=torch.bfloat16).__enter__()

if torch.cuda.get_device_properties(0).major >= 8:
    torch.backends.cuda.matmul.allow_tf32 = True
    torch.backends.cudnn.allow_tf32 = True
以下のパスはオリジナルのものではエラーになったので変更しています。
from sam2.build_sam import build_sam2_video_predictor
checkpoint = "../checkpoints/sam2.1_hiera_base_plus.pt" # バージョン2.1になっています
model_cfg = "../sam2/configs/sam2.1/sam2.1_hiera_b+.yaml" # シンボリックリンクはGitフォルダに取り込まれないので実際のパスを指定
predictor = build_sam2_video_predictor(model_cfg, checkpoint)
可視化のためのpyplotベースのヘルパー
def show_mask(mask, ax, obj_id=None, random_color=False):
    if random_color:
        color = np.concatenate([np.random.random(3), np.array([0.6])], axis=0)
    else:
        cmap = plt.get_cmap("tab10")
        cmap_idx = 0 if obj_id is None else obj_id
        color = np.array([*cmap(cmap_idx)[:3], 0.6])
    h, w = mask.shape[-2:]
    mask_image = mask.reshape(h, w, 1) * color.reshape(1, 1, -1)
    ax.imshow(mask_image)


def show_points(coords, labels, ax, marker_size=200):
    pos_points = coords[labels==1]
    neg_points = coords[labels==0]
    ax.scatter(pos_points[:, 0], pos_points[:, 1], color='green', marker='*', s=marker_size, edgecolor='white', linewidth=1.25)
    ax.scatter(neg_points[:, 0], neg_points[:, 1], color='red', marker='*', s=marker_size, edgecolor='white', linewidth=1.25)
YouTubeからキーノートをダウンロード
注意
- YouTubeがエラーを出す場合があり、その場合はビデオを直接ダウンロードしてDatabricks環境にアップロードする必要があります。
- 私の場合はOAuthでログインしました。
%pip install yt-dlp
%sh yt-dlp -o ./videos/keynote/keynote.mp4 -f "bestvideo[height<=480]" --username=oauth --password="" "https://www.youtube.com/watch?v=-6dt7eJ3cMs"
https://www.google.com/device にアクセスして、以下で表示される**[コード]**を入力して認証します。
[youtube] oauth: Initializing authorization flow
[youtube] oauth: To give yt-dlp access to your account, go to  https://www.google.com/device  and enter code  [コード]
[youtube] Extracting URL: https://www.youtube.com/watch?v=-6dt7eJ3cMs
[youtube] -6dt7eJ3cMs: Downloading webpage
[youtube] -6dt7eJ3cMs: Downloading ios player API JSON
[youtube] -6dt7eJ3cMs: Downloading mweb player API JSON
[youtube] -6dt7eJ3cMs: Downloading player a62d836d
[youtube] -6dt7eJ3cMs: Downloading m3u8 information
[info] -6dt7eJ3cMs: Downloading 1 format(s): 244
[download] Destination: ./videos/keynote/keynote.mp4
[download] 100% of   43.04MiB in 00:00:03 at 12.91MiB/s
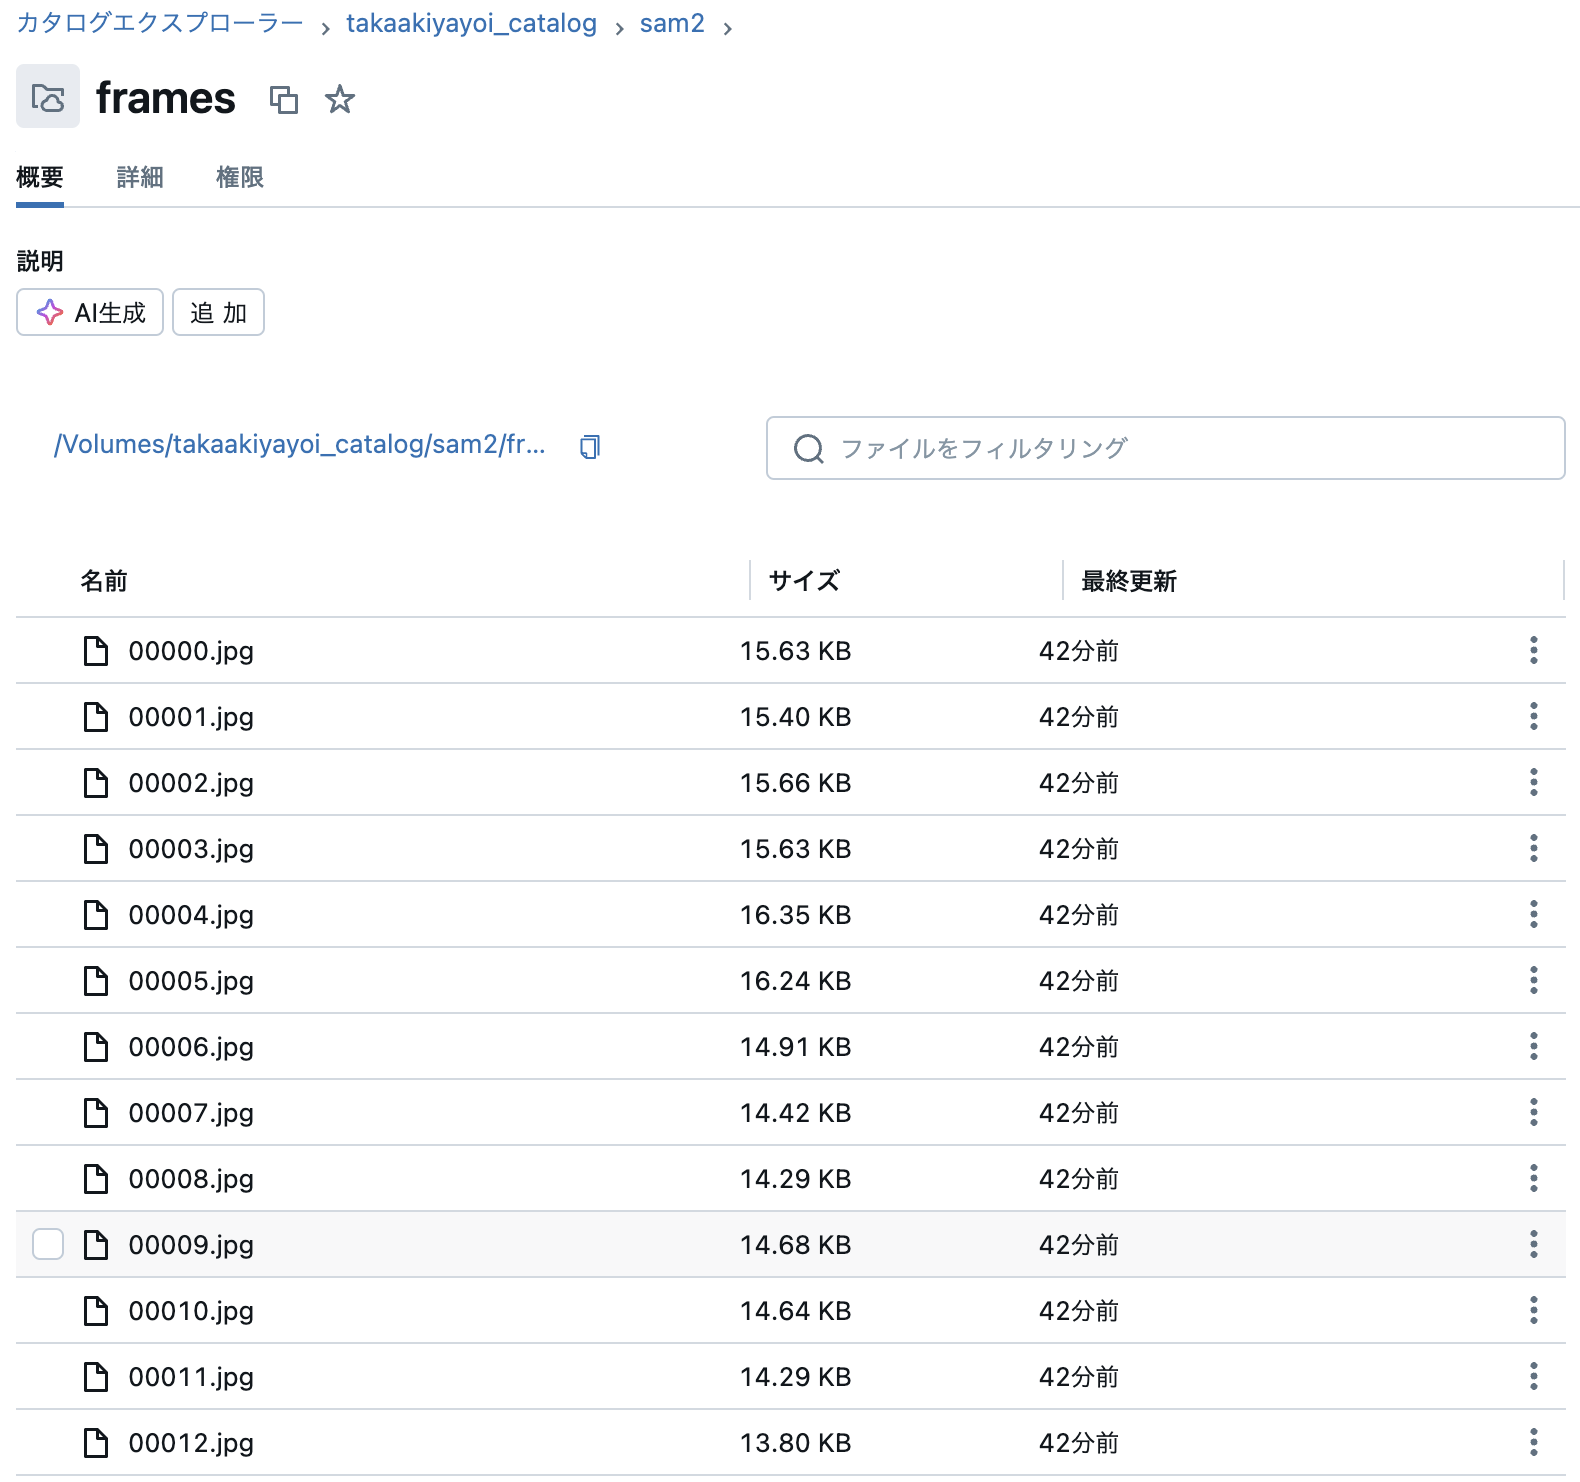
以下を実行する前に、保存先のボリュームがあることを確認します。
%sh ffmpeg -ss 00:00:15 -i ./videos/keynote/keynote.mp4 -t 00:00:10 -q:v 2 -start_number 0 /Volumes/takaakiyayoi_catalog/sam2/frames/'%05d.jpg'
# `video_dir` はファイル名が `<frame_index>.jpg` のJPEGフレームを格納しているディレクトリ
video_dir = "/Volumes/takaakiyayoi_catalog/sam2/frames"

# このディレクトリ内のすべてのJPEGフレーム名をスキャン
frame_names = [
    p for p in os.listdir(video_dir)
    if os.path.splitext(p)[-1] in [".jpg", ".jpeg", ".JPG", ".JPEG"]
]
frame_names.sort(key=lambda p: int(os.path.splitext(p)[0]))

# 最初のビデオフレームを確認
frame_idx = 0
plt.figure(figsize=(12, 8))
plt.title(f"frame {frame_idx}")
plt.imshow(Image.open(os.path.join(video_dir, frame_names[frame_idx])))
inference_state = predictor.init_state(video_path=video_dir)
frame loading (JPEG): 100%|██████████| 300/300 [00:20<00:00, 14.51it/s]
ann_frame_idx = 0  # インタラクションするフレームのインデックス
ann_obj_id = 1  # インタラクションする各オブジェクトに一意のIDを付与(任意の整数で可)

# 開始するために (x, y) = (210, 350) に正のクリックを追加
points = np.array([[350, 100]], dtype=np.float32)
# ラベルについて、`1` は正のクリック、`0` は負のクリックを意味する
labels = np.array([1], np.int32)

_, out_obj_ids, out_mask_logits = predictor.add_new_points(
    inference_state=inference_state,
    frame_idx=ann_frame_idx,
    obj_id=ann_obj_id,
    points=points,
    labels=labels,
)

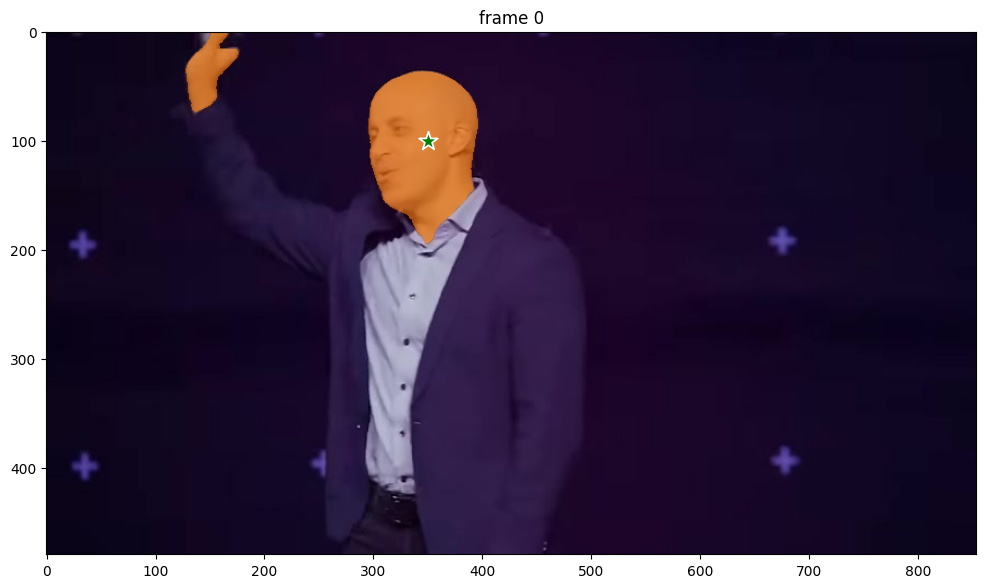
# 現在の(インタラクションした)フレームに結果を表示
plt.figure(figsize=(12, 8))
plt.title(f"frame {ann_frame_idx}")
plt.imshow(Image.open(os.path.join(video_dir, frame_names[ann_frame_idx])))
show_points(points, labels, plt.gca())
show_mask((out_mask_logits[0] > 0.0).cpu().numpy(), plt.gca(), obj_id=out_obj_ids[0])
追従する対象である頭部に星マークがついています。
# ビデオ全体にわたって伝播を実行し、結果をディクショナリーに収集
video_segments = {}  # video_segmentsにはフレームごとのセグメンテーション結果が含まれる
for out_frame_idx, out_obj_ids, out_mask_logits in predictor.propagate_in_video(inference_state):
    video_segments[out_frame_idx] = {
        out_obj_id: (out_mask_logits[i] > 0.0).cpu().numpy()
        for i, out_obj_id in enumerate(out_obj_ids)
    }
# 数フレームごとにセグメンテーション結果を表示
vis_frame_stride = 15
plt.close("all")
for out_frame_idx in range(0, len(frame_names), vis_frame_stride):
    plt.figure(figsize=(6, 4))
    plt.title(f"frame {out_frame_idx}")
    plt.imshow(Image.open(os.path.join(video_dir, frame_names[out_frame_idx])))
    for out_obj_id, out_mask in video_segments[out_frame_idx].items():
        show_mask(out_mask, plt.gca(), obj_id=out_obj_id)
それぞれのフレームで頭部が追跡できていることがわかります。
IPythonウィジェットベースのスライダー
import os
from PIL import Image
import matplotlib.pyplot as plt
import ipywidgets as widgets
from IPython.display import display, clear_output

vis_frame_stride = 15

# 画像を表示するための出力ウィジェットを作成
output = widgets.Output()

# セグメンテーション結果を含むフレームをレンダリングする関数
def render_frame(out_frame_idx):
    with output:
        clear_output(wait=True)  # コントロールではなく、画像の出力のみをクリア
        plt.figure(figsize=(6, 4))
        plt.title(f"frame {out_frame_idx}")
        plt.imshow(Image.open(os.path.join(video_dir, frame_names[out_frame_idx])))
        for out_obj_id, out_mask in video_segments[out_frame_idx].items():
            show_mask(out_mask, plt.gca(), obj_id=out_obj_id)
        plt.axis('off')
        plt.show()

# スライダーとボタンのコールバック関数
def update_frame(change):
    render_frame(change['new'])  # スライダーの値が変わったときにrender_frameを呼び出す

# 初期フレームの設定
out_frame_idx = 0

# フレームを選択するためのスライダーを作成
frame_slider = widgets.IntSlider(
    value=0, min=0, max=len(frame_names)-1, step=vis_frame_stride,
    description="Frame", continuous_update=False
)
frame_slider.observe(update_frame, names='value')

# 前へボタンと次へボタンの作成
def on_prev_clicked(b):
    if frame_slider.value > 0:
        frame_slider.value -= vis_frame_stride

def on_next_clicked(b):
    if frame_slider.value < len(frame_names) - 1:
        frame_slider.value += vis_frame_stride

prev_button = widgets.Button(description="Previous")
next_button = widgets.Button(description="Next")

prev_button.on_click(on_prev_clicked)
next_button.on_click(on_next_clicked)

# コントロールと出力ウィジェットを表示
controls = widgets.HBox([prev_button, frame_slider, next_button])
display(controls, output)

# 最初のフレームの初期レンダリング
render_frame(out_frame_idx)
セグメンテーションの結果をブラウズできるウィジェットがノートブックに表示されます。
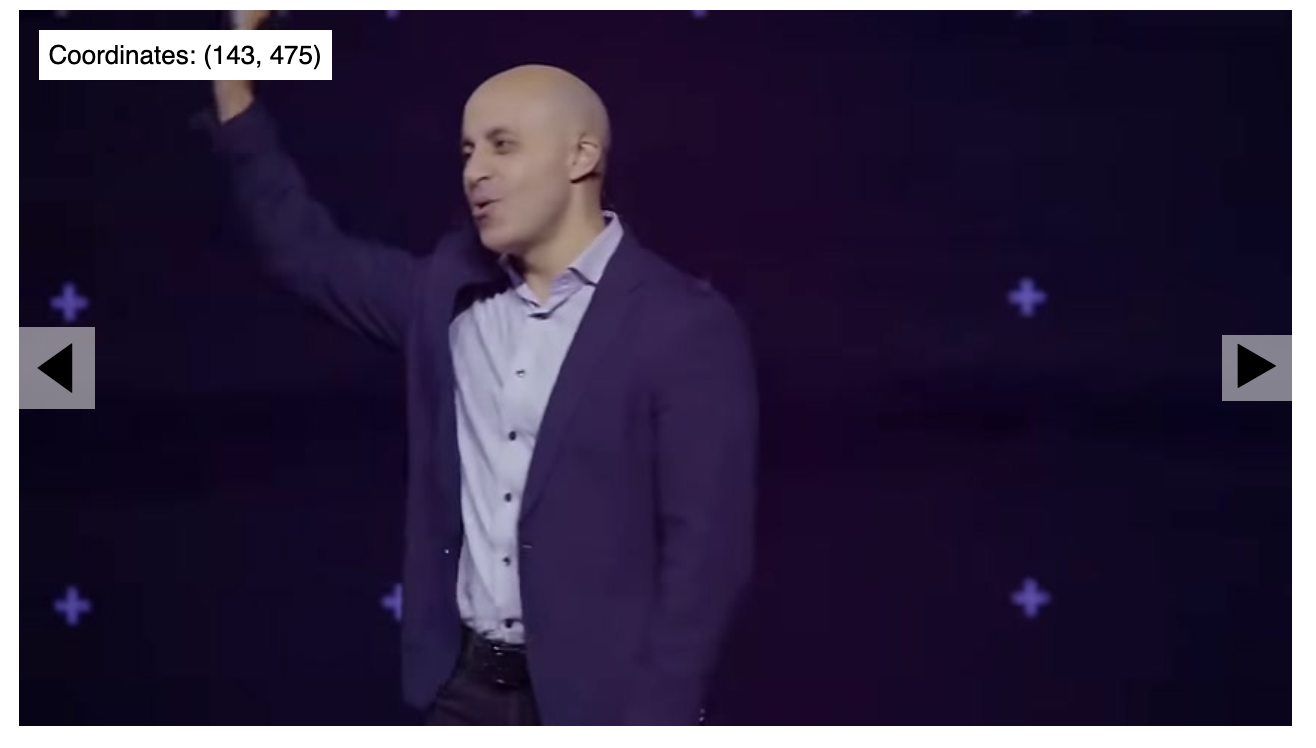
DatabricksのdisplayHTMLを使用してカスタム画像スライダーを作成する
displayHTML関数を用いることで、JavaScriptで動作するウィジェットをノートブックに表示することができます。
import os
import base64
def encode_image_to_base64(file_path):
with open(file_path, "rb") as image_file:
return base64.b64encode(image_file.read()).decode('utf-8')
def process_images(directory):
images = sorted([f for f in os.listdir(directory) if f.endswith('.jpg')])
imgs = ""
# 最初のフレームから10枚ごとに画像を処理
for i in range(0, len(images), 10):
image_path = os.path.join(directory, images[i])
imgs += f'"data:image/jpeg;base64,{encode_image_to_base64(image_path)}",'
return imgs
imgs = process_images("/Volumes/takaakiyayoi_catalog/sam2/frames/")
html = f'''
<!DOCTYPE html>
<html lang="en">
<head>
<meta charset="UTF-8">
<title>Image Slider with Coordinates</title>
<style>
#slider-container {{
width: 50%;
margin: auto;
text-align: center;
position: relative;
}}
#image {{
width: 100%;
display: block;
}}
.nav-button {{
position: absolute;
top: 50%;
transform: translateY(-50%);
background-color: rgba(255, 255, 255, 0.5);
border: none;
font-size: 2em;
cursor: pointer;
}}
#prev {{
left: 0;
}}
#next {{
right: 0;
}}
#coords {{
position: absolute;
top: 10px;
left: 10px;
background: white;
padding: 5px;
}}
</style>
</head>
<body>
<div id="slider-container">
<button id="prev" class="nav-button">◀</button>
<img id="image" src="" alt="Image Slider">
<button id="next" class="nav-button">▶</button>
<div id="coords">Coordinates: (x, y)</div>
</div>
<script>
let images = [
{imgs}
];
let currentIndex = 0;
let imgElement = document.getElementById('image');
let prevButton = document.getElementById('prev');
let nextButton = document.getElementById('next');
let coords = document.getElementById('coords');
function showImage(index) {{
imgElement.src = images[index];
}}
prevButton.addEventListener('click', () => {{
currentIndex = (currentIndex > 0) ? currentIndex - 1 : images.length - 1;
showImage(currentIndex);
}});
nextButton.addEventListener('click', () => {{
currentIndex = (currentIndex < images.length - 1) ? currentIndex + 1 : 0;
showImage(currentIndex);
}});
imgElement.addEventListener('mousemove', (e) => {{
let rect = e.target.getBoundingClientRect();
let scaleX = imgElement.naturalWidth / rect.width;
let scaleY = imgElement.naturalHeight / rect.height;
let x = (e.clientX - rect.left) * scaleX;
let y = (e.clientY - rect.top) * scaleY;
coords.textContent = `Coordinates: (${{Math.round(x)}}, ${{Math.round(y)}})`;
}});
// 最初の画像でスライダーを初期化
showImage(currentIndex);
</script>
</body>
</html>
'''
displayHTML(html)


