こちらのブログで紹介されている内容をウォークスルーします。猫の画像を見て手が止まりませんでした。
ブログの内容そのままでは動かないので、適宜修正、補足しています。
ここで紹介されているのは、ベースとなる画像に対してプロンプトを与えることで、それに応じて画像を加工できるアプリを作るというものです。
HuggingFaceモデルのモデルサービングエンドへのデプロイ
この章では、HuggingFaceモデルをDatabricksのMosaic AIモデルサービングにデプロイすることが主な作業となります。これによって、アプリからモデルにアクセスできるようになります。
ノートブックを作成して、サーバレスコンピュートにアタッチします。
%pip install diffusers
%pip install -U mlflow databricks-sdk
%restart_python
サンプル画像をボリュームにロード
import diffusers
from diffusers.utils import load_image, make_image_grid
from databricks.sdk import WorkspaceClient
from io import BytesIO
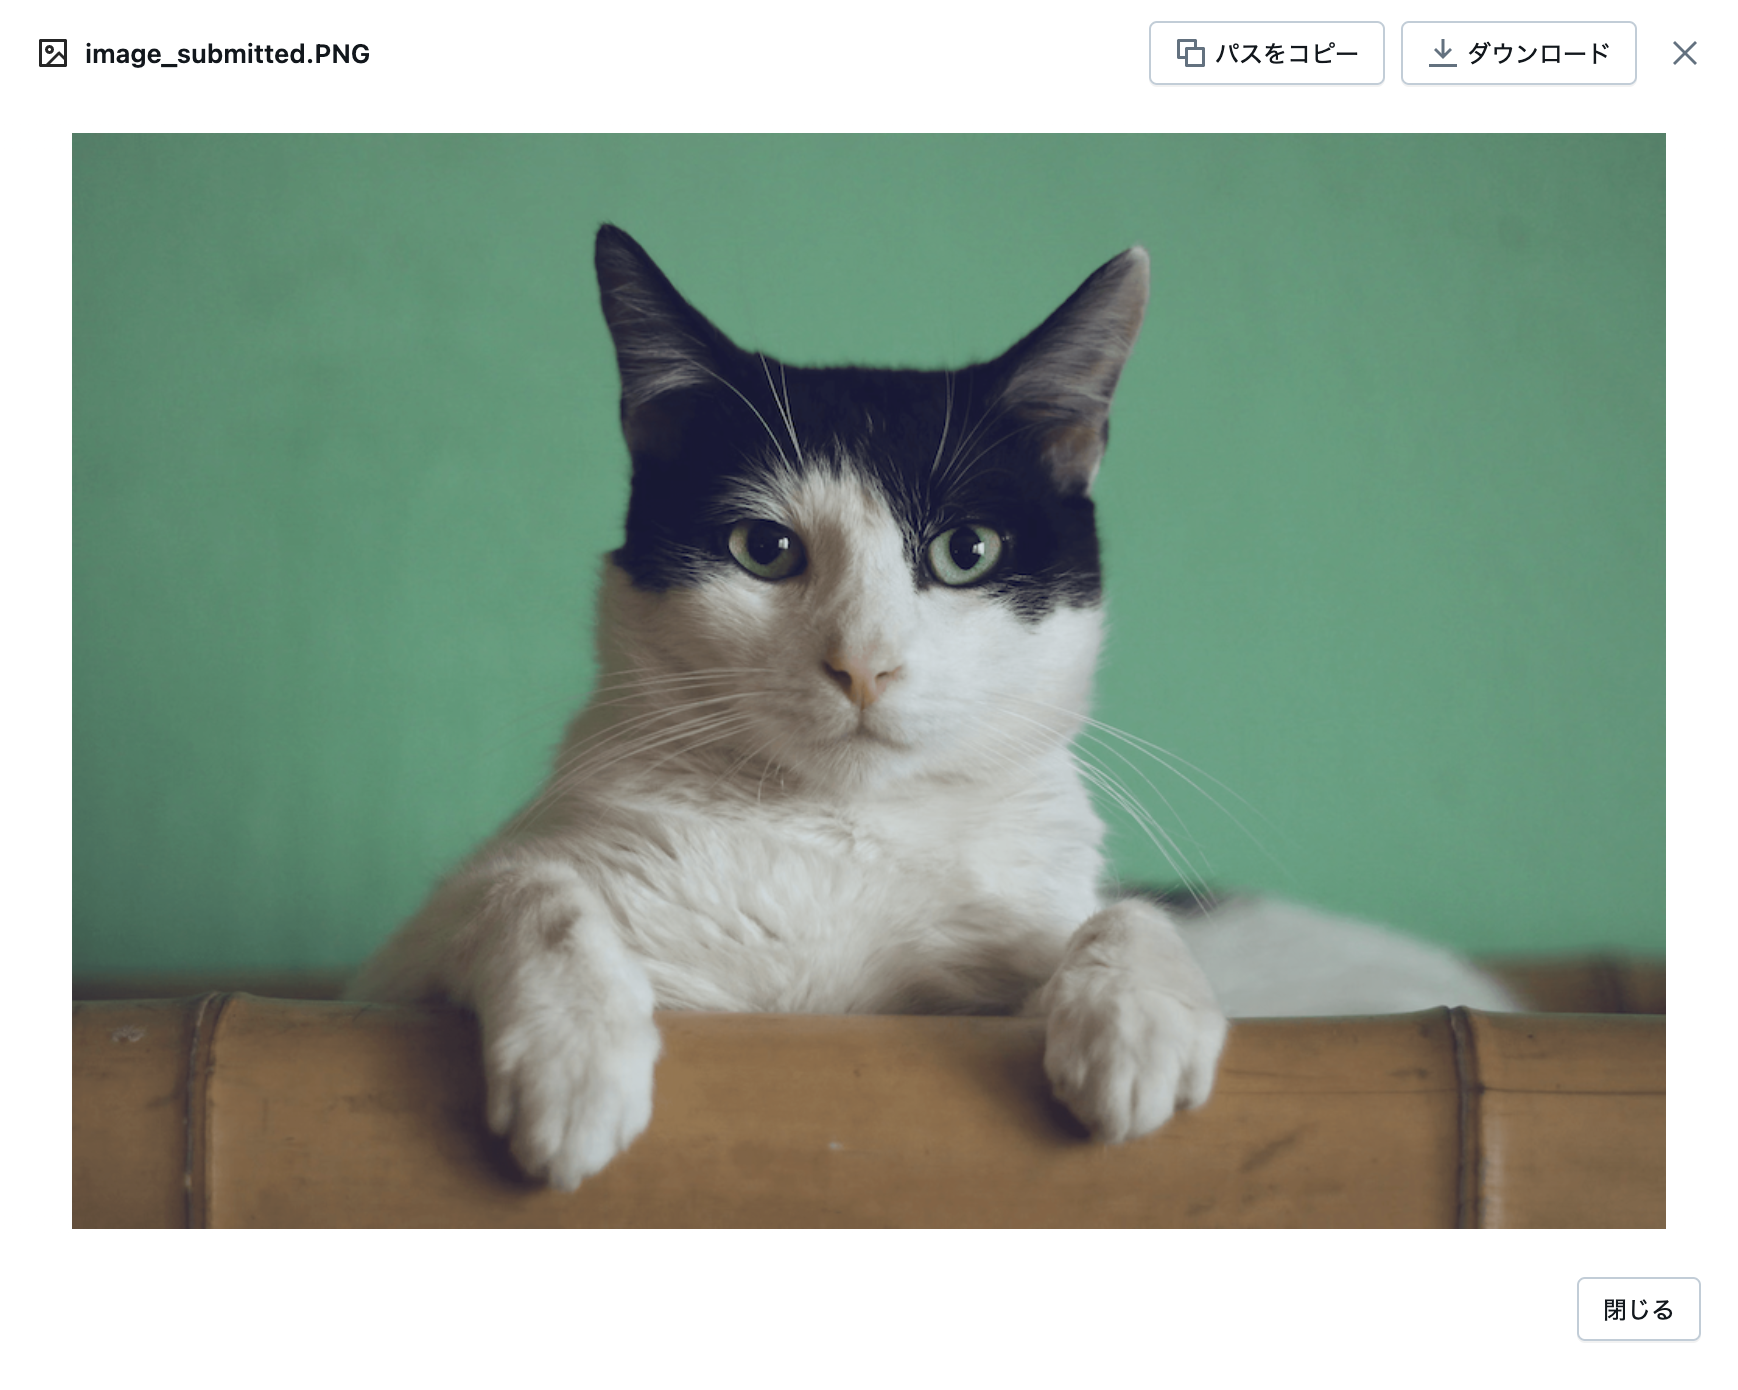
init_image = load_image("https://huggingface.co/datasets/huggingface/documentation-images/resolve/main/diffusers/cat.png")
# init_imageがPIL Imageオブジェクトであると仮定
w = WorkspaceClient()
# PIL Imageをバイトに変換
img_byte_arr = BytesIO()
init_image.save(img_byte_arr, format='PNG') # または 'JPEG' を使用
img_byte_arr = img_byte_arr.getvalue()
# ボリューム内の保存先パスを定義
destination_path = "/Volumes/users/takaaki_yayoi/data/image_submitted.PNG"
# 画像をボリュームにアップロード
w.files.upload(destination_path, img_byte_arr, overwrite=True)
アップロードされました。
HuggingFaceからのモデルをUnity CatalogにMLflowで登録
モデルの前処理、後処理を含むメソッドを持つクラスで生成AIモデルをラッピングします。
使っているモデルはこちらです。
import mlflow

class StableDiffusionImgToImg(mlflow.pyfunc.PythonModel):
   def __init__(self):
       self.pipe = None

   def load_context(self, context):
       import torch
       from diffusers import AutoPipelineForImage2Image
       # モデルを初期化する。正しいデバイスで行うことを確認
       self.pipe = AutoPipelineForImage2Image.from_pretrained(
           "kandinsky-community/kandinsky-2-2-decoder", torch_dtype=torch.float16, use_safetensors=True
       )
       self.pipe = self.pipe.to("cuda")

   def image_to_base64(self, image):
       from io import BytesIO
       import base64
       buffered = BytesIO()
       image.save(buffered, format="JPEG")
       return base64.b64encode(buffered.getvalue()).decode('utf-8')

   def base64_to_image(self, base64_string):
       from io import BytesIO
       import base64
       import PIL
       from PIL import Image
       # base64文字列をデコード
       img_data = base64.b64decode(base64_string)

       # デコードされたデータからBytesIOオブジェクトを作成
       buffer = BytesIO(img_data)

       # PILを使用して画像を開く
       image = Image.open(buffer)

       return image

   def predict(self, context, model_input):
       prompt = model_input["prompt"][0]
       init_image = self.base64_to_image(model_input["init_image"][0])
       negative_prompt = model_input["negative_prompt"][0]
       strength = model_input["strength"][0]
       guidance_scale = model_input["guidance_scale"][0]

       # 画像生成
       image = self.pipe(prompt, negative_prompt=negative_prompt, image=init_image, strength=strength, guidance_scale=guidance_scale).images[0]

       return self.image_to_base64(image)
MLflowでモデルを記録します。
import base64
from mlflow.models import ModelSignature, infer_signature
from mlflow.types.schema import Schema, ColSpec, DataType
import pandas as pd

mlflow.set_registry_uri('databricks-uc')

def load_image_from_volume(volume_path):
     import PIL
     from PIL import Image
     with Image.open(volume_path) as img:
       return img.convert("RGB")

def image_to_base64(image):
   buffered = BytesIO()
   image.save(buffered, format="JPEG")
   return base64.b64encode(buffered.getvalue()).decode('utf-8')

# 入力スキーマ
input_schema = Schema([ColSpec(DataType.string, "prompt"),
                      ColSpec(DataType.string, "negative_prompt"),
                      ColSpec(DataType.string, "init_image"),
                      ColSpec(DataType.float, "strength"),
                      ColSpec(DataType.float, "guidance_scale")])

# 出力スキーマ
output_schema = Schema([ColSpec(DataType.string, "image")])

# ボリュームから画像を読み込み、base64に変換
image = image_to_base64(load_image_from_volume("/Volumes/users/takaaki_yayoi/data/image_submitted.PNG"))

# 入力例を定義
input_example=pd.DataFrame({"prompt":["cat grey bearded wizard, detailed, fantasy, cute, adorable, animated, cgi, entertainment, 8K"],
                           "negative_prompt" : ["deformed, ugly, blurry, low-quality, low-resolution"],
                           "init_image" : [image],
                           "strength" : [0.1],
                           "guidance_scale" : [18.0]})

# シグネチャを推定
signature = infer_signature(input_example, image)

# モデルの詳細(アーティファクト、pip要件、入力例など)と共にモデルをログ
with mlflow.start_run() as run:
   mlflow.pyfunc.log_model(
       "model",
       python_model=StableDiffusionImgToImg(),
       input_example=input_example,
       signature=signature,
       registered_model_name="users.takaaki_yayoi.kandinsky-model",
       pip_requirements=["transformers", "torch", "accelerate", "diffusers", "huggingface_hub==0.23.0", "invisible-watermark>=0.2.0", "transparent-background", "opencv-python-headless"]
   )
入出力のスキーマと共に記録されました。

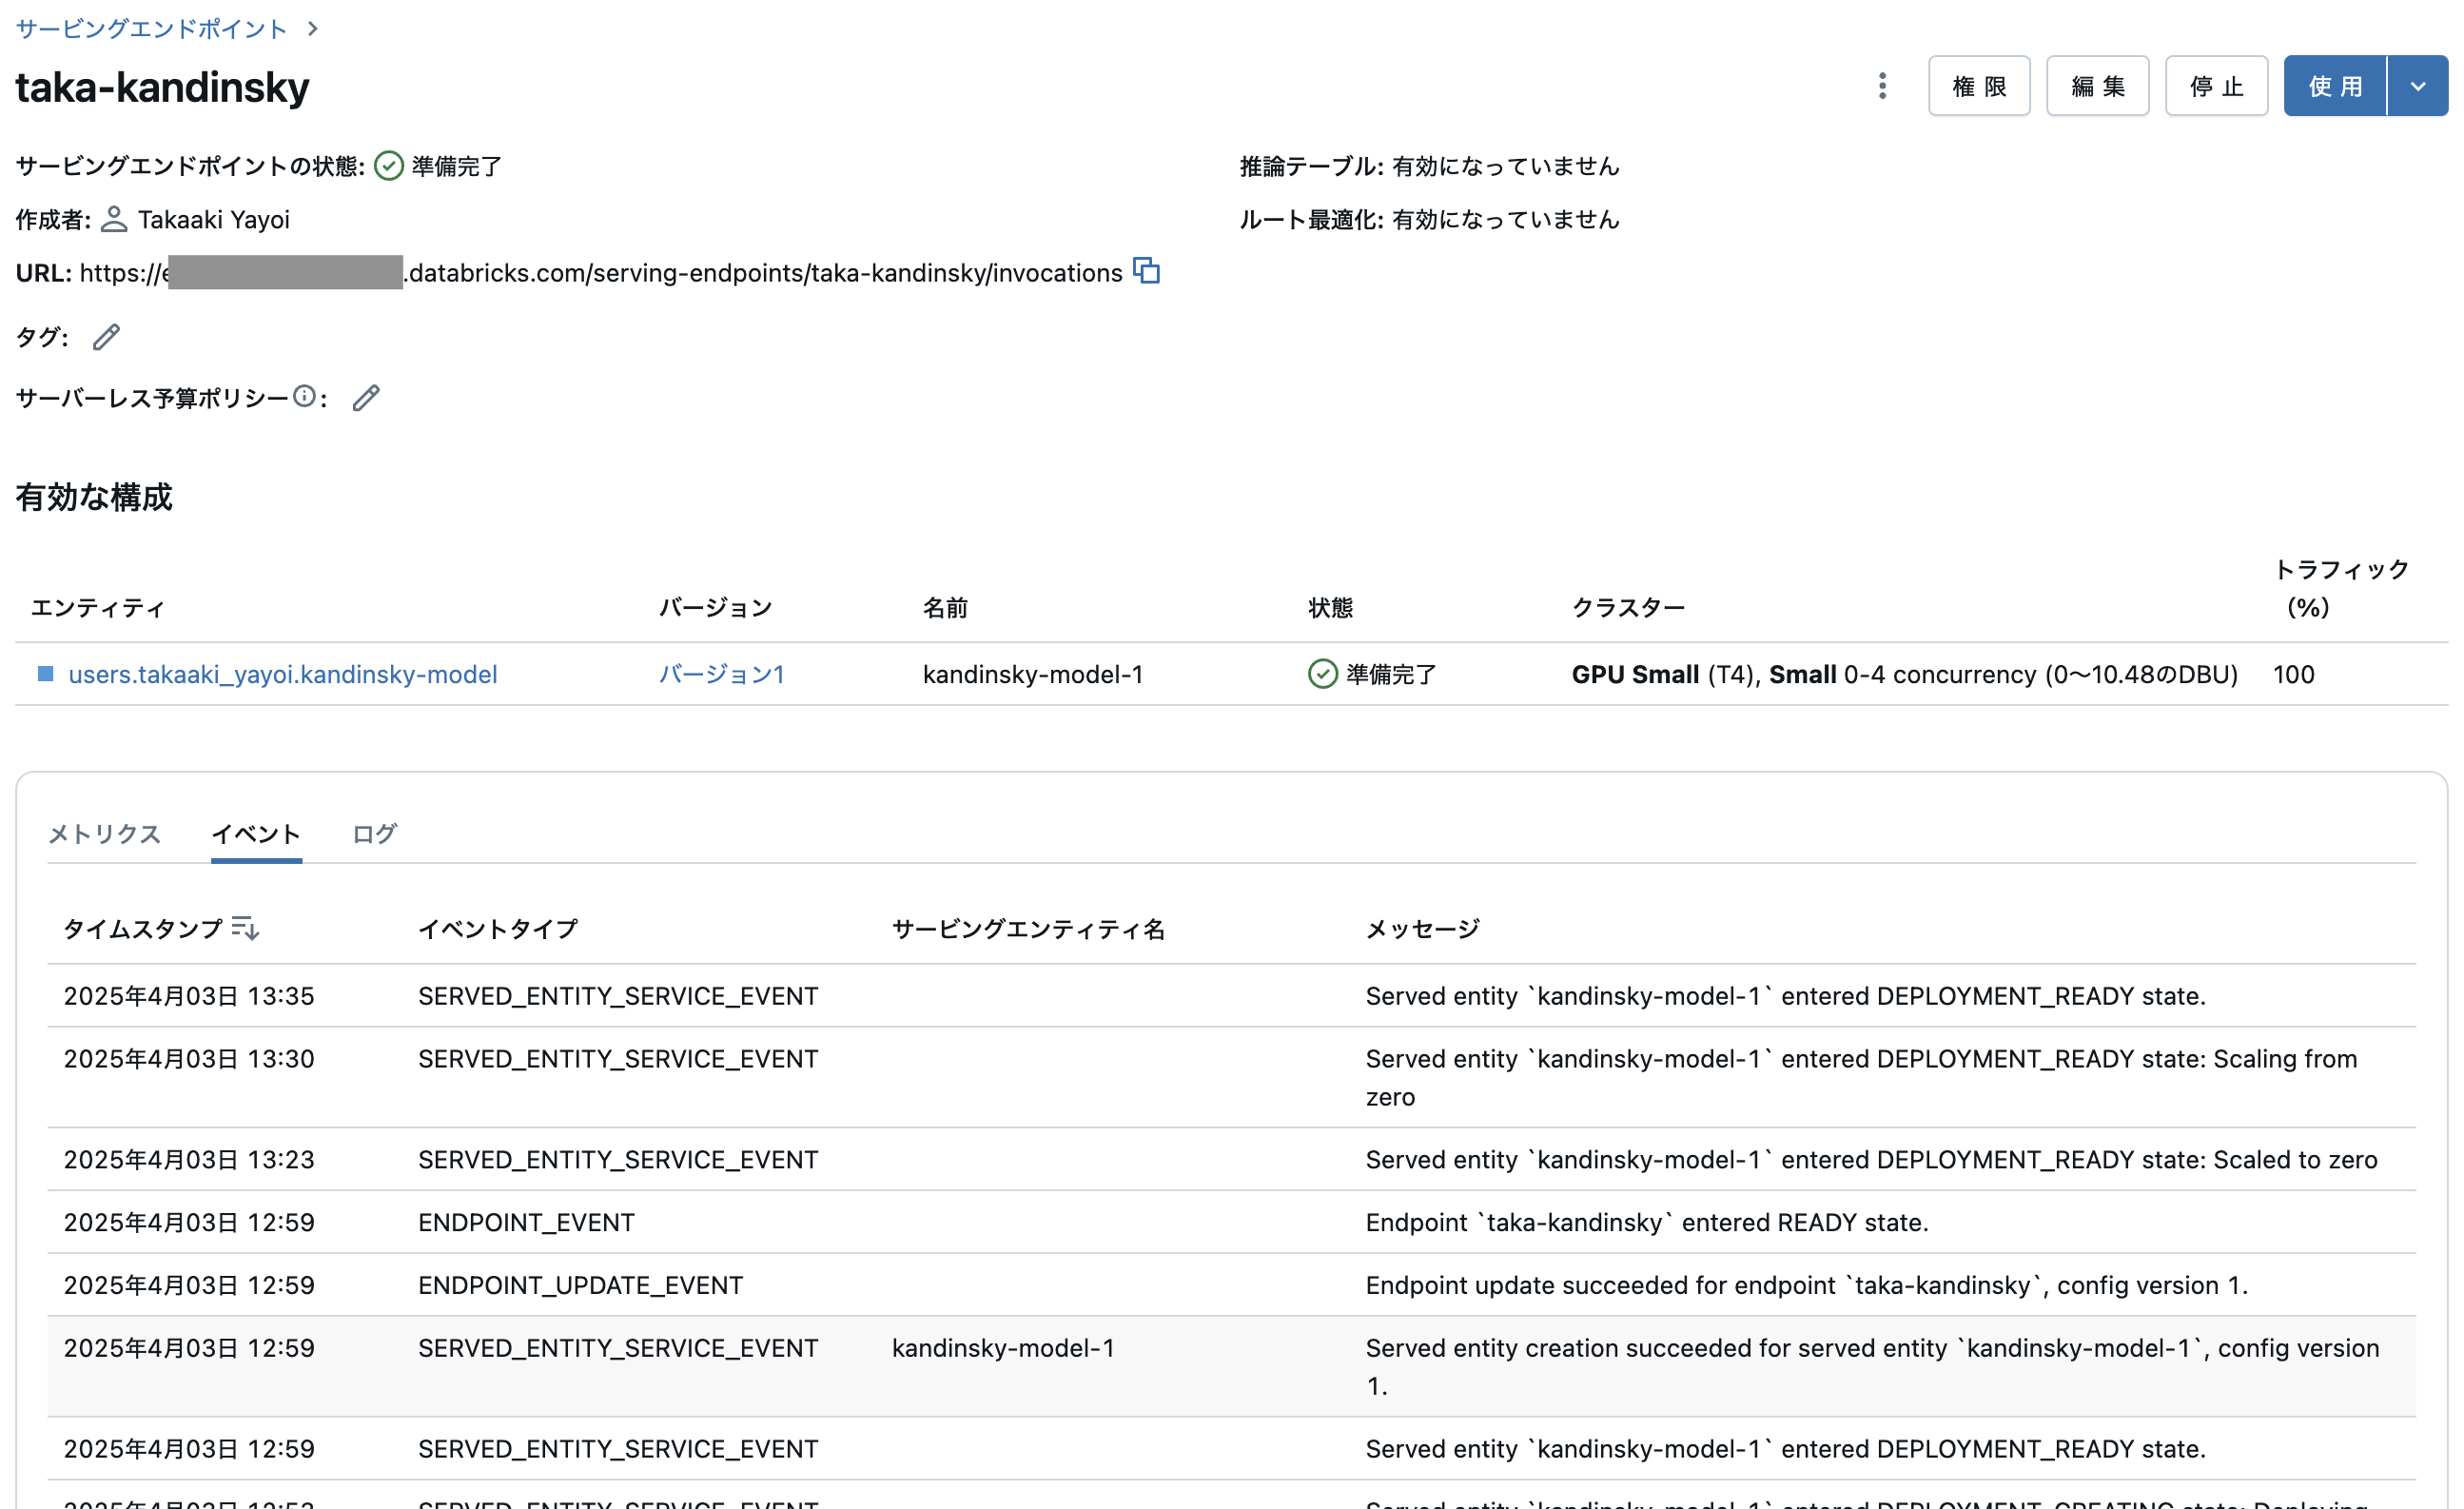
モデルサービングエンドポイントへのデプロイ
画像系のモデルなのでGPUを指定します。
from mlflow.deployments import get_deploy_client

client = get_deploy_client("databricks")

endpoint = client.create_endpoint(
   name="taka-kandinsky",
   config={
       "served_entities": [{
           "entity_name": "users.takaaki_yayoi.kandinsky-model",
           "entity_version": "1",
           "workload_type": "GPU_SMALL",
           "workload_size": "Small",
           "scale_to_zero_enabled": True
       }],
       "traffic_config": {
           "routes": [{
               "served_model_name": "kandinsky-model-1",
               "traffic_percentage": 100
           }]
       }
   }
)
しばらく待つとエンドポイントが起動します。これでモデル側の準備は整い、REST API経由でモデルを利用できるようになりました。
Databricks Appsによるフロントエンドの構築
Databricks Appsを利用してフロントエンドとDatabricksリソースへのアクセスを構成します。今度は別のファイルとしてmain.pyを作成します。また、タイトル画像を格納するためのstaticフォルダも作成します。

注意
執筆時点ではDatabricks Appsはまだ日本リージョンに来ていません。
アプリの実装
main.pyファイルの中身は以下のようになります。前のノートブックで実装したimage_to_base64などの前処理、後処理はこちらでも必要となります。
import io
import os
import PIL
from PIL import Image
from io import BytesIO
from databricks.sdk import WorkspaceClient
import base64
import pandas as pd
import json, requests

VOLUME_URI = os.getenv("VOLUME_URI", "/Volumes/users/takaaki_yayoi/data")

w = WorkspaceClient()

def image_to_base64(image):
   buffered = BytesIO()
   image.save(buffered, format="JPEG")
   return base64.b64encode(buffered.getvalue()).decode('utf-8')

def base64_to_image(base64_string):
    # Decode the base64 string
    img_data = base64.b64decode(base64_string)
    # Create a BytesIO object from the decoded data
    buffer = BytesIO(img_data)
    # Open the image using PIL
    image = Image.open(buffer)

    return image

def query_image_from_volume():

   image_name="image_submitted.PNG"

   image_path = os.path.join(VOLUME_URI, image_name)

   # シークレットから読み込んだパーソナルアクセストークンを環境変数に設定
   os.environ["TOKEN"] = w.dbutils.secrets.get(scope="demo-token-takaaki.yayoi", key="pat")

   response = w.files.download(image_path)
   image_data = io.BytesIO(response.contents.read())

   with Image.open(image_data) as img:
     return img.convert("RGB")

def query_model_endpoint(prompt):

    img_base64 = image_to_base64(query_image_from_volume())

    input_example=pd.DataFrame({"prompt":[prompt],
                                "negative_prompt" : [""],
                                "init_image" : [img_base64],
                                "strength" : [0.1],
                                "guidance_scale" : [18]})

    # モデルサービングエンドポイントへのアクセス
    url = 'https://e2-demo-west.cloud.databricks.com/serving-endpoints/taka-kandinsky/invocations'
    headers = {'Authorization': f'Bearer {os.environ.get("TOKEN")}', 'Content-Type': 'application/json'}
    ds_dict = {'dataframe_split': input_example.to_dict(orient='split')}
    data_json = json.dumps(ds_dict, allow_nan=True)
    response = requests.request(method='POST', headers=headers, url=url, data=data_json)
    final_img = base64_to_image(response.json()['predictions'])

    return final_img.convert("RGB")


import gradio as gr

with gr.Blocks() as demo:
   with gr.Row():
       gr.set_static_paths(paths=["static/databricks-logo.png"])
       gr.HTML(value='<img src="/file=static/databricks-logo.png", width="450", class="Databricks_logo"">', elem_id="Databricks Logo")
       gr.Markdown(value="# Picture Yourself in Generative AI")

   with gr.Row():
       inp = gr.Textbox(label="Character", placeholder="Enter the Character:")

   with gr.Row():
       image_ouput1 = gr.Image(value=query_image_from_volume, interactive=False, label="Before")
       image_output2 = gr.Image(label="After", show_download_button=True)
   with gr.Row():
       btn = gr.Button("Run")
       clear_button = gr.ClearButton([image_ouput1, image_output2, inp])

   btn.click(fn=query_model_endpoint, inputs=[inp], outputs=image_output2)


if __name__ == "__main__":
   demo.launch()
リソースに対するアクセス権設定
ここで注意しなくてはならないのは、DatabricksアプリからDatabricks管理リソースへのアクセスです。
Databricksアプリは、アプリの作成とともに作成されるサービスプリンシパルの権限で動作し、その権限でDatabricks管理のリソース(ボリュームなど)にアクセスします。このため、リソースに対するサービスプリンシパルの権限を適切に設定する必要があります。

今回の例では、ボリュームに格納されている画像をアプリから読み込んでいるので、当該ボリュームではサービスプリンシパルに対してREAD_VOLUMEの権限を付与します。(実際にはアプリを一度作成してそのサービスプリンシパルの権限を後で付与します)
そして、モデルサービングエンドポイントへのアクセスにはパーソナルアクセストークンが必要です。これを平文でアプリに埋め込むのではなく、シークレットで安全に管理されているパーソナルアクセストークンを参照するようにします。そのためには事前にパーソナルアクセストークンをシークレットに格納しておきます。私の場合はスコープdemo-token-takaaki.yayoiのキーpatにパーソナルアクセストークンを格納しています。
これらの準備ができたら、以下のように使用するリソースを指定してアプリを作成し、上記main.pyが格納されているパスを指定してアプリをデプロイします。

稼働したら、上述のアクセス権を確認の上、アプリにアクセスします。

blue colored realistic wizard catのようなプロンプトを与えます。
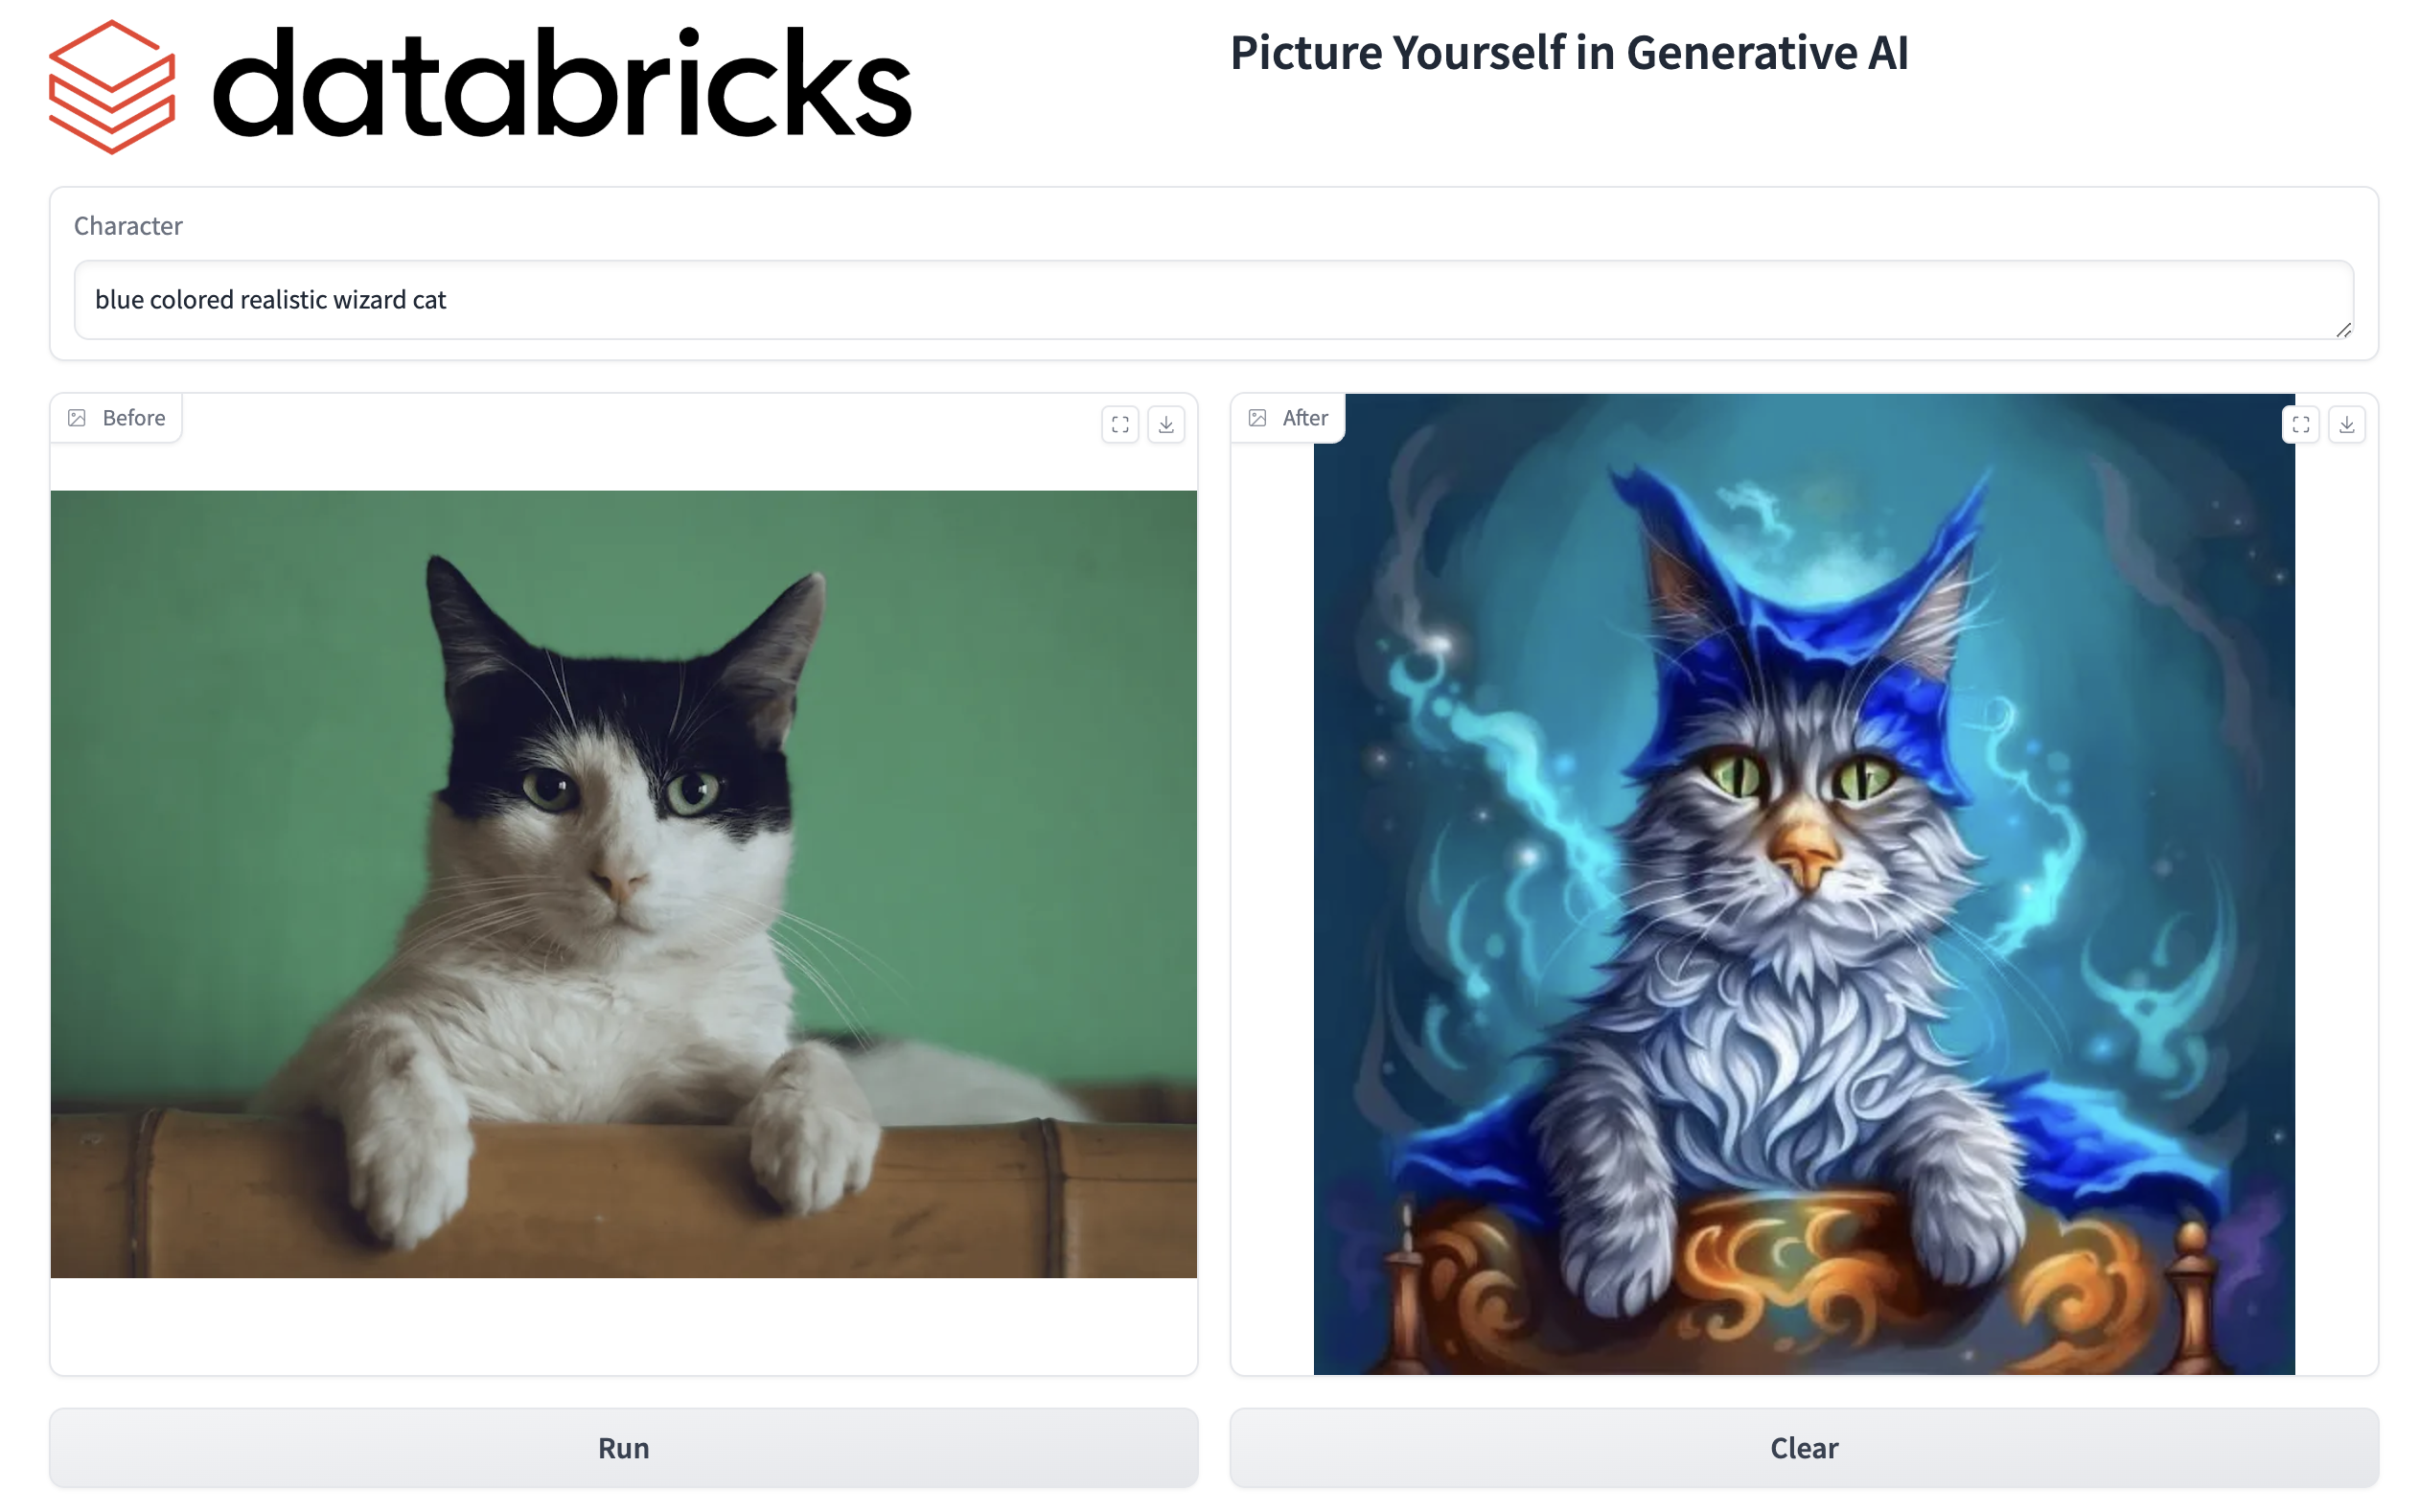
動きました!
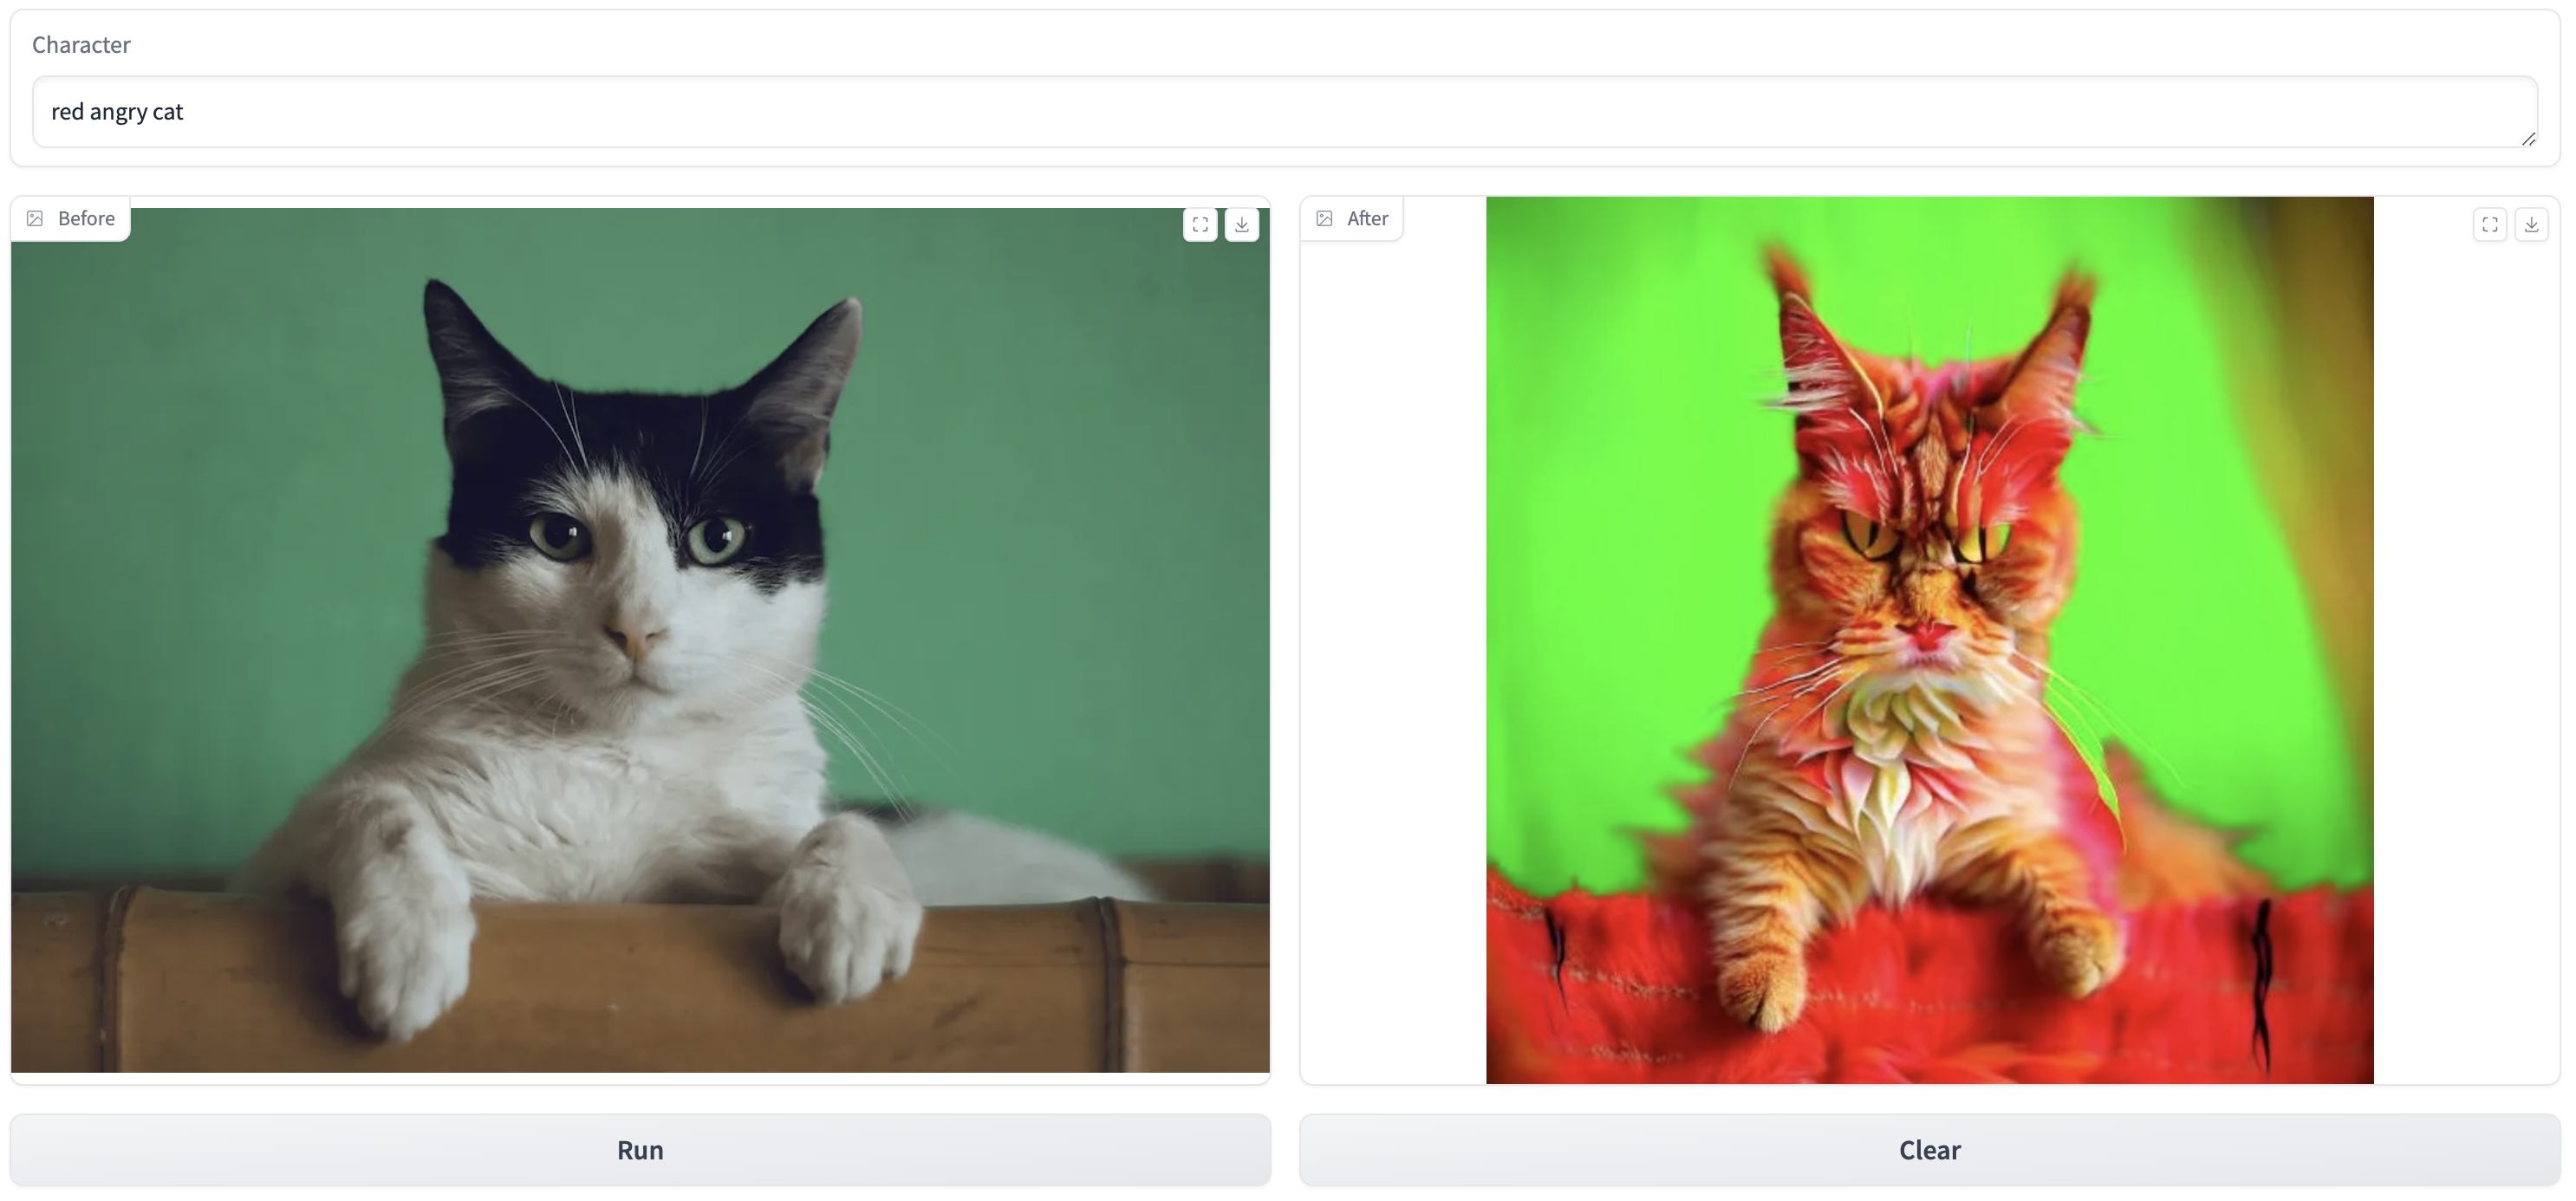
red angry cat
purple sad cat

なにこれ楽しい