生成AIのアプリケーションがどんどん増えていっています。
こちらの記事を書いたのは、
元々同じ会社のエンジニアの方が書かれたこちらの記事がきっかけでした。非常に興味深い。
ということでウォークスルーします。
環境準備
こちらを指定して、Gitフォルダーを作成します。
クラスターを作成します。
モデルの登録およびサービング
main_notebookを実行していきます。
セットアップ
このノートブックを正しく実行するには、MLランタイム15.4 LTSを使用してクラスターを作成してください。60 GBのメモリとGPU(少なくとも16GBのVRAM)を持つシングルノードクラスター
%pip install mlflow==2.17.2 diffusers==0.31.0
dbutils.library.restartPython()
import mlflow

# Unity CatalogをMLflow Model Registryのホストとして設定
mlflow.set_registry_uri('databricks-uc')
# CUDAが利用可能か確認
import torch
torch.cuda.is_available()
True
num_cuda_devices = torch.cuda.device_count()
for i in range(num_cuda_devices):
    device_name = torch.cuda.get_device_name(i)
    print(f"CUDA device {i}: {device_name}")
CUDA device 0: Tesla T4
# Databricksの管理されたシークレットを使用してHuggingfaceにログイン
from huggingface_hub import login

login(token=dbutils.secrets.get('eo_scope', 'HF_API_TOKEN'))
# インペインティングパイプラインの実験
import torch
from diffusers import AutoPipelineForInpainting

pipe = AutoPipelineForInpainting.from_pretrained("diffusers/stable-diffusion-xl-1.0-inpainting-0.1", torch_dtype=torch.float16, variant="fp16")
pipe = pipe.to("cuda:0")
pipe.config
FrozenDict([('vae', ('diffusers', 'AutoencoderKL')),
            ('text_encoder', ('transformers', 'CLIPTextModel')),
            ('text_encoder_2',
             ('transformers', 'CLIPTextModelWithProjection')),
            ('tokenizer', ('transformers', 'CLIPTokenizer')),
            ('tokenizer_2', ('transformers', 'CLIPTokenizer')),
            ('unet', ('diffusers', 'UNet2DConditionModel')),
            ('image_encoder', (None, None)),
            ('feature_extractor', (None, None)),
            ('scheduler', ('diffusers', 'EulerDiscreteScheduler')),
            ('force_zeros_for_empty_prompt', True),
            ('requires_aesthetics_score', False),
            ('_name_or_path',
             'diffusers/stable-diffusion-xl-1.0-inpainting-0.1')])
動作確認
動作確認します。img_urlやmask_urlにある画像をワークスペースにインポートして実行します。
from PIL import Image

# ファイルから画像を読み込む
#img_url = "https://raw.githubusercontent.com/CompVis/latent-diffusion/main/data/inpainting_examples/overture-creations-5sI6fQgYIuo.png"
#mask_url = "https://raw.githubusercontent.com/CompVis/latent-diffusion/main/data/inpainting_examples/overture-creations-5sI6fQgYIuo_mask.png"

image_path = "./overture-creations-5sI6fQgYIuo.png"
image = Image.open(image_path).convert("RGB")

mask_path = "./overture-creations-5sI6fQgYIuo_mask.png"
mask = Image.open(image_path).convert("L").convert("RGB")
インプット画像
マスク
image.width, image.height, image.width//8*8, image.height//8*8
assert image.width == mask.width, "Image and mask width should be the same!"
assert image.height == mask.height, "Image and mask height should be the same!"

try:
  assert image.width%8 == 0, "Mask width should be divisible by 8!"
  assert image.height%8 == 0, "Mask height should be divisible by 8!"
except AssertionError:
  image = image.resize((image.width//8*8, image.height//8*8))
  mask = mask.resize((image.width//8*8, image.height//8*8))
prompt = "bautiful smile, high quality, realistic"
negative_prompt = "bad, ugly, cartoon, low quality"

# prompt = "a realistic head of a cute cat, high quality, realistic"
# negative_prompt = "low quality, cartoon"

# 画像とマスク画像はPIL画像である必要があります。
# マスクの構造は、塗りつぶし部分が白、保持部分が黒です
output_image = pipe(
  width=image.width,
  height=image.height,
  prompt=prompt,
  negative_prompt=negative_prompt,
  image=image,
  mask_image=mask,
  num_inference_steps=40,
  guidance_scale=9,
  strength=.81, #.81
).images[0]
output_image.save("./output.png")
output_image.size
(512, 512)
output.pngをマークダウンとして表示します。ちょっと違いが分かりにくいですが、動作はしています。
%md

MLFlow、UCモデルの登録とサービング
この部分では、カスタムMLFlow pyfuncモデルを作成し、それをログに記録してからUnity Catalog (UC) に登録し、Databricksモデル提供を使用して提供できるようにします。
from huggingface_hub import snapshot_download

# SDXLインペインティングモデルをローカルディレクトリキャッシュにダウンロード
snapshot_location = snapshot_download(repo_id="diffusers/stable-diffusion-xl-1.0-inpainting-0.1", local_dir='/local_disk0/sdinpaint/')
import torch
from diffusers import AutoPipelineForInpainting

from PIL import Image
import io
import base64

import mlflow
mlflow.set_registry_uri('databricks-uc')

class InPainter(mlflow.pyfunc.PythonModel):
    def load_context(self, context):
        """
        指定されたモデルスナップショットディレクトリを使用して、トークナイザーと言語モデルを初期化します。
        """
        self.pipe = AutoPipelineForInpainting.from_pretrained(context.artifacts["snapshot"], torch_dtype=torch.float16, variant="fp16")

        # NB: CUDA対応デバイスがない場合や、CUDAサポート付きのtorchがインストールされていない場合、
        # この設定は正しく機能しません。デバイスを 'cpu' に設定することは有効ですが、
        # パフォーマンスは非常に遅くなります。
        # self.pipe.to(device="cpu")
        # GPU対応環境で実行する場合は、以下の行のコメントを解除してください:
        self.pipe.to(device="cuda:0")


    def image_to_base64(self, image):
        """
        PIL Imageをメモリ内バイトバッファを使用してバイナリ形式に変換します。

        パラメータ:
        image (PIL.Image.Image): 変換する画像。

        戻り値:
        bytes: 画像のバイナリ表現。
        """
        buffer = io.BytesIO()
        image.save(buffer, format='PNG')  # 必要に応じて異なる形式を選択できます
        image_binary = buffer.getvalue()
        img_base64 = base64.b64encode(image_binary)
        img_base64_str = img_base64.decode("utf-8")
        return img_base64_str


    def base64_to_image(self, img_base64_str):
        # base64文字列をバイナリにデコード
        img_binary = base64.b64decode(img_base64_str)

        # バイナリデータをBytesIOオブジェクトに変換
        img_buffered = io.BytesIO(img_binary)

        # PILで画像を開く
        image = Image.open(img_buffered)

        return image


    def predict(self, context, model_input, params=None):
        """
        指定された入力に対して予測を生成します。
        """
        prompt = model_input["prompt"][0]
        negative_prompt = model_input["negative_prompt"][0]

        image = self.base64_to_image(model_input['image'][0])
        mask = self.base64_to_image(model_input['mask'][0])

        # temperatureとmax_tokensのデフォルト値を取得または使用
        num_inference_steps = params.get("num_inference_steps", 30) if params else 30
        guidance_scale = params.get("guidance_scale", 3.5) if params else 3.5
        strength = params.get("strength", .81) if params else .81

        try:
            width = int((image.width/8)*8)
            height = int((image.height/8)*8)
        except Exception:
            width = 1024
            height = 1024


        # NB: トークナイズされた入力をここで明示的にGPUに送信しても、システムにCUDAサポートがない場合は機能しません。
        # GPUサポートで実行しようとする場合は、最大パフォーマンスのために 'cpu' を 'cuda' に変更してください
        output = self.pipe(
                width=width,
                height=height,
                prompt=prompt,
                negative_prompt=negative_prompt,
                image=image,
                mask_image=mask,
                num_inference_steps=num_inference_steps,
                guidance_scale=guidance_scale,
                strength=strength
        ).images[0]


        return {"output_image": self.image_to_base64(output)}
モデルシグネチャの作成
import numpy as np
from mlflow.models.signature import ModelSignature
from mlflow.types import ColSpec, DataType, ParamSchema, ParamSpec, Schema

# 入力と出力のスキーマを定義
input_schema = Schema(
    [
        ColSpec(DataType.string, "prompt"),
        ColSpec(DataType.string, "negative_prompt"),
        ColSpec(DataType.binary, "image"),
        ColSpec(DataType.binary, "mask")
    ]
)
output_schema = Schema([ColSpec(DataType.binary, "output_image")])

# パラメータのスキーマを定義
parameters = ParamSchema(
    [
        ParamSpec("num_inference_steps", DataType.integer, np.int32(40), None),
        ParamSpec("max_tokens", DataType.float, np.float32(3.5), None),
        ParamSpec("strength", DataType.float, np.float32(.81), None)
    ]
)

signature = ModelSignature(inputs=input_schema, outputs=output_schema, params=parameters)
signature
inputs:
  ['prompt': string (required), 'negative_prompt': string (required), 'image': binary (required), 'mask': binary (required)]
outputs:
  ['output_image': binary (required)]
params:
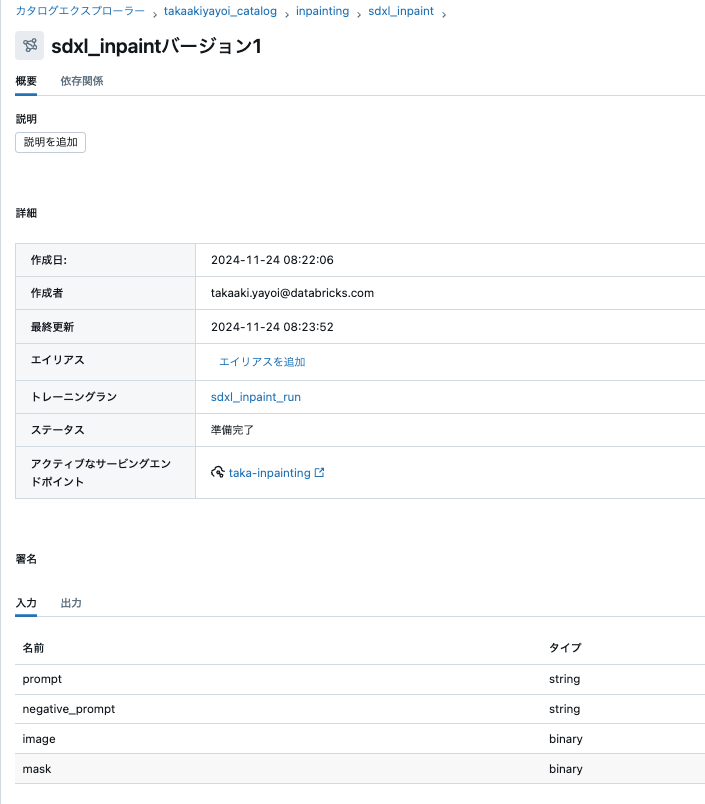
  ['num_inference_steps': integer (default: 40), 'max_tokens': float (default: 3.5), 'strength': float (default: 0.8100000023841858)]
MLflowへのモデルのロギングとUCへの登録
with mlflow.start_run(run_name='sdxl_inpaint_run'):
  mlflow.pyfunc.log_model(
        artifact_path="sdxl_inpaint_model",
        python_model=InPainter(),
        artifacts={"snapshot": snapshot_location},
        conda_env='./conda_env.yaml',
        registered_model_name='takaakiyayoi_catalog.inpainting.sdxl_inpaint',
        signature=signature
  )
上の処理が完了すると、Unity Catalog配下にモデルが登録されます。
モデルサービング
元々のソースではAPIで処理していますが、GUIでサービングエンドポイントを作成します。
モデルのデプロイが完了して、サービングエンドポイントが起動するまでには数十分を要します。
モデルサービングエンドポイントのテスト
同梱されているtest-serving-endpointで、エンドポイントの動作を確認する事ができます。
from PIL import Image
import io
import base64
import json

# Load or create a PIL image
image = Image.new("RGB", (1024, 1024), (255, 0, 0))  # Example: a blank red image (height and width should be divisible by 8)
mask = Image.new("RGB", (1024, 1024), (255, 255, 255))  # Example: a blank white image (height and width should be divisible by 8)

def pil_image_to_base64(pil_image):

  def add_padding(b64_string):
    while len(b64_string) % 4 != 0:
        b64_string += '='
    return b64_string

  buffered = io.BytesIO()
  pil_image.save(buffered, format="PNG")  # Specify the format (e.g., "PNG", "JPEG")
  image_binary = buffered.getvalue()
  img_base64 = base64.b64encode(image_binary)
  img_base64_str = img_base64.decode("utf8")

  return add_padding(img_base64_str)


def base64_to_pil_image(base64_string):
    # Decode the base64 string into bytes
    image_data = base64.b64decode(base64_string)

    # Convert the bytes data to a PIL image
    image = Image.open(io.BytesIO(image_data))

    return image

prompt = "Face of a yellow cat"
negative_prompt = "low quality"
image_base64 = pil_image_to_base64(image.convert('RGB'))
mask_base64 = pil_image_to_base64(mask.convert('L').convert('RGB'))
data = {
  "inputs" : {"prompt": prompt, "negative_prompt": negative_prompt, "image": image_base64, "mask": mask_base64},
  "params" : {"num_inference_steps": 20, "guidance_scale": 7.5, "strength": 1.0}
}
from databricks.sdk import WorkspaceClient
w = WorkspaceClient()

ENDPOINT_NAME = "taka-inpainting"

response = w.api_client.do(
        'POST',
        f'/serving-endpoints/{ENDPOINT_NAME}/invocations',
        headers={'Content-Type': 'application/json'},
        data=json.dumps(data)
    )
response
base64_to_pil_image(response["predictions"]["output_image"])
ここではマスクは画像全体となっているので、プロンプトで指定された画像が全体に表示されます。プロンプトFace of a yellow catの通り、画像が生成されています。
Databricks Appsによるフロントエンドアプリの構築
元々のGitHubリポジトリには、Databricks Appsでデプロイできるフロントエンドアプリも同梱されています。
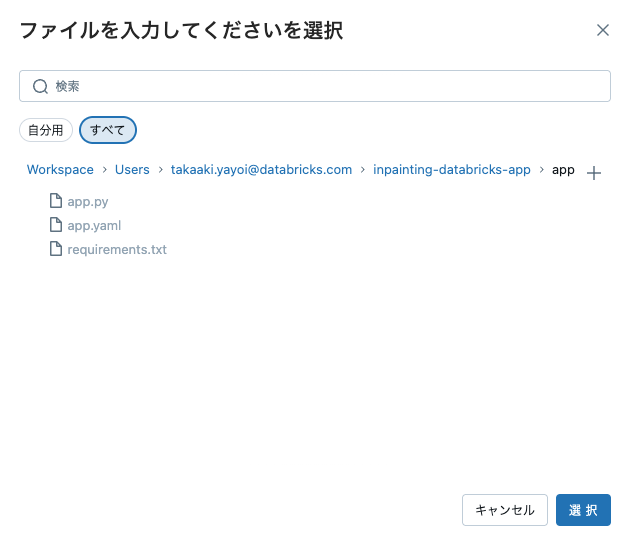
GUIから同梱されているappディレクトリを指定してアプリをデプロイできます。
上で設定したモデルサービングエンドポイントを指定することを忘れないようにしてください。
アプリにアクセスすると、以下のような画面が表示されます。
左のボックスに画像をドラッグ&ドロップします。うちの猫です。
画像の下に表示されるペンツールを使って、マスクの箇所を指定します。これは便利だ。
プロンプトやパラメーターを指定して、Generateをクリックすると…
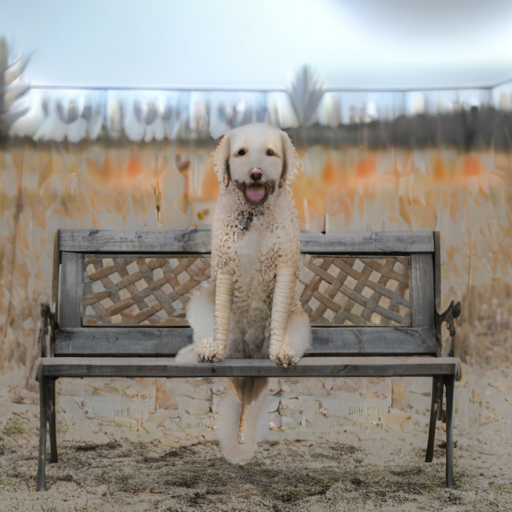
犬になった…
これはある意味toyアプリですが、「ここがこうなっていたらどうだろう」的にアイディエーションなどでの活用ができそうだと思いました。


