こちらのマニュアルで説明しているdbxを実際に動かしてみます。Databricks Connectの後継です。
Databricksワークスペースの設定
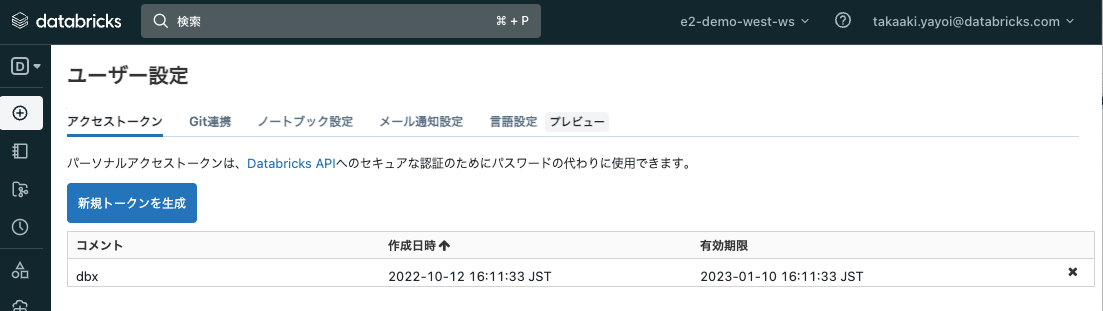
アクセス先のDatabricksワークスペースでパーソナルアクセストークンを作成します。
- トップバーのユーザー設定をクリックします。

- 新規トークンを作成をクリックして、トークンを作成しトークンをメモしておきます。
dbxからアクセスするクラスターのIDをメモしておきます。クラスターの詳細ページにアクセスして、URLからIDを取り出してメモしておきます。以下の赤枠内がクラスターIDです。詳細はDatabricksでワークスペースID、クラスターID、ノートブックID、モデルID、ジョブIDを取得するをご覧ください。

ローカルでの設定
ここでは、Databricks CLIがインストール済みであるものとして、CLIの設定ファイル.databrickscfgを編集してDatabricksワークスペースのホストと上記ステップで取得したパーソナルアクセストークンを設定します。
[DEFAULT]
host = https://<DatabricksワークスペースURL>/
token = <パーソナルアクセストークン>
jobs-api-version = 2.0
dbxルートディレクトリを作成します。
mkdir dbx-demo
cd dbx-demo
Python仮想環境を作成します。pipenvがインストールされていない場合にはインストールします。
pipenv --python <version>

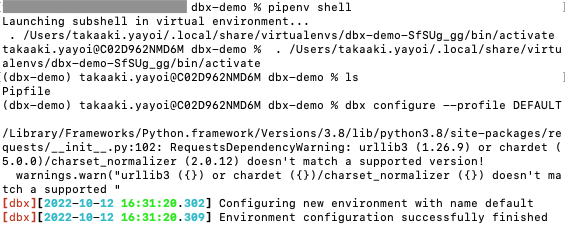
仮想環境を有効化します。
pipenv shell
confディレクトリを作成し、deployment.yamlファイルを作成します。
mkdir conf
deployment.yaml
build:
  no_build: true
environments:
  default:
    workflows:
      - name: "dbx-demo-job"
        spark_python_task:
          python_file: "file://dbx-demo-job.py"
dbx-demo配下にdbx-demo-job.pyファイルを作成します。
dbx-demo-job.py
# For testing and debugging of local objects, run
# "pip install pyspark=X.Y.Z", where "X.Y.Z"
# matches the version of PySpark
# on your target clusters.
from pyspark.sql import SparkSession

from pyspark.sql.types import *
from datetime import date

spark = SparkSession.builder.appName("dbx-demo").getOrCreate()

# Create a DataFrame consisting of high and low temperatures
# by airport code and date.
schema = StructType([
   StructField('AirportCode', StringType(), False),
   StructField('Date', DateType(), False),
   StructField('TempHighF', IntegerType(), False),
   StructField('TempLowF', IntegerType(), False)
])

data = [
   [ 'BLI', date(2021, 4, 3), 52, 43],
   [ 'BLI', date(2021, 4, 2), 50, 38],
   [ 'BLI', date(2021, 4, 1), 52, 41],
   [ 'PDX', date(2021, 4, 3), 64, 45],
   [ 'PDX', date(2021, 4, 2), 61, 41],
   [ 'PDX', date(2021, 4, 1), 66, 39],
   [ 'SEA', date(2021, 4, 3), 57, 43],
   [ 'SEA', date(2021, 4, 2), 54, 39],
   [ 'SEA', date(2021, 4, 1), 56, 41]
]

temps = spark.createDataFrame(data, schema)

# Create a table on the cluster and then fill
# the table with the DataFrame's contents.
# If the table already exists from a previous run,
# delete it first.
spark.sql('USE default')
spark.sql('DROP TABLE IF EXISTS demo_temps_table')
temps.write.saveAsTable('demo_temps_table')

# Query the table on the cluster, returning rows
# where the airport code is not BLI and the date is later
# than 2021-04-01. Group the results and order by high
# temperature in descending order.
df_temps = spark.sql("SELECT * FROM demo_temps_table " \
   "WHERE AirportCode != 'BLI' AND Date > '2021-04-01' " \
   "GROUP BY AirportCode, Date, TempHighF, TempLowF " \
   "ORDER BY TempHighF DESC")
df_temps.show()

# Results:
#
# +-----------+----------+---------+--------+
# |AirportCode|      Date|TempHighF|TempLowF|
# +-----------+----------+---------+--------+
# |        PDX|2021-04-03|       64|      45|
# |        PDX|2021-04-02|       61|      41|
# |        SEA|2021-04-03|       57|      43|
# |        SEA|2021-04-02|       54|      39|
# +-----------+----------+---------+--------+

# Clean up by deleting the table from the cluster.
spark.sql('DROP TABLE demo_temps_table')
dbxの設定を行います。
dbx configure --profile DEFAULT

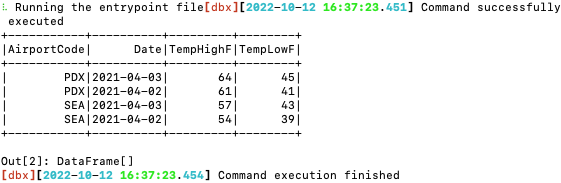
以下のコマンドを実行して、PythonスクリプトをDatabricksで実行します。<existing-cluster-id>が以前のステップでメモしたクラスターIDを指定してください。
dbx execute --cluster-id=<existing-cluster-id> --job=dbx-demo-job --no-rebuild --no-package

無事に処理結果が表示されました。