OPX(OpenSwitch) 仮想版インストール
参考 https://github.com/open-switch/opx-docs/wiki/Run-virtual-machine
Windows10 環境にOPXの仮想版をインストールする手順です。
1. VirtualBoxをインストール
執筆時点ではVersion 5系列の最新メンテナンスリリースの5.2.22を入れました。
下記よりWindows hosts版をダウンロードしてインストールします。インストール作業はすべてデフォルトでよいです。
https://www.virtualbox.org/wiki/Download_Old_Builds_5_2
VirtualBoxインストール後にPATHを追加します(こちらの記事を参照)。
2.OpenSSH、pscp(Putty)をインストール
OpenSSHをインストールします。
https://winscp.net/eng/docs/guide_windows_openssh_server
事情により手動でバイナリをダウンロードしていれました。
以下から最新版のOpenSSH-Win64.zip (執筆時点ではv77.2.0p1-Beta)をダウンロード
https://github.com/PowerShell/Win32-OpenSSH/releases
OpenSSH-Win64.zip を解凍、中身を c:\Program Files\OpenSSH に配置します。
解凍後、c:\Program Files\OpenSSH にPATHを通します。(こちらの記事を参照)。
c:\Program Files\OpenSSH>dir
Volume in drive C is OS
Volume Serial Number is 4EA0-4676

Directory of c:\Program Files\OpenSSH

2019/01/09  16:21    <DIR>          .
2019/01/09  16:21    <DIR>          ..
2018/07/26  18:27            17,399 FixHostFilePermissions.ps1
2018/07/26  18:27            15,712 FixUserFilePermissions.ps1
2018/07/26  18:27            15,505 install-sshd.ps1
2018/07/26  18:27         1,624,200 libcrypto.dll
2019/01/09  16:29             2,801 openssh-events.man
2018/07/26  18:27            14,147 OpenSSHUtils.psd1
2018/07/26  18:27            42,695 OpenSSHUtils.psm1
2018/07/26  18:27           328,328 scp.exe
2018/07/26  18:27           345,080 sftp-server.exe
2018/07/26  18:27           398,984 sftp.exe
2018/07/26  18:27           501,784 ssh-add.exe
2018/07/26  18:27           397,848 ssh-agent.exe
2018/07/26  18:27           647,192 ssh-keygen.exe
2018/07/26  18:27           544,280 ssh-keyscan.exe
2018/08/04  22:40           162,432 ssh-shellhost.exe
2018/07/26  18:27           883,736 ssh.exe
2018/07/26  18:27           976,408 sshd.exe
2018/07/26  18:27             2,143 sshd_config_default
2018/07/26  18:27            15,862 uninstall-sshd.ps1
              19 File(s)      6,936,536 bytes
               2 Dir(s)  142,858,907,648 bytes free

c:\Program Files\OpenSSH>
pscp(putty)をインストールします。
下記よりPuttyのパッケージファイル最新版(執筆時点では putty-64bit-0.70-installer.msi)をダウンロードします。
https://www.chiark.greenend.org.uk/~sgtatham/putty/latest.html
https://the.earth.li/~sgtatham/putty/latest/w64/putty-64bit-0.70-installer.msi
ダウンロードしたファイルをダブルクリックしてインストールします。PATHはインストーラが通してくれるので手動作業は不要です。
3.OPXインストール
OPXのアーカイブサイトから以下のファイルをダウンロードします。
執筆時点で最新の 3.1.0を入手します。
http://archive.openswitch.net/vm-tools/vm.exe
http://archive.openswitch.net/installers/3.1.0/Dell-EMC/PKGS_OPX-3.1.0-installer-x86_64.bin
http://archive.openswitch.net/onie/vm/onie_kvm.iso
上記3つを同じフォルダに入れます。
(注意)ファイルを配置するフォルダ名(フルパス)はスペースを含まないものにしてください。含むとエラーになります。
c:\Users\tajimh1\OPX>dir
Volume in drive C is OS
Volume Serial Number is 4EA0-4676

Directory of c:\Users\tajimh1\OPX

2019/01/10  15:05    <DIR>          .
2019/01/10  15:05    <DIR>          ..
2019/01/10  14:53    <DIR>          back
2019/01/10  13:39        17,934,336 onie_kvm.iso
2019/01/10  14:50       474,966,592 PKGS_OPX-3.1.0-installer-x86_64.bin
2019/01/10  13:55        18,224,350 vm.exe
               3 File(s)    511,125,278 bytes
               3 Dir(s)  142,362,116,096 bytes free
vm.exeを実行してインストールします。
c:\Users\tajimh1\OPX>vm.exe create vm1 --iso onie_kvm.iso --bin PKGS_OPX-3.1.0-installer-x86_64.bin --gui

             t8.                           ..S:.
          .;.88X                            ;888:
        X; 8. 8X                            t888S 8X
    .8S;;.:.  8X...                        .;@@8@8@8X88..
  .@ :.       :::::.                 .  8XSS88S8888@@@8:@
@8S:..       ..    : @                S 88X@8@88888888@88 88
8t X               ..; @           .S 8888S8@88@@888X8888888
  .X8X        t@ @  .::X.          888X8S88888888888X@88:
     S  8    .@t 8 ;:.  : X.    .S 8S888888St8S888888S :
        :@8X:.8X   @ ;:.tX8    S 88X8888;;; X88888XX
            @.@t     :SX:.    888X8888    .. 88@:.
             :X:      88.   SS@S88888:      t8X.
                          X 888X888S:      .:.
                         888S8S888;
                       SX@X888888X            .
           .t8.:     S 8888X88XX: .88:8.    ;8 8.
         .X:88XX..  888X8S88      .;SX8:    X8@888.
      .SSX888X8.  X 8X8888@      8X   .X 8 .t8 .:@:X8:
   :8.8X88X8@88;8X@88888@      .:;8 t...tS X.@   .:tX8XXt
:X8S@88XX8888888@888X88            tX ...t;.         .;8tt
88X888@88X@88888888888@.             8 ;:..               X:
:X8888@8S@8@8888888.:.                @ @888.        .8X;t
  ;. SS888888@8@t  ; ..                   ..X8       S.:
     .::8888888  ..                         X8   :X8@;
      .:; .S888S:                           X8S :X.
          :;  8X.                           ;.X
           ..::

    _____                  _____          _ _       _
   |  _  |                /  ___|        (_) |     | |
   | | | |_ __   ___ _ __ \ `--.__      ___| |_ ___| |__
   | | | | '_ \ / _ \ '_ \ `--. \ \ /\ / / | __/ __| '_ \
   \ \_/ / |_) |  __/ | | /\__/ /\ V  V /| | || (__| | | |
    \___/| .__/ \___|_| |_\____/  \_/\_/ |_|\__\___|_| |_|
         | |
         |_|

                        Version 2.3.3

The programs included with the Debian GNU/Linux system are free software;
the exact distribution terms for each program are described in the
individual files on the virtual machine in /usr/share/doc/*/copyright.

Debian GNU/Linux comes with ABSOLUTELY NO WARRANTY, to the extent
permitted by applicable law.

OS-installer file: c:\Users\tajimh1\OPX\PKGS_OPX-3.1.0-installer-x86_64.bin
ONIE-Recovery file: c:\Users\tajimh1\OPX\onie_kvm.iso
Deleting VM name: "vm1"
Initial boot in progress........................................................OK
ONIE is self-embedding..........................................................OK
Wait for VM to boot.............................................................OK
ONIE stop discovery.............................................................OK
Load OS-installer. This operation may take a few minutes. Please wait...........OK
Installing OS...................................................................OK
Configure OS....................................................................OK
Final Restart of VM.............................................................OK
Setup complete! You can now connect using: ssh -p 2222 opxUser@127.0.0.1

c:\Users\tajimh1\OPX>
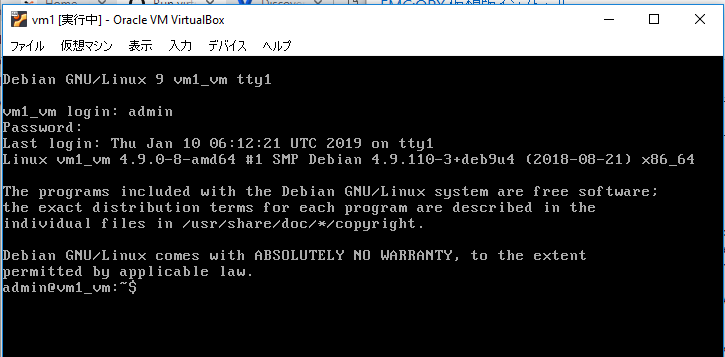
VirtualBox画面が自動起動します。
VirtualBox画面にログインプロンプトが出れば成功です。
補足:VirtulBoxコンソール画面に入力キーボード/マウスが掴まれてしまった場合、右Ctrlキーを押せば開放されます。
ssh でログインしてみます(パスワードなし)。まんまDebian Linuxです。
cat /etc/OPX-release-version でOPXバージョンが確認できます。
c:\Users\tajimh1\OPX>ssh -p 2222 opxUser@127.0.0.1
The authenticity of host '[127.0.0.1]:2222 ([127.0.0.1]:2222)' can't be established.
ECDSA key fingerprint is SHA256:jIDkTLTTA1A+ysF4OnAXMhl0MhlBgNq4S8ETbF+JEyE.
Are you sure you want to continue connecting (yes/no)? yes
Warning: Permanently added '[127.0.0.1]:2222' (ECDSA) to the list of known hosts.
Linux vm1_vm 4.9.0-8-amd64 #1 SMP Debian 4.9.110-3+deb9u4 (2018-08-21) x86_64

The programs included with the Debian GNU/Linux system are free software;
the exact distribution terms for each program are described in the
individual files in /usr/share/doc/*/copyright.

Debian GNU/Linux comes with ABSOLUTELY NO WARRANTY, to the extent
permitted by applicable law.
opxUser@vm1_vm:~$

opxUser@vm1_vm:~$ cat /etc/OPX-release-version
OS_NAME="OPX"
OS_VERSION="3.1.0"
PLATFORM="S6000-VM"
ARCHITECTURE="x86_64"
INTERNAL_BUILD_ID="OpenSwitch blueprint for Dell 1.0.0"
BUILD_VERSION="3.1.0.0-rc1"
BUILD_DATE="2018-12-19T12:31:44-0800"
INSTALL_DATE="2019-01-10T06:01:12+00:00"
o
VirtualBoxのコンソール画面でもログインできます。デフォルトID/PWは admin/admin です。