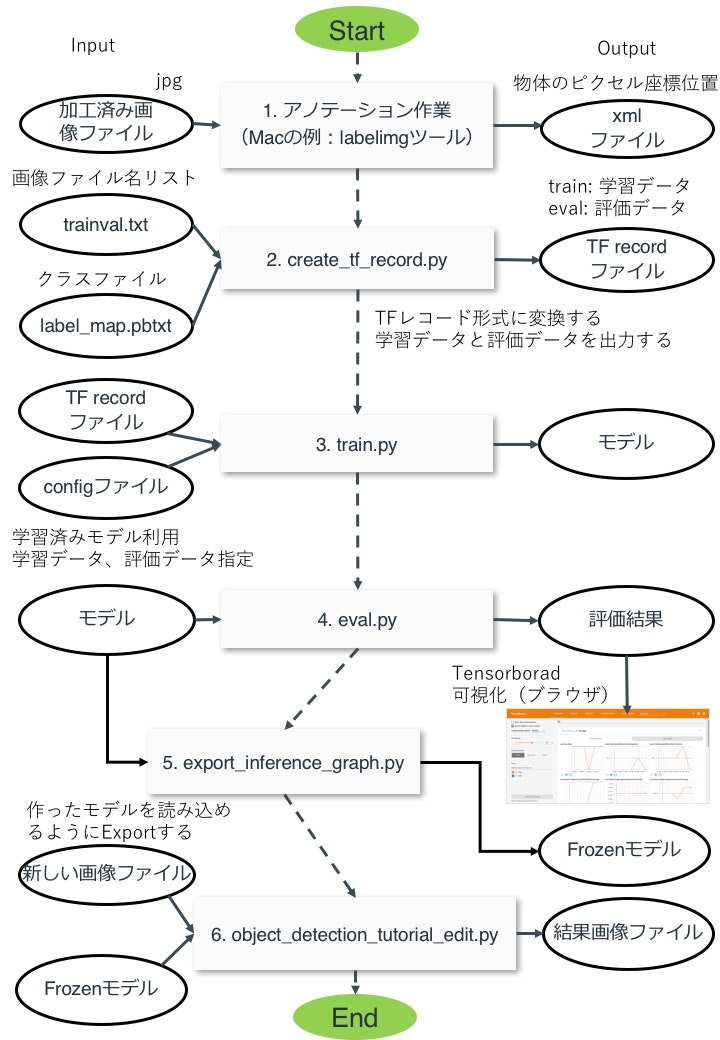
物体検出までの流れ
TensorFlowの物体検出を実際にやってみたので、そのプロセスをまとめてみました。いくつかのステップを踏みながら進める必要があり、結構大変ですね。
この記事の前提として、画像ファイルは収集、加工してあるものとして、アノテーションからのプロセスを書いてみました。
また、TensorFlowが動かせる環境は準備されているものとします。PCでもクラウドでも何でもよいです。学習する数や画像サイズにもよりますが、私がMac PC環境で動かすと学習時間に7~8時間もかかります![]() GPUがなくてもできるだけ速いマシンがあればよいです。学習は一度止めて、チェックポイントから再開できるので、分割して何回も動かしてもよいですが、それはそれで大変ですね
GPUがなくてもできるだけ速いマシンがあればよいです。学習は一度止めて、チェックポイントから再開できるので、分割して何回も動かしてもよいですが、それはそれで大変ですね![]()
Macのアノテーションツールとしてlabelimgを使いました。出力されるxmlファイルの要素名(<要素名>)がチュートリアルと同じものになるツールを使った方が、コード変更が少ないのでよいと思います。
Object Detectionのコードはここから入手しました。
https://github.com/bourdakos1/Custom-Object-Detection/blob/master/object_detection/create_tf_record.py
実行するプログラムや画像ファイル、パラメータなどのフォルダー構造を決めておくと、開発しやすくなる。[追加した記事][link-1]と合わせて見ていただくと、わかりやすいと思う![]()
[link-1]:https://qiita.com/t_kawa1/items/c7cd7d067c0334503eab
