概要
Raspberry Pi にTensorflowをインストールする方法 2021/11/13版
Operating system imagesで2021/11/13時点に配布されているRaspberry Pi OSやUbuntuを試しましたが、色々と面倒でした。
個人的には、手持ちの古いRaspberry Pi OS BUSTER(Raspberry Pi OS 9 2020-02-13-raspbian-buster.zip)を使う方が比較的簡単でしたので、そちらの手順を記載※しておきます。
※初級者、AIハンズオン参加者 向けの参考資料を兼ねておりまして、このような判断をしています
環境
・Raspberry Pi4
・SDカード 64GB
・有線のインターネット環境(初期設定時にあれば楽)
インストール後の環境
$ uname -a
Linux  5.10.63-v7l+ #1459 SMP Wed Oct 6 16:41:57 BST 2021 armv7l GNU/Linux
$ python3 --version
Python 3.7.3
$ pip3 --version
pip 18.1 from /usr/lib/python3/dist-packages/pip (python 3.7)
$ python3
Python 3.7.3 (default, Jan 22 2021, 20:04:44)
[GCC 8.3.0] on linux
Type "help", "copyright", "credits" or "license" for more information.
>>> import numpy as np
>>> print(np.__version__)
1.20.0
>>> import cv2
>>> print(cv2.__version__)
4.5.4-dev
>>> import keras
Using TensorFlow backend.
>>> keras.__version__
'2.5.0'
>>> exit()
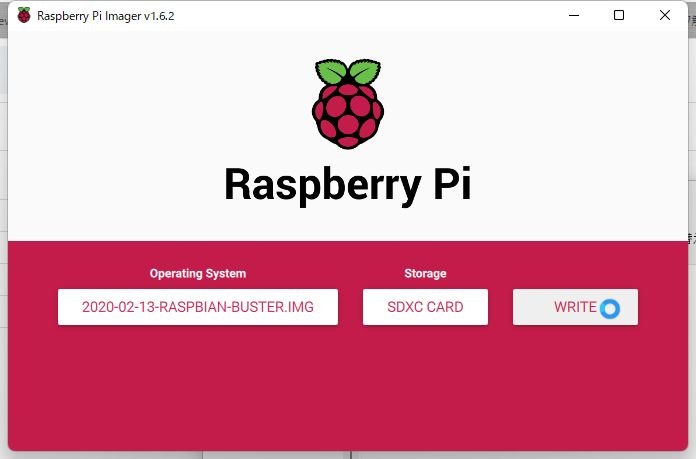
OSをSDカードへ書き込み
Operating system imagesから過去のOSダウンロードができないので。
過去にダウンロードしていたBUSTER(Raspberry Pi OS 9 2020-02-13-raspbian-buster.zip)を利用。
書き込みにはRaspberry Pi Imagerを使います。


OS インストール


更新など
$ sudo apt update
sudo apt dist-upgrade
取得:1 http://archive.raspberrypi.org/debian buster InRelease [32.6 kB]
取得:2 http://raspbian.raspberrypi.org/raspbian buster InRelease [15.0 kB]
E: Repository 'http://archive.raspberrypi.org/debian buster InRelease' changed its 'Suite' value from 'testing' to 'oldstable'
N: This must be accepted explicitly before updates for this repository can be applied. See apt-secure(8) manpage for details.
E: Repository 'http://raspbian.raspberrypi.org/raspbian buster InRelease' changed its 'Suite' value from 'stable' to 'oldstable'
N: This must be accepted explicitly before updates for this repository can be applied. See apt-secure(8) manpage for details.
Do you want to accept these changes and continue updating from this repository? [y/N] y
47.6 kB を 5秒 で取得しました (8,962 B/s)
パッケージリストを読み込んでいます... 完了
E: http://raspbian.raspberrypi.org/raspbian/dists/buster/InRelease の取得に失敗しました
E: http://archive.raspberrypi.org/debian/dists/buster/InRelease の取得に失敗しました
E: いくつかのインデックスファイルのダウンロードに失敗しました。これらは無視されるか、古いものが代わりに使われます。
$ sudo apt dist-upgrade
パッケージリストを読み込んでいます... 完了
依存関係ツリーを作成しています
状態情報を読み取っています... 完了
アップグレードパッケージを検出しています... 完了
アップグレード: 0 個、新規インストール: 0 個、削除: 0 個、保留: 0 個。
$ sudo apt-get update
取得:1 http://raspbian.raspberrypi.org/raspbian buster InRelease [15.0 kB]
取得:2 http://archive.raspberrypi.org/debian buster InRelease [32.6 kB]
パッケージリストを読み込んでいます... 完了
E: Repository 'http://raspbian.raspberrypi.org/raspbian buster InRelease' changed its 'Suite' value from 'stable' to 'oldstable'
N: This must be accepted explicitly before updates for this repository can be applied. See apt-secure(8) manpage for details.
E: Repository 'http://archive.raspberrypi.org/debian buster InRelease' changed its 'Suite' value from 'testing' to 'oldstable'
N: This must be accepted explicitly before updates for this repository can be applied. See apt-secure(8) manpage for details.
リリースが情報変更となったことを許容するオプション付きで update する
$ sudo apt-get update --allow-releaseinfo-change
取得:1 http://archive.raspberrypi.org/debian buster InRelease [32.6 kB]
取得:2 http://raspbian.raspberrypi.org/raspbian buster InRelease [15.0 kB]
取得:3 http://archive.raspberrypi.org/debian buster/main armhf Packages [393 kB]
取得:4 http://raspbian.raspberrypi.org/raspbian buster/main armhf Packages [13.0 MB]
取得:5 http://raspbian.raspberrypi.org/raspbian buster/contrib armhf Packages [58.8 kB]
取得:6 http://raspbian.raspberrypi.org/raspbian buster/non-free armhf Packages [104 kB]
13.6 MB を 24秒 で取得しました (570 kB/s)
パッケージリストを読み込んでいます... 完了
N: Repository 'http://archive.raspberrypi.org/debian buster InRelease' changed its 'Suite' value from 'testing' to 'oldstable'
N: Repository 'http://raspbian.raspberrypi.org/raspbian buster InRelease' changed its 'Suite' value from 'stable' to 'oldstable'
upgrade する
$ sudo apt upgrade
必要なものをインストール
$ sudo pip install --upgrade pip
$ sudo pip3 install --upgrade setuptools
$ sudo pip3 install numpy==1.20.0
$ sudo apt-get install -y libhdf5-dev libc-ares-dev libeigen3-dev gcc gfortran python-dev libgfortran5 libatlas3-base libatlas-base-dev libopenblas-dev libopenblas-base libblas-dev liblapack-dev cython libatlas-base-dev openmpi-bin libopenmpi-dev python3-dev
$ sudo pip3 install keras_applications==1.0.8 --no-deps
$ sudo pip3 install keras_preprocessing==1.1.0 --no-deps
$ sudo pip3 install h5py==2.9.0
$ sudo pip3 install pybind11
$ pip3 install -U --user six wheel mock
Tensorflowのインストール
環境の確認
$ uname -a
Linux tagraspi4lcd 4.19.97-v7l+ #1294 SMP Thu Jan 30 13:21:14 GMT 2020 armv7l GNU/Linux
$ python3 --version
Python 3.7.3
$ pip3 --version
pip 18.1 from /usr/lib/python3/dist-packages/pip (python 3.7)
$ python3
Python 3.7.3 (default, Dec 20 2019, 18:57:59)
[GCC 8.3.0] on linux
Type "help", "copyright", "credits" or "license" for more information.
>>> import numpy as np
>>> print(np.__version__)
1.20.0
>>> quit()
GithubのPINTO0309/Tensorflow-binを利用させて頂きます
cp37(Python 3.7.3)、armv7l、numpy 1.20.0になるので以下をダウンロードします。
tensorflow-2.5.0-cp37-none-linux_armv7l_numpy1200_download.sh
$ mkdir -p ~/Env/tensorflow
$ cd  ~/Env/tensorflow
$ pwd
/home/pi/Env/tensorflow
$ wget "https://raw.githubusercontent.com/PINTO0309/Tensorflow-bin/main/tensorflow-2.5.0-cp37-none-linux_armv7l_numpy1200_download.sh"
$ sudo bash ./tensorflow-2.5.0-cp37-none-linux_armv7l_numpy1200_download.sh
$ sudo pip3 uninstall tensorflow
Skipping tensorflow as it is not installed.
 $ ls
tensorflow-2.5.0-cp37-none-linux_armv7l.whl  tensorflow-2.5.0-cp37-none-linux_armv7l_numpy1200_download.sh
$ sudo -H pip3 install tensorflow-2.5.0-cp37-none-linux_armv7l.whl
tensorflow のバージョン確認
 $ python3
Python 3.7.3 (default, Dec 20 2019, 18:57:59)
[GCC 8.3.0] on linux
Type "help", "copyright", "credits" or "license" for more information.
>>> import tensorflow
>>> tensorflow.__version__
'2.5.0'
>>> exit()
OpenCVのインストール
必要なものをインストール
$ sudo apt update
$ sudo apt install build-essential
$ sudo apt install cmake git libgtk2.0-dev pkg-config libavcodec-dev libavformat-dev libswscale-dev
作業ディレクトリに opencv と opencv_contrib を落とす
$ mkdir -p ~/Env/opencv
$ cd  ~/Env/opencv
$ pwd
/home/pi/Env/opencv
$ wget -O opencv4.x.zip https://github.com/opencv/opencv/archive/refs/heads/4.x.zip
$ unzip opencv4.x.zip
$ wget -O opencv_contrib4.x.zip https://github.com/opencv/opencv_contrib/archive/refs/heads/4.x.zip
$ unzip opencv_contrib4.x.zip
$ ls
opencv-4.x  opencv4.x.zip  opencv_contrib-4.x  opencv_contrib4.x.zip
メモリ不足回避のためスワップサイズを拡張
/etc/dphys-swapfile
$ sudo cp /etc/dphys-swapfile /etc/dphys-swapfile.org
$ sudo vi /etc/dphys-swapfile
変更点
CONF_SWAPSIZE=100 先頭に#を追加しコメントアウト
CONF_SWAPSIZE=2048 追加
# /etc/dphys-swapfile - user settings for dphys-swapfile package
# author Neil Franklin, last modification 2010.05.05
# copyright ETH Zuerich Physics Departement
#   use under either modified/non-advertising BSD or GPL license

# this file is sourced with . so full normal sh syntax applies

# the default settings are added as commented out CONF_*=* lines


# where we want the swapfile to be, this is the default
# CONF_SWAPFILE=/var/swap

# set size to absolute value, leaving empty (default) then uses computed value
#   you most likely don't want this, unless you have an special disk situation
# CONF_SWAPSIZE=100
CONF_SWAPSIZE=2048

# set size to computed value, this times RAM size, dynamically adapts,
#   guarantees that there is enough swap without wasting disk space on excess
# CONF_SWAPFACTOR=2

# restrict size (computed and absolute!) to maximally this limit
#   can be set to empty for no limit, but beware of filled partitions!
#   this is/was a (outdated?) 32bit kernel limit (in MBytes), do not overrun it
#   but is also sensible on 64bit to prevent filling /var or even / partition
# CONF_MAXSWAP=2048
再起動します
$ sudo reboot
cmake
DOPENCV_EXTRA_MODULES_PATHはopencv_contrib-4.xディレクトリの場所に合わせます。
-DCMAKE_INSTALL_PREFIXはインストール先を設定します。
$ cd opencv-4.x
mkdir build
cd build
cmake .. -DOPENCV_EXTRA_MODULES_PATH=$HOME/Env/opencv/opencv_contrib-4.x/modules/ -DCMAKE_INSTALL_PREFIX=/usr
make
Raspberry Pi 4で3時間程度かかります。
$ make -j4
インストール
$ sudo make install
動作確認
$ python3
Python 3.7.3 (default, Jan 22 2021, 20:04:44)
[GCC 8.3.0] on linux
Type "help", "copyright", "credits" or "license" for more information.
>>> import cv2
>>> print(cv2.__version__)
4.5.4-dev
>>> quit()
Keras のインストール
pipでKeras をインストール
$ sudo pip3 install Keras
keras のバージョン確認
$ python3
Python 3.7.3 (default, Jan 22 2021, 20:04:44)
[GCC 8.3.0] on linux
Type "help", "copyright", "credits" or "license" for more information.
>>> import keras
Using TensorFlow backend.
>>> keras.__version__
'2.5.0'
>>> exit()