Electronってどういうことができるのか全く知らない状態からスタートです。
Electronとは?についての参考資料
- Electron 本家サイト
- HTML5でクロスプラットフォームなデスクトップアプリを開発できる「Electron」とは
- Electron 1.0でデスクトップアプリ開発超入門――動作の仕組み、基本的な使い方、セキュリティの懸念点
- 本家サイトを翻訳してくれているページ発見 助かる。。
★ 本家サイトからのデモファイルDL時に混乱したこと
http://electron.atom.io/#get-started
に「Downlode for mac」があったのでそれをDLして中身を確認しようとしました。
しかし、これは**「Electronで開発したアプリでは、どのようなことが行えるか」**がわかるappであり、期待しているソースファイルはありませんでした。
自分でつくった場合のパッケージの形がこういうapp拡張子のものになる感じですね。
ソースサンプルは Docs画面のQuick Startのチュートリアルから進めればいい感じです。
<参照>
30分で出来る、JavaScript (Electron) でデスクトップアプリを作って配布するまで
Electronの特徴
・ HTML、CSS、JavaScriptといったWebフロントエンド技術を使って開発できる
・ Node.jsとChroniumで動作する
・ WindowsやMac(OS X)、Linuxなどのデスクトップ向けアプリを開発できる
Electronアプリ環境をつくる
必要なインストール
- node環境(npmモジュールをインストールするため)
- Electronアプリデバッグ用モジュール
- Electronアプリパッケージング用モジュール
本家サイトをみると以下のバージョンが書かれていました(20160628現在)
Electron:1.2.5 Node:6.1.0 Chromium:51.0.2704.103 V8:5.1.281.65
これはElectron:1.2.5にはNodeとかはこのバージョンで内包されているよ的な感じらしい。
20160628現在のNode最新はv6.2.2のようなのだが、ローカルも合わせておいたほうが変なことにはまらないと思うのでv6.1.0にする。
Nodeはすでにインストール済みとします。
Nodeの設定はmacでNode.jsの環境設定参照
バージョン違いでインストールされていたら適切なバージョンをインストールします。
Node v6.1.0 インストール
$ nvm ls-remote
        v0.1.14
        v0.1.15
:
         v6.2.1
         v6.2.2
$ node -v
v0.12.8
$ nvm install v6.1.0
Downloading https://nodejs.org/dist/v6.1.0/node-v6.1.0-darwin-x64.tar.gz...
######################################################################## 100.0%
Now using node v6.1.0 (npm v3.8.6)
Creating default alias: default -> v6.1.0
$
デバッグ用モジュールインストール
Electronアプリをデバッグ目的でビルドし実行するには、npmモジュール「electron-prebuilt」を使います。
$ npm -g install electron-prebuilt
/Users/***/.nvm/versions/node/v6.1.0/bin/electron -> /Users/***/.nvm/versions/node/v6.1.0/lib/node_modules/electron-prebuilt/cli.js

> electron-prebuilt@1.2.5 postinstall /Users/***/.nvm/versions/node/v6.1.0/lib/node_modules/electron-prebuilt
> node install.js

Downloading electron-v1.2.5-darwin-x64.zip
[============================================>] 100.0% of 42.61 MB (358.03 kB/s)
/Users/***/.nvm/versions/node/v6.1.0/lib
└─┬ electron-prebuilt@1.2.5
  ├─┬ electron-download@2.1.2
 :
$
パッケージング用モジュールインストール
パッケージングするには、npmモジュール「electron-packager」を使います。
(Macの「.app」形式のファイル、Windowsの「.exe」形式のファイルなどにする)
$ npm -g install electron-packager
/Users/***/.nvm/versions/node/v6.1.0/bin/electron-packager -> /Users/***/.nvm/versions/node/v6.1.0/lib/node_modules/electron-packager/cli.js
/Users/***/.nvm/versions/node/v6.1.0/lib
└─┬ electron-packager@7.1.0
  ├─┬ asar@0.11.0
 :
$
Electronでアプリケーションを作成
★補足20160704 手っ取り早く確認したいならば・・・
TOP画面の下の方にあるQuick Startのところにある
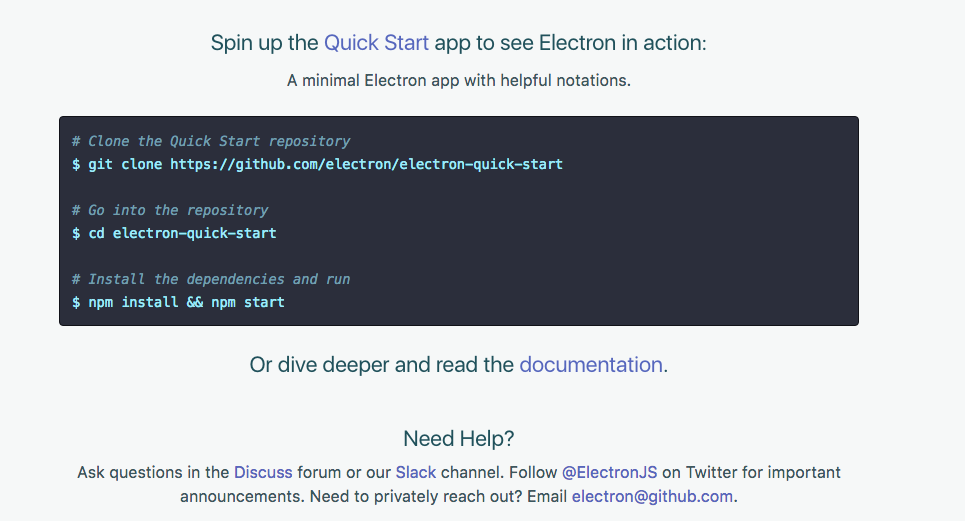
ここを実行すればelectron起動までの確認はできますし、ソースの書き方の確認もできます。
$ git clone https://github.com/electron/electron-quick-start
$ cd electron-quick-start
$ npm install && npm start
プロジェクトの作成
Quick Start 画面中 Write your First Electron App にあるようにファイルを用意します。
.
├── index.html
├── main.js
└── package.json
npm init を使わなくてもいきなり package.json を作ることもできますが、今回は npm init を使って package.json を作りました。
package.json の中は後からでも書き換えれるので流されるままに対話します。
$ mkdir sample
$ cd sample
$ npm init
This utility will walk you through creating a package.json file.
It only covers the most common items, and tries to guess sensible defaults.

See `npm help json` for definitive documentation on these fields
and exactly what they do.

Use `npm install <pkg> --save` afterwards to install a package and
save it as a dependency in the package.json file.

Press ^C at any time to quit.
name: (sample) tago-app
version: (1.0.0) 0.1.0
description: サンプル
entry point: (index.js) main.js
test command:
git repository:
keywords:
author: tagosaku
license: (ISC) MIT
About to write to /Users/***/NodeSampleTmp/electron/sample/package.json:

{
  "name": "tago-app",
  "version": "0.1.0",
  "description": "サンプル",
  "main": "main.js",
  "scripts": {
    "test": "echo \"Error: no test specified\" && exit 1"
  },
  "author": "tagosaku",
  "license": "MIT"
}

Is this ok? (yes) yes
$
main.js コピーしてみた。
// electronモジュールを読み込み
const electron = require('electron');
const {app} = electron;
const {BrowserWindow} = electron; //ウィンドウを表す[BrowserWindow]はelectronモジュールに含まれている

// 新しいウィンドウ(Webページ)を生成
let win;
function createWindow() {
  // BrowserWindowインスタンスを生成
  win = new BrowserWindow({width: 800, height: 600});
  // index.htmlを表示
  win.loadURL(`file://${__dirname}/index.html`);
  // デバッグするためのDevToolsを表示
  win.webContents.openDevTools();
  // ウィンドウを閉じたら参照を破棄
  win.on('closed', () => {   // ()は function ()と書いていい
    win = null;
  });
}
// アプリの準備が整ったらウィンドウを表示
app.on('ready', createWindow);
// 全てのウィンドウを閉じたらアプリを終了
app.on('window-all-closed', () => {
  if (process.platform !== 'darwin') {
    app.quit();
  }
});
app.on('activate', () => {
  if (win === null) {
    createWindow();
  }
});
Electronアプリでは「electron」モジュールが全ての基礎になる。
Electronアプリのさまざまな制御を行うために使うのが「app」オブジェクト
★ 補足:20160707
Electronでよく見るサンプルのmain.jsの出だしは
 :
var app = require('app');
var BrowserWindow = require('browser-window');
 :
こんな感じになってるけどそのままではエラーになって動かないです。
今のElectron:1.2.5バージョンはelectronの下にappなどが移っているからelectronを呼び出さないとエラーになります。
$ electron .
App threw an error during load
Error: Cannot find module 'app'
    at Module._resolveFilename (module.js:438:15)
    at Function.Module._resolveFilename (/Users/***/.nvm/versions/node/v6.1.0/lib/node_modules/electron-prebuilt/dist/Electron.app/Contents/Resources/electron.asar/common/reset-search-paths.js:47:12)
    at Function.Module._load (module.js:386:25)
    at Module.require (module.js:466:17)
    at require (internal/module.js:20:19)
    at Object.<anonymous> (/Users/***/NodeSampleTmp/electron/yawcam_cal/main.js:3:11)
    at Module._compile (module.js:541:32)
    at Object.Module._extensions..js (module.js:550:10)
    at Module.load (module.js:456:32)
    at tryModuleLoad (module.js:415:12)
index.html コピーしてみた。
<!DOCTYPE html>
<html>
  <head>
    <meta charset="UTF-8">
    <title>Hello World!</title>
  </head>
  <body>
    <h1>Hello World!</h1>
    We are using node <script>document.write(process.versions.node)</script>,
    Chrome <script>document.write(process.versions.chrome)</script>,
    and Electron <script>document.write(process.versions.electron)</script>.
  </body>
</html>
デバッグ実行
Electronアプリのディレクトリで、次のコマンドを実行するとデバッグ実行されます。
$ electron .
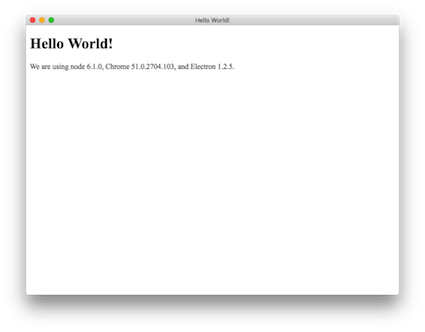
画面がたちあがってきました!
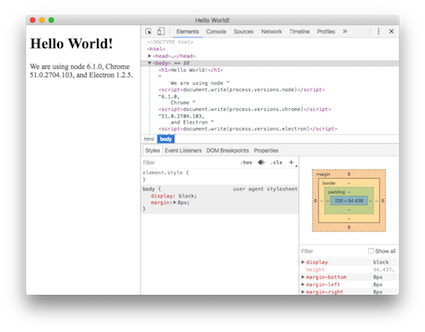
ウィンドウを閉じると画面は終了しますが、Macの場合はelectronアプリは終了していません。
ターミナルでControl+Cを入力すると終了します。
パッケージング
MacとWindows向けにパッケージングします。
$ electron -v
v1.2.5
$ electron-packager . sample --platform=darwin,win32 --arch=x64 --version=1.2.5
Packaging app for platform darwin x64 using electron v1.2.5
Downloading electron-v1.2.5-win32-x64.zip
[============================================>] 100.0% of 52.47 MB (90.38 kB/s)
Packaging app for platform win32 x64 using electron v1.2.5
Wrote new apps to:
/Users/***/NodeSampleTmp/electron/sample/sample-darwin-x64
/Users/***/NodeSampleTmp/electron/sample/sample-win32-x64
$ ls
index.html		package.json		sample-win32-x64
main.js			sample-darwin-x64
(sampleというアプリ名にしています。)
実行終了すると、
- windows 64bit用パッケージフォルダ:sample-win32-x64
- mac 64bit用パッケージフォルダ:sample-darwin-x64
ができます。
パッケージフォルダ内の winならsample.exe、macならsample.appを叩くとデバッグブラウザで確認したような画面が表示されます。
win.webContents.openDevTools(); が書かれたままだと開発ツールも起動されてしまうので、消してください。
electron-packager {ソースディレクトリ} {アプリ名} --platform={プラットフォーム} --arch={アーキテクチャ} --version (バージョン} [その他のオプション ...]

platform ・・・ all, linux, win32, darwin のいずれかを選択。
            「--all」は全部入りのパッケージング。
            「darwin」はmacのこと。複数選択はカンマ区切り。
arch ・・・ all, ia32, x64 のいずれかを選択。
version ・・・ Electronのバージョンを指定。(*electron -v*で確認)
★ 補足:20160630
Windwos 32bit用なんだけどなという場合は*--platform=win32 --arch=ia32* だけでできます。
$ electron-packager . sample --platform=win32 --arch=ia32 --version=1.2.5
Packaging app for platform win32 ia32 using electron v1.2.5
Wrote new app to /Users/***/NodeSampleTmp/electron/sample/sample-win32-ia32
$
ただし、一度electronを実行したフォルダには [***-win32-ia32]とかフォルダができてます。
そのフォルダ構成の状態でmac用をつくろうかな。って electron-packager を再度実行しちゃうと・・・
予定のパッケージング用ファイルだけでなく、*[***-win32-ia32]*まで含まれてパッケージ化されるので気をつけてください。
.
├── index.html
├── main.js
├── package.json
├── sample-win32-ia32
│   ├── LICENSE
 :
Windows用でElectronの環境を整えたいのなら、
初めてのElectron
こちらが参考になるかもしれません。
macでelectron-packager実行後にできたwindows用のフォルダ一式をwindowsマシンに持って行き、exeを叩けば作成したものが表示されます。
アプリのウィンドウを変えたい場合は、browser-window API で変更できるのでいろいろいじってみよう。。
Electron 本家Docs参照
アイコン変えたいよね 20161115 追加
electron-packagerのiconオプションで簡単に変えれます。
$ electron-packager . sample --platform=win32 --arch=ia32 --icon=icon.ico --version=1.2.6  # Windows

$ electron-packager . sample --platform=darwin --arch=x64 --icon=icon.icns --version=1.2.6  # Mac
★ macの場合、いろんなサイズの画像を用意してicnsにしますよね?
1つのpngからサクッと変換してくれたら楽ちんなのにというので探して見つけたアプリが
「Image2icon」AppStoreからすぐに見つかります。
freeでできる範囲で十分つくれました。
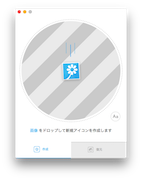 pngファイルをドロップする
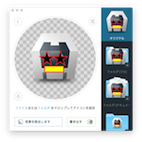
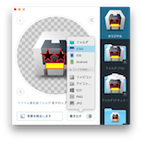


icns選択して保存したら、できあがり。
おまけ
index.html のファイル名を記載しているのは main.js
なので、昔作った別ファイルに置き換えてみた。
 :
  win.loadURL(`file://${__dirname}/index_range.html`);
 :
しかし、jqueryが読み込めなていないというjavascriptエラーが起きた。
 :
<script type="text/javascript" src="jquery.js"></script>
<script type="text/javascript" src="jquery-ui.min.js"></script>
 :
解決策は
 :
<script>
window.nodeRequire = require;
delete window.require;
delete window.exports;
delete window.module;
</script>
<script type="text/javascript" src="jquery.js"></script>
<script type="text/javascript" src="jquery-ui.min.js"></script>
 :
補足:20160704 JSファイル読み込みの別の方法
 :
</script>
require('jquery.js')
require('jquery-ui.min.js')
</script>
 :
★ 補足:20160707
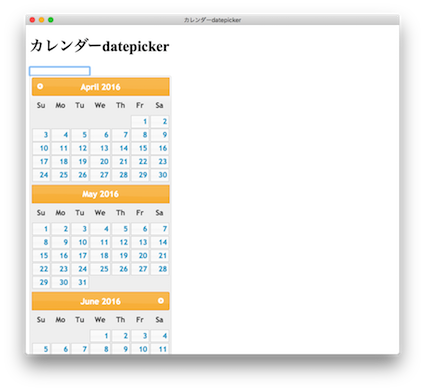
ELECTRONでJQUERYを使ってみる.
ここのサイトのようにJQUERY_AFTER.JSを作るのが一番スマートな書き方なような気がしました。
