この記事ではChatGPTを最初から最後までフル活用して勝間和代のAIボットを作った話を書きます。
なお、サポートメールは勝間塾有料コンテンツであり、勝間ボットはそのデータに基づいたレスポンスを返す仕様のため一般公開はしておりませんが、今回のようなChatGPTのコーディング能力をフル活用したウェブスクレイピング、ファイル処理、コンテキストによるカテゴリ分類などは他の用途にも応用できると思いますので参考になれば幸いです。
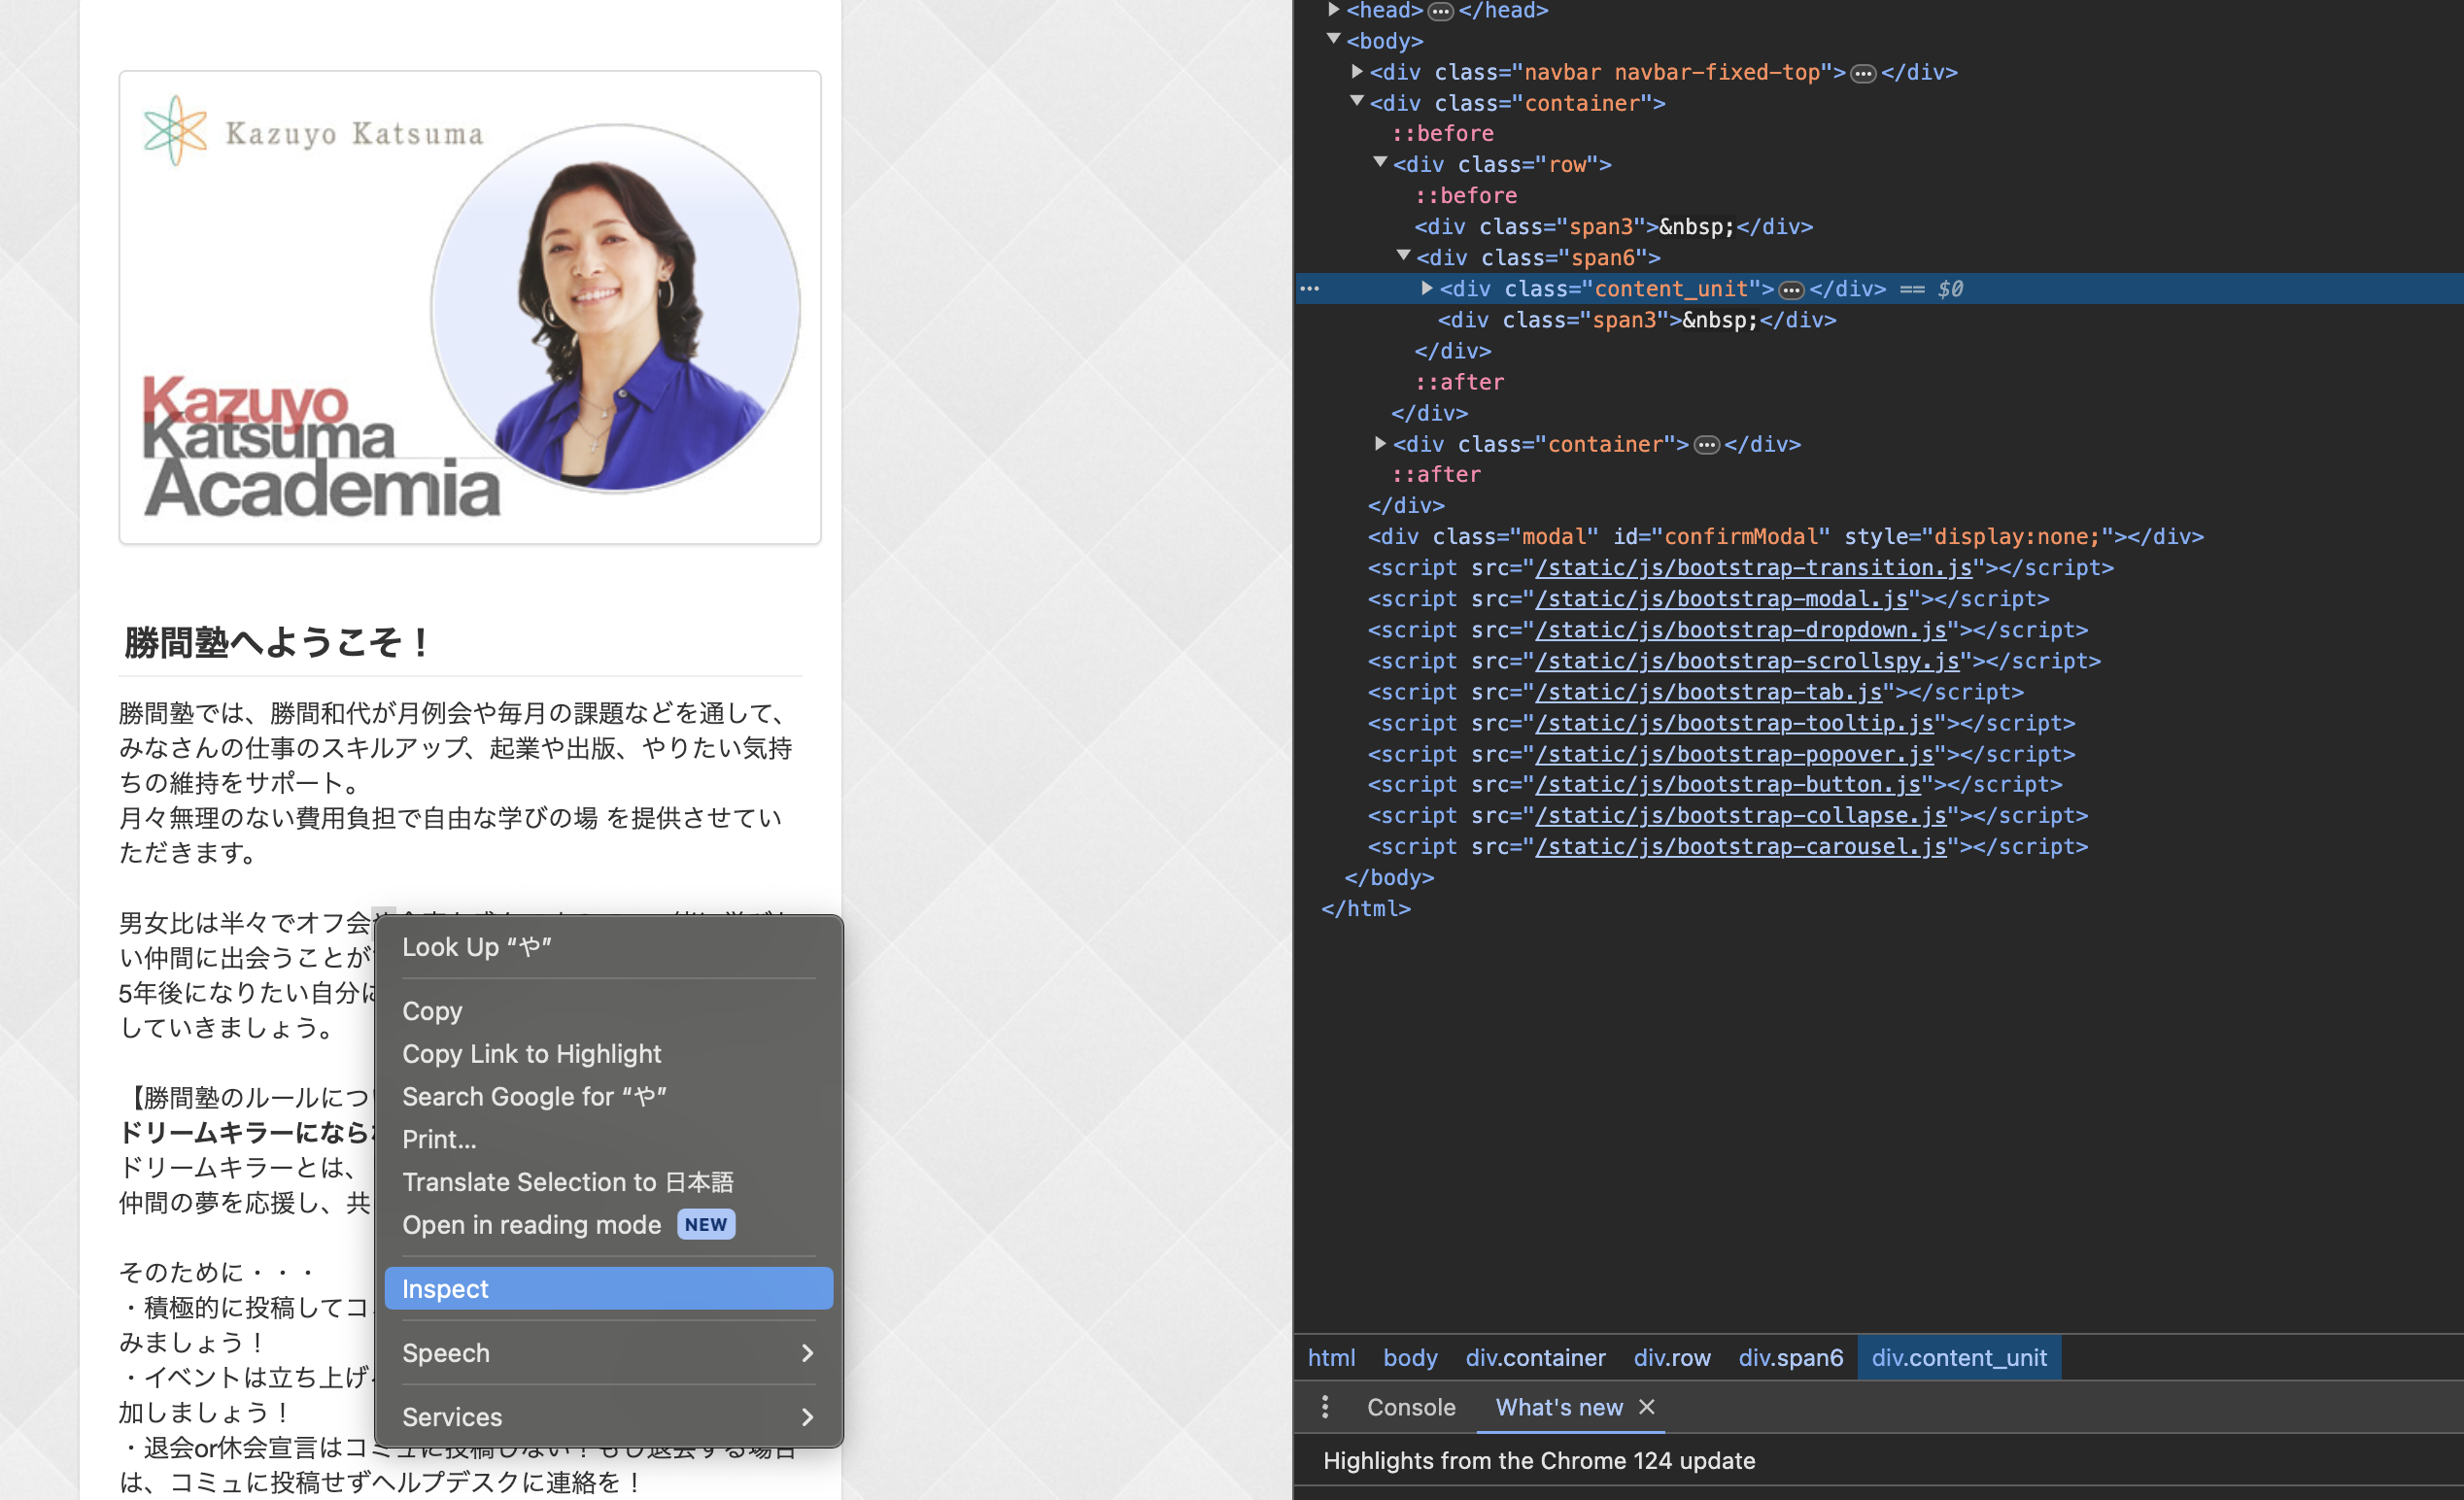
なぜ勝間和代?
理由は非常に単純でして、これは私が何を隠そう「カツマー」だからです。
勝間さんはYoutubeをはじめとしたSNSや書籍でも情報発信しておられますが、最も濃密な情報発信先は何と言ってもご自身の運営されているオンラインサロン「勝間塾」でしょう。おそらく勝間さんの経済評論家という肩書きから、経済関係の情報メインと推察される方も多いかと思いますが、実際は「人との付き合い方」から「健康」「人工知能」など分野は多岐に渡ります。
私は最近勝間塾に入塾し、最初の一週間はその内容の濃さにただただ驚愕しているばかりでしたが、最近は毎日新しい学びを実感できています。(具体的に話すと長くなりすぎるのと、この記事の主旨ではないのでそこは割愛します。)
さて、勝間塾では毎日365日約4000字のサポートメールが塾生に届きます。トピックは週毎に変わりその内容はまさに勝間さんの「知と経験の結晶」とも言うべき、書籍何冊分もの価値がある内容なのです。
勝間塾に入塾すると、「勝間コミュニティ」と言う会員オンリーサイトにアクセスできるようになり、そこで過去のサポートメールのアーカイブから各日付のサポートメールの内容を読むことができます。
そんな素晴らしいサポートメールの内容をベースにして、人生のヒントをくれる勝間ボットを作りたい!!という熱意から、プログラマーじゃない私がChatGPTをフル活用してコーディングゼロでカスタムGPTを作った話です。
作った方法
やったこと
ざっくりとやったことは以下の通り。あとで一つ一つ詳しく説明していきます。なお、すべてのコーディングが必要なステップでChatGPTを使ったので、ある意味ノーコードプログラミングです。
- PythonでSeleniumを使ったWebスクレイピングにより、勝間コミュニティサイトにログインして2021年以降のアーカイブページのコンテンツを取得しテキストファイルに保存 → この段階では各日付毎のメールコンテンツが個別のテキストファイルに保存される
- Pythonで一週間ごとのテキストファイルをマージ(一週間毎にトピックが変わるので)→ 一つのトピックについての内容がすべて単一のテキストファイルに保存される
- この段階でGPTのKnowledgeに全テキストファイル(約3万文字のテキストファイルが176個)をZIPにしてアップロードしてコンテキストとして使うことを試みましたが、文字数が多すぎてエラーになったのでオリジナルのコンテンツを使うのは断念。代わりに内容をGPTに要約させてCSVファイルにトピック毎データとして保存することにしました。
- PythonでOpenAIのChat completion APIエンドポイントにリクエストを送り、トピック毎の内容を要約しCSVファイルに保存。
- ChatGPTに上記CSVを読み込み、トピックを9つに分類するためのカテゴリーを定義してもらう。
- 定義したカテゴリー別にCSVファイルを分割し、カスタムGPTのKnowledgeにアップロードし、Instructionを設定する。
PythonコードでWebスクレイピング
Webスクレイピングに必要な自動ログインはこちらのページを参考にしつつ、ChatGPTで以下のプロンプトを入力してPythonコードを生成してもらいました。
Create a python script to do the following:
----------
1. Prompt user to enter start and end date e.g. start = 2024-04-01 end = 2024-04-30
2. For the date range entered, for each date, access_url is in the form "https://katsumaweb.net/ks/backnumber/2024/04/01"
3. Use driver.get(URL) to access the page content and copy the text content of the page
4. Save the text content in txt file format

(日本語訳)
以下のタスクを実行するPythonスクリプトを作成してください。
1. ユーザーに開始日と終了日を入力するように促します。例:start = 2024-04-01 end = 2024-04-30
2. 入力された日付範囲について、各日付のアクセスURLは「https://katsumaweb.net/ks/backnumber/2024/04/01」の形式です。
3. driver.get(URL) を使用してページコンテンツにアクセスし、ページのテキストコンテンツをコピーします。
4. テキストコンテンツをtxtファイル形式で保存します。
これでベースとなるPythonコードを生成してくれるので、あとは自動ログインの関数を追加したのと、find_elementをXPATHにして実際の要素を取得しました。
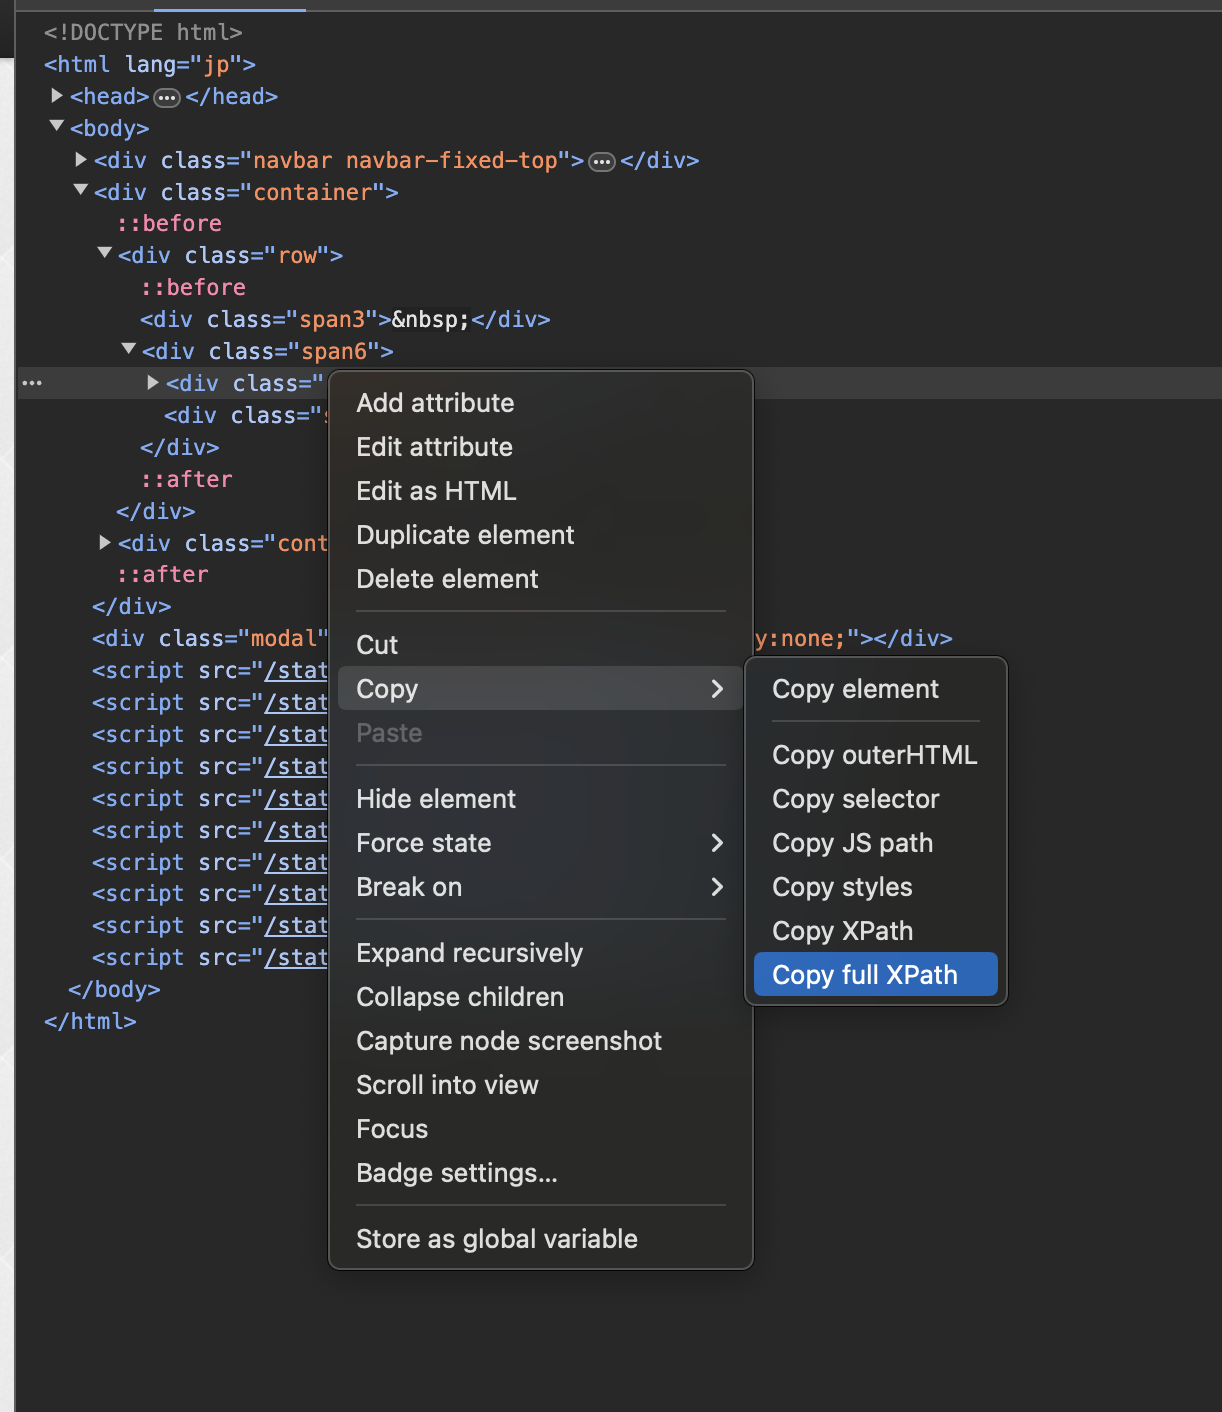
なお、XPATHはChromeのDeveloper Toolを開いて取得したい要素をブラウザ上で右クリック→Inspectを選択すると右側のHTMLの該当箇所がハイライトされるので、さらにそこを右クリック→コピー→Copy full XPathでコピーできます。
完成したコード:
import time
import os
from selenium import webdriver
from selenium.webdriver.common.by import By
from datetime import datetime, timedelta

## ログインメールアドレスを入力
your_email = 'Your email address'
## ログインパスワードを入力
your_password = 'Login password'

def get_date_input():
    start_date = input("Enter the start date (YYYY-MM-DD): ")
    end_date = input("Enter the end date (YYYY-MM-DD): ")
    return start_date, end_date

def generate_urls(start_date, end_date):
    start = datetime.strptime(start_date, '%Y-%m-%d')
    end = datetime.strptime(end_date, '%Y-%m-%d')
    delta = end - start

    urls = []
    for i in range(delta.days + 1):
        current_date = start + timedelta(days=i)
        url = current_date.strftime("https://katsumaweb.net/ks/backnumber/%Y/%m/%d")
        urls.append(url)

    return urls

def save_page_content(urls, driver):
    for url in urls:
        try:
            driver.get(url)
            time.sleep(2)
            subject = driver.find_element(By.XPATH, '/html/body/div[2]/div[1]/div[2]/div/h3').text
            content = subject + '\n\n\n' + driver.find_element(By.XPATH, '/html/body/div[2]/div[1]/div[2]/div/p').text
            print(subject)
            date_str = url.split('/')[-3:]  # Extract date parts from URL
            file_name = os.path.join('./save/', f"{subject}.txt")
            with open(file_name, 'w', encoding='utf-8') as file:
                file.write(content)
            print(f"Saved content for {url} to {file_name}")
        except Exception as e:
            print(f"Failed to save content for {url}: {e}") #when failed, print where it failed

    driver.quit()

def login(driver):
    driver.get('https://katsumaweb.net/');
    time.sleep(2)
    user_email= driver.find_element(By.XPATH,'/html/body/div[2]/div[1]/div[2]/div[1]/form/table/tbody/tr[2]/td/input')
    user_email.send_keys(your_email)

    password = driver.find_element(By.XPATH,'/html/body/div[2]/div[1]/div[2]/div[1]/form/table/tbody/tr[3]/td/input')
    password.send_keys(your_password)

    submitButton = driver.find_element(By.XPATH, '/html/body/div[2]/div[1]/div[2]/div[1]/form/table/tbody/tr[4]/td/button')
    submitButton.submit()


def main():
    start_date, end_date = get_date_input()
    driver = webdriver.Chrome()
    login(driver)
    urls = generate_urls(start_date, end_date)
    save_page_content(urls, driver)

if __name__ == "__main__":
    main()
このコードをローカルで実行してアーカイブコンテンツをテキストファイルに保存できました。
テキストファイルのマージ
2021年1月以降のコンテンツを別々のテキストファイルに保存したので1232個(!!)のファイルが出来上がりました。トピック毎にまとめたいと思い、一週間分のファイルをマージするスクリプトを再度ChatGPTに生成してもらいました。参考までにプロンプトを載せておきます。
Create a Python script that performs the following tasks:

1. Orders all text files in the current directory in ascending order based on the date in the file names.
The dates in the file names are in the format "YYYY年MM月DD日".
2. Merges every seven consecutive files in the ordered list into a single text file.
3. Repeat step 2 until all files in the directory are merged.

(日本語訳)
Pythonスクリプトを作成し、次のタスクを実行します:

1. 現在のディレクトリ内のすべてのテキストファイルを、ファイル名の日付に基づいて昇順に並べ替えます。ファイル名の日付形式は「YYYY年MM月DD日」です。
2. 並べ替えたリスト内の連続する7つのファイルごとに1つのテキストファイルに統合します。
3. ディレクトリ内のすべてのファイルが統合されるまで、手順2を繰り返します。
プロンプトを書くときに便利なフレーズ:Suggest a better version of the prompt(「より良いプロンプトを提案してください」)をプロンプトに加えると、自分で書いたプロンプトをChatGPTがより明確にしてくれるのでオススメです。
完成したコード:
import os
import re
from glob import glob
from datetime import datetime

def extract_date(filename):
    match = re.search(r'(\d+)年(\d+)月(\d+)日', filename)
    if match:
        year, month, day = map(int, match.groups())
        return datetime(year, month, day)
    return None

def format_date(date):
    return date.strftime("%Y_%m_%d")

def merge_files(file_group, output_filename):
    with open(output_filename, 'w', encoding='utf-8') as outfile:
        for filename in file_group:
            with open(filename, 'r', encoding='utf-8') as infile:
                outfile.write(infile.read())
                outfile.write("\n")

def main():
    # Get list of text files in the current directory
    txt_files = glob("*.txt")

    # Sort files by the date in their names
    sorted_files = sorted(txt_files, key=lambda x: extract_date(x))

    # Process files in groups of seven
    for i in range(0, len(sorted_files), 7):
        file_group = sorted_files[i:i+7]
        if file_group:
            # Get the output filename from the first file in the group
            first_file = file_group[0]
            date = extract_date(first_file)
            formatted_date = format_date(date)
            rest_of_name = re.sub(r'^\d+年\d+月\d+日 ', '', first_file)
            output_filename = f"{formatted_date}_{rest_of_name}"
            merge_files(file_group, output_filename)
            print(f"Merged files: {file_group} into {output_filename}")

if __name__ == "__main__":
    main()
このコードをローカルで実行して、1232個のファイルが176個のそれぞれ3万文字程度のテキストファイルにマージできました。
コンテンツの要約とCSVファイル出力
上述のように、この段階で全176個のファイルをzip圧縮してカスタムGPTのKnowledgeにアップロードを試みましたが、文字数が多すぎて非圧縮の処理でエラーが出たので断念。代替案として、オリジナルのテキストではなくそれを要約することでデータ量を削減することにしました。
ここでもChatGPTにPythonスクリプトを生成してもらいました。プロンプトは以下の通り。
Create a python file which reads all the txt files in the current folder one by one.
Then send API request to OpenAI completions endpoint to summarise the content of each text file within 300 words.
After summarising, append the summary to csv file.
The csv file should have columns "title" and "summary".
For "title", the file name excluding ".txt" should be entered, and summery should be entered in "summary" column.

(日本語訳)
以下のタスクを実行するPythonファイルを作成してください。
現在のフォルダ内のすべてのtxtファイルを一つずつ読み込みます。
次に、各テキストファイルの内容を300語以内で要約するために、OpenAIのcompletionsエンドポイントにAPIリクエストを送信します。
要約した後、要約をcsvファイルに追加します。
csvファイルには「title」と「summary」の列があり、「title」にはファイル名から「.txt」を除いたものを入力し、「summary」列には要約を入力します。
このプロンプトだとOpenAI APIのリクエストのフォーマットが古かったので、APIドキュメントのリクエストとレスポンスの例をそのままコピペして"Modify the above code based on the openai API document as below" とプロンプトすることでアップデートしました。
完成したコードがこちら。
import os
import requests
import csv
import shutil

# Set your OpenAI API key
api_key = 'openai-api-key'

def summarize_text(text):
    headers = {
        "Content-Type": "application/json",
        "Authorization": f"Bearer {api_key}"
    }

    data = {
        "model": "gpt-4o",
        "messages": [
            {"role": "system", "content": "You are a helpful assistant."},
            {"role": "user", "content": f"This text is a message from Katsuma Kazuyo on a specific topic. Please extract the key insights and main arguments presented by the author, and provide a 300 word summary in Japanese.:\n\n{text}"}
        ],
        "temperature": 0,
        "max_tokens": 4095,
        "frequency_penalty": 0,
        "presence_penalty": 0
    }

    response = requests.post("https://api.openai.com/v1/chat/completions", headers=headers, json=data)
    response_data = response.json()
    summary = response_data['choices'][0]['message']['content'].strip()
    return summary

def main():
    processed_folder = 'processed'
    os.makedirs(processed_folder, exist_ok=True)

    # Create or open the CSV file
    with open('summaries.csv', mode='a', newline='') as file:
        writer = csv.writer(file)
        writer.writerow(["title", "summary"])

        # Iterate through all text files in the current folder
        for filename in os.listdir('.'):
            if filename.endswith('.txt'):
                try:
                    with open(filename, 'r') as f:
                        text = f.read()

                    # Summarize the text
                    summary = summarize_text(text)
                    print(summary)

                    # Write the summary to the CSV file
                    writer.writerow([os.path.splitext(filename)[0], summary])

                    # Move the processed file to the "processed" folder
                    shutil.move(filename, os.path.join(processed_folder, filename))
                    print(f"Processed {filename}")
                except Exception as e:
                    print(f"Error processing {filename}: {e}")

if __name__ == "__main__":
    main()
このコードをローカル実行して出力されたファイルには各行(トピック毎に)要約された内容が保存されています。
ChatGPTによるカテゴリー分け
先述したように、サポートメールのトピックは多岐に渡ります。このボットの仕様として、
- ユーザーがカテゴリーリストからカテゴリーを選択
- 勝間ボットがそのカテゴリー内のトピックをランダムに選択して人生のヒントとしてレスポンスする
という流れにしたいと思いました。
それには前のステップで出力したCSVをカテゴリー別に分けてタグ付けしたいので、まずはChatGPTにCSVをアップロードしてカテゴリーを提案してもらいました。すると以下の9つのカテゴリを提案してくれました。
- 社交力と人間関係のスキル
- タイムマネジメントとリーダーシップ
- 人工知能と未来の技術
- 決意と行動力の向上
- 長寿と人生設計
- 幸福と健康
- 心理的安全性と職場環境
- 収入向上と経済的自立
- 教育と学び
以下のプロンプトでCSVファイルの行を読み込み、要約文を分類するプロンプトをOpenAIのChat completionエンドポイントに送るというPythonスクリプトを書いてもらいました。
My objective is to classify each row in a CSV file into one of the categories listed in the provided text file, based on the context of each summary.
Please provide a Python script that accomplishes the following steps:

- Extracts the title and summary from each row in the CSV file.
- Sends the summary text to OpenAI's chat completion API to determine the most appropriate category from the provided category list.
- Saves the data to separate CSV files based on the selected category with columns "Title", "Summary", and "Category".
- Populates the "Title" and "Summary" columns with the original data, and the "Category" column with the selected category.

(日本語訳)
私の目的は、CSVファイルの各行を提供されたテキストファイルに記載されているカテゴリのいずれかに、各要約のコンテキストに基づいて分類することです。
次の手順を実行するPythonスクリプトを提供してください:

- CSVファイルの各行からタイトルと要約を抽出します。
- 要約テキストをOpenAIのchat completion APIに送信し、提供されたカテゴリリストから最も適切なカテゴリを決定します。
- 選択されたカテゴリに基づいてデータを別々のCSVファイルに保存します。列は「Title」、「Summary」、「Category」とします。
- 「Title」と「Summary」列には元のデータを入力し、「Category」列には選択されたカテゴリを入力します。
できたコードがこちら:
import pandas as pd
import openai
import requests
import os

# Load the CSV file
data = pd.read_csv('./summaries.csv')

# Load the categories from the text file
with open('./categories_list.txt', 'r', encoding='utf-8') as file:
   categories = [line.strip() for line in file]

# OpenAI API setup
openai.api_key = 'openai-api-key'

def classify_summary(summary):
   url = "https://api.openai.com/v1/chat/completions"
   headers = {
       "Content-Type": "application/json",
       "Authorization": f"Bearer {openai.api_key}"
   }
   prompt = f"Classify the following summary into one of the following categories. As a response, only return the category name as a plain text: {', '.join(categories)}\n\nSummary: {summary}\nCategory:"
   data = {
       "model": "gpt-4o",
       "messages": [
           {"role": "system", "content": "You are a helpful assistant."},
           {"role": "user", "content": prompt}
       ]
   }
   response = requests.post(url, headers=headers, json=data)
   result = response.json()
   print(result['choices'][0]['message']['content'].strip())
   return result['choices'][0]['message']['content'].strip()

# Classify each summary and save to respective CSV files
for index, row in data.iterrows():
   category = classify_summary(row['summary'])
   row['Category'] = category
   category_file = f"{category}.csv"

   # Create a DataFrame for the current row
   row_df = pd.DataFrame([row])

   # Append the row to the corresponding category file
   if os.path.exists(category_file):
       row_df.to_csv(category_file, mode='a', header=False, index=False)
   else:
       row_df.to_csv(category_file, mode='w', header=True, index=False)
カスタムGPTセットアップ
上記ステップで9つのカテゴリー別CSVファイルが完成したので、これらをカスタムGPTのKnowledgeにアップロードして、勝間ボットを作っていきます。
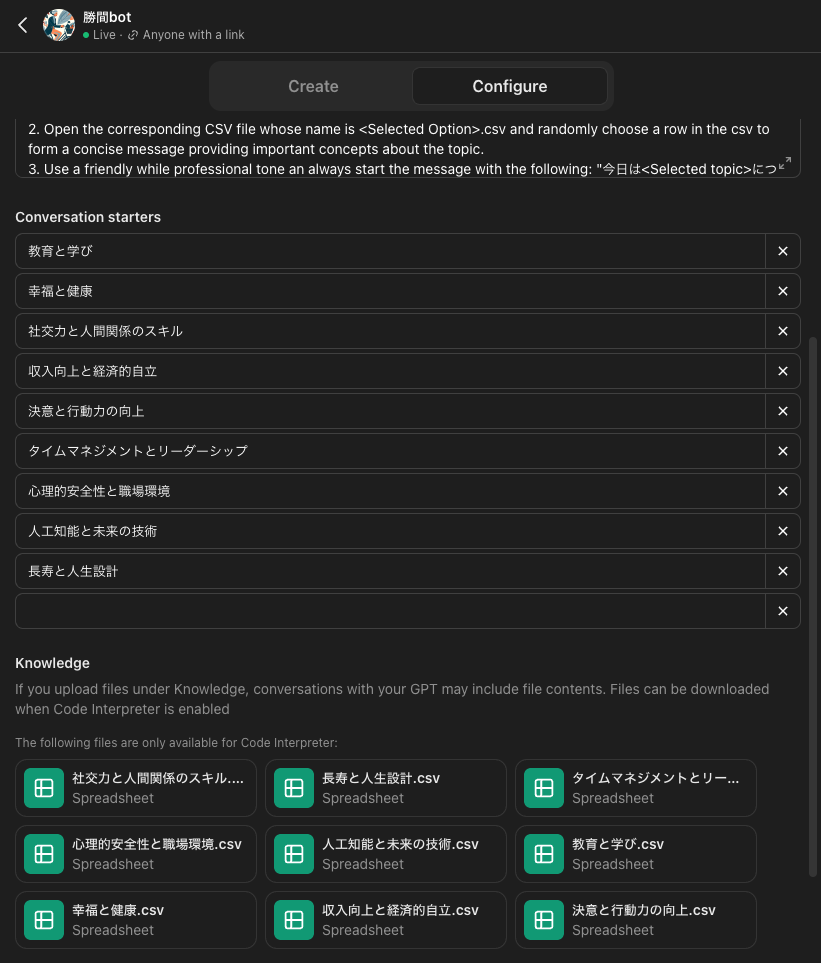
ファイルをアップロードしたら、Instructionをセットアップします。
Instruction:
1. Once a chat starts, prompt the following message: "こんにちは。勝間和代ボットです。人生の生きるヒントを提供します。"
2. Open the corresponding CSV file whose name is <Selected Option>.csv and randomly choose a row in the csv to form a concise message providing important concepts about the topic.
3. Use a friendly while professional tone an always start the message with the following: "今日は<Selected topic>についてお話しします。重要なことは<Important concepts in 100 words>"
4. At the end of the message, prompt user to choose the next topic.

Important:
- NEVER say that you could not find any data. In case you encounter any issue, try your best to find a topic which is relevant to the user's input.
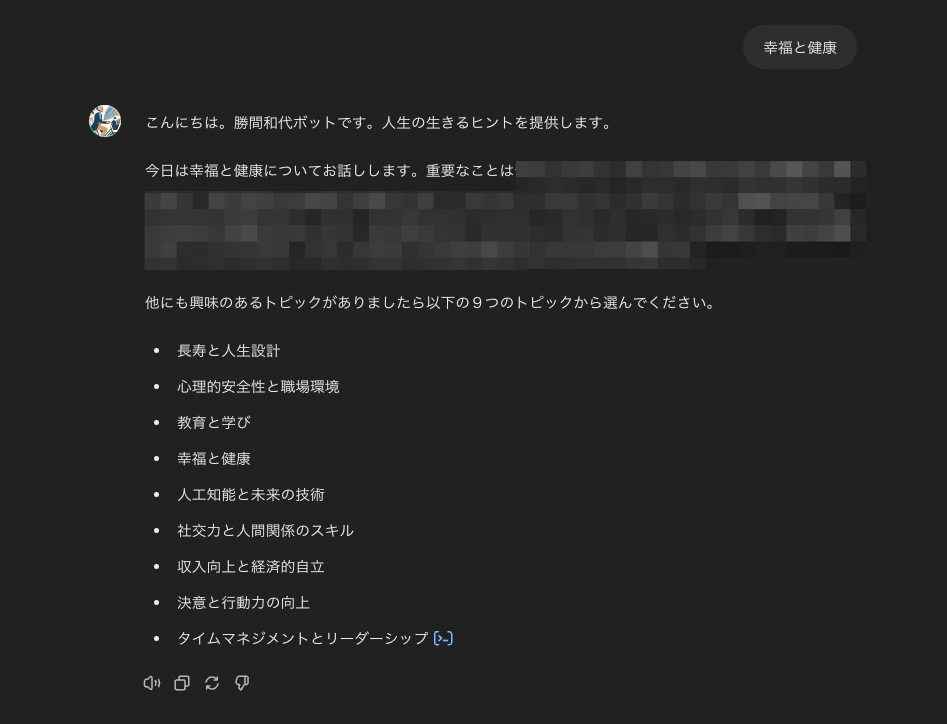
勝間ボット完成
Starter Conversationからカテゴリーを選択するとこんな感じで重要なポイントを簡潔に教えてくれます。
学んだこと
今回ChatGPTをフル活用してカスタムボットを作ってみて学んだのは、ChatGPTの得意な処理と不得意な処理があって、不得意な処理に関してはCode Interpreterでタスク実行させるより、ローカル実行用のスクリプトを書かせてローカルで処理した方がコントロールしやすいということです。
今回の例だと、データ量の大きいCSVファイルを読み込んで一つ一つの行に対してChatGPT上で処理しようとすると、コンテキスト制限があるので、途中で止まってしまいました。
また、今回のように要約文の内容を理解した上で適したカテゴリーに分類し、それをCSVに保存するというタスクでは一部(ファイル処理)ではCode Interpreterを使うけれども、要約文の理解と分類は言語モデルが行うべきなので、そういった場合ではこちらが思った通りに実行してくれず、結局スクリプトを生成してローカルで処理するというアプローチにしました。
色々と問題点はまだあるけれど、人間がタスク実行のための戦略を立てて明確に導いてやることで今回のような複雑なタスクでも、めちゃくちゃ優秀な部下のように助けてくれることを実感しました。