はじめに
JTAppleCalendarを触る機会がたまたまあり、記事を執筆当時に公式チュートリアルにバージョン7系は記されていましたが、バージョン8.0.0のページでは具体的な使い方は記述されていませんでした。
そこで、バージョン8系での簡単な処理についてまとめてみました。
これからの流れは、こちらの記事をベースに進めています。
手順
前準備
適当なプロジェクトを作成します。今回は、JTAppleCalendarSampleで作成しました。
今回JTAppleCalendarはcocoapodsでインストールします。
この記事ではバージョンは8.0.3をインストールしています。
インストールの方法はベースの記事を参照してください。
インストール後は.xcworkspaceを開いてください。
実装
パーツ
プロジェクトを開いて、まずはパーツを設置しましょう。
Main.storyboardではUIView(オレンジ背景)の上にUICollectionViewを設置します。
曜日の部分は適当にUILabelを並べています。

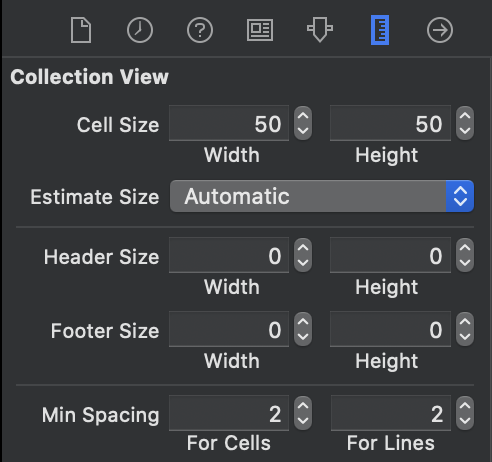
CollectionViewのCustom ClassはClassをJTACMonthView、moduleをJTAppleCalendarにしてください。

セルの境界をわかるようにするため、Min Spacingを設定しておきます。
カスタムセル
カレンダーの日付部分のセルのファイルを生成します。
MainCalendarViewCellというクラス名にし、親クラスはJTACDayCellを入力して下さい。(バージョン7系ではJTAppleCellでした)
XIBファイルも同時に作成しておきます。

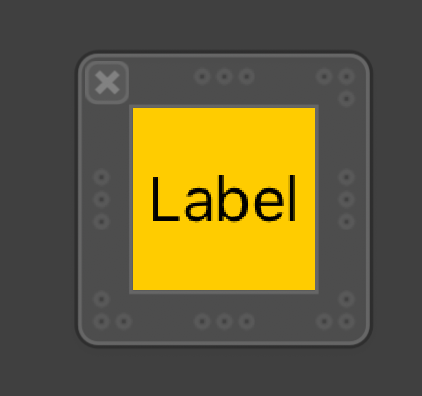
MainCalendarCell.xibでは、Labelは縦横中心に設置しております。
セルとセルの境界をわかるようにするため、背景に色を付けています。
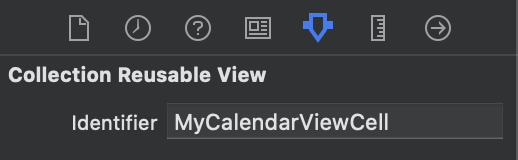
セルのCustom ClassはMyCalendarViewCellにして、同様にIdentifierにも同様にもMyCalendarViewCellを設定します。
実装ですることは3つ
- JTAppleCalendarをimport
- MainCalendarViewCell.xibで置いたLabelをOutlet接続
- configureメソッドを作成(カレンダークラスで使用)
まとめたものが以下です。
import UIKit
import JTAppleCalendar // 1

class MyCalendarViewCell: JTACDayCell {

    @IBOutlet weak var titleLabel: UILabel! // 2

    /// 3 セルの表示の設定をする
    /// ex.ラベルに日にちを入れる
    func configure(cellState: CellState) {
        titleLabel.text = cellState.text
    }
}
カレンダービュー
次にカレンダービューの実装をします。
UIViewクラスを継承したMyCalendarView.swiftを作成します。
ここでやることは、
- JTAppleCalendarをimport
- Main.storyboadで設置したカレンダービューをOutlet接続する
- delegateとdatasourceを定義する
- cellの登録をする
です。
import UIKit
import JTAppleCalendar // 1

class MyCalendarView: UIView {

    @IBOutlet var calendarView: JTACMonthView! // 2

    override func awakeFromNib() {
        // 3 delegateとdetasourceの定義
        calendarView.calendarDelegate = self
        calendarView.calendarDataSource = self

        // 4 MainCalendarCellの登録
        let nibName = UINib(nibName: "MyCalendarViewCell", bundle:nil)
        calendarView.register(nibName, forCellWithReuseIdentifier: "MyCalendarViewCell")
    }
}
Delegate
上のメソッドは空の記述でも動きますが、下のメソッドと同様のコードを書く必要があるようです。
理由はこちらのProblem 1を参照してください。
extension MyCalendarView: JTACMonthViewDelegate {
    func calendar(_ calendar: JTACMonthView, willDisplay cell: JTACDayCell, forItemAt date: Date, cellState: CellState, indexPath: IndexPath) {
        let cell = cell as! MyCalendarViewCell
        cell.configure(cellState: cellState)
    }

    // cellの設定
    func calendar(_ calendar: JTACMonthView, cellForItemAt date: Date, cellState: CellState, indexPath: IndexPath) -> JTACDayCell {
        let cell = calendar.dequeueReusableCell(withReuseIdentifier: "MyCalendarViewCell", for: indexPath) as! MyCalendarViewCell
        cell.configure(cellState: cellState)
        return cell
    }
}
Datasoure
extension MyCalendarView: JTACMonthViewDataSource {
    // カレンダー作成に必要なパラメータの設定
    func configureCalendar(_ calendar: JTACMonthView) -> ConfigurationParameters {
        var current = Calendar.current
        current.locale = Locale(identifier: "ja_JP")
        current.timeZone = TimeZone(identifier: "Asia/Tokyo")!
        let date = Date()

        let startDate = date // 現在
        let endDate = current.date(byAdding: .month,
                                   value: +1,
                                   to: current.startOfDay(for: date)) //1月後

        let parameters = ConfigurationParameters(startDate: startDate,
                                                 endDate: endDate!,
                                                 numberOfRows: 5,
                                                 calendar: current,
                                                 firstDayOfWeek: .sunday)
        return parameters
    }
}
結果
これを実行すると、下記のような画面でカレンダーが表示されます。

おわりに
基本的にはバージョン7系のときと使い方は変わりませんでした。
オブジェクト名が変わっているので、そこは注意が必要なようですね。