1. 概要
React Three Fiberにて作成した3DオブジェクトをStorybook上で管理する、環境構築に関する記事に始まり、前回はEffect (PostProcessing)のComponentの管理に関する記事を書きました。
今回は、Generativeなオブジェクトの生成などに役立つGPGPU (Compute Shader)を活用したオブジェクトの生成を行いましたので、ご共有をさせていただきます。
2. 内容
前回は下図の様にEffectが掛かる所まで作成しました。
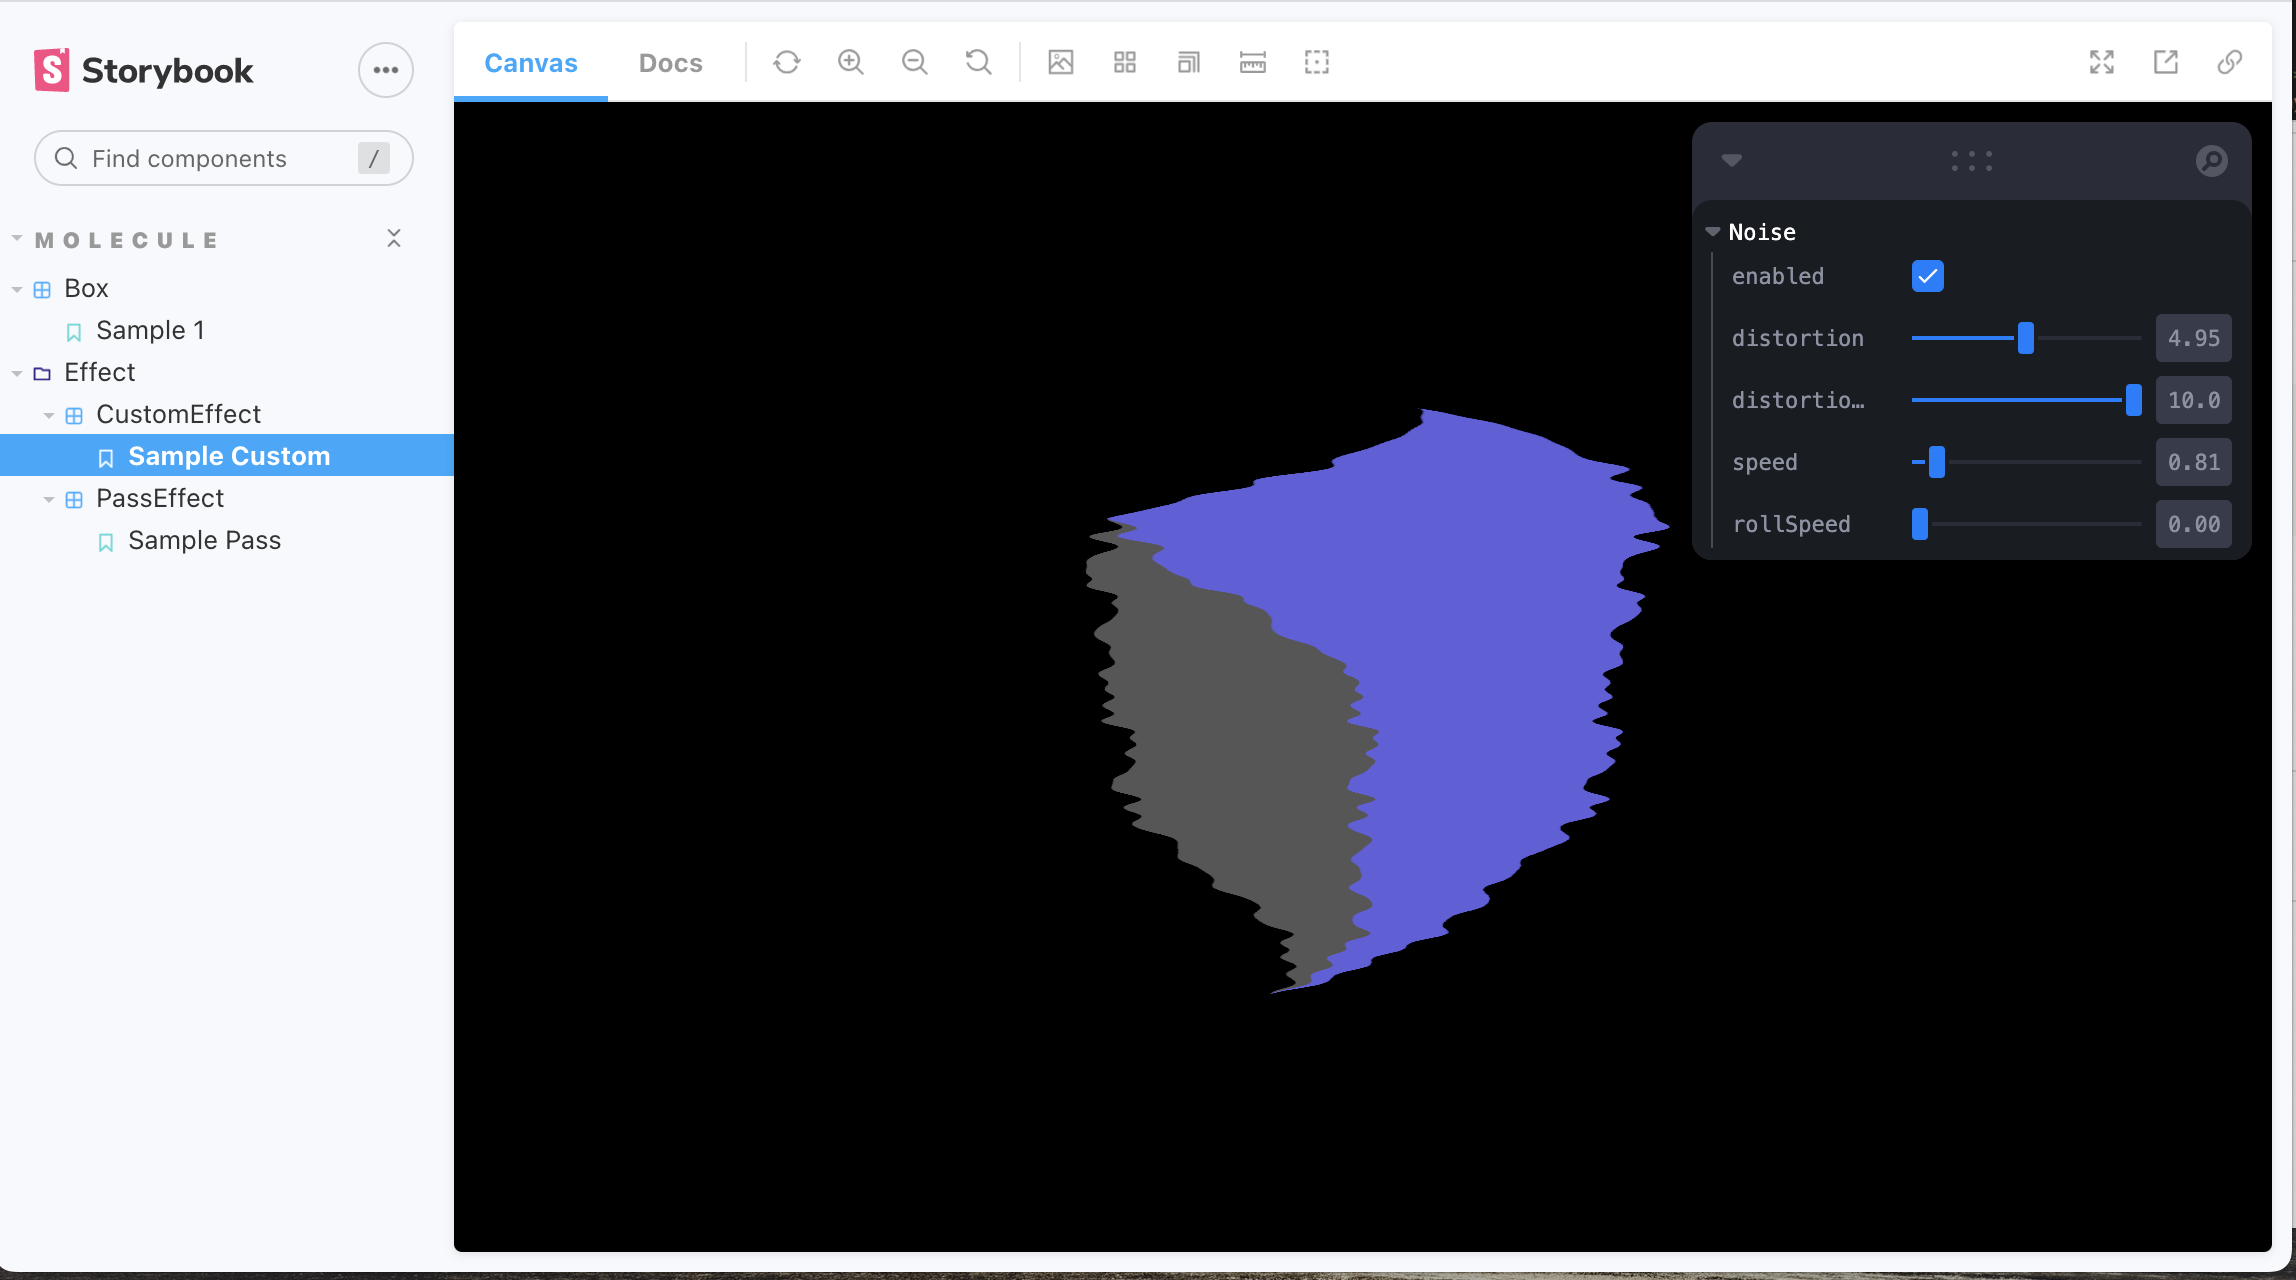
今回は下図の様に、GPGPUを用いたGenerativeなオブジェクトが生成される所まで作成しました

全体的なコードは以下github repositoryから参照することができます
GPGPUは簡潔に言えば、各座標毎の演算など、計算量の多い数値計算をCPUでなくGPUベースにて並列計算できる技術です
人工知能分野においても、ライブラリ内の演算の高速化などに主に使用されています。
今回は、1000x500のparticleの座標の演算結果を1000x500のtextureにて保持し、それぞれの要素 (座標)に対してGLSLによる演算を並列に行うことで処理の高速化を実現しています
3. 技術
React Three Fiberだけでは対応しきれなかったため、Three.js本体のGPUComputationRendererを管理するclassを作成し、GPGPU周りの処理を管理しています。
参考資料
GPGPU周りの理論に関しては、主に以下の記事を参考とさせていただきました
GPGPUがまったくわからないのでGPUComputationRenderer.jsをまず調べてみるメモ
また、Simulator等の設計は以下記事を一部参考とさせていただきました
https://qiita.com/nemutas/items/b40baa2a1f33fae6b20d
4. 実装
先に、全体の構成としては下図のようなイメージです (雑で恐縮ですが・・)
React Three Fiberが適用するuseFrame Hooksが各frame毎の演算処理を制御するライフサイクルとなっており
基本的には、以下の1~3を繰り返すイメージです
- Simulatorクラスを利用し、GPGPU演算処理を行う
- Simulatorクラスから座標演算結果を受け取り、Particle側の
geometry,materialに渡す - (ライフサイクルにて) レンダリングを行う

フォルダ構成は以下の様な形です
src
 L components/molecules/Particle
                            L module
                                L simulator.ts
                                L simulator.type.ts
                                L update.ts
                            L index.stories.tsx
                            L index.tsx
 L utils/shader
            L Particle
                  L particlesShader.ts
                  L positionShader.ts
                  L velocityShader.ts
                  L snoise.ts
Particle Part
geometry
const geometry = useMemo(() => {
    const geo = new THREE.BufferGeometry();

    const uv = new Float32Array(width * height * 2);
    let p = 0;
    for (let i = 0; i < width; i++) {
        for (let j = 0; j < height; j++) {
            uv[p++]= i / (width - 1);
            uv[p++]= j / (height - 1);
        }
    }

    geo.setAttribute('uv', new THREE.BufferAttribute(uv, 2));
    const positions = new Float32Array(width * height * 3);
    geo.setAttribute('position', new THREE.BufferAttribute(positions, 3));
    return geo;
}, []);
[1,1]~[width,height]を[0,0]~[1,1]に正規化します
BufferAttributeに対して、[..., ...{normalizedX, normalizedY}, ...]の順に交互に格納しuvします
positionはwidth x heightのRGB(3次元)として設定しています
(後でGPGPU側の初期値を初期座標として設定するので、この時点では特に何も代入しません)
material
const uni = {
    time: { type: 'f', value: 1.0 },
    texturePosition: { value: null },
    textureVelocity: { value: null }
}
const matShader = useMemo(() => {
    const mat = new THREE.ShaderMaterial({
        uniforms: uni,
        vertexShader: particlesVertexShader,
        fragmentShader: particlesFragmentShader,
        transparent: true
    });
    mat.extensions.drawBuffers = true;
    return mat;
}, []);

<points geometry={geometry} material={matShader}/>
useFrameによるframe毎の更新
useFrame(() => {
    ...
    simulator.compute(time); // GPGPUの更新
    updateParticlesUniforms(matShader, simulator); // 演算結果をmaterialに反映する
    ...
    matShader.needsUpdate = true; // 初期描画以降にpositionを更新する場合にはフラグを指定する (重要)
    setTime(time + 1);
});
GPGPU (Simulator) Part
処理手順は以下となります
- 基本的にはuseFrameにてframe単位に
Simulator#computeを呼び出し、textureを更新する - その後、
Simulator#getPositionTextureで取得したtexture (position計算の集合)をParticle側VertexShaderのuniformとして渡す - 最終的に
gl_Positionの計算に使用される事でParticle - GPGPUが繋がる
export class Simulator {
      ...
    constructor(gl: THREE.WebGLRenderer) {
        this.computeRenderer = new GPUComputationRenderer(1000, 500, gl);
        this.init();
    }

    init // computationRendererの初期化
    compute // 更新
    getPositionTexture // positionのtexture (演算結果)を取得する
    getVelocityTexture // velocityの演算結果を取得する
...
関数initにて、positionとvelocityに関し、それぞれ初期化を行うものの、処理自体は殆ど類似しています
1. 初期化(例: position)
// 1. textureの初期化
const initPositionTex = this.computeRenderer.createTexture();

// 2. textureデータを格納しておくオブジェクトを作成する
// GPGPUにて使用するShader (Fragment Shader)のattach
// 第二引数にはfragment shader
// 第三引数には、variableの初期化に用いるtextureを設定する
this.comTexs.position.texture = this.computeRenderer.addVariable(
    'texturePosition',
    positionFragmentShader,
    initPositionTex
);

// 3. Shader間でtextureを参照できる様にする (variableの依存関係を設定する)
// addVariableしたtexture (position.texture)から、position.texture, velocity.textureを参照できる様に紐付ける
this.computeRenderer.setVariableDependencies(
    this.comTexs.position.texture,
    [this.comTexs.position.texture, this.comTexs.velocity.texture]
);
this.comTexs.position.uniforms = this.comTexs.position.texture.material.uniforms;
...

// オフスクリーンレンダリング用のWebGLRenderTargetを作成する
this.computeRenderer.init();
-
initにより、GPUComputationRendererの内部ではWebGLRenderTargetが2つ作成されます -
setVariableにて設定したtextureをライブラリ側でuniform sampler2D texturePositionの様に自動的に挿入してくれる仕様となっております。 - 尚、この時点では、
uniforms.texturePositionの値はnullとなります
2. 更新 (GPGPU演算)
compute = () => {
    this.computeRenderer.compute();
    ...
}
- computeを呼び出す毎 (各フレーム毎)に参照用・格納用を入れ替えます
- shader処理の実行結果を格納用textureに入れる。次回のcompute時にswapし、参照用となったtextureを読み込みます
3. 演算結果取得
getPositionTexture() {
    const target = this.computeRenderer.getCurrentRenderTarget(this.comTexs.position.texture!) as THREE.WebGLRenderTarget;
    return target.texture;
}
5. 総括
GPGPUを活用し作成したオブジェクトをStorybook上で動かしてみました。
全体的なコードは以下github repositoryから参照することができます
今回作成したParticleの絵的な描画処理自体に関してはあまり触れていませんが
いずれ機会があれば掘り下げたいとは思います
(正直、2年程前に作成したネタだったので、詳細をゆっくり整理してからにします)
今後の更新計画は未定ですが、もう少しStorybook自体にfocusした内容にするか、WebAssemblyなどを絡めた内容にするか・・
以上