SwitchBotを買ってきました。
赤外線リモコンを1デバイスで管理できて便利です。
これをNodeREDから制御してみましょう。
必要なもの
- NodeRED環境 (NASの環境にNodeREDを構築しました)
- SwitchBot - HubMini
- その他
手順
SwitchBotの製品登録
スマホアプリを使ってやっておきましょう
スマホアプリで開発者向けオプションからトークンを取得
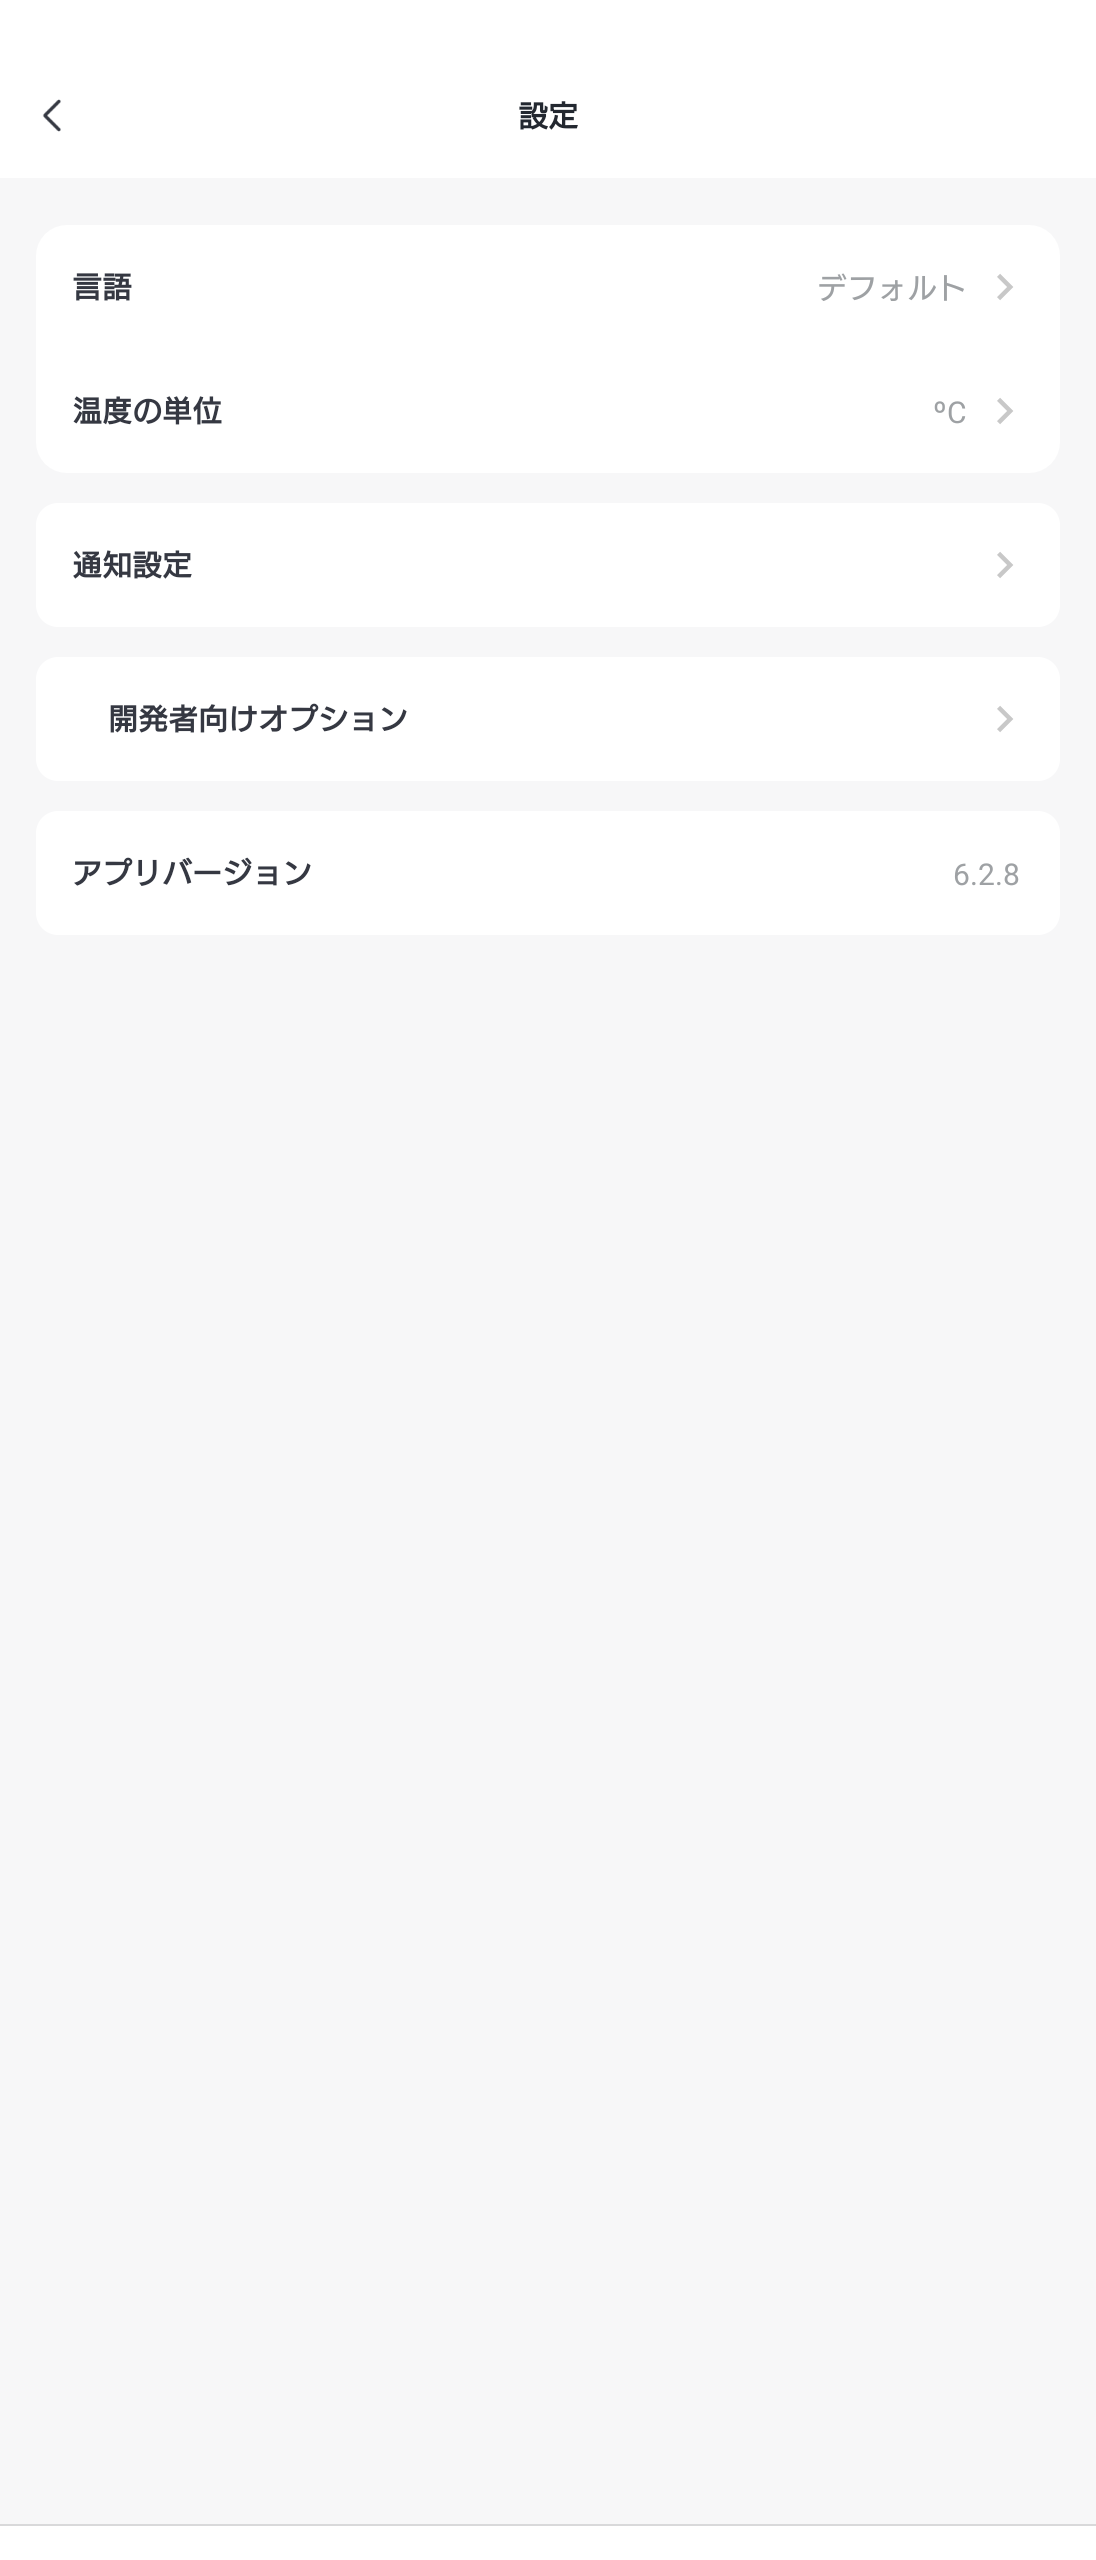
SwitchBotアプリの"プロフィール" > "設定" > "アプリバージョン"を10回タップすると
"開発者オプション"が表示されます。
ここでトークンを取得しメモしておきましょう。

デバイス一覧を取得するフローを作成
制御する前にまずAPIが使えるか確認してみましょう。
下記、NodeREDフローです。読み込んでみると図のようになります。
[{"id":"4eabea3f.a98724","type":"inject","z":"19c27f03.e61db1","name":"","props":[],"repeat":"","crontab":"","once":false,"onceDelay":0.1,"topic":"","x":90,"y":180,"wires":[["e594765f.90d2c8"]]},{"id":"1d848c96.bcdf83","type":"http request","z":"19c27f03.e61db1","name":"","method":"GET","ret":"obj","paytoqs":"ignore","url":"https://api.switch-bot.com/v1.0/devices","tls":"","persist":false,"proxy":"","authType":"","x":410,"y":180,"wires":[["ba6ffbd2.c6f9d8"]]},{"id":"ba6ffbd2.c6f9d8","type":"debug","z":"19c27f03.e61db1","name":"","active":true,"tosidebar":true,"console":false,"tostatus":false,"complete":"payload","targetType":"msg","statusVal":"","statusType":"auto","x":590,"y":180,"wires":[]},{"id":"ad5b3a15.b2e1d8","type":"inject","z":"19c27f03.e61db1","name":"","props":[{"p":"headers","v":"{\"Authorization\": \"\"}","vt":"json"}],"repeat":"","crontab":"","once":true,"onceDelay":0.1,"topic":"","x":90,"y":80,"wires":[["67741ae1.1a2d04"]]},{"id":"67741ae1.1a2d04","type":"change","z":"19c27f03.e61db1","name":"saveToken","rules":[{"t":"set","p":"headers","pt":"flow","to":"headers","tot":"msg"}],"action":"","property":"","from":"","to":"","reg":false,"x":250,"y":80,"wires":[["6391c885.1fced8"]]},{"id":"e594765f.90d2c8","type":"change","z":"19c27f03.e61db1","name":"setToken","rules":[{"t":"set","p":"headers","pt":"msg","to":"headers","tot":"flow"}],"action":"","property":"","from":"","to":"","reg":false,"x":240,"y":180,"wires":[["1d848c96.bcdf83"]]},{"id":"558cfdaf.8413b4","type":"comment","z":"19c27f03.e61db1","name":"デバイス一覧","info":"","x":90,"y":140,"wires":[]},{"id":"745c9589.14302c","type":"comment","z":"19c27f03.e61db1","name":"固定値初期化","info":"","x":90,"y":40,"wires":[]},{"id":"6391c885.1fced8","type":"change","z":"19c27f03.e61db1","name":"lightStatus","rules":[{"t":"set","p":"livingLight","pt":"flow","to":"on","tot":"str"}],"action":"","property":"","from":"","to":"","reg":false,"x":410,"y":80,"wires":[[]]}]
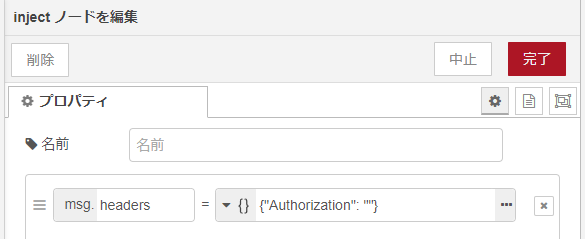
"固定値初期化"の下のinjectノードに取得したトークンを"Authorization"のvalueに入力します。

NodeREDの仕組みについては深くは触れませんが、上側のフローで環境変数的にトークンを保存しておいて、
それを下側のフローで参照している感じです。
デバイス一覧を取得
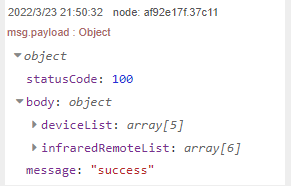
下側のフローのinjectを実行するとデバッグウィンドウに取得結果が出力されます。
私の環境だとこんな感じです。

APIの実行に成功するとstatusCode:100, message:"success"が出力されます。
ちなみにSwitchBotのAPIはたくさんあります。こちら
照明を操作してみる
下記のフローを同じタブに読み込みます。
[{"id":"c65592c9.1b9d5","type":"change","z":"f6f2187d.f17ca8","name":"setToken","rules":[{"t":"set","p":"headers","pt":"msg","to":"headers","tot":"flow"}],"action":"","property":"","from":"","to":"","reg":false,"x":240,"y":500,"wires":[["9bddb062.1fb2e"]]},{"id":"6d55bf79.d2c3","type":"inject","z":"f6f2187d.f17ca8","name":"","props":[{"p":"topic","vt":"str"}],"repeat":"","crontab":"","once":false,"onceDelay":0.1,"topic":"on","x":90,"y":500,"wires":[["c65592c9.1b9d5"]]},{"id":"9bddb062.1fb2e","type":"function","z":"f6f2187d.f17ca8","name":"","func":"const urlBase = \"https://api.switch-bot.com/v1.0/devices\";\nconst deviceId = \"\";\nvar action = {\"command\": \"\", \"parameter\": \"\", \"commandType\": \"command\"};\n\nvar command = \"\"\nswitch (msg.topic) {\n case \"on\":\n command = \"turnOn\";\n break;\n \n case \"off\":\n command = \"turnOff\";\n break;\n}\n\naction.command = command;\nmsg.url = urlBase + \"/\" + deviceId + \"/commands\";\nmsg.payload = action\n\nreturn msg;\n","outputs":1,"noerr":0,"initialize":"","finalize":"","libs":[],"x":400,"y":500,"wires":[["9ed4d8d1.1a8478"]]},{"id":"9ed4d8d1.1a8478","type":"http request","z":"f6f2187d.f17ca8","name":"","method":"POST","ret":"obj","paytoqs":"ignore","url":"","tls":"","persist":false,"proxy":"","authType":"","x":570,"y":500,"wires":[["b1a31169.a353e"]]},{"id":"b1a31169.a353e","type":"debug","z":"f6f2187d.f17ca8","name":"","active":true,"tosidebar":true,"console":false,"tostatus":false,"complete":"payload","targetType":"msg","statusVal":"","statusType":"auto","x":750,"y":500,"wires":[]},{"id":"43357f35.99d5","type":"comment","z":"f6f2187d.f17ca8","name":"照明操作","info":"","x":80,"y":460,"wires":[]}]
functionノード2行目のdeviceId変数に先ほど取得したデバイス一覧から照明デバイスのIDを記入します。
コマンド実行時には、APIの呼び出し先(msg.url)と実行するコマンドの内容(msg.payload)が必要です。
コマンドの内容には下記のような情報を設定する必要があります。
どんなものがあるかは先ほどのURLと同様、こちら から。
{
  "command": "",
  "parameter": "",
  "commandType": "command"
}
家の電気を消灯してみて、フローを実行してみましょう。明るくなればOKです!
上手くいっていればデバッグウィンドウには同様に成功時の出力が出ます。
照明のON/OFFを切り替える
先ほどのフローではmsg.topicにon/offを設定してあれば動作するので、
下記のようなフローでONスイッチ/OFFスイッチを実装すれば切り替えが簡単です。

または環境変数と同様にflowコンテキストを使用して、その時に"on"だったら"off"に切り替え、
"off"だったら"on"に切り替え、というのも面白いですね。
これでいろんなデバイスを制御してみてください!
← PREV: NASの環境にNodeREDを構築しました
→ NEXT: Alexaに色々喋らせる

