はじめに
NetBox上の構成情報からAnsibleのInventoryとして使う以下の記事の事例を拝見して、
NW機器のコンフィグ情報から構成情報を取得してNetBoxへ自動保存する仕組みが作れないかなと考えて試してみました。
記事が長くなってしまったので、2部に分けております。
後半は下記記事になります。
AnsibleでNW機器のタグVLANインターフェイスをNetboxに自動登録する②
デモの構成
今回のデモは以下のAnsibleとNetBox、Juniper社の仮想ルーターvSRXの構成で行います。

VLANインターフェイスのコンフィグパースにはansibleのcli_parse、Parserにはttpを使用します。
ttpはtextfsmのようにコンフィグはコマンド実行結果をパースするツールで、
textfsmよりも正規表現を意識しない形でテンプレート定義できるので直感的に作れるのが特徴です。
- AnsibleとNetboxのバージョン一覧
ansible==2.10.7
ansible-base==2.10.10
NetBox==v2.11.4
ansible-galaxyのcollectionとpip packageインストール
NetboxおよびvSRXへの処理を行うためには
以下のansible-galaxyのcollectionとpip packageをインストールします。
$ ansible-galaxy collection install ansible.netcommon ansible.utils netbox.netbox
$ pip install netaddr paramiko pynetbox jmespath ttp
vsrx01の準備
vSRXのVMを用意します。
事前にSSHログインを有効にする設定を行い、インタ−フェイスを以下の3つ設定します。
- マネジメント用 Interface: ge-0/0/0
- Trunk VLAN Interface(複数VLAN): ge-0/0/1
- Trunk VLAN Interface(単一VLAN): ge-0/0/2
※複数VLAN持つ場合と一つ持つ場合の2つあるのはcli_parserで使うttpの仕様の説明をするために用意しました。
下記が今回のデモでのコンフィグになります。
> show configuration interfaces
ge-0/0/0 {
    unit 0 {
        family inet {
            address 172.16.0.101/24;
        }
    }
}
ge-0/0/1 {
    flexible-vlan-tagging;
    unit 1000 {
        vlan-id 1000;
        family inet {
            address 172.20.0.1/24;
        }
    }
    unit 1001 {
        vlan-id 1001;
        family inet {
            address 172.20.1.1/24;
        }
    }
}
ge-0/0/2 {
    flexible-vlan-tagging;
    unit 2000 {
        vlan-id 2000;
        family inet {
            address 172.21.0.1/24;
        }
    }
}
デモの実行準備① Inventoryファイルの作成
NetBoxのインベントリ情報を作成します。
※個人的好みでyaml形式で記載しています
all:
  children:
    netbox:
      hosts:
        netbox:
          ansible_host: {{ NetBoxのアドレス }}
デモの実行準備② ansible.cfgの作成
ansible.cfgにて、netboxのインベントリーの有効化および、
NW機器へのSSHログインの初回接続時対応の設定も有効にします。
inventoryのhostsファイルと同じディレクトリにこのファイルを作成します。
[defaults]
host_key_checking = False
inventory = netbox_inventory.yaml
デモの実行準備③ demo01.yamlの作成
NetBoxをAnsibleのInventoryとして使うためにNetBoxへvSRXの構成情報を登録するPlaybookのdemo01.yamlを作成します。
inventoryのhostsファイルと同じディレクトリにこのPlaybookを作成します。
※長いPlaybookとなっているので、分割してPlaybookの内容を解説します。
hosts定義部分の説明
collectionsでインストールしたnetboxを指定し、
taskで必要なvarsを定義します。
---
- hosts: netbox
  gather_facts: false
  connection: local
  collections:
    - netbox.netbox

  vars:
    ansible_python_interpreter: /usr/bin/python3
    netbox_url: http://{{ NetBoxのURL }}
    netbox_token: {{ NetBoxのApi tokens }}
    site: myhome
    manufacture: Juniper
    role: core
    ansible_network_os: junos
    ansible_user: {{ vSRXのユーザ名 }}
    ansible_password: {{ vSRXのログインパスワード }}
    target: vsrx01
    model: vsrx
    primary_ip4: "172.16.0.101/24"
    ifname: ge-0/0/0
NetBoxの変数定義
Netboxで必要な変数は横地さんのブログを参考にさせていただきました。
- site: 拠点名を指定
- manufacture: ベンダー名を指定
- role: 対象の機器の役割を指定
- model: モデル名を指定
デバイス情報の変数定義
- target: 対象のNW機器名を指定
- model: NW機器の機種名を指定
- primary_ip4: 対象のNW機器の管理用アドレスを指定
- ifname: 対象のNW機器の管理用Interfaceを指定
tasksの定義その①
NW機器を登録するには設備情報を登録しないといけないので、
以下のタスクの流れで登録します。
- Netboxへ拠点名を登録
- ベンダー名を登録
- 機器の役割を登録
- 機種名を登録
  tasks:
    - name: site
      netbox_site:
        netbox_url: "{{ netbox_url }}"
        netbox_token: "{{ netbox_token }}"
        data:
          name: "{{ site }}"
        state: present

    - name: add manufacturers
      netbox_manufacturer:
        netbox_url: "{{ netbox_url }}"
        netbox_token: "{{ netbox_token }}"
        data:
          name: "{{ manufacture }}"
        state: present

    - netbox_device_role:
        netbox_url: "{{ netbox_url }}"
        netbox_token: "{{ netbox_token }}"
        data:
          name: "{{ role }}"
          slug: "{{ role }}"
          color: FFFFFF
        state: present

    - netbox_device_type:
        netbox_url: "{{ netbox_url }}"
        netbox_token: "{{ netbox_token }}"
        data:
          slug: "{{ model }}"
          model: "{{ model }}"
          manufacturer: "{{ manufacture }}"
        state: present
      register: result
tasksの定義その②
以下の順序でNetBoxへNW機器のインベントリ情報を登録します。
- demo02.yamlでのansibleでNw機器への実行に必要なインベントリ情報を登録します。
local_context_dataにansibleのインベントリ情報を持たせる方法は以下の記事を参考にしました。 - 管理インターフェイスを作成します。
- 管理インターフェイスを対象機器へアサインして、アドレスを登録します。
- 3.で登録したアドレスを対象機器の管理アドレスとして紐付けします。
    - name: add devices
      netbox_device:
        netbox_url: "{{ netbox_url }}"
        netbox_token: "{{ netbox_token }}"
        data:
          name: "{{ target }}"
          device_type: "{{ model }}"
          device_role: "{{ role }}"
          local_context_data:
            ansible_persistent_log_messages: True
            ansible_network_os: "{{ ansible_network_os }}"
            ansible_user: "{{ ansible_user }}"
            ansible_password: "{{ ansible_password }}"
          site: "{{ site }}"

    - name: Create interface
      netbox_device_interface:
        netbox_url: "{{ netbox_url }}"
        netbox_token: "{{ netbox_token }}"
        data:
          device: "{{ target }}"
          name: "{{ ifname }}"
          enabled: true
          type: 1000Base-t (1GE)
          mtu: 1500
          mgmt_only: true
          mode: Access
        state: present

    - name: Create IP address and assign device ifname
      netbox_ip_address:
        netbox_url: "{{ netbox_url }}"
        netbox_token: "{{ netbox_token }}"
        data:
          status: active
          address: "{{ primary_ip4 }}"
          assigned_object:
            name: "{{ ifname }}"
            device: "{{ target }}"
        state: present

    - name: set primary ipv4
      netbox_device:
        netbox_url: "{{ netbox_url }}"
        netbox_token: "{{ netbox_token }}"
        data:
          name: "{{ target }}"
          primary_ip4: "{{ primary_ip4 }}"
        state: present
デモの実行方法
ansible-playbook -i ./hosts demo01.yaml \
	-e target=vsrx01 -e netbox_url=http://{{ NetBoxのURL }} \
	-e netbox_token={{ NetBoxのApi tokens }} \
	-e role=core -e manufacture=Juniper \
	-e ansible_network_os=junos -e ansible_user={{ vSRXのユーザ名 }} \
	-e ansible_password={{ vSRXのログインパスワード }} -e model=vsrx \
	-e primary_ip4=172.16.0.101/24 -e ifname=ge-0/0/0 -v
NetBox画面
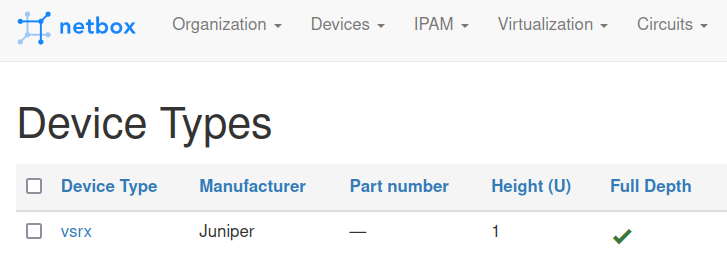
demo01.yaml実行結果のNetBoxの画面スクリーンショットになります。
Sites

Roles

Device Types

Devices


