Goal
- Login form
- Chat
- Push Notification
Development environment
- Ubuntu 16.04 LTS
- Node 10.2.1
- Npm 5.6.0
- React 16.3.1
- React Native 0.55.4
- Server chat use Cable Rails 5.2.0 & Ruby 2.3.1
- JDK
- Android Studio (emulator)
Build environment
Install Ruby 2.3.1
sudo apt-get update
sudo apt-get install -y curl gnupg build-essential

gpg --keyserver hkp://keys.gnupg.net --recv-keys 409B6B1796C275462A1703113804BB82D39DC0E3 7D2BAF1CF37B13E2069D6956105BD0E739499BDB
curl -sSL https://get.rvm.io | bash -s stable --ruby

rvm install ruby-2.3.1
rvm --default use ruby-2.3.1
Install bundler
gem install bundler --no-rdoc --no-ri
Install Node 10.2.1 & npm
curl -sL https://deb.nodesource.com/setup_10.x | sudo -E bash -
sudo apt-get install -y nodejs
sudo apt-get install -y build-essential
Install React Native
npm install -g react-native-cli # Install React Native

# Install watchman
git clone https://github.com/facebook/watchman.git
cd watchman
git checkout v4.9.0  # the latest stable release
./autogen.sh
./configure
make
sudo make install
Install Android development environment
You can install via guide at this link
Let's make Chat App
Github: https://github.com/ducnhat1989/chat-app
Build and run project React native
Initialize new project
react-native init chat_app_react_native
cd chat_app_react_native
Create and run virtual device
You can read guide at this link
Run React native application on Android
npm start
react-native run-android
Install route packages
npm install react-native-router-flux --save # Package for Router
Implement
We have 2 screen Login and Chat screens that correspond to two React's components. After login, application will go to Chat Screen.
import React, { Component } from 'react';
import {
  Router,
  Scene,
} from 'react-native-router-flux';

// Components
import Login from './components/Login';
import NewChat from './components/NewChat';

export default class App extends Component {
  render() {
    return (
      <Router>
        <Scene key='root'>
          <Scene key='login' component={Login} title='Login' />
          <Scene
            key='chat'
            component={NewChat}
            title='ChatRoom'
            rightTitle="LogOut"
          />

        </Scene>
      </Router>
    );
  }
};
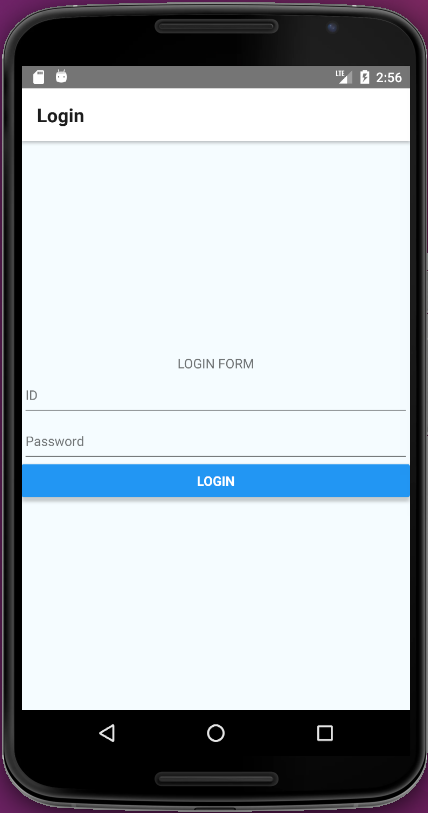
Implement Component Login
Screen Design
Install packages
Our App chat need connect to Server side by API, so we need install package for network. In this post, I choose axios package.
npm install axios --save
After login, we need save information authenticate of user. On the website, we use sessions, but on react native, we use AsyncStorage.
In this post, I choose react-native-storage package because it is easier to use.
npm install react-native-storage --save
Implement client side
import React, { Component } from 'react';
import {
  StyleSheet,
  Text,
  View,
  TextInput,
  Button,
} from 'react-native';
import {Actions} from 'react-native-router-flux';
import axios from 'axios';

export default class Login extends Component {
  constructor(props) {
    super(props);
    this.state = {
      id: '',
      password: '',
      isLogin: false,
    };
  }

  render() {
    return (
      <View style={stylesLogin.container}>
        <View style={stylesLogin.topBox}>
          <Text style={stylesLogin.titleTopBox}>
            LOGIN FORM
          </Text>
        </View>

        <View style={stylesLogin.inputBox}>
          <TextInput
            onChangeText={ (text) => this.updateID(text) }
            placeholder='ID'
            value={this.state.id}
          />

          <TextInput
            onChangeText={ (text) => this.updatePass(text) }
            placeholder='Password'
            secureTextEntry={true}
            value={this.state.password}
          />

          <Button
            onPress={ () => this.authLogin() }
            title='Login'
          />
        </View>
      </View>
    );
  }

  // My function

  updateID(id) {
    this.setState({id: id});
  }

  updatePass(text) {
    this.setState({password: text});
  }

  authLogin() {
    axios.post(`http://10.0.2.2:3001/auth/sign_in`, {
      email: this.state.id,
      password: this.state.password
      })
      .then(res => {
        this.setState({isLogin: true});
        this.sysnStorage(res);
        this.redirect_to_chat();
      })
      .catch(err => {
        alert(err);
      });
  }

  redirect_to_chat() {
    Actions.chat({title: 'Chat Room'});
  }

  sysnStorage(res){
    storage.save({
      key: 'auth',
      data: {
        user: res.data.data,
        uid: res.headers.uid,
        client: res.headers.client,
        access_token: res.headers['access-token']
      },
      expires: 1000 * 60
    });
  }
};

const stylesLogin = StyleSheet.create({
  container: {
    flex: 1,
    justifyContent: 'center',
    alignItems: 'stretch',
    backgroundColor: '#F5FCFF',
  },
  topBox: {
    justifyContent: 'center',
    alignItems: 'center',
    backgroundColor: '#F5FCFF',
  },
  titleTopBox: {

  },
  inputBox: {

  }
});
Implement Server Side (Rails)
To build authencation for user, I use gem devise_token_auth
Note: you can read routes authenticate for client at the here
rails new chat-app --database=mysql --api
# Add the following to your Gemfile
# gem 'devise_token_auth'
bundle install
rails g devise_token_auth:install User auth
rails db:create
rails db:migrate
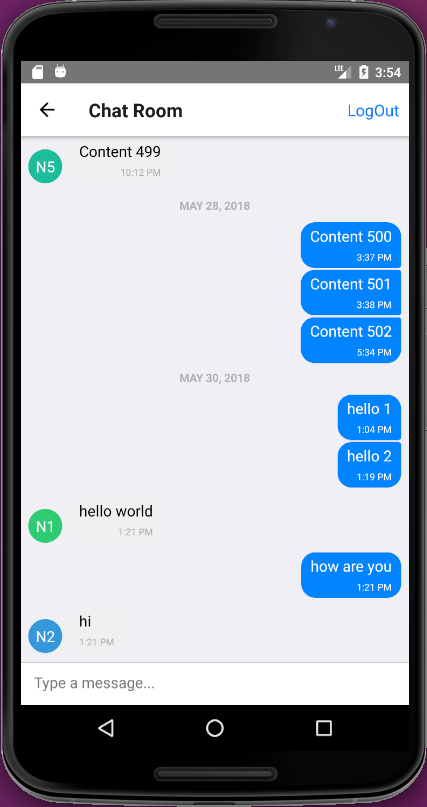
Implement Component Chat
Screen Design
Install packages
To build the fastest and most complete chat interface, I choose react-native-gifted-chat. (It's great. Thanks @Satoooon for the suggestion)
npm install react-native-gifted-chat --save
With application chat, we need use web socket to transmit the message to everyone in a channel.
In react native, I choose react-native-actioncable
npm install react-native-actioncable --save
Implement client side
import React, {Component} from 'react';
import {
  AsyncStorage
} from 'react-native';
import {
  GiftedChat
} from 'react-native-gifted-chat';
import ActionCable from 'react-native-actioncable';
import {Actions} from "react-native-router-flux";
import axios from 'axios';

export default class NewChat extends Component {
  constructor(props) {
    super(props);
    this.state = {
      messages: [],
      user: '',
      uid: '',
      client: '',
      access_token: '',
      refreshing: true,
      nextPage: 0
    };
  }

  componentWillMount() {
    storage.load({key: 'auth'})
      .then(res => {
        this.setState({
          user: res.user,
          uid: res.uid,
          client: res.client,
          access_token: res.access_token
        })
      })
      .catch(err => {
        alert(err.message);
      });
    this.initMessages();
  }

  componentDidMount() {
    this.createSocket();
  }

  render() {
    return (
      <GiftedChat
        messages={this.state.messages}
        onSend={messages => this.onSend(messages)}
        user={{
          _id: this.state.user.id,
        }}

        loadEarlier={this.state.refreshing}

        listViewProps={{
          scrollEventThrottle: 400,
          onScroll: ({ nativeEvent }) => {
            if (this.isCloseToTop(nativeEvent)) {
              this.setState({refreshing: true});
              this.loadMoreMessage();
            }
          }
        }}
      />
    );
  }

  // Scene function
  static onRight() {
    Actions.login({
      title: 'Login',
    });
  }

  // My function
  fetchMessages(limit, nextPage) {
    axios.get(`http://10.0.2.2:3001/api/v1/chat_messages?limit=${limit}&nextPage=${nextPage}`)
      .then(res => {
        data_messages = res.data.chat_messages;
        this.setState(prevState => ({
          messages: GiftedChat.prepend(prevState.messages, data_messages),
          nextPage: res.data.nextPage,
          refreshing: false,
        }));
      })
      .catch(err => {
        alert(err);
      });
  }

  initMessages() {
    this.fetchMessages(20, this.state.nextPage);
  }

  loadMoreMessage() {
    nextPage = this.state.nextPage + 1;
    this.fetchMessages(20, nextPage);
  }

  isCloseToTop({ layoutMeasurement, contentOffset, contentSize }) {
    const paddingToTop = 80;
    return contentSize.height - layoutMeasurement.height - paddingToTop <= contentOffset.y;
  }

  createSocket() {
    let cable = ActionCable.createConsumer('ws://10.0.2.2:3001/cable');

    this.chats = cable.subscriptions.create(
      {
        channel: 'ChatChannel'
      },
      {
        connected: () => {
          console.log('Connected!');
        },
        received: (messages) => {
          this.setState(prevState => ({
            messages: GiftedChat.append(prevState.messages, messages)
          }));
        },
        create: function(messages){
          this.perform('create', {content: messages});
        }
      }
    )
  }

  onSend(messages = []) {
    this.chats.create(messages);
  }
};
Implement Server Side (Rails)
Create a ChatMessage model to store the message of the user.
rails g model chat_message content:text user:references
rails db:migrate
Next, let's create a chat channel (only support with Rails 5 or above)
class ChatChannel < ApplicationCable::Channel
  def subscribed
    stream_from 'chat_channel'
  end

  def unsubscribed
  end

  def create messages
    messages["content"].each do |message|
      ChatMessage.create content: message["text"], user_id: message["user"]["_id"]
    end
  end
end
Need to create an event broadcase job class chat_message_creation_event_broadcast_job.rb
class ChatMessageCreationEventBroadcaseJob < ApplicationJob
  queue_as :default

  def perform chat_message
    ActionCable.server
      .broadcast(
        'chat_channel',
        _id: chat_message.id,
        text: chat_message.content,
        createdAt: chat_message.created_at,
        user: {
          _id: chat_message.user.id,
          name: chat_message.user.name
        }
      )
  end
end
class ChatMessage < ApplicationRecord
  after_create_commit do
    ChatMessageCreationEventBroadcaseJob.perform_later self
  end

  belongs_to :user
end
Besides, we need rack-cors gem to let the request call from cross domain. Add this line into Gemfile
gem 'rack-cors'
and then run
bundle install
Setup to allow the whitelisted domain to send a request across.
...

    # Config rack-cors
    config.middleware.insert_before 0, Rack::Cors do
      allow do
        origins '*'
        resource '*', headers: :any, methods: %I[get post options]
      end
    end
...
Finally, add an Action cable route at routes
mount ActionCable.server => '/cable'
Implement Push Notification (continue...)
Continue: https://qiita.com/t-nhat/items/8688d21f2c009bb0b0c1