1. 概要
ひとつ前の記事では、いくつかの仮想マシンと外部からの疎通確認を行いました。
ここでは、仮想マシンに GitLab と GitLab Runner を導入していきます。
やっとスタートと言えますね。
2. ロードマップ
- 1 全体的な説明
- 2 仮想マシンを構築
- 3 GitLab の導入と GitLab Runner の導入 ★ 今ここ
- 4 GitLab Runner 設定
- 5 テストラン
3. アプリ導入
-
機能要件(取り消し線は済)
-
Hyper-V で構築された仮想マシンが 3 つ必要 -
OS は Linux が 2 つ、Windows が 1 つ- Linux の GitLab 用仮想マシンには Docker をインストールし、Docker コンテナに GitLab をインストールする
- Linux の GitLab Runner 用仮想マシンには Docker をインストールし、Docker コンテナに GitLab Runner をインストールする(用途ごとにコンテナは分ける)
- Windows の GitLab Runner 用仮想マシンには、Windows コンテナに GitLab Runner をインストールする(用途ごとにコンテナは分ける)
-
CI/CD によって、前準備&ビルドが可能
3.1. Ubuntu Desktop 24.04.3(GitLab)仮想マシンに GitLab を導入(192.168.0.177)
- ここでは、Docker とGitLab EEの導入をします。
3.1.1. Ubuntu に Docker と Docker Compose をインストール
-
事前確認として、現段階のパッケージリストをチェックします。
- (正直するかは好みですが)自分はエラーの原因調査とかの手がかりとして残すことが多いです。
-
192.168.0.177_apt_list_before.txtはこちらにあるので、気が向いたかたはどうぞ(そんなもの好きはいないと思いますが笑)。思った以上に多いですね。
gitlab@gitlab:~$ sudo apt list > 192.168.0.177_apt_list_before.txt WARNING: apt does not have a stable CLI interface. Use with caution in scripts. gitlab@gitlab:~$ -
(必要なら)root のパスワードを設定します。
- デフォルトでは root のパスワードが設定されていません。
-
su -などで利用できるようにするためには、パスワードを設定する必要があります。
gitlab@gitlab:~$ sudo passwd root [sudo] gitlab のパスワード: 新しいパスワード: # パスワード入力 新しいパスワードを再入力してください: # もう一回パスワード入力 passwd: パスワードは正しく更新されました gitlab@gitlab:~$ su - パスワード: root@gitlab:~# -
こちらの手順に沿って、Docker の apt リポジトリを登録します。
- curl の-fsSL オプションについてはこちら
# aptリポジトリの更新
sudo apt update
# aptリポジトリからライブラリをインストールする
# gitlab@gitlab:~$ apt-cache search ca-certificates
# ca-certificates - 一般的な CA の証明書
# gitlab@gitlab:~$ apt-cache search curl
# curl - URL 文法でデータを転送するコマンドラインツール
sudo apt install ca-certificates curl
# installコマンドでディレクトリ作成と同時に権限設定
sudo install -m 0755 -d /etc/apt/keyrings
# curlでGPG公開鍵をダウンロード
sudo curl -fsSL https://download.docker.com/linux/ubuntu/gpg -o /etc/apt/keyrings/docker.asc
# 出力された鍵に権限設定
sudo chmod a+r /etc/apt/keyrings/docker.asc

# aptリポジトリの情報を追記
sudo tee /etc/apt/sources.list.d/docker.sources <<EOF
Types: deb
URIs: https://download.docker.com/linux/ubuntu
Suites: $(. /etc/os-release && echo "${UBUNTU_CODENAME:-$VERSION_CODENAME}")
Components: stable
Signed-By: /etc/apt/keyrings/docker.asc
EOF

# aptリポジトリの更新
sudo apt update
# Dockerのライブラリをインストール
sudo apt install docker-ce docker-ce-cli containerd.io docker-buildx-plugin docker-compose-plugin

# Docker Composeの動作確認
docker compose version
標準出力を含めた上記コマンド実行結果
gitlab@gitlab:~$ sudo apt update ヒット:1 http://archive.ubuntu.com/ubuntu noble InRelease ヒット:2 http://archive.ubuntu.com/ubuntu noble-updates InRelease ヒット:3 http://security.ubuntu.com/ubuntu noble-security InRelease ヒット:4 http://archive.ubuntu.com/ubuntu noble-backports InRelease パッケージリストを読み込んでいます... 完了 依存関係ツリーを作成しています... 完了 状態情報を読み取っています... 完了 アップグレードできるパッケージが 151 個あります。表示するには 'apt list --upgradable' を実行してください。 gitlab@gitlab:~$ sudo apt install ca-certificates curl パッケージリストを読み込んでいます... 完了 依存関係ツリーを作成しています... 完了 状態情報を読み取っています... 完了 ca-certificates はすでに最新バージョン (20240203) です。 ca-certificates は手動でインストールしたと設定されました。 以下のパッケージが新たにインストールされます: curl アップグレード: 0 個、新規インストール: 1 個、削除: 0 個、保留: 151 個。 226 kB のアーカイブを取得する必要があります。 この操作後に追加で 534 kB のディスク容量が消費されます。 続行しますか? [Y/n] Y 取得:1 http://archive.ubuntu.com/ubuntu noble-updates/main amd64 curl amd64 8.5.0-2ubuntu10.6 [226 kB] 226 kB を 2秒 で取得しました (136 kB/s) 以前に未選択のパッケージ curl を選択しています。 (データベースを読み込んでいます ... 現在 150459 個のファイルとディレクトリがインストールされています。) .../curl_8.5.0-2ubuntu10.6_amd64.deb を展開する準備をしています ... curl (8.5.0-2ubuntu10.6) を展開しています... curl (8.5.0-2ubuntu10.6) を設定しています ... man-db (2.12.0-4build2) のトリガを処理しています ... gitlab@gitlab:~$ sudo install -m 0755 -d /etc/apt/keyrings gitlab@gitlab:~$ sudo curl -fsSL https://download.docker.com/linux/ubuntu/gpg -o /etc/apt/keyrings/docker.asc gitlab@gitlab:~$ sudo chmod a+r /etc/apt/keyrings/docker.asc gitlab@gitlab:~$ sudo tee /etc/apt/sources.list.d/docker.sources <<EOF Types: deb URIs: https://download.docker.com/linux/ubuntu Suites: $(. /etc/os-release && echo "${UBUNTU_CODENAME:-$VERSION_CODENAME}") Components: stable Signed-By: /etc/apt/keyrings/docker.asc EOF Types: deb URIs: https://download.docker.com/linux/ubuntu Suites: noble Components: stable Signed-By: /etc/apt/keyrings/docker.asc gitlab@gitlab:~$ sudo apt update 取得:1 https://download.docker.com/linux/ubuntu noble InRelease [48.5 kB] 取得:2 https://download.docker.com/linux/ubuntu noble/stable amd64 Packages [41.1 kB] ヒット:3 http://security.ubuntu.com/ubuntu noble-security InRelease ヒット:4 http://archive.ubuntu.com/ubuntu noble InRelease ヒット:5 http://archive.ubuntu.com/ubuntu noble-updates InRelease ヒット:6 http://archive.ubuntu.com/ubuntu noble-backports InRelease 89.6 kB を 1秒 で取得しました (79.8 kB/s) パッケージリストを読み込んでいます... 完了 依存関係ツリーを作成しています... 完了 状態情報を読み取っています... 完了 アップグレードできるパッケージが 151 個あります。表示するには 'apt list --upgradable' を実行してください。 gitlab@gitlab:~$ sudo apt install docker-ce docker-ce-cli containerd.io docker-buildx-plugin docker-compose-plugin パッケージリストを読み込んでいます... 完了 依存関係ツリーを作成しています... 完了 状態情報を読み取っています... 完了 以下の追加パッケージがインストールされます: docker-ce-rootless-extras git git-man liberror-perl libslirp0 pigz slirp4netns 提案パッケージ: cgroupfs-mount | cgroup-lite docker-model-plugin git-daemon-run | git-daemon-sysvinit git-doc git-email git-gui gitk gitweb git-cvs git-mediawiki git-svn 以下のパッケージが新たにインストールされます: containerd.io docker-buildx-plugin docker-ce docker-ce-cli docker-ce-rootless-extras docker-compose-plugin git git-man liberror-perl libslirp0 pigz slirp4netns アップグレード: 0 個、新規インストール: 12 個、削除: 0 個、保留: 151 個。 96.1 MB のアーカイブを取得する必要があります。 この操作後に追加で 388 MB のディスク容量が消費されます。 続行しますか? [Y/n] Y 取得:1 https://download.docker.com/linux/ubuntu noble/stable amd64 containerd.io amd64 2.2.1-1~ubuntu.24.04~noble [23.4 MB] 取得:2 http://archive.ubuntu.com/ubuntu noble/universe amd64 pigz amd64 2.8-1 [65.6 kB] 取得:3 http://archive.ubuntu.com/ubuntu noble/main amd64 liberror-perl all 0.17029-2 [25.6 kB] 取得:4 http://archive.ubuntu.com/ubuntu noble-updates/main amd64 git-man all 1:2.43.0-1ubuntu7.3 [1,100 kB] 取得:5 https://download.docker.com/linux/ubuntu noble/stable amd64 docker-ce-cli amd64 5:29.1.3-1~ubuntu.24.04~noble [16.3 MB] 取得:6 http://archive.ubuntu.com/ubuntu noble-updates/main amd64 git amd64 1:2.43.0-1ubuntu7.3 [3,680 kB] 取得:7 http://archive.ubuntu.com/ubuntu noble/main amd64 libslirp0 amd64 4.7.0-1ubuntu3 [63.8 kB] 取得:8 http://archive.ubuntu.com/ubuntu noble/universe amd64 slirp4netns amd64 1.2.1-1build2 [34.9 kB] 取得:9 https://download.docker.com/linux/ubuntu noble/stable amd64 docker-ce amd64 5:29.1.3-1~ubuntu.24.04~noble [21.0 MB] 取得:10 https://download.docker.com/linux/ubuntu noble/stable amd64 docker-buildx-plugin amd64 0.30.1-1~ubuntu.24.04~noble [16.4 MB] 取得:11 https://download.docker.com/linux/ubuntu noble/stable amd64 docker-ce-rootless-extras amd64 5:29.1.3-1~ubuntu.24.04~noble [6,383 kB] 取得:12 https://download.docker.com/linux/ubuntu noble/stable amd64 docker-compose-plugin amd64 5.0.0-1~ubuntu.24.04~noble [7,709 kB] 96.1 MB を 8秒 で取得しました (11.5 MB/s) 以前に未選択のパッケージ containerd.io を選択しています。 (データベースを読み込んでいます ... 現在 150466 個のファイルとディレクトリがインストールされています。) .../00-containerd.io_2.2.1-1~ubuntu.24.04~noble_amd64.deb を展開する準備をしています ... containerd.io (2.2.1-1~ubuntu.24.04~noble) を展開しています... 以前に未選択のパッケージ docker-ce-cli を選択しています。 .../01-docker-ce-cli_5%3a29.1.3-1~ubuntu.24.04~noble_amd64.deb を展開する準備をしています ... docker-ce-cli (5:29.1.3-1~ubuntu.24.04~noble) を展開しています... 以前に未選択のパッケージ docker-ce を選択しています。 .../02-docker-ce_5%3a29.1.3-1~ubuntu.24.04~noble_amd64.deb を展開する準備をしています ... docker-ce (5:29.1.3-1~ubuntu.24.04~noble) を展開しています... 以前に未選択のパッケージ pigz を選択しています。 .../03-pigz_2.8-1_amd64.deb を展開する準備をしています ... pigz (2.8-1) を展開しています... 以前に未選択のパッケージ docker-buildx-plugin を選択しています。 .../04-docker-buildx-plugin_0.30.1-1~ubuntu.24.04~noble_amd64.deb を展開する準備をしています ... docker-buildx-plugin (0.30.1-1~ubuntu.24.04~noble) を展開しています... 以前に未選択のパッケージ docker-ce-rootless-extras を選択しています。 .../05-docker-ce-rootless-extras_5%3a29.1.3-1~ubuntu.24.04~noble_amd64.deb を展開する準備をしています ... docker-ce-rootless-extras (5:29.1.3-1~ubuntu.24.04~noble) を展開しています... 以前に未選択のパッケージ docker-compose-plugin を選択しています。 .../06-docker-compose-plugin_5.0.0-1~ubuntu.24.04~noble_amd64.deb を展開する準備をしています ... docker-compose-plugin (5.0.0-1~ubuntu.24.04~noble) を展開しています... 以前に未選択のパッケージ liberror-perl を選択しています。 .../07-liberror-perl_0.17029-2_all.deb を展開する準備をしています ... liberror-perl (0.17029-2) を展開しています... 以前に未選択のパッケージ git-man を選択しています。 .../08-git-man_1%3a2.43.0-1ubuntu7.3_all.deb を展開する準備をしています ... git-man (1:2.43.0-1ubuntu7.3) を展開しています... 以前に未選択のパッケージ git を選択しています。 .../09-git_1%3a2.43.0-1ubuntu7.3_amd64.deb を展開する準備をしています ... git (1:2.43.0-1ubuntu7.3) を展開しています... 以前に未選択のパッケージ libslirp0:amd64 を選択しています。 .../10-libslirp0_4.7.0-1ubuntu3_amd64.deb を展開する準備をしています ... libslirp0:amd64 (4.7.0-1ubuntu3) を展開しています... 以前に未選択のパッケージ slirp4netns を選択しています。 .../11-slirp4netns_1.2.1-1build2_amd64.deb を展開する準備をしています ... slirp4netns (1.2.1-1build2) を展開しています... liberror-perl (0.17029-2) を設定しています ... docker-buildx-plugin (0.30.1-1~ubuntu.24.04~noble) を設定しています ... containerd.io (2.2.1-1~ubuntu.24.04~noble) を設定しています ... Created symlink /etc/systemd/system/multi-user.target.wants/containerd.service → /usr/lib/systemd/system/containerd.service. docker-compose-plugin (5.0.0-1~ubuntu.24.04~noble) を設定しています ... docker-ce-cli (5:29.1.3-1~ubuntu.24.04~noble) を設定しています ... libslirp0:amd64 (4.7.0-1ubuntu3) を設定しています ... pigz (2.8-1) を設定しています ... git-man (1:2.43.0-1ubuntu7.3) を設定しています ... docker-ce-rootless-extras (5:29.1.3-1~ubuntu.24.04~noble) を設定しています ... slirp4netns (1.2.1-1build2) を設定しています ... docker-ce (5:29.1.3-1~ubuntu.24.04~noble) を設定しています ... Created symlink /etc/systemd/system/multi-user.target.wants/docker.service → /usr/lib/systemd/system/docker.service. Created symlink /etc/systemd/system/sockets.target.wants/docker.socket → /usr/lib/systemd/system/docker.socket. git (1:2.43.0-1ubuntu7.3) を設定しています ... man-db (2.12.0-4build2) のトリガを処理しています ... libc-bin (2.39-0ubuntu8.6) のトリガを処理しています ... gitlab@gitlab:~$ docker compose version Docker Compose version v5.0.0 gitlab@gitlab:~$ -
インストール後のパッケージリストをチェックします。
- インストール前があるならば、インストール後も記録しておきます。これも好みです。
-
192.168.0.177_apt_list_after.txtはこちらにあります。
gitlab@gitlab:~$ sudo apt list > 192.168.0.177_apt_list_after.txt

WARNING: apt does not have a stable CLI interface. Use with caution in scripts.

gitlab@gitlab:~$
3.1.2. docker-compose.ymlの記載とコンテナ構築
-
docker-compose.ymlの配置場所を記載内容を設計します。- 配置場所についてコメントします。
-
/optは一般的に追加アプリを配置する場所として使われます。srv と opt のどちらかという派閥もありますが、スルーしてください。 - docker-compose 以外を追加する際に困るので、
docker-containersディレクトリを作成しました。 - Docker Compose は複数の Docker コンテナをプロジェクトという単位でまとめて管理します。プロジェクト名と同名ディレクトリを作成しました。
- その中に yml ファイルを配置します。
-
/opt/docker-containers/{プロジェクト名}/docker-compose.ymlという具合ですね。
-
-
-
docker-compose.ymlは下記です。ファイル内コメントは適宜削除してご利用ください。
docker-compose.yml# プロジェクト名を指定する。命名優先順については下記参照。 # https://docs.docker.com/compose/how-tos/project-name/#set-a-project-name name: "gitlab" services: gitlab: container_name: gitlab # imageのバージョンは明記 # GitLab 18 は破壊的変更を含むそうです。お好みで17とかにすることを視野に入れていただければ。 # https://about.gitlab.com/ja-jp/blog/a-guide-to-the-breaking-changes-in-gitlab-18-0/ image: gitlab/gitlab-ee:18.7.0-ee.0 restart: always hostname: "gitlab" # ポートフォワーディング # 仮想マシンの18780をDockerコンテナの80に割り当てます ports: - "18780:80" - "18743:443" - "18750:5000" # GitLabコンテナが使う # https://gitlab-docs.creationline.com/ee/install/docker.html volumes: # /opt/docker-containers/{プロジェクト名}/{コンテナ名} 配下にボリュームを配置 - /opt/docker-containers/gitlab/gitlab/data:/var/opt/gitlab - /opt/docker-containers/gitlab/gitlab/logs:/var/log/gitlab - /opt/docker-containers/gitlab/gitlab/config:/etc/gitlab # シークレットキー生成部分にミス、`gloas-`プレフィックスをなくす # https://developer.apple.com/forums/thread/738513?answerId=768799022#768799022 # GitLab 18.7 では/assets/wrapperが/assets/init-containerになっています。 # https://gitlab.com/gitlab-org/omnibus-gitlab/-/merge_requests/8211 command: > bash -c 'sed -i "s|gloas-%{token}|%{token}|" /opt/gitlab/embedded/service/gitlab-rails/lib/gitlab/doorkeeper_secret_storing/token/unique_application_token.rb && exec /assets/init-container' - 配置場所についてコメントします。
-
空の
docker-compose.ymlを作成します。- install コマンドを使うと、chmod と touch をセットでできます(Docker インストール時のです)。
root@gitlab:~# install -D -m 0777 /dev/null /opt/docker-containers/gitlab/docker-compose.yml root@gitlab:~# ls -all /opt/docker-containers/gitlab/docker-compose.yml -rwxrwxrwx 1 root root 0 12月 31 22:37 /opt/docker-containers/gitlab/docker-compose.yml root@gitlab:~# -
docker-compose.ymlに 1 項の内容を書き込みます(自分は nano で書き込む派です)。-
最終的に下記のようになれば大丈夫です。
root@gitlab:~# cat /opt/docker-containers/gitlab/docker-compose.yml
name: "gitlab"
services:
  gitlab:
    container_name: gitlab
    image: gitlab/gitlab-ee:18.7.0-ee.0
    restart: always
    hostname: "gitlab"
    ports:
      - "18780:80"
      - "18743:443"
      - "18750:5000"
    volumes:
      - /opt/docker-containers/gitlab/gitlab/data:/var/opt/gitlab
      - /opt/docker-containers/gitlab/gitlab/logs:/var/log/gitlab
      - /opt/docker-containers/gitlab/gitlab/config:/etc/gitlab
    command: >
      bash -c 'sed -i "s|gloas-%{token}|%{token}|" /opt/gitlab/embedded/service/gitlab-rails/lib/gitlab/doorkeeper_secret_storing/token/unique_application_token.rb && exec /assets/wrapper'
root@gitlab:~#
-
-
docker compose up -dを実行します。
-
ドキュメントはこちら
-
docker compose upはコンテナの構築と起動をします。 -
-dオプションは、バックグラウンドでコンテナを実行するためのオプションです。root@gitlab:/opt/docker-containers/gitlab# docker compose up -d [+] up 12/12 ✔ Image gitlab/gitlab-ee:18.7.0-ee.0 Pulled 201.8s ✔ Network gitlab_default Created 0.0s ✔ Container gitlab Created 2.9s root@gitlab:/opt/docker-containers/gitlab# -
補足
-
実際に
docker container upが通っているかについて-
実際にコンテナが構築されているかは、ログを確認するとチェックできます。
-
docker logs -f --tail=500 {コンテナ名}のような、docker logs が役立ちます。 -
上記だと「{コンテナ名}コンテナのログのうち、最終行 500 行を流しつつ表示」することを意味します。
root@gitlab:/opt/docker-containers/gitlab# docker logs -f --tail=250 gitlab
~~中略~~
tion_s":0.0,"db_ci_duration_s":0.0,"db_main_replica_duration_s":0.0,"db_ci_replica_duration_s":0.0,"cpu_s":0.277669,"mem_objects":121182,"mem_bytes":3403520,"mem_mallocs":38082,"mem_total_bytes":8250800,"worker_id":"sidekiq_0","rate_limiting_gates":[],"exclusive_lock_requested_count":1,"exclusive_lock_wait_duration_s":0,"exclusive_lock_hold_duration_s":0,"duration_s":1.344732,"completed_at":"2025-12-31T16:02:10.471Z","load_balancing_strategy":"primary_no_wal","db_duration_s":0.0,"urgency":"low","target_duration_s":300,"target_scheduling_latency_s":60}

==> /var/log/gitlab/gitlab-exporter/current <==
2025-12-31_16:02:14.21005 ::1 - - [31/Dec/2025:16:02:14 UTC] "GET /database HTTP/1.1" 200 1778
2025-12-31_16:02:14.21010 - -> /database
2025-12-31_16:02:14.52700 ::1 - - [31/Dec/2025:16:02:14 UTC] "GET /ruby HTTP/1.1" 200 1089
2025-12-31_16:02:14.52704 - -> /ruby
-
-
docker container upは通ってるっぽいけど終わった?-
自分の場合は
docker logs {コンテナ名}でコンテナログを全出力しました。root@gitlab:~# docker logs gitlab > /home/gitlab/192.168.0.177_gitlab_docker_compose_up.txt cat: /var/opt/gitlab/gitlab-rails/VERSION: No such file or directory /opt/gitlab/embedded/bin/runsvdir-start: line 37: /proc/sys/fs/file-max: Read-only file system /opt/gitlab/embedded/lib/ruby/gems/3.2.0/gems/ffi-yajl-2.6.0/lib/ffi_yajl/encoder.rb:42: warning: undefining the allocator of T_DATA class FFI_Yajl::Ext::Encoder::YajlGen ~~中略~~ /opt/gitlab/embedded/cookbooks/package/libraries/gitlab_cluster.rb:17: warning: previous definition of JSON_FILE was here root@gitlab:~# -
ログには下記文面が含まれています。ファイル自体はこちらです。
-
これが含まれていたなら、GitLab の設定は完了したと考えていいでしょう。
[2025-12-31T15:58:47+00:00] INFO: Report handlers complete
Infra Phase complete, 574/1654 resources updated in 03 minutes 48 seconds

Notes:
Default admin account has been configured with following details:
Username: root
Password: You didn't opt-in to print initial root password to STDOUT.
Password stored to /etc/gitlab/initial_root_password. This file will be cleaned up in first reconfigure run after 24 hours.

NOTE: Because these credentials might be present in your log files in plain text, it is highly recommended to change the password following https://docs.gitlab.com/user/profile/user_passwords/#change-your-password.

gitlab Reconfigured!
-
-
| 用語 | 説明 |
|---|---|
| Docker | |
| Docker コンテナ | |
| Docker Compose | |
| Linux ディレクトリ構造 | こちらが素晴らしくわかりやすいです。 |
3.1.3. GitLab へログイン
-
GitLab へ(この記事の場合は
http://192.168.0.177:18780/)へアクセスしましょう。証明書の設定はしていないので、http を使います。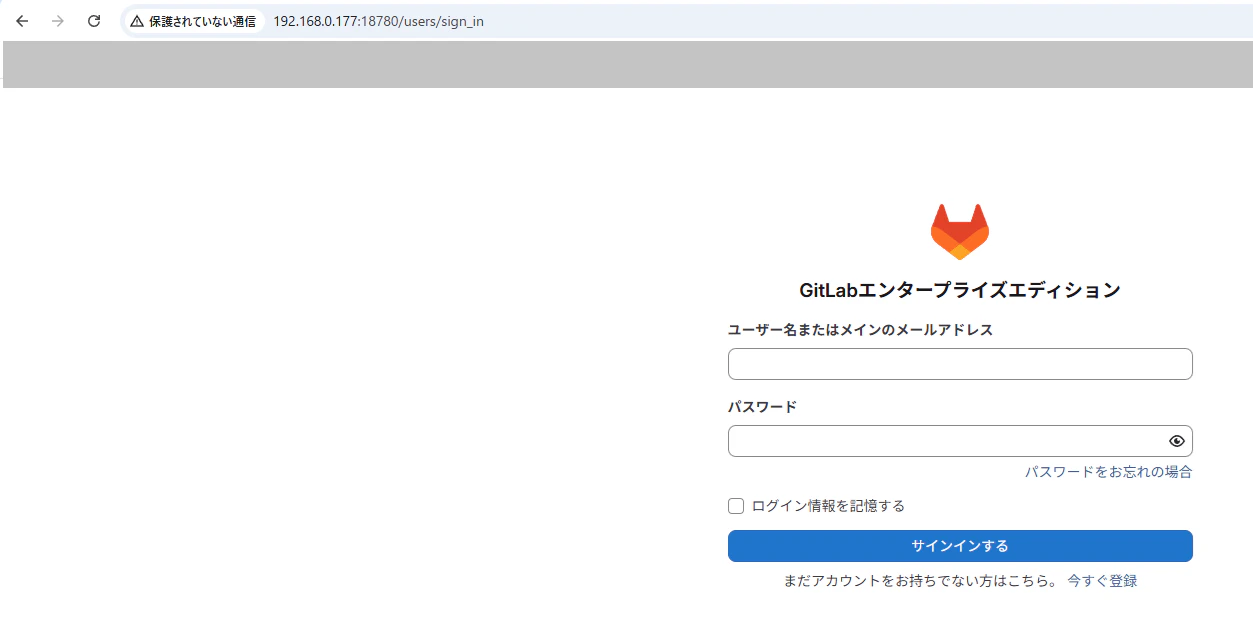
-
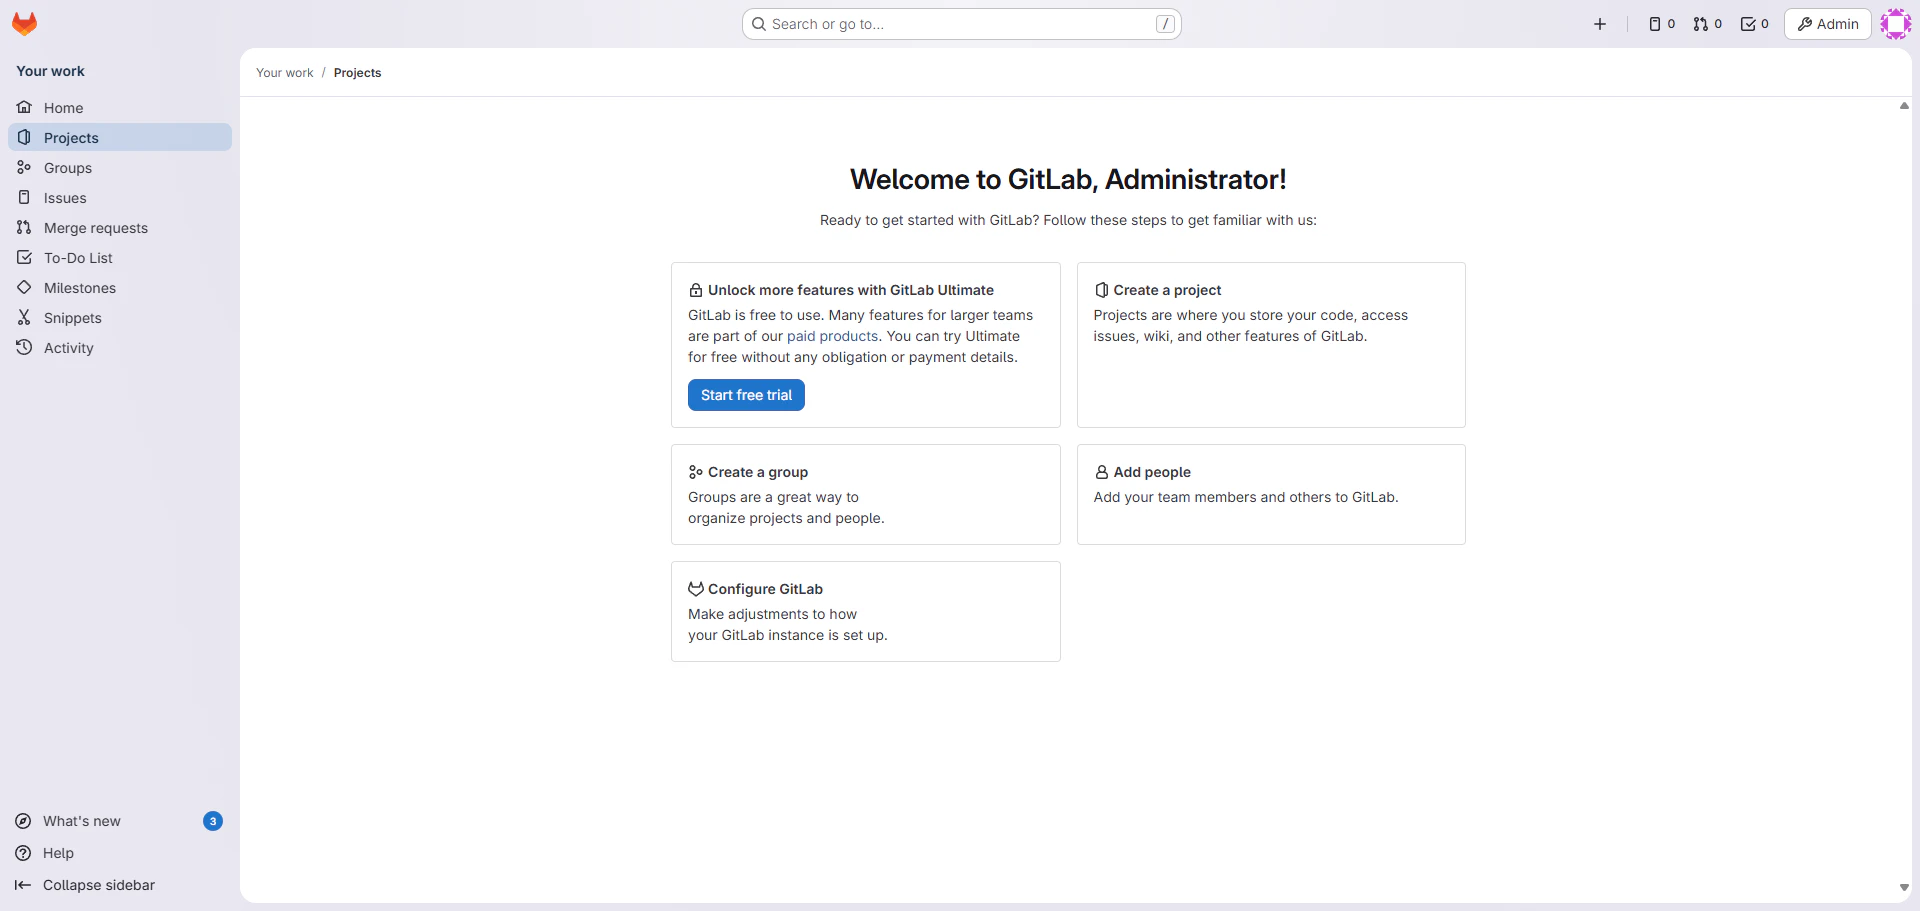
ログインします。
- ユーザ名は
rootを入力 - (初期)パスワードは GitLab アプリケーションサーバー上の
initial_root_passwordファイルに記載されています。 - Docker コンテナのボリュームを変更していないなら、
/opt/docker-containers/gitlab/gitlab/configにあります。
- ユーザ名は
3.1.4. エラーなど
3.1.4.1. bash: line 1: /assets/wrapper: No such file or directory
-
docker compose upのタイミングでコンテナ構築に失敗したときのログです。 - docker-compose.yml にコメントをしましたが、GitLab 18.7 を区切りにディレクトリ名が wrapper から init-container に変更されていたことが原因でした。
- マージリクエストに記載があります(というか最初の設計時でちゃんとした名前を付けるべきではあるが...)。
3.2. Ubuntu Desktop 24.04.3(GitLab Runner on Linux)仮想マシンに GitLab Runner を Linux で導入(192.168.0.178)
- GitLab Runnerを Docker コンテナで構築。
3.2.1. Ubuntu に Docker と Docker Compose をインストール
3.1.1. Ubuntu に Docker と Docker Compose をインストールと同手順です
3.2.2. docker-compose.ymlの記載とコンテナ構築
-
docker-compose.ymlの配置場所を記載内容を設計します。- 配置場所についてコメントします。
-
/optは一般的に追加アプリを配置する場所として使われます。srv と opt のどちらかという派閥もありますが、スルーしてください。 - docker-compose 以外を追加する際に困るので、
docker-containersディレクトリを作成しました。 - Docker Compose は複数の Docker コンテナをプロジェクトという単位でまとめて管理します。プロジェクト名と同名ディレクトリを作成しました。
- その中に yml ファイルを配置します。
-
/opt/docker-containers/{プロジェクト名}/docker-compose.ymlという具合ですね。
-
-
-
docker-compose.ymlは下記です。ファイル内コメントは適宜削除してご利用ください。
docker-compose.yml# プロジェクト名を指定する。命名優先順については下記参照。 # https://docs.docker.com/compose/how-tos/project-name/#set-a-project-name name: "gitlab-runner" services: gitlab-runner: container_name: gitlab-runner # imageのバージョンは明記 # バージョン互換性については、 # 互換性の理由から、GitLab Runnerのメジャー・マイナーバージョンは # GitLabのメジャー・マイナーバージョンと同期している必要があります。 # だそうです。 # 加えて # GitLab Runner 15.0は登録APIリクエストフォーマットの変更を導入しました。 # これにより、GitLab Runnerは14.8より低いバージョンのGitLabと通信できなくなりました。 # だそうです。latestで自動指定みたいなことをしない場合は、事前に互換性を調査しないといけませんね。 # https://gitlab-docs.creationline.com/runner/ image: gitlab/gitlab-runner:v18.7.1 restart: always hostname: "gitlab-runner" # GitLab Runnerコンテナが使うボリューム # https://gitlab-docs.creationline.com/runner/install/docker.html volumes: # /opt/docker-containers/{プロジェクト名}/{コンテナ名} 配下にボリュームを配置 - /opt/docker-containers/gitlab-runner/gitlab-runner/config:/etc/gitlab-runner # *.sockや*.socketはUNIXドメインソケットファイルです。プロセス間のソケット通信に使われます。 # https://mypage.otsuka-shokai.co.jp/contents/business-oyakudachi/words/unix-domain-socket.html - /var/run/docker.sock:/var/run/docker.sock - 配置場所についてコメントします。
-
空の
docker-compose.ymlを作成します。- install コマンドを使うと、chmod と touch をセットでできます(Docker インストール時のです)。
root@gitlab-runner:~# install -D -m 0777 /dev/null /opt/docker-containers/gitlab-runner/docker-compose.yml root@gitlab-runner:~# ls -all /opt/docker-containers/gitlab-runner/docker-compose.yml -rwxrwxrwx 1 root root 0 1月 2 03:17 /opt/docker-containers/gitlab-runner/docker-compose.yml root@gitlab-runner:~#- 補足:
- 777 は「実行+読み込み+書き込み」を意味します。
- 数字の 1 が実行、2 が読み込み、4 が書き込みです。倍々になっていくと考えれば印象に残りやすいでしょう。
- 「実行+読み込み+書き込み」→「1+2+4」→6 になります。
-
docker-compose.ymlに 1 項の内容を書き込みます(自分は nano で書き込む派です)。-
最終的に下記のようになれば大丈夫です。
root@gitlab-runner:~# cat /opt/docker-containers/gitlab-runner/docker-compose.yml
name: "gitlab-runner"
services:
  gitlab-runner:
    container_name: gitlab-runner
    image: gitlab/gitlab-runner:v18.7.1
    restart: always
    hostname: "gitlab-runner"
    volumes:
      - /opt/docker-containers/gitlab-runner/gitlab-runner/config:/etc/gitlab-runner
      - /var/run/docker.sock:/var/run/docker.sock
root@gitlab-runner:~#
-
-
docker compose up -dを実行します。
-
ドキュメントはこちら
-
docker compose upはコンテナの構築と起動をします。 -
-dオプションは、バックグラウンドでコンテナを実行するためのオプションです。root@gitlab-runner:/opt/docker-containers/gitlab-runner# docker compose up -d [+] up 2/2 ✔ Network gitlab-runner_default Created 0.0s ✔ Container gitlab-runner Created 0.1s root@gitlab-runner:/opt/docker-containers/gitlab-runner# docker ps --format "table {{.ID}} {{.Names}} {{.Status}}" CONTAINER ID NAMES STATUS f9ea7da523d1 gitlab-runner Up 31 seconds root@gitlab-runner:/opt/docker-containers/gitlab-runner#
3.2.3. GitLab Runner の動作確認
-
GitLab Runner は Docker コンテナのステータスを確認するだけで十分と判断しました。
root@gitlab-runner:/opt/docker-containers/gitlab-runner# docker compose up -d
[+] up 2/2
✔ Network gitlab-runner_default Created                                                                                                           0.0s
✔ Container gitlab-runner       Created                                                                                                           0.1s
root@gitlab-runner:/opt/docker-containers/gitlab-runner# docker ps --format "table {{.ID}} {{.Names}} {{.Status}}"
CONTAINER ID NAMES STATUS
f9ea7da523d1 gitlab-runner Up 31 seconds
root@gitlab-runner:/opt/docker-containers/gitlab-runner#
3.2.4. エラーなど
3.2.4.1. ERROR: Failed to load config stat /etc/gitlab-runner/config.toml: no such file or directory builds=0 max_builds=1
- ログへの出力とコンテナのステータスはこのように
root@gitlab-runner:/opt/docker-containers/gitlab-runner# docker logs -f --tail=250 gitlab-runner
Runtime platform                                    arch=amd64 os=linux pid=7 revision=cc7f9277 version=18.7.1
Starting multi-runner from /etc/gitlab-runner/config.toml...  builds=0 max_builds=0
Running in system-mode.

Created missing unique system ID                    system_id=r_ShYFZtPw3of2
Usage logger disabled                               builds=0 max_builds=1
Configuration loaded                                builds=0 max_builds=1
listen_address not defined, metrics & debug endpoints disabled  builds=0 max_builds=1
[session_server].listen_address not defined, session endpoints disabled  builds=0 max_builds=1
Initializing executor providers                     builds=0 max_builds=1
ERROR: Failed to load config stat /etc/gitlab-runner/config.toml: no such file or directory  builds=0 max_builds=1
ERROR: Failed to load config stat /etc/gitlab-runner/config.toml: no such file or directory  builds=0 max_builds=1
^Croot@gitlab-runner:/opt/docker-containers/gitlab-runner# docker ps --format "table {{.ID}} {{.Names}} {{.Status}}"
CONTAINER ID NAMES STATUS
d1b95ef7b555 gitlab-runner Up 3 minutes
root@gitlab-runner:/opt/docker-containers/gitlab-runner# docker compose down gitlab-runner
[+] down 1/2
 ✔ Container gitlab-runner       Removed                                                                                                           0.1s
 ⠋ Network gitlab-runner_default Removing                                                                                                          0.1s
root@gitlab-runner:/opt/docker-containers/gitlab-runner#
-
こちらには、
That means that you probably haven't yet run the sudo gitlab-runner register command within your container yet.と、つまり Runner が登録されていないことが原因らしいです。 -
まだ Runner 自体作成していないので、放置しましょう。
3.3. Windows Server 2019(GitLab Runner on Windows)仮想マシンに GitLab Runner を Windows で導入(192.168.0.179)
- GitLab Runnerを Windows で構築した Docker コンテナで構築。
- Windows コンテナって初なんですよね。まず情報を探すのが難しかったです(WSL2 に Docker エンジンをインストールした場合の情報ばっかり出てきてしまう)...
- 自分が参考にしたドキュメントや先人の記事といった情報源を記載します。
| 情報源 | 概説(認識ミスがあったらごめんなさい(-_-;)) |
|---|---|
| Isolation Modes | コンテナ間をどのように分離するかの手法とそのアーキテクチャについて説明していました。 |
| Get started: Prep Windows for containers |
こっちはイメージを Pull する準備をするための作業でした。 |
| Container platform tools on Windows |
こっちもアーキテクチャについての記事。 これを見ると Docker Composeが Windows 側でも使えるのかな。 |
| Windows コンテナー ネットワーク | NIC から Hyper-V 仮想スイッチを介して、コンテナの場合は vNIC へ繋がるというネットワークがどうなっているかが記載されています。 Hyper-V 仮想スイッチとほぼ同じに見えました。 |
| Install Docker Desktop on Windows system-requirements |
ここにはDocker Desktop's functionality remains consistent on both WSL and Hyper-V, without a preference for either architecture.とWSL2 と Hyper-V のどちらで動かしても機能は同じで動くとハッキリ書かれていました。 |
| WSL2 と Hyper-V の関係 | こちらの図解には、Hyper-V ハイパーバイザー・Hyper-V・Windows コンテナ・WSL2 の関係性がわかりやすく載っていました。 |
| Docker Desktop の復習と、Windows Container に入門: Windows Server Container 理論編 |
こちらを拝読すれば、ひととおりの関係性を理解できると感じました。 |
| 図解:Windows10 の Linux コンテナ比較 (LCOW、DockerDesktop VM、WSL2、VirtualBox) |
こちらも同じく拝読すれば、ひととおりの関係性を理解できると感じました。 特に 2. 各コンテナ方式の構成比較が役に立つと感じます。ホスト OS 型の仮想マシンとそれ以外も図からわかりやすいです。 |
3.3.0. 前提条件
-
(使いたいサーバーが Windows Server ではない場合)Docker Desktop がインストールされていること。
-
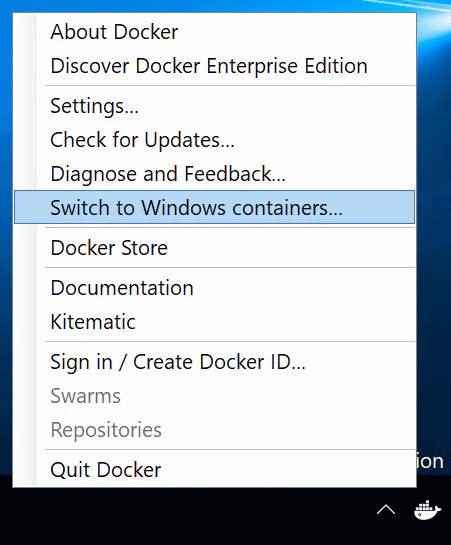
コンテナーの種類を Windows コンテナーに設定していること(同じ箇所から Linux への切り替えも可能です)。
-
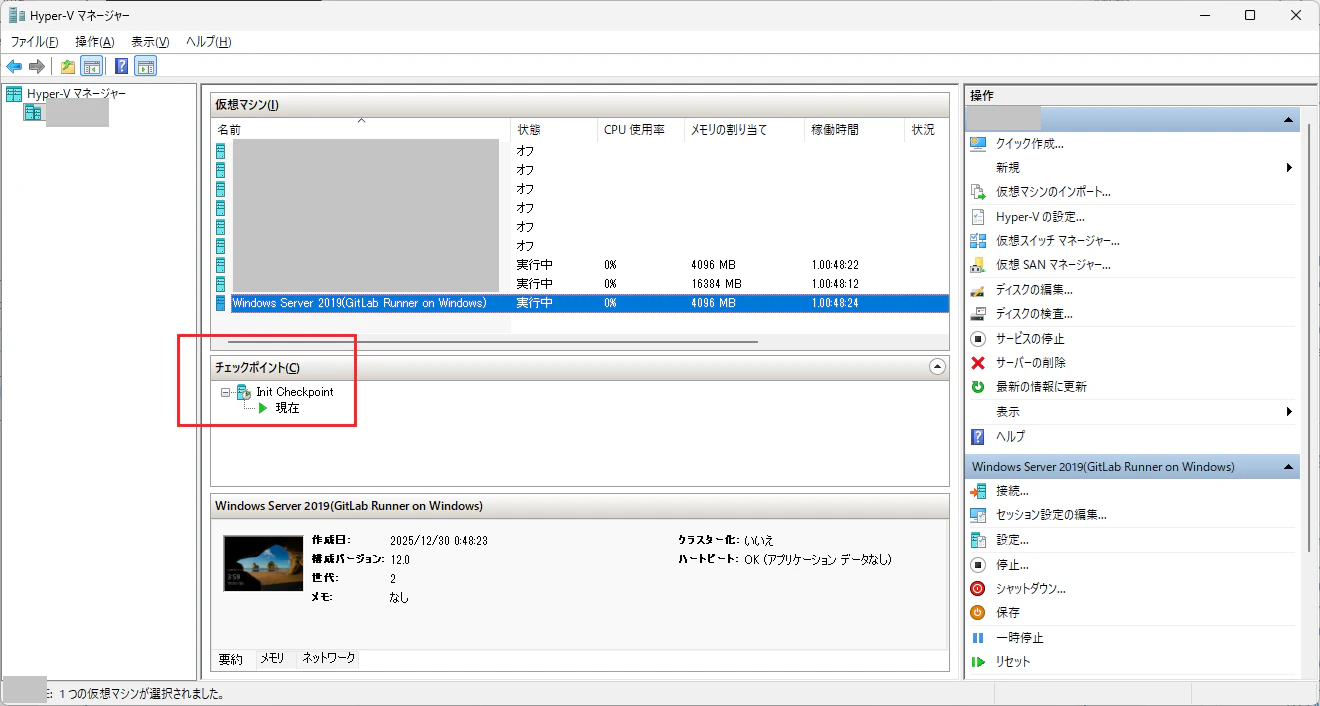
(可能なら)仮想マシンのチェックポイントがあること。
-
仮想マシン内で Windows の機能のコンテナーと Hyper-V が有効になっていること。
PS C:\Users\Administrator> Install-WindowsFeature Containers, Hyper-V -IncludeManagementTools -Restart
3.3.1. Windows Server に Docker ランタイム をインストール
- Windows Server > Docker CE/Mobyタブにある PowerShell スクリプトを実行します。
-
まずは下記のようにスクリプトが実行され、再起動が入ります。
PS C:\Windows\system32> Invoke-WebRequest -UseBasicParsing "https://raw.githubusercontent.com/microsoft/Windows-Containers/Main/helpful_tools/Install-DockerCE/install-docker-ce.ps1" -o install-docker-ce.ps1
>> .\install-docker-ce.ps1
Querying status of Windows feature: Containers...
Feature Containers is already enabled.
-
再起動後にログインすると、続きの処理が行われ、下記出力とともに処理が終わります。
Querying status of Windows feature: Containers... Feature Containers is already enabled. DOCKER default Checking Docker versions Downloading https://download.docker.com/win/static/stable/x86_64/docker-29.1.3.zip to C:\Users\Administrator\DockerDownloads\docker-29.1.3.zip Installing Docker... C:\Users\Administrator\DockerDownloads\docker-29.1.3\docker\docker.exe Installing Docker daemon... C:\Users\Administrator\DockerDownloads\docker-29.1.3\docker\dockerd.exe Configuring the docker service... Waiting for Docker daemon... Successfully connected to Docker Daemon. The following images are present on this machine: WARNING: This output is designed for human readability. For machine-readable output, please use --format. IMAGE ID DISK USAGE CONTENT SIZE EXTRA Script complete! PS C:\Windows\system32> -
(以下動作確認)windows server 2022 のイメージをダウンロードします。
-
やはりといいますか、サイズは大きいですね。
```
PS C:\Users\Administrator> docker pull mcr.microsoft.com/windows/servercore:ltsc2019
ltsc2019: Pulling from windows/servercore
dfdc1c49bb20: Pull complete
c9f12e6082f9: Pull complete
Digest: sha256:a3d7773c4a836c2efd3ecb89f4fcb41199ee56d454225cf72a65b603bf569eca
Status: Downloaded newer image for mcr.microsoft.com/windows/servercore:ltsc2019
mcr.microsoft.com/windows/servercore:ltsc2019
PS C:\Users\Administrator> docker images
                                                                                                                                                                        i Info →   U  In Use
IMAGE                                           ID             DISK USAGE   CONTENT SIZE   EXTRA
mcr.microsoft.com/windows/servercore:ltsc2019   23e07635a855       4.56GB             0B
PS C:\Users\Administrator>
```
-
(以下動作確認)windows コンテナーを作成し、コンテナ内でコマンドを実行します。
PS C:\Users\Administrator> hostname gitlab-runner PS C:\Users\Administrator> docker run -it mcr.microsoft.com/windows/nanoserver:ltsc2019 cmd.exe ~~プログレスゲージが出てきました~~ C:\>hostname e5de67fb7e14 C:\>echo "Hello World" "Hello World" C:\>exit PS C:\Users\Administrator> hostname gitlab-runner PS C:\Users\Administrator> docker ps -a CONTAINER ID IMAGE COMMAND CREATED STATUS PORTS NAMES c625255439da mcr.microsoft.com/windows/nanoserver:ltsc2019 "cmd.exe" 2 minutes ago Exited (0) About a minute ago boring_knuth PS C:\Users\Administrator> -
Docker Compose を配置する。
- Install the Docker Compose standalone (Legacy)に従って、Docker Compose を配置します。
- Windows11 などは Docker Desktop からと書かれていますが、Windows Server はこちらの方法をとらないといけないようです(Legacy と書かれていますが...)。
- 下記のような、特別な操作もなく配置する感じでした。
PS C:\Users\Administrator> New-Item -ItemType Directory -Force "$Env:ProgramFiles\Docker" | Out-Null
PS C:\Users\Administrator> [Net.ServicePointManager]::SecurityProtocol = [Net.SecurityProtocolType]::Tls12
PS C:\Users\Administrator>  Start-BitsTransfer -Source "https://github.com/docker/compose/releases/download/v5.0.1/docker-compose-windows-x86_64.exe" -Destination $Env:ProgramFiles\D
ocker\docker-compose.exe
PS C:\Users\Administrator> ls "$Env:ProgramFiles\Docker"


    ディレクトリ: C:\Program Files\Docker


Mode                LastWriteTime         Length Name
----                -------------         ------ ----
-a----       2025/12/18     19:41       31983616 docker-compose.exe


PS C:\Users\Administrator>
- (要チェック)PATH が docker-compose.exe に通っているか?
- 通っていないなら追加してください。
PS C:\Users\Administrator> & "$Env:ProgramFiles\Docker\docker-compose.exe" version
Docker Compose version v5.0.1
PS C:\Users\Administrator> where.exe docker-compose
情報: 与えられたパターンのファイルが見つかりませんでした。
PS C:\Users\Administrator>
3.3.2. Windows コンテナを構築する
3.3.2.1. ディレクトリ構築
- DockerFile やボリュームマウントに使うディレクトリを作ります。
PS C:\Users\Administrator> mkdir C:\gitlab-runner-win\data\runner1

    ディレクトリ: C:\gitlab-runner-win\data

Mode                LastWriteTime         Length Name
----                -------------         ------ ----
d-----       2026/01/03      2:17                runner1

PS C:\Users\Administrator> mkdir C:\gitlab-runner-win\data\runner2

    ディレクトリ: C:\gitlab-runner-win\data


Mode                LastWriteTime         Length Name
----                -------------         ------ ----
d-----       2026/01/03      2:17                runner2

PS C:\Users\Administrator> mkdir C:\gitlab-runner-win\data\runner3

    ディレクトリ: C:\gitlab-runner-win\data

Mode                LastWriteTime         Length Name
----                -------------         ------ ----
d-----       2026/01/03      2:17                runner3

PS C:\Users\Administrator> tree C:\gitlab-runner-win
フォルダー パスの一覧
ボリューム シリアル番号は ACF1-9601 です
C:\GITLAB-RUNNER-WIN
└─data
    ├─runner1
    ├─runner2
    └─runner3
PS C:\Users\Administrator>
3.3.2.2. Dockerfile の記載
-
Dockerfile.gitlab-runner.ltsc2019という名前の Dockerfile を作成します。 - Dockerfile の内容とコメントは下記です。
# escape=`

# Dockerfileから作られるイメージの元となるイメージを指定します
FROM mcr.microsoft.com/windows/servercore:ltsc2019

# powershellを起動する
SHELL ["powershell","-NoProfile","-ExecutionPolicy","Bypass","-Command"]

# ディレクトリ作成
RUN New-Item -ItemType Directory -Force C:\gitlab-runner | Out-Null
# コマンド実行する場所を指定
WORKDIR C:\gitlab-runner

# gitlab-runner.exe をダウンロードして配置
RUN [Net.ServicePointManager]::SecurityProtocol = [Net.SecurityProtocolType]::Tls12 ; `
    Invoke-WebRequest -UseBasicParsing `
      -Uri "https://s3.dualstack.us-east-1.amazonaws.com/gitlab-runner-downloads/latest/binaries/gitlab-runner-windows-amd64.exe" `
      -OutFile "C:\gitlab-runner\gitlab-runner.exe"

# ホストのファイルを複製
COPY startup.ps1 C:\startup.ps1

# PSS配置場所は指定のためCMDではなくENTRYPOINT
ENTRYPOINT ["powershell","-NoProfile","-ExecutionPolicy","Bypass","-File","C:\\startup.ps1"]
- ni コマンドでファイル作成、ls コマンドで確認、notepad で内容を書き込み、type コマンドで中身を表示という順番です。
PS C:\Users\Administrator> ni C:\gitlab-runner-win\Dockerfile.gitlab-runner.ltsc2019


    ディレクトリ: C:\gitlab-runner-win


Mode                LastWriteTime         Length Name
----                -------------         ------ ----
-a----       2026/01/03      3:10              0 Dockerfile.gitlab-runner.ltsc2019


PS C:\Users\Administrator> ls C:\gitlab-runner-win\


    ディレクトリ: C:\gitlab-runner-win


Mode                LastWriteTime         Length Name
----                -------------         ------ ----
d-----       2026/01/03      2:17                data
-a----       2026/01/03      3:10              0 Dockerfile.gitlab-runner.ltsc2019


PS C:\Users\Administrator> notepad C:\gitlab-runner-win\Dockerfile.gitlab-runner.ltsc2019
PS C:\Users\Administrator> type C:\gitlab-runner-win\Dockerfile.gitlab-runner.ltsc2019
# escape=`
FROM mcr.microsoft.com/windows/servercore:ltsc2019

SHELL ["powershell","-NoProfile","-ExecutionPolicy","Bypass","-Command"]

RUN New-Item -ItemType Directory -Force C:\gitlab-runner | Out-Null
WORKDIR C:\gitlab-runner

RUN [Net.ServicePointManager]::SecurityProtocol = [Net.SecurityProtocolType]::Tls12 ; `
    Invoke-WebRequest -UseBasicParsing `
      -Uri "https://s3.dualstack.us-east-1.amazonaws.com/gitlab-runner-downloads/latest/binaries/gitlab-runner-windows-amd64.exe" `
      -OutFile "C:\gitlab-runner\gitlab-runner.exe"

COPY startup.ps1 C:\startup.ps1

ENTRYPOINT ["powershell","-NoProfile","-ExecutionPolicy","Bypass","-File","C:\\startup.ps1"]
PS C:\Users\Administrator>
3.3.2.3. Powershell の記載
-
3322-dockerfile の記載の時と同じコマンドを使い、ファイル作成をします。
-
下記のような PowerShell を配置します。
$ErrorActionPreference = "Stop"

$cfgDir = "C:\runner\data"
$cfgFile = Join-Path $cfgDir "config.toml"
$exe = "C:\gitlab-runner.exe"

if (-not (Test-Path $cfgDir)) { New-Item -ItemType Directory -Force $cfgDir | Out-Null }
Set-Location $cfgDir

# must env vars
if (-not $env:GITLAB_URL) { throw "GITLAB_URL is required" }
if (-not $env:RUNNER_TOKEN) { throw "RUNNER_TOKEN is required" }
if (-not $env:RUNNER_NAME) { $env:RUNNER_NAME = $env:COMPUTERNAME }

function Get-TokenFromConfig([string]$path) {
    if (-not (Test-Path $path)) { return $null }
    $txt = Get-Content -Raw -Encoding UTF8 $path
    $m = [regex]::Match($txt, '(?m)^\s*token\s*=\s*"([^"]*)"\s*$')
    if ($m.Success) { return $m.Groups[1].Value }
    return $null
}

function Set-TokenInConfig([string]$path, [string]$newToken) {
    $txt = Get-Content -Raw -Encoding UTF8 $path

    # extract token line and preserve indent
    $re = [regex]'(?m)^(?<indent>\s*)token\s*=\s*"[^"]*"\s*$'
    if (-not $re.IsMatch($txt)) {
        throw "token line not found in config.toml"
    }
    $txt2 = $re.Replace($txt, '${indent}token = "' + $newToken + '"', 1)
    Set-Content -Path $path -Value $txt2 -Encoding UTF8
}

# if config.toml does not exist, register the runner
if (-not (Test-Path $cfgFile)) {
    & $exe register `
        --non-interactive `
        --url "$env:GITLAB_URL" `
        --token "$env:RUNNER_TOKEN" `
        --name "$env:RUNNER_NAME" `
        --executor "shell"
}

# if token in config.toml is different from env:RUNNER_TOKEN, update it
$current = Get-TokenFromConfig $cfgFile
if ($current -and ($current -ne $env:RUNNER_TOKEN)) {
    Write-Host "Token changed: updating config.toml token..."
    Set-TokenInConfig -path $cfgFile -newToken $env:RUNNER_TOKEN
}

# run
& $exe run --working-directory $cfgDir
3.3.2.5. docker-compose.yml の記載
- 3322-dockerfile の記載の時と同じコマンドを使い、各コンテナの設定ファイル(env)作成をします。
- 今回は runner1~3 と Runner 用コンテナを 3 つ用意したとします。
services:
  runner1:
    image: gitlab-runner-win:ltsc2019
    build:
      context: .
      dockerfile: Dockerfile.gitlab-runner.ltsc2019
    isolation: hyperv
    restart: unless-stopped
    env_file:
      - runner1.env
    volumes:
      - type: bind
        source: C:\gitlab-runner-win\data\runner1
        target: C:\runner\data

  runner2:
    image: gitlab-runner-win:ltsc2019
    isolation: hyperv
    restart: unless-stopped
    env_file:
      - runner2.env
    volumes:
      - type: bind
        source: C:\gitlab-runner-win\data\runner2
        target: C:\runner\data

  runner3:
    image: gitlab-runner-win:ltsc2019
    isolation: hyperv
    restart: unless-stopped
    env_file:
      - runner3.env
    volumes:
      - type: bind
        source: C:\gitlab-runner-win\data\runner3
        target: C:\runner\data
3.3.2.6. env の記載
- 3322-dockerfile の記載の時と同じコマンドを使い、各コンテナの設定ファイル(env)作成をします。
GITLAB_URL=http://192.168.0.177:18780
RUNNER_TOKEN=glrt-xxxxxxxxxxxxxxxx  # GitLabでRunner作成時に出てきたトークン
RUNNER_NAME=win-runner-01
3.3.2.7. docker compose upを実行する
- 現状はこのような配置
PS C:\gitlab-runner-win> pwd

Path
----
C:\gitlab-runner-win


PS C:\gitlab-runner-win> tree /f
フォルダー パスの一覧
ボリューム シリアル番号は ACF1-9601 です
C:.
│  docker-compose.yml
│  Dockerfile.gitlab-runner.ltsc2019
│  runner1.env
│  runner2.env
│  runner3.env
│  startup.ps1
│
└─data
    ├─runner1
    ├─runner2
    └─runner3
PS C:\gitlab-runner-win>
- 下記のようにイメージのビルドとコンテナ構築を行い起動します。
PS C:\gitlab-runner-win> docker-compose config
name: gitlab-runner-win
services:
  runner1:
    build:
      context: C:\gitlab-runner-win
      dockerfile: Dockerfile.gitlab-runner.ltsc2019
    environment:
      GITLAB_URL: http://192.168.0.177:18780
      RUNNER_NAME: win-runner-01
      RUNNER_TOKEN: glrt-xxxxxxxxxxxxxxxx
    image: gitlab-runner-win:ltsc2019
    isolation: hyperv
    networks:
      default: null
    restart: unless-stopped
    volumes:
      - type: bind
        source: C:\gitlab-runner-win\data\runner1
        target: C:\runner\data
  runner2:
    environment:
      GITLAB_URL: http://192.168.0.177:18780
      RUNNER_NAME: win-runner-02
      RUNNER_TOKEN: glrt-xxxxxxxxxxxxxxxx
    image: gitlab-runner-win:ltsc2019
    isolation: hyperv
    networks:
      default: null
    restart: unless-stopped
    volumes:
      - type: bind
        source: C:\gitlab-runner-win\data\runner2
        target: C:\runner\data
  runner3:
    environment:
      GITLAB_URL: http://192.168.0.177:18780
      RUNNER_NAME: win-runner-03
      RUNNER_TOKEN: glrt-xxxxxxxxxxxxxxxx
    image: gitlab-runner-win:ltsc2019
    isolation: hyperv
    networks:
      default: null
    restart: unless-stopped
    volumes:
      - type: bind
        source: C:\gitlab-runner-win\data\runner3
        target: C:\runner\data
networks:
  default:
    name: gitlab-runner-win_default
PS C:\gitlab-runner-win> docker-compose build
Sending build context to Docker daemon  1.716kB
Step 1/8 : FROM mcr.microsoft.com/windows/servercore:ltsc2019
ltsc2019: Pulling from windows/servercore
dfdc1c49bb20: Pull complete
c9f12e6082f9: Pull complete
Digest: sha256:a3d7773c4a836c2efd3ecb89f4fcb41199ee56d454225cf72a65b603bf569eca
Status: Downloaded newer image for mcr.microsoft.com/windows/servercore:ltsc2019
 ---> 23e07635a855
Step 2/8 : SHELL ["powershell","-NoProfile","-ExecutionPolicy","Bypass","-Command"]
 ---> Running in 85be3a15cb9b
 ---> Removed intermediate container 85be3a15cb9b
 ---> 428812400d93
Step 3/8 : RUN New-Item -ItemType Directory -Force C:\gitlab-runner | Out-Null
 ---> Running in 589c660ca8ff
 ---> Removed intermediate container 589c660ca8ff
 ---> 7315014d6d77
Step 4/8 : WORKDIR C:\gitlab-runner
 ---> Running in 81a33ab61981
 ---> Removed intermediate container 81a33ab61981
 ---> f2129bddf284
Step 5/8 : RUN [Net.ServicePointManager]::SecurityProtocol = [Net.SecurityProtocolType]::Tls12 ;     Invoke-WebRequest -UseBasicParsing       -Uri "https://s3.dualstack.us-east-1.amazonaws.com/gitlab-runner-downloads/latest/binaries/gitlab-runner-windows-amd64.exe"       -OutFile "C:\gitlab-runner\gitlab-runner.exe"
 ---> Running in 83c0a2b278a0
 ---> Removed intermediate container 83c0a2b278a0
 ---> d2663be42c16
Step 6/8 : COPY startup.ps1 C:\startup.ps1
 ---> 08d542a268b7
Step 7/8 : ENTRYPOINT ["powershell","-NoProfile","-ExecutionPolicy","Bypass","-File","C:\\startup.ps1"]
 ---> Running in fd1dea6e4935
 ---> Removed intermediate container fd1dea6e4935
 ---> 3e83782da20b
Step 8/8 : LABEL com.docker.compose.image.builder=classic
 ---> Running in 797eb73b063f
 ---> Removed intermediate container 797eb73b063f
 ---> e698d058a9b5
Successfully built e698d058a9b5
Successfully tagged gitlab-runner-win:ltsc2019
[+] build 1/1
 ✔ Image gitlab-runner-win:ltsc2019 Built                                                                                                                                   565.7s
PS C:\gitlab-runner-win> docker-compose up -d
time="2026-01-03T06:19:33+09:00" level=warning msg="No services to build"
[+] up 4/4
 ✔ Network gitlab-runner-win_default     Created                                                                                                                              0.2s
 ✔ Container gitlab-runner-win-runner1-1 Created                                                                                                                              0.3s
 ✔ Container gitlab-runner-win-runner2-1 Created                                                                                                                              0.4s
 ✔ Container gitlab-runner-win-runner3-1 Created                                                                                                                              0.3s
PS C:\gitlab-runner-win> docker-compose ps
NAME                          IMAGE                        COMMAND                   SERVICE   CREATED         STATUS                          PORTS
gitlab-runner-win-runner1-1   gitlab-runner-win:ltsc2019   "powershell -NoProfi…"   runner1   3 minutes ago   Restarting (1) 23 seconds ago
gitlab-runner-win-runner2-1   gitlab-runner-win:ltsc2019   "powershell -NoProfi…"   runner2   3 minutes ago   Restarting (1) 23 seconds ago
gitlab-runner-win-runner3-1   gitlab-runner-win:ltsc2019   "powershell -NoProfi…"   runner3   3 minutes ago   Restarting (1) 23 seconds ago
PS C:\gitlab-runner-win>
- 用語説明(ちょっとここは自信ないです...)
| 用語 | 説明 |
|---|---|
| Windows コンテナ |
コンテナ間の独立方法は、プロセス分離モードと Hyper-V 分離モードがある。 |
| プロセス分離モード | ホスト OS のカーネルを共有(ここは Linux コンテナと同じ)する場合のコンテナ分離方法。ホストとコンテナにおいてOS バージョンとビルドが同じ必要があるそうです。ビルドも揃えるとなると手間に感じました。 |
| Hyper-V 分離モード | ハイパーバイザーを利用したコンテナ分離方法。ハイパーバイザーの上にコンテナごとのUtility VMが作られるみたいです。改めて考えてみると、「 Utility VM によってコンテナごとに OS が作られるなら、WSL2 と Windows コンテナってやっていること同じでは? 」と疑問に思い調べてみました。Docker for Windows の概要と導入 > Linux Containers on Windowsの絵がわかりやすかったです。 |
- 補足
- プロセス分離モードでは本当にビルドまでそろえるのか?、面倒でハードル高くない?と考え、調べなおしてみました。メモ. Windows コンテナーの新機能| Windows Server 2025 大特集フォローアップには、
大前提として、Windowsコンテナーは、それを実行するコンテナーホストと同じOSビルドをプロセス分離モード(カーネルを共有)実行でき、古いOSビルドはHyper-V分離モードで実行できます(図1)。コンテナーホストよりも新しいOSビルドのコンテナーを実行することはできません。とWindows Server 2025(実際にはWindows Server Annual Channel 23H2以降)からは、特定の古いOSビルド(Windows Server 2022)のコンテナーを、引き続きプロセス分離モードで実行できるようになりました(図2、画面4、画面5)。という文面がありました。プロセス分離モードに対しては、今は違うのかもしれませんね。
- プロセス分離モードでは本当にビルドまでそろえるのか?、面倒でハードル高くない?と考え、調べなおしてみました。メモ. Windows コンテナーの新機能| Windows Server 2025 大特集フォローアップには、
3.3.4. エラーなど
3.3.4.1. Hyper-V をインストールできません: 必要な仮想化機能がプロセッサにありません。
- ホストマシン側で入れ子仮想化が許可されていないために生じる下記エラーです。
PS C:\Users\Administrator> Install-WindowsFeature Containers, Hyper-V -IncludeManagementTools -Restart

Success Restart Needed Exit Code      Feature Result
------- -------------- ---------      --------------
False   Maybe          Failed         {}
Install-WindowsFeature : Hyper-V 機能の前提条件の確認に失敗しました。
1. Hyper-V をインストールできません: 必要な仮想化機能がプロセッサにありません。
発生場所 行:1 文字:1
+ Install-WindowsFeature Containers, Hyper-V -IncludeManagementTools -R ...
+ ~~~~~~~~~~~~~~~~~~~~~~~~~~~~~~~~~~~~~~~~~~~~~~~~~~~~~~~~~~~~~~~~~~~~~
    + CategoryInfo          : InvalidOperation: (Hyper-V:ServerComponentWrapper) [Install-WindowsFeature]、Exception
    + FullyQualifiedErrorId : Alteration_PrerequisiteCheck_Failed,Microsoft.Windows.ServerManager.Commands.AddWindowsFeatureCommand


PS C:\Users\Administrator>
- ホストマシン側で、仮想マシンを指定して入れ子仮想化を許可すれば解決します。
PS C:\Users\xxxxx> Stop-VM "Windows Server 2019(GitLab Runner on Windows)"
PS C:\Users\xxxxx> Set-VMProcessor -VMName "Windows Server 2019(GitLab Runner on Windows)" -ExposeVirtualizationExtensions $true
PS C:\Users\xxxxx>
3.3.4.2. マニフェストリストエントリに linux/amd64 の一致するマニフェストがありません
-
Docker の構成が Linux コンテナを実行するようになってしまっていることが原因です。
-
(Windows Server の場合)下記スクリプトを実行します。
Invoke-WebRequest -UseBasicParsing "https://raw.githubusercontent.com/microsoft/Windows-Containers/Main/helpful_tools/Install-DockerCE/install-docker-ce.ps1" -o install-docker-ce.ps1
.\install-docker-ce.ps1
-
(Windows 11 などの場合)
& $Env:ProgramFiles\Docker\Docker\DockerCli.exe -SwitchDaemonを実行します。 -
そうしたら、下記のように Docker の動作確認と OSType が windows になっていることを確認します。
PS C:\Users\Administrator> Get-Service docker

Status   Name               DisplayName
------   ----               -----------
Running  docker             Docker Engine


PS C:\Users\Administrator> docker info | findstr /I "OSType Default Isolation"
 Context:    default
 Default Isolation: process
 OSType: windows
PS C:\Users\Administrator>
4. まとめ
- GitLab, GitLab Runner の構築が終わりました。
- 次は GitLab Runner の設定について調べてみます。