こんにちは!スージーです。
以前書いたこちらの記事はClass Componentで書いた記事だったので、関数コンポーネント(Functional Component)で書き直してみました。関数コンポーネントで書くにあたり、hookを使って実装します
やりたい事
CRUD(新規作成・一覧表示・詳細表示・更新・削除)を実装します
やらない事
- ログイン周りの実装
- Rails側
- アソシエーションを使ったモデルのリレーション
- モデルバリデーション
- CORSの説明
- React側
- クライアントバリデーション
- hooksの説明
- css
- その他
- コマンドの説明
- SQLの説明
- ログの説明
こんな書き方すればReact × Rails APIでCRUDが実装できるんだなーって感じで見ていただけると幸いです
開発環境
Ruby 2.7.1
Rails 6.0.4
MySQL
node.js 14.8.0
React 17.0.2
参考
- React:関数コンポーネントとクラスコンポーネントの違い
- [React hooksを基礎から理解する (useEffect編)](React hooksを基礎から理解する (useEffect編))
- [React hooksを基礎から理解する (useState編)](React hooksを基礎から理解する (useState編))
まずAPI(Rails)側から実装開始
以前の記事とほぼ同じなので色々、割愛します
mkdir react-form-sample && cd react-form-sample
rails new backend -d mysql --api && cd backend
gem 'rack cors'をインストールとモデル・コントローラを作成
gem 'rack-cors'
bundle install
rails g model post name:string neko_type:string
rails db:create
rails db:migrate
rails g controller api/v1/posts
routes.rb
Rails.application.routes.draw do
  namespace :api do
    namespace :v1 do
      resources :posts
    end
  end
end
cors.rb
Rails.application.config.middleware.insert_before 0, Rack::Cors do
  allow do
    origins 'http://localhost:3001'

    resource '*',
      headers: :any,
      methods: [:get, :post, :put, :patch, :delete, :options, :head]
  end
end
Front(React)側は3001ポートで繋ぐのでoriginsは3001を許可します
posts_controller.rb
class Api::V1::PostsController < ApplicationController

  def index
    render json: Post.all
  end

  def show
    render json: Post.find(params[:id])
  end

  def create
    post = Post.new(post_params)
    if post.save
      render json: post
    else
      render json: post.erros, status: 422
    end
  end

  def update
    post = Post.find(params[:id])
    if post.update(post_params)
      render json: post
    else
      render json: post.errors, status: 422
    end
  end

  def destroy
    post = Post.find(params[:id])
    post.destroy
    render json: post
  end

  private
    def post_params
      params.require(:post).permit(:name, :neko_type)
    end
end
seed.rb
Post.create!(name: 'ニャア', neko_type: 'アメリカンショートヘア')
Post.create!(name: 'まる', neko_type: 'スコッティシュフォールド')
Post.create!(name: 'むぎ', neko_type: 'スコッティシュフォールド')
curlコマンドで確かめる為にサンプルデータを作ります
api動作確認
各エンドポイントは以下のようになっています
rails routes
api_v1_posts GET    /api/v1/posts(.:format)                                                                  api/v1/posts#index
POST   /api/v1/posts(.:format)                                                                  api/v1/posts#create
api_v1_post GET    /api/v1/posts/:id(.:format)                                                              api/v1/posts#show
PATCH  /api/v1/posts/:id(.:format)                                                              api/v1/posts#update
PUT    /api/v1/posts/:id(.:format)                                                              api/v1/posts#update
DELETE /api/v1/posts/:id(.:format)                                                              api/v1/posts#destroy
rails db:seed
rails s

// もう一つタブを開く
// index
curl http://localhost:3000/api/v1/posts
[{"id":1,"name":"ニャア","neko_type":"アメリカンショートヘア","created_at":"2021-07-24T15:01:05.371Z","updated_at":"2021-07-24T15:01:05.371Z"},{"id":2,"name":"まる","neko_type":"スコッティシュフォールド","created_at":"2021-07-24T15:01:05.376Z","updated_at":"2021-07-24T15:01:05.376Z"},{"id":3,"name":"むぎ","neko_type":"スコッティシュフォールド","created_at":"2021-07-24T15:01:05.381Z","updated_at":"2021-07-24T15:01:05.381Z"}]

// show
curl http://localhost:3000/api/v1/posts/1
{"id":1,"name":"ニャア","neko_type":"アメリカンショートヘア","created_at":"2021-07-24T15:01:05.371Z","updated_at":"2021-07-24T15:01:05.371Z"}

// create
curl -X POST http://localhost:3000/api/v1/posts -d "[name]=test&[neko_type]=test"
{"id":4,"name":"test","neko_type":"test","created_at":"2021-07-24T15:36:01.040Z","updated_at":"2021-07-24T15:36:01.040Z"}

// update
curl -X PATCH http://localhost:3000/api/v1/posts/4 -d "[name]=update&[neko_type]=update"
{"id":4,"name":"update","neko_type":"update","created_at":"2021-07-24T15:36:01.040Z","updated_at":"2021-07-24T15:36:31.170Z"}

// delete
curl -X DELETE http://localhost:3000/api/v1/posts/4
{"id":4,"name":"update","neko_type":"update","created_at":"2021-07-24T15:36:01.040Z","updated_at":"2021-07-24T15:36:31.170Z"}
jsonが正常に返ってきました。アクションは正常に動いている事が確認できました。これでapi側は完了です
次にClient(React)側の実装開始
react-form-sample $ create-react-app frontend
cd frontend
npm install axios react-router-dom axios-case-converter
今回使うライブラリは以下の通りです
-
axios
- HTTPクライアント用のライブラリ
-
react-router-dom
- ルーティング設定用のライブラリ
-
axios-case-converter
- axiosで送受信する値をスネークケース<=>キャメルケースに変換するライブラリ
使わないファイルを削除とjsファイルをjsxファイルに変換
rm src/App.css src/App.test.js src/logo.svg src/reportWebVitals.js src/setupTests.js
mv src/App.js src/App.jsx
mv src/index.js src/index.jsx
index.jsxとApp.jsxを修正
// index.jsx
import React from 'react';
import ReactDOM from 'react-dom';
import './index.css';
import App from './App';

ReactDOM.render(
  <React.StrictMode>
    <App />
  </React.StrictMode>,
  document.getElementById('root')
);
// App.jsx
import React from 'react';

const App = () => {
  return <h1>Hello World</h1>;
};
export default App;
npm startでlocalhost:3000にアクセスして「Hello World」が表示されればOK
API Clientを作成
各コンポーネントでaxiosを使ってapiコールしても良いのですが、今回はclient.jsファイルとpost.jsファイルを作成してapiコール部分をまとめます。
mkdir -p src/lib/api
touch src/lib/api/client.js
touch src/lib/api/post.js
// client.js
import applyCaseMiddleware from 'axios-case-converter';
import axios from 'axios';

// ヘッダーに関してはケバブケースのままで良いので適用を無視するオプションを追加
const options = {
  ignoreHeaders: true,
};

const client = applyCaseMiddleware(
  axios.create({
    baseURL: 'http://localhost:3000/api/v1',
  }),
  options
);

export default client;
// post.js
import client from './client';

// 一覧
export const getList = () => {
  return client.get('/posts');
};

// 詳細
export const getDetail = (id) => {
  return client.get(`/posts/${id}`);
};

// 新規作成
export const createPost = (params) => {
  return client.post('/posts', params);
};

// 更新
export const updatePost = (id, params) => {
  return client.patch(`/posts/${id}`, params);
};

// 削除
export const deletePost = (id) => {
  return client.delete(`/posts/${id}`);
};
一覧画面を作成
/は一覧画面とします
mkdir -p src/components
touch List.jsx
// App.jsx
import React from 'react';
import {
  BrowserRouter as Router,
  Switch,
  Route,
} from 'react-router-dom';
import List from './components/List';

const App = () => {
  return (
    <Router>
      <Switch>
        <Route exact path='/' component={List} />
      </Switch>
    </Router>
  );
};
export default App;
// List.jsx
import React from 'react';

const List = () => {
  return <h1>HOME</h1>;
};
export default List;
localhost:3000にアクセスするとHOMEとなっていればOK
api側との疎通確認をする
先程作成したlib/api/post.jsが正常に動くか疎通確認をします
// List.jsx
import React, { useEffect, useState } from 'react';
import { getList } from '../lib/api/post';

const List = () => {
  const [dataList, setDataList] = useState({});

  useEffect(() => {
    handleGetList();
  }, []);

  const handleGetList = async () => {
    try {
      const res = await getList();
      console.log(res.data);
      setDataList(res.data);
    } catch (e) {
      console.log(e);
    }
  };
  return <h1>HOME</h1>;
};
export default List;
api側をrails s起動、client側をnpm startして立ち上げます
backend $ rails s
// 別タブで
frontend $ npm start
Would you like to run the app on another port instead? › (Y/n)
Y // Y + enterで3001ポートでアクセスします
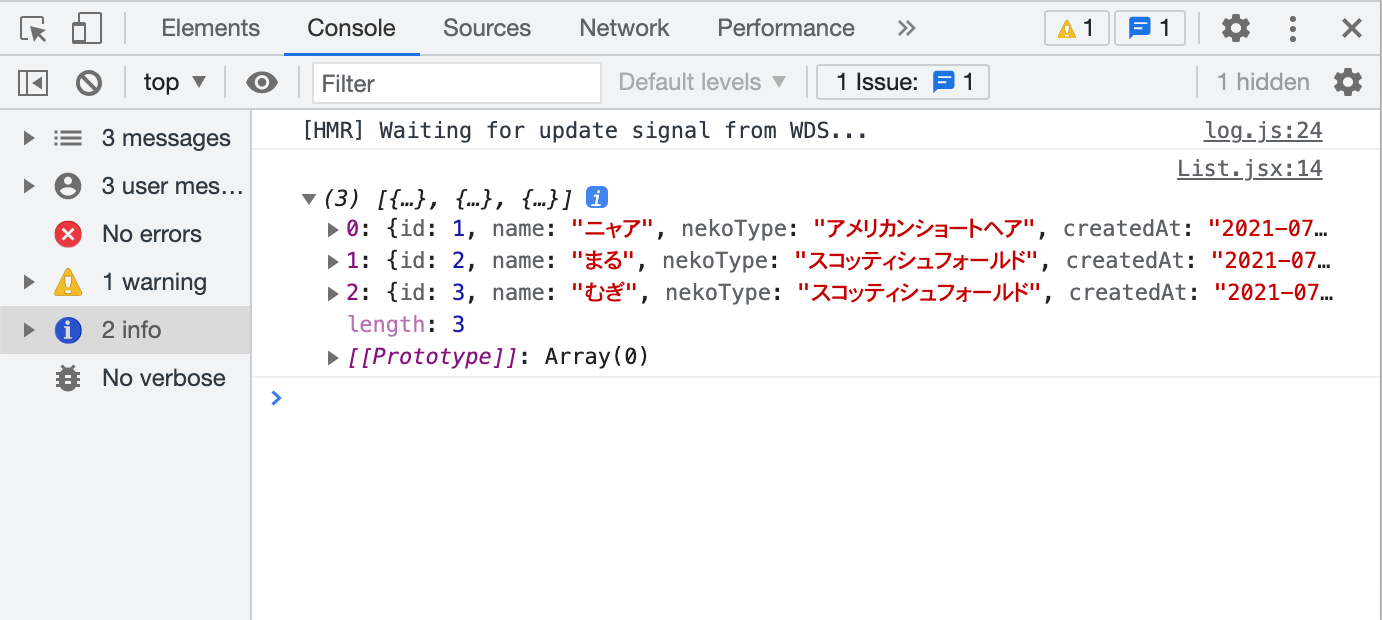
console.logでapiコールで取得したデータがdevツールに表示されればOK
apiから取得した一覧を表示する
// List.jsx
import React, { useEffect, useState } from 'react';
import { getList } from '../lib/api/post';
import { useHistory, Link } from 'react-router-dom';

const List = () => {
  const [dataList, setDataList] = useState([]);

  useEffect(() => {
    handleGetList();
  }, []);

  const handleGetList = async () => {
    try {
      const res = await getList();
      console.log(res.data);
      setDataList(res.data);
    } catch (e) {
      console.log(e);
    }
  };

  return (
    <>
      <h1>HOME</h1>
      <button>新規作成</button>
      <table>
        <thead>
          <tr>
            <th>名前</th>
            <th>猫種</th>
            <th colSpan='1'></th>
            <th colSpan='1'></th>
            <th colSpan='1'></th>
          </tr>
        </thead>
        {dataList.map((item, index) => (
          <tbody key={index}>
            <tr>
              <td>{item.name}</td>
              <td>{item.nekoType}</td>
              <td>
                <Link to={`/edit/${item.id}`}>更新</Link>
              </td>
              <td>
                <Link to={`/post/${item.id}`}>詳細へ</Link>
              </td>
              <td>
                <button>削除</button>
              </td>
            </tr>
          </tbody>
        ))}
      </table>
    </>
  );
};
export default List;
更新ボタン・詳細リンク・削除ボタン・新規作成ボタンはこの後、実装します
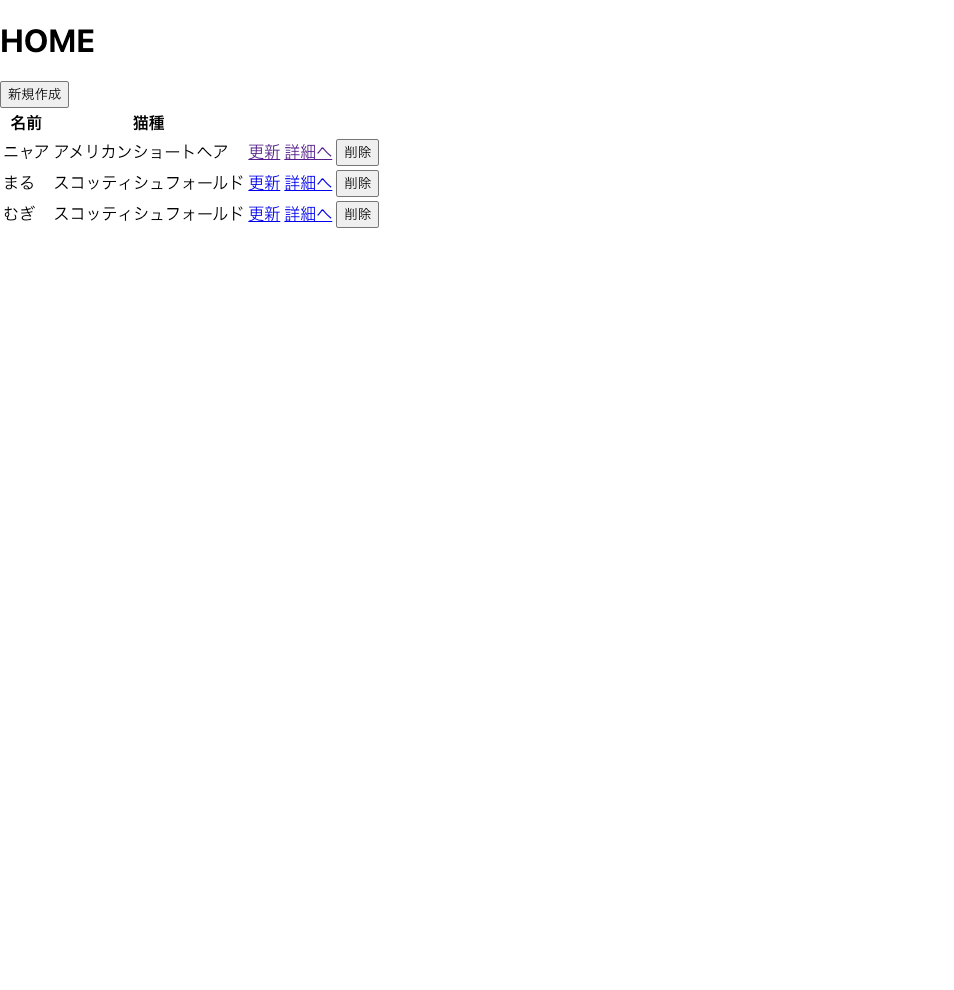
localhost:3001で見ると以下のようにデータが表示されていればOK
詳細画面を作成
次に詳細画面を実装していきます。
- 詳細画面は一覧画面から1レコードを取得
- そのレコードのidを
react-router-domを使ってqueryパラメータから取得 - 取得したidをapiクライアントからサーバへリクエスト
- レスポンスを受け取る
という流れを実装します
まずDetailコンポーネントを作成します
touch src/components/Detail.jsx
詳細画面のパスはlocalhost:3001/post/1とします
// App.jsx
import React from 'react';
import {
  BrowserRouter as Router,
  Switch,
  Route,
} from 'react-router-dom';
import List from './components/List';
// 追加
import Detail from './components/Detail';


const App = () => {
  return (
    <Router>
      <Switch>
        <Route exact path='/' component={List} />
        <Route path='/post/:id' component={Detail} /> // 追加
      </Switch>
    </Router>
  );
};
export default App;
// Detail.jsx
import React, { useEffect, useState } from 'react';
import { getDetail } from '../lib/api/post';
import { useHistory, useParams } from 'react-router-dom';

const Detail = (props) => {
  const [data, setData] = useState({});
  // { id: "1" }を取得する
  const query = useParams();
  // 戻るボタン用
  const history = useHistory();

  // 画面描画時にidがundefinedだとデータ取得できないので
  // 依存配列にidを入れて、idがundifined => 1と更新された時に
    // useEffectの副作用を使い、処理をもう一度実行させる
  useEffect(() => {
    handleGetDetail(query);
  }, [query]);

  const handleGetDetail = async (query) => {
    try {
      const res = await getDetail(query.id);
      console.log(res.data);
      setData(res.data);
    } catch (e) {
      console.log(e);
    }
  };

  return (
    <>
      <h1>DETAIL</h1>
      <div>ID:{data.id}</div>
      <div>名前:{data.name}</div>
      <div>猫種:{data.nekoType}</div>
      <button onClick={() => history.push('/')}>戻る</button>
    </>
  );
};
export default Detail;
localhost:3001/1で見ると以下のようにデータが表示されていればOK

削除機能を実装
一覧ページに配置した削除ボタンで掴んだレコードのデータを物理削除します
- 一覧画面から1レコードを取得
- onClickイベントでidを取得
- 取得したidをapiクライアントに渡しdeleteリクエストをサーバに送る
- 削除したレコード以外を再描画する
// List.jsx
import React, { useEffect, useState } from 'react';
// deletePostを追加
import { getList, deletePost } from '../lib/api/post';
import { Link } from 'react-router-dom';

const List = () => {
  const [dataList, setDataList] = useState([]);

  useEffect(() => {
    handleGetList();
  }, []);

  const handleGetList = async () => {
    try {
      const res = await getList();
      console.log(res.data);
      setDataList(res.data);
    } catch (e) {
      console.log(e);
    }
  };

  // 削除する関数を追加
  const handleDelete = async (item) => {
    // 引数にitemを渡してitem.idで「1」など取得できればOK
    console.log('click', item.id)
    try {
      const res = await deletePost(item.id)
      console.log(res.data)
            // データを再取得
      handleGetList()
    } catch (e) {
      console.log(e)
    }
  }

  return (
    <>
      <h1>HOME</h1>
      <button>新規作成</button>
      <table>
        <thead>
          <tr>
            <th>名前</th>
            <th>猫種</th>
            <th colSpan='1'></th>
            <th colSpan='1'></th>
            <th colSpan='1'></th>
          </tr>
        </thead>
        {dataList.map((item, index) => (
          <tbody key={index}>
            <tr>
              <td>{item.name}</td>
              <td>{item.nekoType}</td>
              <td>
                <Link to={`/edit/${item.id}`}>更新</Link>
              </td>
              <td>
                <Link to={`/${item.id}`}>詳細へ</Link>
              </td>
              <td>
                {/* 追加 */}
                <button onClick={() => handleDelete(item)}>削除</button>
              </td>
            </tr>
          </tbody>
        ))}
      </table>
    </>
  );
};
export default List;
localhost:3001で削除ボタンを押下後、レコードが1件削除できればOK
railsのログを見るとdeleteメソッドでidを受け取り、deleteが実行されているのが分かります
Started DELETE "/api/v1/posts/4" for ::1 at 2021-07-27 10:02:20 +0900
Processing by Api::V1::PostsController#destroy as HTML
  Parameters: {"id"=>"4"}
  Post Load (3.4ms)  SELECT `posts`.* FROM `posts` WHERE `posts`.`id` = 4 LIMIT 1
  ↳ app/controllers/api/v1/posts_controller.rb:30:in `destroy'
   (23.6ms)  BEGIN
  ↳ app/controllers/api/v1/posts_controller.rb:31:in `destroy'
  Post Destroy (0.4ms)  DELETE FROM `posts` WHERE `posts`.`id` = 4
  ↳ app/controllers/api/v1/posts_controller.rb:31:in `destroy'
   (2.1ms)  COMMIT
  ↳ app/controllers/api/v1/posts_controller.rb:31:in `destroy'
Completed 200 OK in 50ms (Views: 3.3ms | ActiveRecord: 29.4ms | Allocations: 2700)
新規作成画面を作成
次に新規作成を作成します。
touch src/components/New.jsx src/components/Form.jsx
フォーム部分は編集画面でも使うのでForm.jsxを作成して、新規登録画面と共通化します
- テキストフィールドの入力された値をonChangeで検知
-
eventでname属性とvalue属性を取得 -
{name: hoge, nekoType: fuga}の連想配列の形でstateに保持 - stateをapiクライアントに渡しpostリクエストをサーバに送る
新規作成画面のパスはlocalhost:3001/newとします
ルータに追加
// App.jsx
import React from 'react';
import {
  BrowserRouter as Router,
  Switch,
  Route,
  Redirect,
} from 'react-router-dom';
import List from './components/List';
import Detail from './components/Detail';
// 追加
import New from './components/New';

const App = () => {
  return (
    <Router>
      <Switch>
        <Route exact path='/' component={List} />
        <Route path='/post/:id' component={Detail} />
        <Route exact path='/new' component={New} /> // 追加
      </Switch>
    </Router>
  );
};
export default App;
一覧ページの新規登録ボタンにイベント追加
// List.jsx
import React, { useEffect, useState } from 'react';
import { getList, deletePost } from '../lib/api/post';
// useHistoryを追加
import { useHistory, Link } from 'react-router-dom';

const List = () => {
  // 追加
  const history = useHistory();

  // 省略

  return (
    <>
      <h1>HOME</h1>
      {/* 追加 */}
      <button onClick={() => history.push('/new')}>新規作成</button>
      <table>
        <thead>
          <tr>
            <th>名前</th>
            <th>猫種</th>
            <th colSpan='1'></th>
            <th colSpan='1'></th>
            <th colSpan='1'></th>
          </tr>
        </thead>
        {dataList.map((item, index) => (
          <tbody key={index}>
            <tr>
              <td>{item.name}</td>
              <td>{item.nekoType}</td>
              <td>
                <Link to={`/edit/${item.id}`}>更新</Link>
              </td>
              <td>
                <Link to={`/post/${item.id}`}>詳細へ</Link>
              </td>
              <td>
                <button onClick={() => handleDelete(item)}>削除</button>
              </td>
            </tr>
          </tbody>
        ))}
      </table>
    </>
  );
};
export default List;
新規登録コンポーネント作成
// New.jsx
import React, { useState } from 'react';
import FormBody from './Form';
import { createPost } from '../lib/api/post';
import { useHistory } from 'react-router-dom';

const New = () => {
  const [value, setValue] = useState({})
  const history = useHistory();

  const handleChange = (e) => {
    setValue({
      ...value,
      [e.target.name]: e.target.value
    })
  }

  const handleSubmit = async (e) => {
    e.preventDefault();
    try {
      const res = await createPost(value)
      console.log(res)
      history.push('/')
    } catch (e) {
      console.log(e)
    }
  }

  return (
    <>
      <h1>NEW</h1>
      <FormBody
        handleChange={handleChange}
        handleSubmit={handleSubmit}
        value={value}
        buttonType='登録'
      />
    </>
  )
};
export default New;
フォーム部分のコンポーネント作成
このコンポーネントをNew.jsxにimportします
// Form.jsx
import React from 'react';

const Form = (props) => {
  const { handleChange, handleSubmit, value, buttonType } = props
  return (
    <>
      <form>
        <div>
          <label htmlFor="name">猫の名前:</label>
          <input type="text" name="name" id="name" onChange={(e) => handleChange(e)} value={value.name}/>
        </div>
        <div>
          <label htmlFor="nekoType">猫種</label>
          <input type="text" name="nekoType" id="nekoType" onChange={(e) => handleChange(e)} value={value.nekoType}/>
        </div>
        <input type="submit" value={buttonType} onClick={(e) => handleSubmit(e)}/>
      </form>
    </>
  )
};
export default Form;
localhost:3001/newにアクセスして、nameとnekoTypeを入力 => 登録ボタン押下 => 一覧画面へリダイレクト、新規登録したデータが表示されればOK

rails側のログを見るとフロントからparameterを受け取って、postテーブルにinsertされている事が確認できます
Started POST "/api/v1/posts" for ::1 at 2021-07-26 23:40:50 +0900
Processing by Api::V1::PostsController#create as HTML
  Parameters: {"name"=>"バニやん", "neko_type"=>"エキゾチックショートヘア", "post"=>{"name"=>"バニやん", "neko_type"=>"エキゾチックショートヘア"}}
   (16.9ms)  BEGIN
  ↳ app/controllers/api/v1/posts_controller.rb:13:in `create'
  Post Create (4.1ms)  INSERT INTO `posts` (`name`, `neko_type`, `created_at`, `updated_at`) VALUES ('バニやん', 'エキゾチックショートヘア', '2021-07-26 14:40:50.273036', '2021-07-26 14:40:50.273036')
  ↳ app/controllers/api/v1/posts_controller.rb:13:in `create'
   (0.9ms)  COMMIT
  ↳ app/controllers/api/v1/posts_controller.rb:13:in `create'
Completed 200 OK in 48ms (Views: 1.8ms | ActiveRecord: 21.9ms | Allocations: 2432)
今回は特にバリデーションやエラーハンドリングしていないので素のHTMLで書いてますが、react-hook-formなどフォーム用の多機能なライブラリも色々あります
更新画面を作成
更新処理でCRUDの実装は終了です
一覧ページに配置した更新リンクでレコードのidを持って遷移させます
- 更新画面は一覧画面から1レコードを取得
- そのレコードのidをreact-router-domを使ってqueryパラメータから取得
- 取得したidをapiクライアントからサーバへリクエスト
- レスポンスを受け取る
- 受け取ったレスポンスをテキストフィールドにセット
- 取得したidとparameterをapiクライアントに渡しpatchリクエストをサーバに送る
touch src/components/Edit.jsx
ルータに追加
編集画面のパスはlocalhost:3001/edit/1とします
import React from 'react';
import {
  BrowserRouter as Router,
  Switch,
  Route,
  Redirect,
} from 'react-router-dom';
import List from './components/List';
import New from './components/New';
import Detail from './components/Detail';
// 追加
import Edit from './components/Edit';

const App = () => {
  return (
    <Router>
      <Switch>
        <Route exact path='/' component={List} />
        <Route path='/post/:id' component={Detail} />
        <Route exact path='/new' component={New} />
        {/* 追加 */}
        <Route path='/edit/:id' component={Edit}/>
      </Switch>
    </Router>
  );
};
export default App;
更新リンクは一覧画面作成時に記述済です
// List.jsx
<Link to={`/edit/${item.id}`}>更新</Link>
更新画面の作成
// Edit.jsx
import React, { useEffect, useState } from 'react';
import { useHistory, useParams } from 'react-router-dom';
import { updatePost, getDetail } from '../lib/api/post';
import FormBody from './Form';

const Edit = () => {
  // apiで取得したデータを管理する為のstate
  const [value, setValue] = useState({
    name: '',
    nekoType: '',
  })
  // 一覧からreact-router-domを使ってidを取得
  const query = useParams();

  const history = useHistory();
  // 画面が描画された時、queryが更新された時に関数を実行
  useEffect(() => {
    handleGetData(query)
  },[query])
  // idをapiクライアントに渡し、/api/v1/posts/:idのエンドポイントからデータ取得
  const handleGetData = async (query) => {
    try {
      const res = await getDetail(query.id)
      console.log(res.data)
      // 使う値のみstateにセットする
      setValue({
        name: res.data.name,
        nekoType: res.data.nekoType,
      })
    } catch (e) {
      console.log(e)
    }
  }
  // テキストフィールドの変更を検知し値を書き換えstateで管理
  const handleChange = (e) => {
    setValue({
      ...value,
      [e.target.name]: e.target.value
    })
  }
  // 更新ボタン押下後、idとparameterをapiクライアントに渡しリクエストを投げる
  const handleSubmit = async (e) => {
    e.preventDefault()
    try {
      const res = await updatePost(query.id, value)
      console.log(res)
      // リクエストが成功したら'/'にリダイレクトさせる
      history.push('/')
    } catch(e) {
      console.log(e)
    }
  }

  return(
    <>
      <h1>Edit</h1>
      <FormBody
        handleChange={handleChange}
        handleSubmit={handleSubmit}
        value={value}
        buttonType='更新'
      />
    </>
  )
}
export default Edit
フォーム部分は新規作成画面でも使ったForm.jsxを使います
一覧画面で選択したレコードの更新リンクから/edit/1に遷移してnameとnekoTypeのデータがテキストフィールドにセットされていればOK

修正して更新ボタンを押下、一覧画面にリダイレクト、データが更新されていればOK
railsのログを見るとpatchリクエストでパラメータを受け取りupdate処理が実行されていることが分かります
Started PATCH "/api/v1/posts/1" for ::1 at 2021-07-27 09:57:49 +0900
Processing by Api::V1::PostsController#update as HTML
  Parameters: {"name"=>"ニャアupdate", "neko_type"=>"アメリカンショートヘア", "id"=>"1", "post"=>{"name"=>"ニャアupdate", "neko_type"=>"アメリカンショートヘア"}}
  Post Load (0.9ms)  SELECT `posts`.* FROM `posts` WHERE `posts`.`id` = 1 LIMIT 1
  ↳ app/controllers/api/v1/posts_controller.rb:21:in `update'
   (0.3ms)  BEGIN
  ↳ app/controllers/api/v1/posts_controller.rb:22:in `update'
  Post Update (29.4ms)  UPDATE `posts` SET `posts`.`name` = 'ニャアupdate', `posts`.`updated_at` = '2021-07-27 00:57:49.761871' WHERE `posts`.`id` = 1
  ↳ app/controllers/api/v1/posts_controller.rb:22:in `update'
   (3.6ms)  COMMIT
  ↳ app/controllers/api/v1/posts_controller.rb:22:in `update'
Completed 200 OK in 59ms (Views: 0.8ms | ActiveRecord: 34.1ms | Allocations: 3346)
以上でCRUDの実装が完了です!お疲れさまでした!
最後に
Reactを業務で使い始めた時に、このCRUDに苦戦した事があったのと、リンクとか、画面間のidの受渡しとか、パラメータのapiクライアントへの渡し方など、自分で見返す為にもまとめてみました
~part2~【FC版】React + Rails API + axios + react-router-domでCRUDを実装する