概要
kubernetes でのサービスメッシュ実装の istio を試しに入れてみた。
デモアプリを動かして、ブラウザで grafana / kiali / jaeger を使って見てみるまでを試してみた。
istioのインストール方法
インストール方法の種類
3つの方法があるようです。
2.helm は廃止予定(The Helm installation approach will be deprecated in the future.)、
3.はエクスペリメント(The following information describes an experimental feature, which is intended for evaluation purposes only.)なので、
公式には 1. istioctl が推奨(We recommend Installing with istioctl, instead.)のようです。
※()内はistioサイト内の各項目に記載の内容。
今回利用するインスール方法
3.operatorによるインスール を選択した。
今後は operator が使われていくような気がするし、軽く試したかったので。
利用operator
operatorは、operatorhubで参照されているbanzaicloudのものではなく、公式のstandalone-operatorを利用する。
環境
kubernetes クラスタ
kubernetes: v1.16.3
詳細はkubesprayでのインストールで記載した環境 (intel nuc + ESXi + centos7 + kubespray)
kubernetes クライアント
実際に操作したりする開発PC環境。
istioctlを入れたりする。
今回Webブラウザでの確認もするので、GUI/Webブラウザがあることが必要。
手元環境は、xubuntu18.04 と macOS Catalina で試した。
istio
Istioのバージョンは2020.1.26時点で最新の 1.4.3 。
0.実施順序
下記の順序で実施する。
公式operatorでインストールして、サンプルアプリを立ち上げて、dashboardで状態を見れることを確認する。
最後に全部消す方法もまとめておく。
- istio のインストール
- istioctl のインストール
- サンプルアプリ(bookinfo)のデプロイ
- istioctl dashboardによる grafana / kiali / jaeger へのアクセス
- アンインストール
1. istio インストール
istio operator のインストール
下記コマンドでistio operatorをインストールする。
kubectl apply -f https://istio.io/operator.yaml
operator による demo プロファイルでの構築
istioは構築する上でプロファイルを指定する。
デフォルトで default/demo/minimal/sds/remote がプロファイルとして用意されている。(https://istio.io/docs/setup/additional-setup/config-profiles/)
今回は grafana/kiali/jaegerなどを試したいので、有効になっている demo を利用する。
apiVersion: install.istio.io/v1alpha2
kind: IstioControlPlane
metadata:
  namespace: istio-operator
  name: example-istiocontrolplane
spec:
  profile: demo
$ kubectl apply -f istio-operator-demo.yaml
2分くらいoperatorでの構築が終わるのを待って、下記で諸々podが立っていることを確認します。
(2分は istioサイトより : The Istio installation completes within 120 seconds.)
# kubectl get svc -n istio-system
NAME                     TYPE           CLUSTER-IP      EXTERNAL-IP   PORT(S)                                                                                                                      AGE
grafana                  ClusterIP      10.233.60.80    <none>        3000/TCP                                                                                                                     2m
istio-citadel            ClusterIP      10.233.36.121   <none>        8060/TCP,15014/TCP                                                                                                           2m
istio-egressgateway      ClusterIP      10.233.44.183   <none>        80/TCP,443/TCP,15443/TCP                                                                                                     2m
istio-galley             ClusterIP      10.233.63.227   <none>        443/TCP,15014/TCP,9901/TCP,15019/TCP                                                                                         2m
istio-ingressgateway     LoadBalancer   10.233.45.102   <pending>     15020:31486/TCP,80:31289/TCP,443:30743/TCP,15029:32434/TCP,15030:31133/TCP,15031:30727/TCP,15032:31390/TCP,15443:32679/TCP   2m
istio-pilot              ClusterIP      10.233.21.170   <none>        15010/TCP,15011/TCP,8080/TCP,15014/TCP                                                                                       2m
istio-policy             ClusterIP      10.233.54.151   <none>        9091/TCP,15004/TCP,15014/TCP                                                                                                 2m
istio-sidecar-injector   ClusterIP      10.233.14.180   <none>        443/TCP                                                                                                                      2m
istio-telemetry          ClusterIP      10.233.14.203   <none>        9091/TCP,15004/TCP,15014/TCP,42422/TCP                                                                                       2m
jaeger-agent             ClusterIP      None            <none>        5775/UDP,6831/UDP,6832/UDP                                                                                                   2m
jaeger-collector         ClusterIP      10.233.39.165   <none>        14267/TCP,14268/TCP,14250/TCP                                                                                                2m
jaeger-query             ClusterIP      10.233.19.84    <none>        16686/TCP                                                                                                                    2m
kiali                    ClusterIP      10.233.18.193   <none>        20001/TCP                                                                                                                    2m
prometheus               ClusterIP      10.233.15.9     <none>        9090/TCP                                                                                                                     2m
tracing                  ClusterIP      10.233.40.79    <none>        9411/TCP                                                                                                                     2m
zipkin                   ClusterIP      10.233.29.61    <none>        9411/TCP                                                                                                                     2m

# kubectl get pods -n istio-system
NAME                                      READY   STATUS    RESTARTS   AGE
grafana-6b65874977-jgpfl                  1/1     Running   0          2m
istio-citadel-677f49fccc-m589k            1/1     Running   0          2m
istio-egressgateway-6d9b9d5b9c-tb5vk      1/1     Running   0          2m
istio-galley-79df4fd667-8vgrh             1/1     Running   0          2m
istio-ingressgateway-ccb686f99-4mqch      1/1     Running   0          2m
istio-pilot-54c7444598-nnvsp              1/1     Running   0          2m
istio-policy-7bf7848c4b-v6rcf             1/1     Running   0          2m
istio-sidecar-injector-7cdc986447-h9ds4   1/1     Running   0          2m
istio-telemetry-5995c84d66-md5v7          1/1     Running   0          2m
istio-tracing-c66d67cd9-rjvck             1/1     Running   0          2m
kiali-8559969566-cmjks                    1/1     Running   0          2m
prometheus-66c5887c86-s5fw6               1/1     Running   0          2m
2. istioctl のインストール
istioの操作のためistioctlをkubernetesクライアント側に入れる。
下記の方法で、使用OSにあったものがgithubから自動でダウンロードされる。
curl -L https://istio.io/downloadIstio | sh -
ダウンロードしたディレクトリへ移動。
istioctl は binフォルダにあるので、binフォルダを PATH へ追加して利用できるようにする。
(恒久的にする場合はistio-1.4.3/bin/istioctlを/usr/local/binなどにmvするか、.bash_profileなどのPATHに書いておくこと。)
cd istio-1.4.3
export PATH=$PWD/bin:$PATH
これでとりあえず istio を利用する環境は整った。
3. サンプルアプリ(bookinfo)のデプロイ
2.でダウンロードしたフォルダにはサンプルアプリがあります。(istio-1.4.3/samples/)
今回はその中から、bookinfoを利用します。(istio-1.4.3/samples/bookinfo/platform/kube/)
istioを常にsidecarとしてpodに設定する場合 (今回はしない)
下記コマンドでdefaultのnamespaceにpodを立てる際はsidecarとしてistio(envoy)を常に入れることが可能。
kubectl label namespace default istio-injection=enabled
今回はお試しのため上記は実施しない。
bookinfoアプリの構築 (istio inject)
お試しアプリ bookinfo はデフォルトは istio(envoy) がsidecar として入っていない。
下記 istioctl にて inject した yaml として作成が可能。
istioctl kube-inject -f istio-1.4.3/samples/bookinfo/platform/kube/bookinfo.yaml > bookinfo-infect-istio.yaml
※ istioctl で デフォルトではない kubeconfig を利用したい際は、 --kubeconfig [kubeconfig] で指定可能。
元のファイルと比較すると大量のdiffが発生し sidecar 関連が増加していることがわかる。
・diff抜粋 (sidecar とか istio とかの関連系が挿入されていることがわかる)
# diff bookinfo-infect-istio.yaml istio-1.4.3/samples/bookinfo/platform/kube/bookinfo.yaml
56c56
<   creationTimestamp: null
---
>   name: details-v1
60d59
<   name: details-v1
67d65
<   strategy: {}
70,72d67
<       annotations:
<         sidecar.istio.io/status: '{"version":"8d80e9685defcc00b0d8c9274b60071ba8810537e0ed310ea96c1de0785272c7","initContainers":["istio-init"],"containers":["istio-proxy"],"volumes":["istio-envoy","istio-certs"],"imagePullSecrets":null}'
<       creationTimestamp: null
〜〜〜〜〜
84,246d78
<         resources: {}
<       - args:
<         - proxy
<         - sidecar
〜〜〜〜〜
<         image: gcr.io/istio-testing/proxyv2:1.4-dev
<         imagePullPolicy: IfNotPresent
<         name: istio-proxy
<         ports:
<         - containerPort: 15090
<           name: http-envoy-prom
<           protocol: TCP
〜〜〜〜〜
作成できた yaml でサンプルbookinfo構築する。(bookinfoの外部アクセス用のgatewayも作成する)
kubectl apply -f bookinfo-infect-istio.yaml
kubectl apply -f istio-1.4.3/samples/bookinfo/networking/bookinfo-gateway.yaml
構築できると下記のような感じで構築されている。
$ kubectl get pod
NAME                              READY   STATUS    RESTARTS   AGE
details-v1-b6df9f7bd-mgwn2        2/2     Running   0          5m
productpage-v1-7f57494596-r95hc   2/2     Running   0          5m
ratings-v1-7dc7b57dfb-vqd8b       2/2     Running   0          5m
reviews-v1-6885c65894-qmmt9       2/2     Running   0          5m
reviews-v2-8ff9cc867-cq7bj        2/2     Running   0          5m
reviews-v3-5584677c44-t295d       2/2     Running   0          5m

$ kubectl get svc
NAME          TYPE        CLUSTER-IP      EXTERNAL-IP   PORT(S)    AGE
details       ClusterIP   10.233.16.203   <none>        9080/TCP   5m
kubernetes    ClusterIP   10.233.0.1      <none>        443/TCP    42d
productpage   ClusterIP   10.233.30.140   <none>        9080/TCP   5m
ratings       ClusterIP   10.233.9.199    <none>        9080/TCP   5m
reviews       ClusterIP   10.233.9.183    <none>        9080/TCP   5m
構築したbookinfoへアクセスできるかテストする。
kubectl exec -it $(kubectl get pod -l app=ratings -o jsonpath='{.items[0].metadata.name}') -c ratings -- curl productpage:9080/productpage | grep -o "<title>.*</title>"
成功していれば下記が返ってくる。
<title>Simple Bookstore App</title>
下記のように環境変数にアクセスするノード情報を入れておくことも可能。
(最後のcurlでのテストは、上記と同様な内容)
export INGRESS_PORT=$(kubectl -n istio-system get service istio-ingressgateway -o jsonpath='{.spec.ports[?(@.name=="http2")].nodePort}')
export SECURE_INGRESS_PORT=$(kubectl -n istio-system get service istio-ingressgateway -o jsonpath='{.spec.ports[?(@.name=="https")].nodePort}')
export INGRESS_HOST=$(kubectl get po -l istio=ingressgateway -n istio-system -o jsonpath='{.items[0].status.hostIP}')

curl $INGRESS_HOST:$INGRESS_PORT/productpage | grep -o "<title>.*</title>"
これで外部からのアクセスもできることが確認できた。
下記で、環境変数からアクセスするURLを作成する。(下記の192.168.129.36とポートは例で実行ごとに変わる)
# echo http://$INGRESS_HOST:$INGRESS_PORT/productpage
http://192.168.129.36:31289/productpage
表示されたURLをブラウザでアクセスすると、下記のようなテストページ(bookinfo)が出てきます。
4. istioctl dashboardによる grafana / kiali / jaeger へのアクセス
実際のトラフィックを載せないと見るデータがのらないので、
3.で立てたproductpageの右上の「Sign in」を押して「User name : admin」「Password : admin」でログインや、ページを何回か更新し、トラフィックを発生させておきます。
grafana / kiali / jaeger は 下記 istioctl dashboard コマンドを使用することでアクセスができます。
grafana
istioctl dashboard grafana &
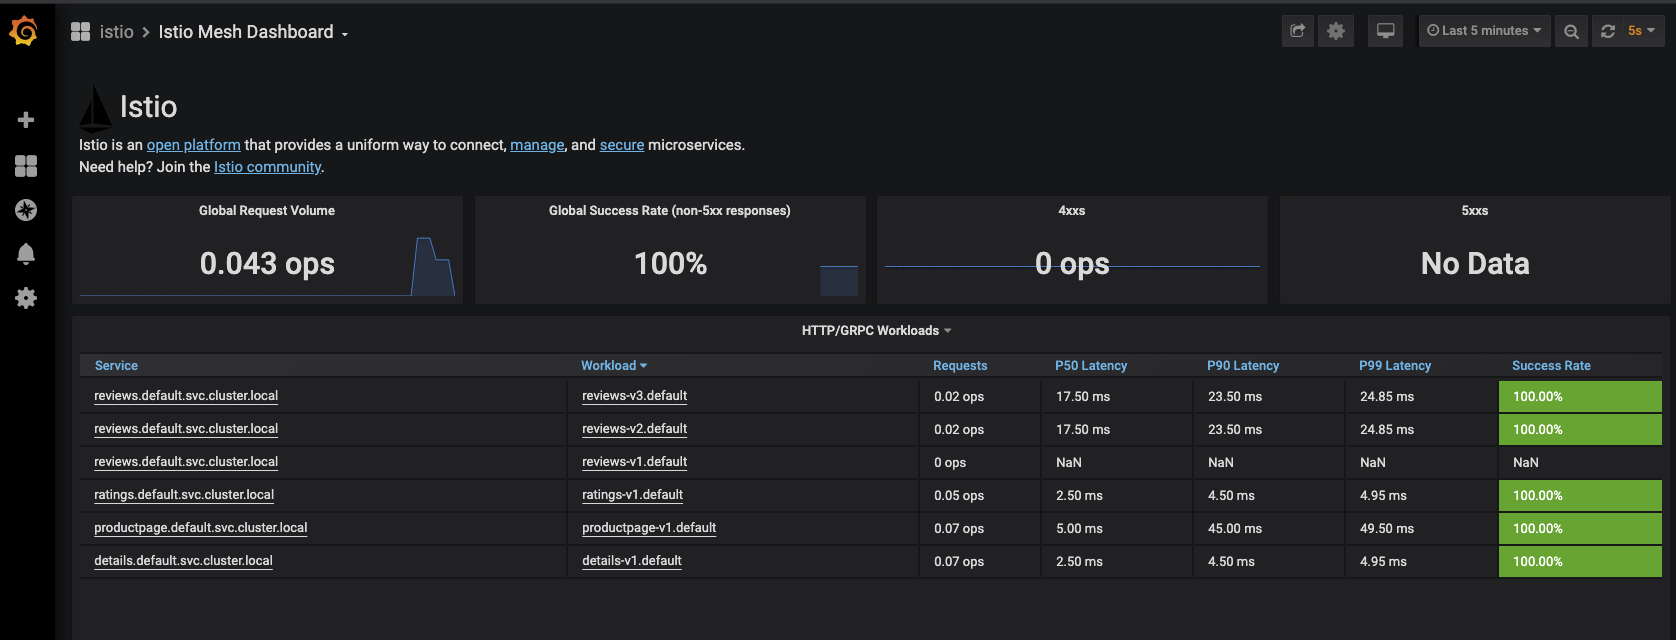
Home -> istio -> istio-mesh-dashboard とアクセスすると下記のように成功率などが表示できます。(他にもistio用のdashboardなどいろいろ用意されてます)
kiali
istioctl dashboard kiali &
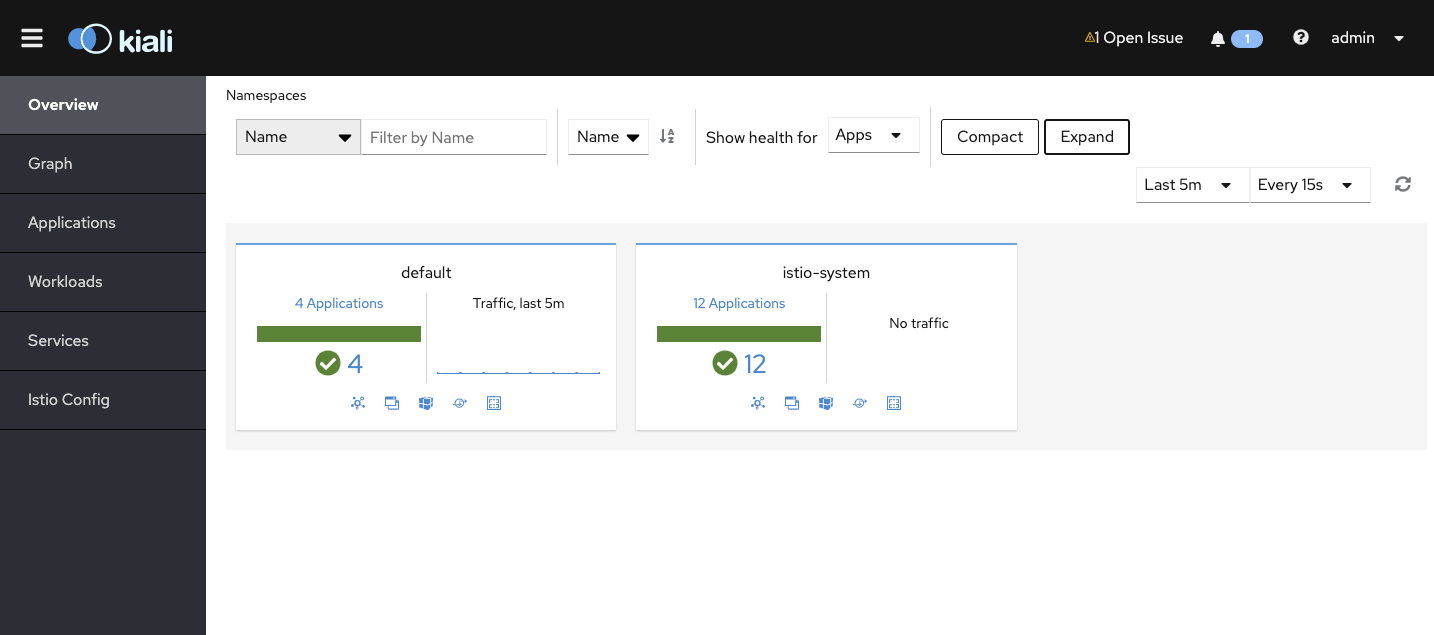
自動でブラウザが開き、下記のような感じで出ます。
(デフォルトでは、 admin/adminでログインできます)
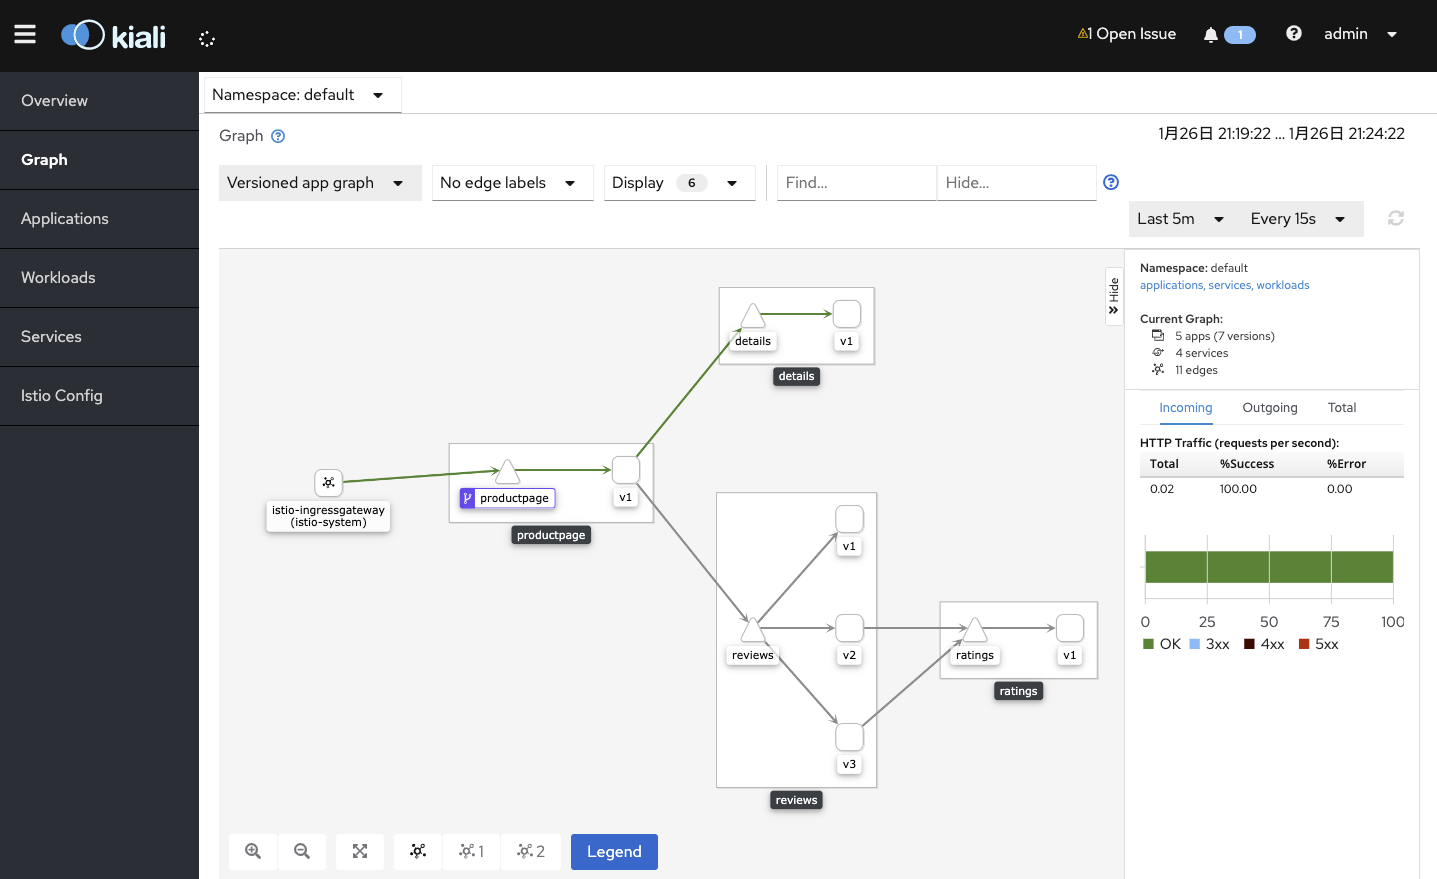
最初にテストページにログインをテストしているのでうまくいけば下記のようにGraphが描けることが確認できます。(見えない場合は、上の方にある「Namespace: 」に「default」などが選択されていることを確認してください)
jaeger
istioctl dashboard jaeger &
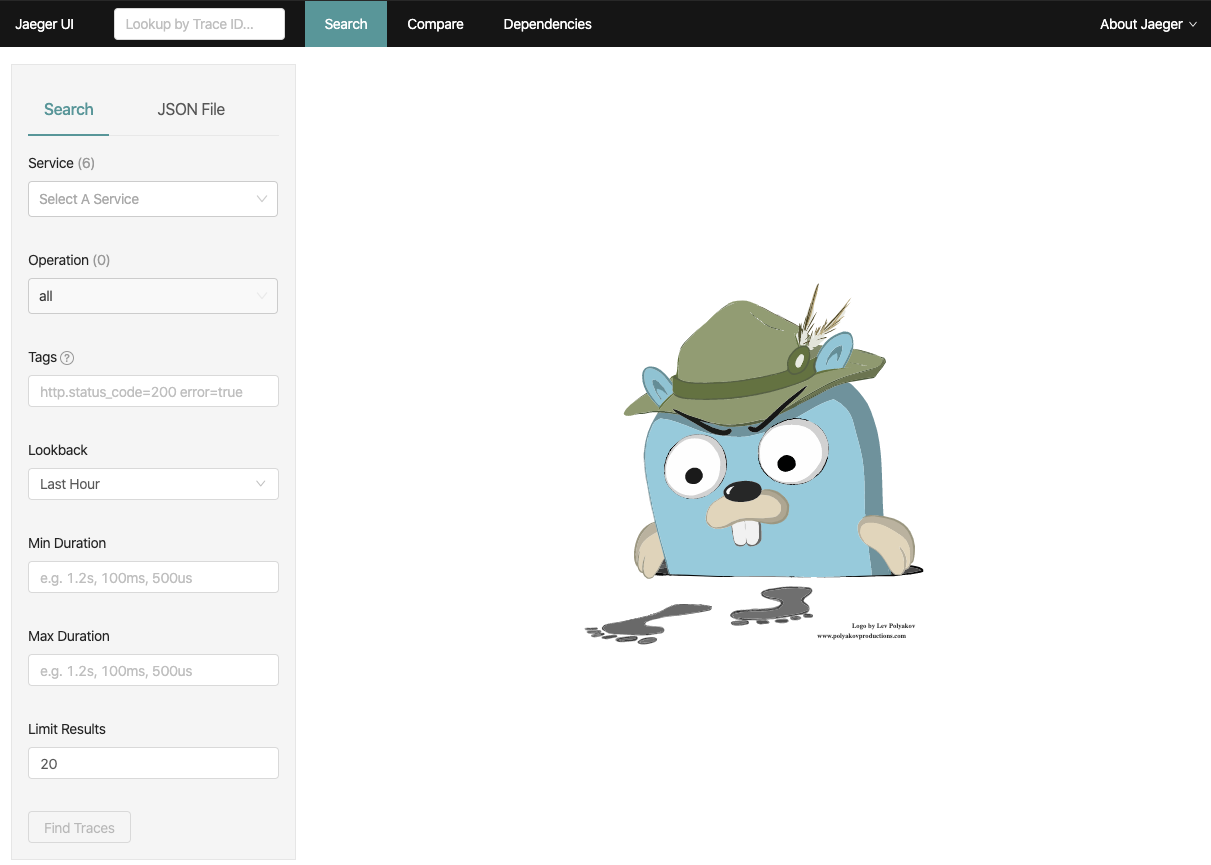
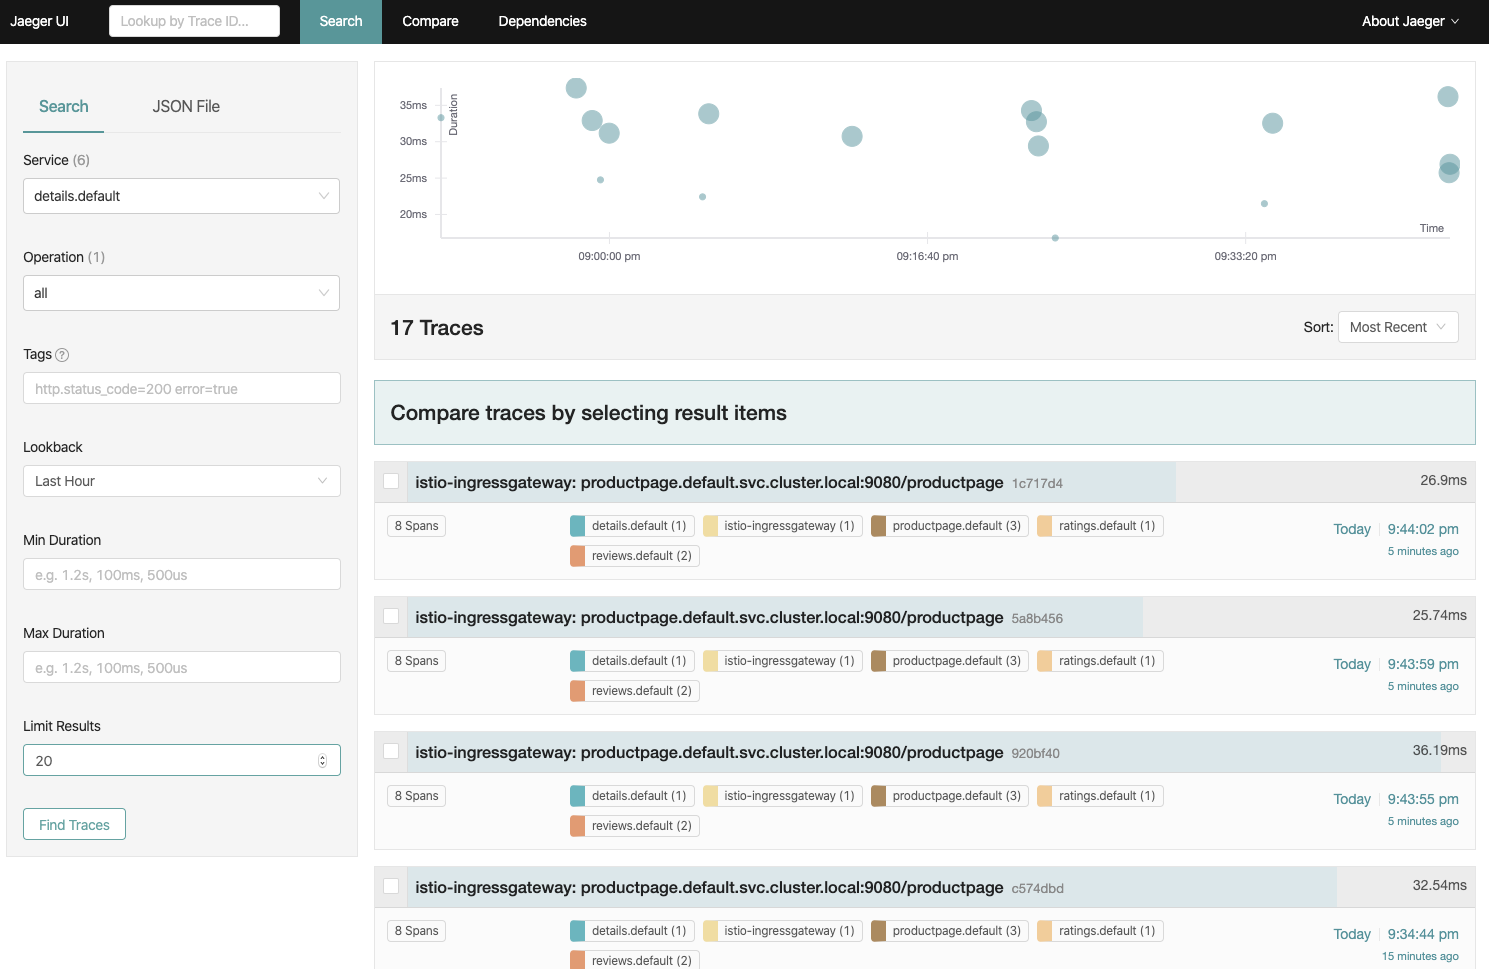
Service を 何か選択(例でdetails.default)し、「Find Traces」を押すと下記のように見える。
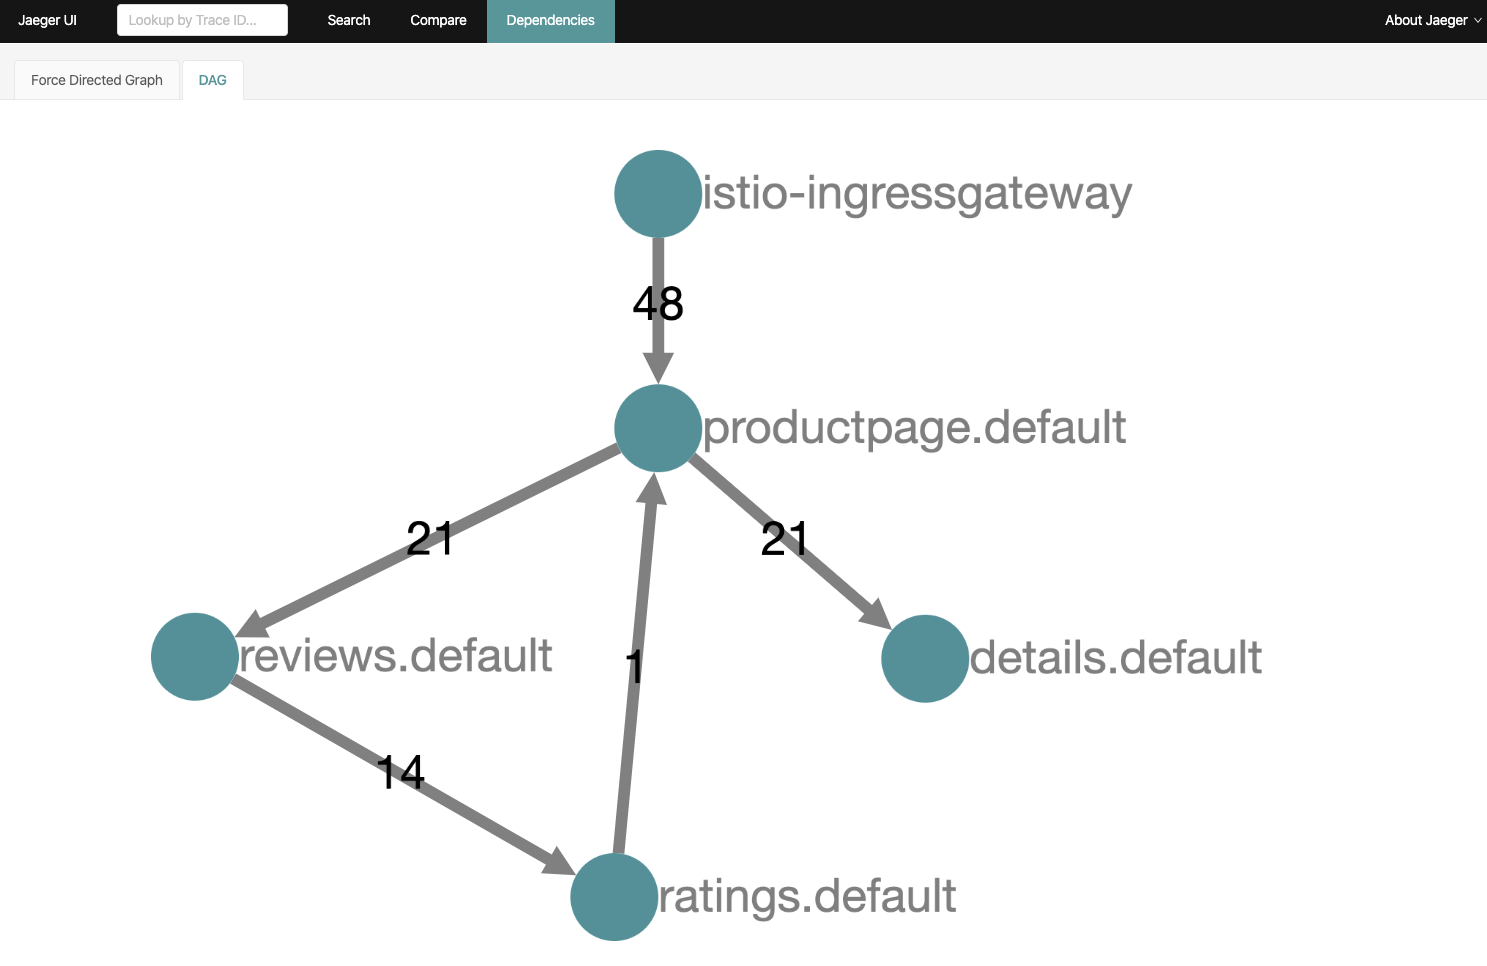
また、上のバーから「Dependencies」を選び「DAG」タブをみると、下記のようなDAGが見える。
以上でとりあえずのお試しとしての記載はおわり。いろいろあるので触れて学んでいきたい。
立ち上げたdashboardは & でバックグラウンドで動いているので fg などでフォワグラウンドに持ってきて適宜落とす。
5. アンインストール
今回実施した kubernetes クラスタへの変更を戻す手順をまとめておく。
kubectl delete -f istio-1.4.3/samples/bookinfo/networking/bookinfo-gateway.yaml
kubectl delete -f bookinfo-infect-istio.yaml
kubectl delete -f istio-operator-demo.yaml
kubectl delete -f https://istio.io/operator.yaml
rm -Rf istio-1.4.3
おわりに
istioについて試せる環境を構築して、テストアプリにsidecarでistio(envoy)を入れて、オブザーバビリティを提供する grafana/kiali/jaeger を使って状態確認するところまで実践してみた。
テストに使った bookinfo (https://istio.io/docs/examples/bookinfo/) はルーティング制御など色々できるようになっている。
下記が bookinfo の色々試せる例などが書かれているだろう yaml 置き場。traffic routing, fault injection, rate limiting,など様々な例があり参考に試していくと良さそう。
# ls istio-1.4.3/samples/bookinfo/networking/
bookinfo-gateway.yaml           destination-rule-reviews.yaml    virtual-service-details-v2.yaml        virtual-service-ratings-test-abort.yaml  virtual-service-reviews-90-10.yaml        virtual-service-reviews-v3.yaml
certmanager-gateway.yaml        egress-rule-google-apis.yaml     virtual-service-ratings-db.yaml        virtual-service-ratings-test-delay.yaml  virtual-service-reviews-jason-v2-v3.yaml
destination-rule-all-mtls.yaml  fault-injection-details-v1.yaml  virtual-service-ratings-mysql-vm.yaml  virtual-service-reviews-50-v3.yaml       virtual-service-reviews-test-v2.yaml
destination-rule-all.yaml       virtual-service-all-v1.yaml      virtual-service-ratings-mysql.yaml     virtual-service-reviews-80-20.yaml       virtual-service-reviews-v2-v3.yaml
今後いろいろ試していきたい。
参考サイト(istio.io)
Getting Started https://istio.io/docs/setup/getting-started/
Standalone Operator Install [Experimental] https://istio.io/docs/setup/install/standalone-operator/
Installation Configuration Profiles https://istio.io/docs/setup/additional-setup/config-profiles/
Bookinfo Application https://istio.io/docs/examples/bookinfo/
Ingress Gateways https://istio.io/docs/tasks/traffic-management/ingress/ingress-control/
istioctl https://istio.io/docs/reference/commands/istioctl/

