はじめに
オンプレの自宅ラボ環境の Anthos Clusters on bare metal 上に Cloud Run for Anthos を導入したのでその内容を記載する
Cloud Run for Anthos
Cloud Run for Anthos は、Knative をベースとしたサーバレスプラットフォーム
Google が管理・サポートする Knative ベースのサーバレス環境を Anthos (Kubernetes) 上で利用できる
Anthos Clusters on VMware 以外のプラットフォーム上で利用する場合にはプレビュー版となっている (2023.06.30時点)
ドキュメントを見る限り Knative Serving 箇所のみを提供しており、Eventing のドキュメントはアーカイブ状態で Install に必要なコマンドも削除されており現在提供されていなそう
よって今回の実施は Serving 箇所を Cloud Run で実施する
Knative
Knative (ケイネイティブ) は、プラットフォームに依存しないサーバーレスを Kubernetes 上で可能にする (What is Knative?)
Knative プロジェクトは、2018 年に Google が設立を発表し、IBM、Red Hat、VMware、SAP と開発され 2021 年に Cloud Native Computing Foundation(CNCF) へ移管し (Knative、CNCF のプロジェクトとして承認される)、
2022.03 に CNCF incubating project となっている
バージョンは 2021.11 に v1.0 がリリースされ、2023.07 時点では v1.10 となっている
現在のコンポーネントは Knative Serving, Knative Eventing, Knative Functions を提供している
(以前あった Knative Building は廃止となった)
CloudRun for Anthos は Serving 箇所のみサポートされてそうなので、Serving について概要を次に記載する
Knavive Serving
Knative Serving は、オブジェクトのセットを Kubernetes カスタム リソース定義 (CRD) として定義し、サーバーレス ワークロードがクラスター上でどのように動作するかを定義および制御するために使用される
主要な Knative Serving リソースは下記の通り (画像は Knative の説明画像から引用)

| Knative Serving resources | CRD | 内容 |
|---|---|---|
| Service | service.serving.knative.dev | Knative Serving 全体のライフサイクル管理を実施する Service は Route, Configuration を管理し、リソースが作成されると自動的に Route, Configuration を作成する |
| Route | route.serving.knative.dev | エンドポイントを1つ以上の Revision と紐付けを実施する Revision へのトラフィック比率を管理して分割可能 |
| Configuration | configuration.serving.knative.dev | デプロイメントに望ましい状態を維持する 構成情報 (コンテナイメージ, ポート番号など)を記載して管理する 構成を変更すると新しい Revision が作成される |
| Revision | revision.serving.knative.dev | ワークロードに加えられた特定時点のスナップショットで不変オブジェクト |
実施環境
クラスタ
こちらで構築しBGP等のネットワーク設定をしたクラスタ環境で実施している
Anthos clusters on bare metal Version 1.15.1 (Kubernetes 1.26 (v1.26.2-gke.1001))
前提状況
クラスタ要件にある通り「Anthos Service Mesh をインストールするユーザー クラスタに、最低 4 つの vCPU、15 GB のメモリ、4 つのノード」が必要とあるが、自宅ラボで実施しているためワーカノードは1ノードのみで実施している
実施内容
最初に Anthos クラスタ (ユーザクラスタ) への Cloud Run 有効化のための設定を Cloud 含め実施し、
カスタムドメイン・Cloud Console 操作のための権限設定も実施する
設定完了後にアプリのデプロイとリビジョン・トラフィック切り替えの簡易な動作試験も実施している
- クラスタへの Cloud Run for Anthos 設定
- カスタムドメイン設定
- Cloud Console での作成・操作での権限付与
- アプリ デプロイ試験
- リビジョン・トラフィック切り替え動作試験
クラスタへの Cloud Run for Anthos 設定
ドキュメントに沿って対応する
前提条件になっているASMインストールも実施する
プロジェクト設定
ASMで必要な API を有効化
    # https://cloud.google.com/service-mesh/docs/unified-install/project-cluster-setup#required_apis
    "mesh.googleapis.com",
    "meshconfig.googleapis.com",
    "meshca.googleapis.com",
    "container.googleapis.com",
    "gkehub.googleapis.com",
    "monitoring.googleapis.com",
    "stackdriver.googleapis.com",
    "opsconfigmonitoring.googleapis.com",
    "connectgateway.googleapis.com",
    "trafficdirector.googleapis.com",
    "networkservices.googleapis.com",
    "networksecurity.googleapis.com",
必要なIAMを設定する
    # https://cloud.google.com/service-mesh/docs/installation-permissions?hl=ja
    "roles/gkehub.admin",
    "roles/serviceusage.serviceUsageAdmin",
    # "roles/privateca.admin", # CA Service 管理者 - このロールは、CA Service と統合する場合にのみ必要です。
    "roles/container.admin",
    "roles/meshconfig.admin",
    "roles/resourcemanager.projectIamAdmin",
    "roles/iam.serviceAccountAdmin",
    "roles/servicemanagement.admin",
    "roles/serviceusage.serviceUsageAdmin",
    "roles/run.admin",
Anthos Service Mesh インストール
クラスタのバージョンに対応した ASM バージョンをインストールする (参照)
実施環境は Anthosが v1.15.1 なので、ASM は v1.17 をインストールする
asmcliのインストールを実施する (参照)
下記は Ansible での task 記載例
# https://cloud.google.com/service-mesh/docs/unified-install/install-dependent-tools?hl=ja#install_required_tools
- name: Install asmcli requred tools
  apt:
    name: "{{ packages }}"
    state: latest
    update_cache: yes
  vars:
    packages:
      - kubectl
      - git
      - jq
  when:
    - ansible_distribution == "Ubuntu"
  become: yes

# https://cloud.google.com/service-mesh/docs/unified-install/install-dependent-tools?hl=ja#download_asmcli

- name: asmcli install
  get_url:
    url: https://storage.googleapis.com/csm-artifacts/asm/asmcli_1.17
    dest: /usr/local/bin/asmcli
    mode: "+x"
  become: yes
デフォルトの機能と Mesh CA をインストールする
Mesh CA をインストールする (他にも機能があるので環境・要件に合ったものを選択する必要がある)
cd ~/anthos
mkdir $HOME/anthos/asm
export FREET_PROJECT_ID="[クラスタ所属のプロジェクトID]"
export KUBECONFIG=$HOME/anthos/bmctl-workspace/usercluster1/usercluster1-kubeconfig
export DIR_PATH=$HOME/anthos/asm
unset CLUSTER_NAME
unset PROJECT_ID
kubectl create ns istio-system
asmcli install \
  --fleet_id $FREET_PROJECT_ID \
  --kubeconfig $KUBECONFIG \
  --output_dir $DIR_PATH \
  --platform multicloud \
  --enable_all \
  --ca mesh_ca
ゲートウェイ インストール
istio-ingress-gateway をインストールする
kubectl create namespace istio-system
kubectl label namespace istio-system istio-injection- istio.io/rev="$(kubectl get deploy -n istio-system -l app=istiod   -o=jsonpath='{.items[*].metadata.labels.istio\.io\/rev}''{"\n"}')" --overwrite
kubectl apply -n istio-system -f $HOME/anthos/asm/samples/gateways/istio-ingressgateway
サービスアカウント作成
クラウド側と連携するためのサービスアカウントを作成してmonitoring.metricsWriterロールを IAM で権限付与する (ドキュメント)
下記は Terraform で実施するコード例の抜粋版
# Cloud Run for Anthos
## https://cloud.google.com/anthos/run/docs/install/outside-gcp?hl=ja#configure_your_cloudrun_custom_resource
resource "google_service_account" "cloudrun-anthos-baremetal" {
  account_id   = "cloudrun-anthos-baremetal"
  display_name = "cloudrun-anthos-baremetal"
  project      = google_project.main.name
}

resource "google_project_iam_binding" "monitoring_metricwriter" {
  project = google_project.main.id

  role = "roles/monitoring.metricWriter"

  members = [
    "serviceAccount:${google_service_account.cloudrun-anthos-baremetal.email}", # # Cloud Run for Anthos
  ]
}

output "cloudrun-anthos-baremetal" {
  value       = join("", ["gcloud --project ${google_project.main.name} iam service-accounts keys create cloudrun-anthos-baremetal.json --iam-account ", google_service_account.cloudrun-anthos-baremetal.email])
  description = "Service Account for Anthos Cloud Run cloudrun-anthos-baremetal"
}
サービスアカウントを作成したら、key.json をダウンロードする
gcloud --project [プロジェクトID] iam service-accounts keys create cloudrun-anthos-baremetal.json --iam-account cloudrun-anthos-baremetal@[プロジェクトID].iam.gserviceaccount.com
クラスタ設定
Admin Workstation サーバに作業用ディレクトリを作成する
cd ~/anthos/
mkdir cloudrun
mkdir cloudrun/manifest
サービスアカウントの json キーを作業用ディレクトリに配置して下記を実施する(ドキュメント)
export PROJECT_ID="[クラスタ所属のプロジェクトID]"
export KUBECONFIG=bmctl-workspace/usercluster1/usercluster1-kubeconfig
export GCP_ZONE="asia-northeast1-b"
export CLUSTER_NAME="usercluster1"
kubectl create namespace knative-serving
kubectl create secret -n knative-serving generic cloudrun-anthos-baremetal --from-file=$PWD/cloudrun/cloudrun-anthos-baremetal.json
cat <<EOF > cloudrun/manifest/cloud-run.yaml
apiVersion: operator.run.cloud.google.com/v1alpha1
kind: CloudRun
metadata:
  name: cloud-run
spec:
  metricscollector:
    stackdriver:
      projectid: $PROJECT_ID
      gcpzone: $GCP_ZONE
      clustername: $CLUSTER_NAME
      secretname: cloudrun-anthos-baremetal
      secretkey: cloudrun-anthos-baremetal.json
EOF
Cloud Run for Anthos 有効化
ユーザクラスタで Cloud Run for Anthos を有効化する(ドキュメント)
export PROJECT_ID="[クラスタ所属のプロジェクトID]"
gcloud container fleet cloudrun enable --project=$PROJECT_ID
gcloud container fleet mesh enable --project=$PROJECT_ID
gcloud container fleet features list  --project=$PROJECT_ID
kubectl apply --kubeconfig=$KUBECONFIG --filename cloudrun/manifest/cloud-run.yaml
上記インストールが完了すると、Cloud Console のAnthos > 機能の管理 (下記画像)で、
Cloud Run for Anthos の 詳細をクリックして有効化したクラスタを確認できる
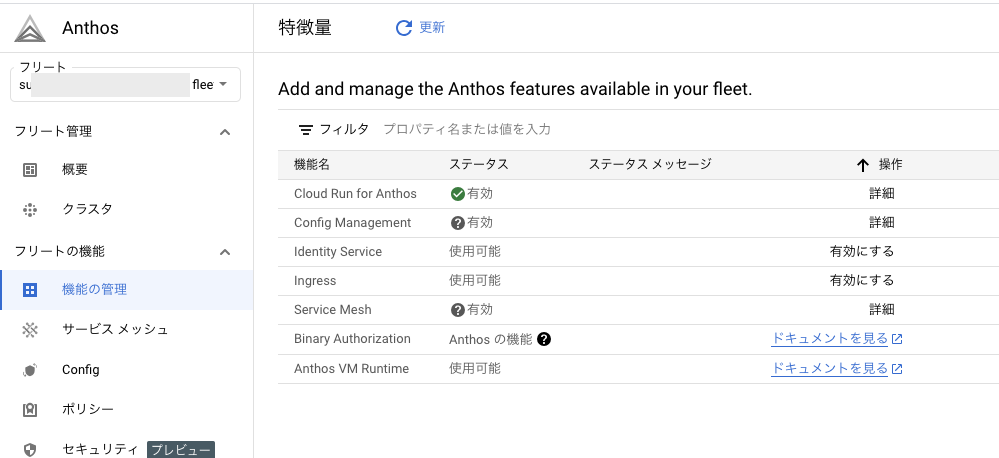
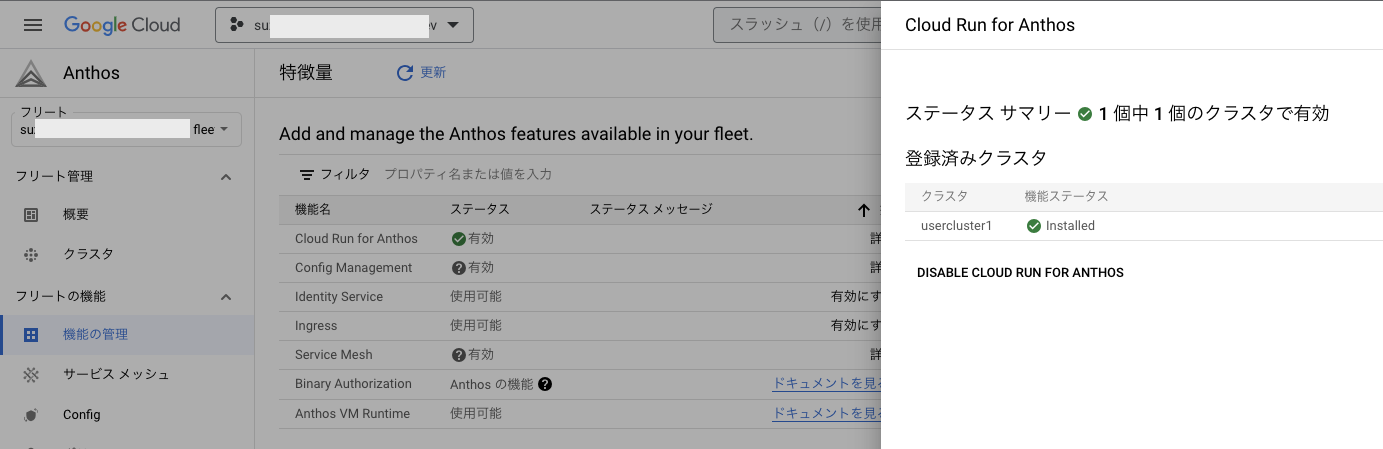
以上でクラスタの Cloud Run for Anthos 機能の有効化完了
カスタムドメイン設定
このままだとアクセスドメインが http://{SERVICE_NAME}.{NAMESPACE}.kuberun.{EXTERNAL_IP}.nip.io(テストドメイン) になるので、ドキュメントを参考にしてドメインを変更する
クラスタ単位でのマッピング
クラスタ単位でドメインを変更する場合は下記の通り
(ドキュメントだとnip.ioだが、正確にはkuberun.{EXTERNAL_IP}.nip.ioにしないといけない)
export YOUR_DOMAIN="[カスタムドメイン]"
cat <<EOF > cloudrun/manifest/custom_domain_patch.yaml
data:
  "kuberun.$(kubectl get svc istio-ingressgateway -n istio-system -o jsonpath='{.status.loadBalancer.ingress[0].ip}').nip.io": null
  "${YOUR_DOMAIN}": ""
EOF
kubectl patch configmap config-domain --namespace knative-serving --patch-file cloudrun/manifest/custom_domain_patch.yaml
サービス一覧の URL が変わっていることが確認できる
gcloud run services list --platform kubernetes
DNS レコードを追加する
実行環境の DNS へ DNS レコードを登録する
Google Domains だと下記のような感じで、*.[YOUR_DOMAIN]で登録する
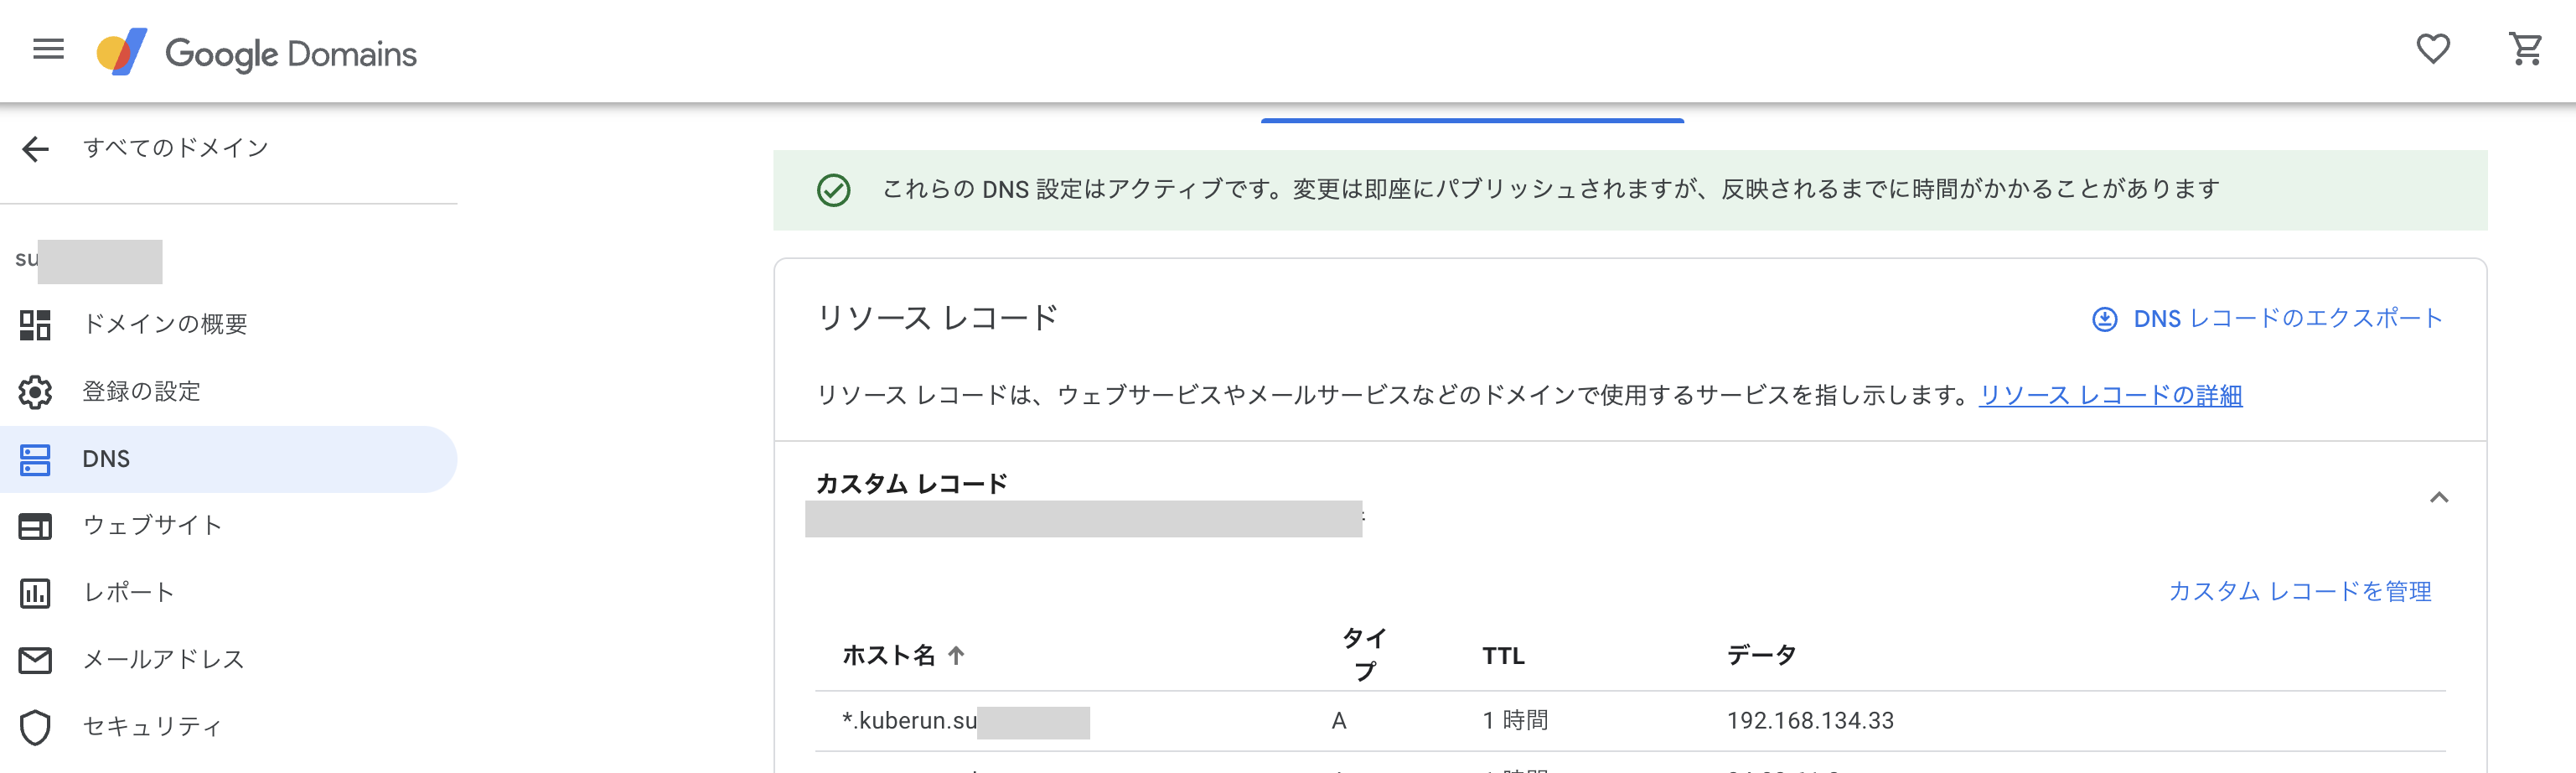
以上で、カスタムドメインで Web アクセスが可能になる
Cloud Console での作成・操作での権限付与
署名なしトークンを使用して認証する のドキュメントのままのクラスタ権限だと Cloud Console で作成しようとすると失敗する
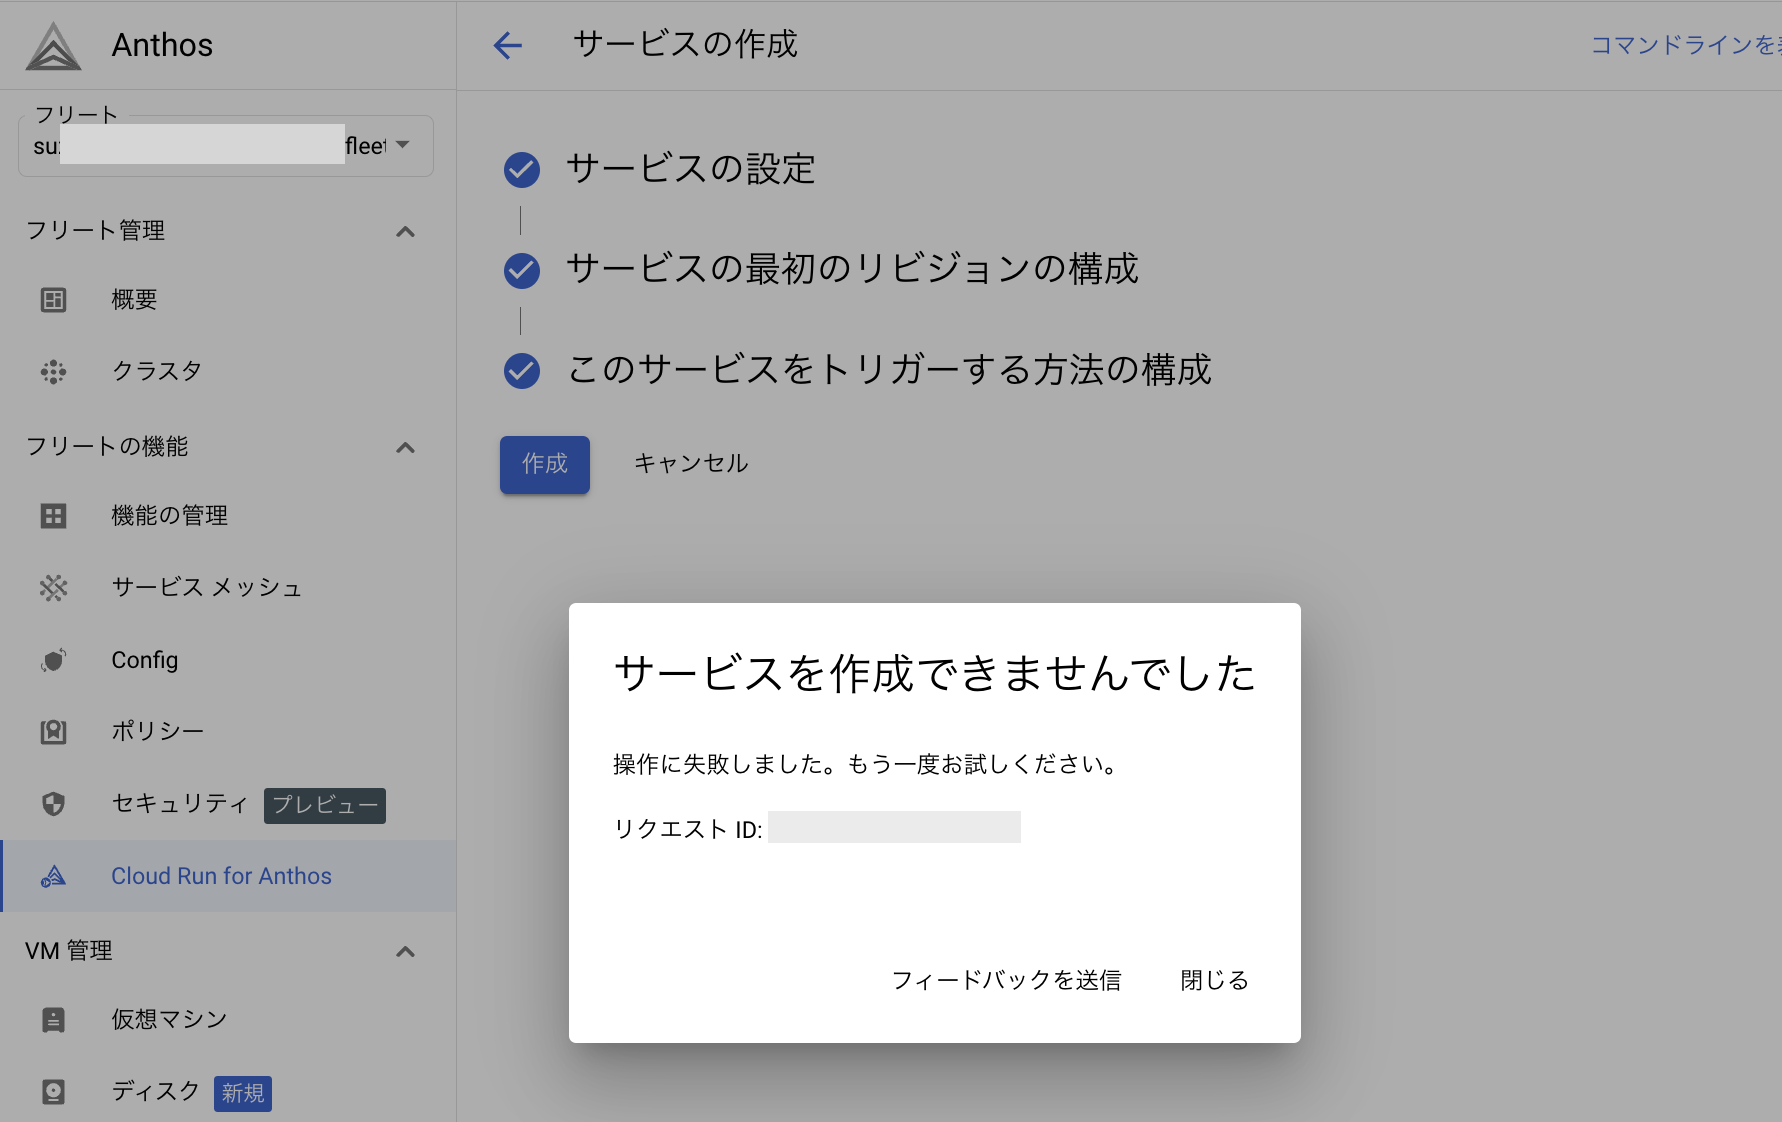
最小権限まで切り分けできてないが、clusterrole の edit を追加で付与すると成功するようにできる
export KUBECONFIG=bmctl-workspace/usercluster1/usercluster1-kubeconfig
kubectl create clusterrolebinding cloud-console-reader-edit --clusterrole edit --serviceaccount default:cloud-console-reader
apiVersion: rbac.authorization.k8s.io/v1
kind: ClusterRoleBinding
metadata:
  name: cloud-console-reader-edit
roleRef:
  apiGroup: rbac.authorization.k8s.io
  kind: ClusterRole
  name: edit
subjects:
- kind: ServiceAccount
  name: cloud-console-reader
  namespace: default
これらは読み取り以上の権限をつけることになるので、共通のアクセストークンのようなものではなく、ユーザ個別で作成してトークンを管理するようにした方が良さそう
アプリ デプロイ試験
設定が完了したため、CLI/GUI で試験アプリのデプロイ方法の試験を実施する
namespace 設定
試験用の namespace 作成と自動でサイドカー付与の設定を実施する
kubectl create namespace test-cloudrun
kubectl label namespace test-cloudrun istio-injection=enabled istio.io/rev- --overwrite
CLI での実行
ドキュメントを参考に demo 用イメージをデプロイする
gcloud run deploy test01 --image gcr.io/cloudrun/hello --platform kubernetes --namespace test-cloudrun --kubeconfig bmctl-workspace/usercluster1/usercluster1-kubeconfig
$ gcloud run deploy test01 --image gcr.io/cloudrun/hello --platform kubernetes  --namespace test-cloudrun --kubeconfig bmctl-workspace/usercluster1/usercluster1-kubeconfig
Deploying container to Cloud Run for Anthos service [test01] in namespace [test-cloudrun] of context [usercluster1-admin@usercluster1] referenced by config file [bmctl-workspace/usercluster1/usercluster1-kubeconfig]
✓ Deploying new service... Done.
  ✓ Creating Revision...
  ✓ Routing traffic...
Done.
Service [test01] revision [test01-00001-bex] has been deployed and is serving 100 percent of traffic.
Service URL: http://test01.test-cloudrun.[CUSTOM_DOMAIN]
下記が出力された Service URL へアクセスした例
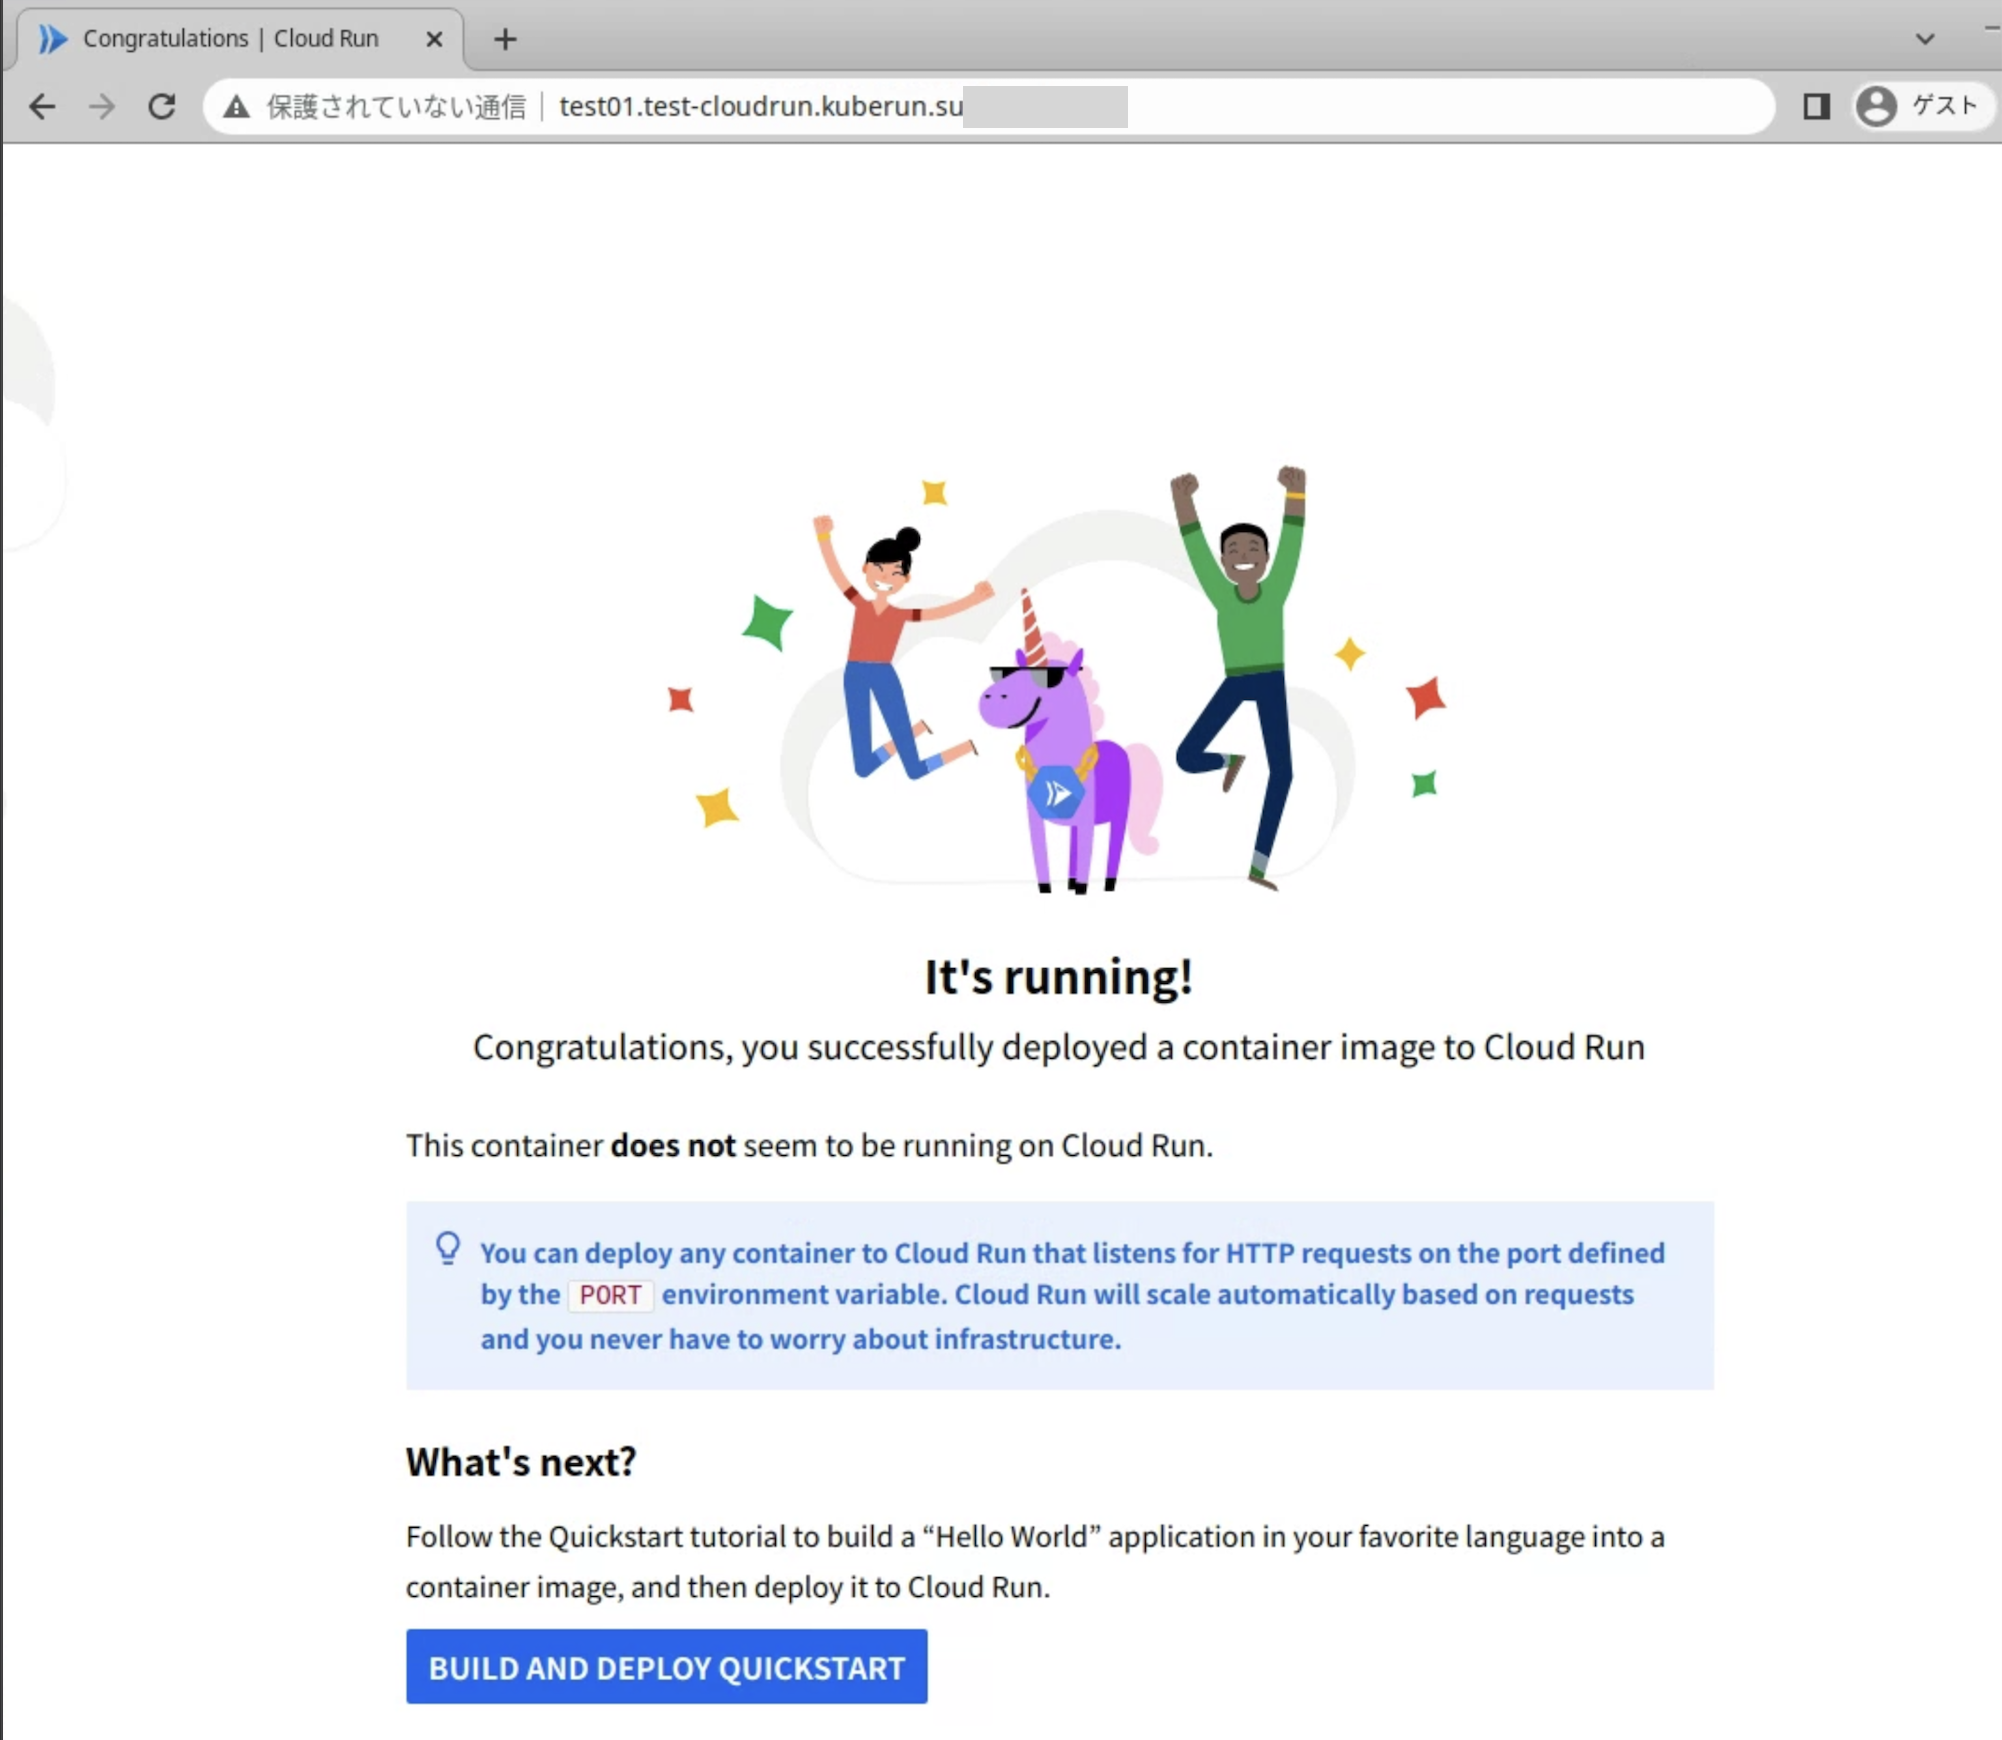
This container does not seem to be running on Cloud Run.と出力されてしまうらしい
一覧表示は下記の通り
$ gcloud run services list --platform kubernetes --namespace test-cloudrun
For cluster [usercluster1] in [None]:
   SERVICE  NAMESPACE      URL                                             LAST DEPLOYED BY  LAST DEPLOYED AT
✔  test01   test-cloudrun  http://test01.test-cloudrun.[CUSTOM_DOMAIN]     kubernetes-admin  2023-07-30T06:23:00Z
削除は下記コマンド
$ gcloud run services delete test01  --platform kubernetes  --namespace test-cloudrun --kubeconfig bmctl-workspace/usercluster1/usercluster1-kubeconfig
Service [test01] will be deleted.

Do you want to continue (Y/n)?  Y

Deleted service [test01].

$ gcloud run services list --platform kubernetes --namespace test-cloudrun
For cluster [usercluster1] in [None]:
Listed 0 items.
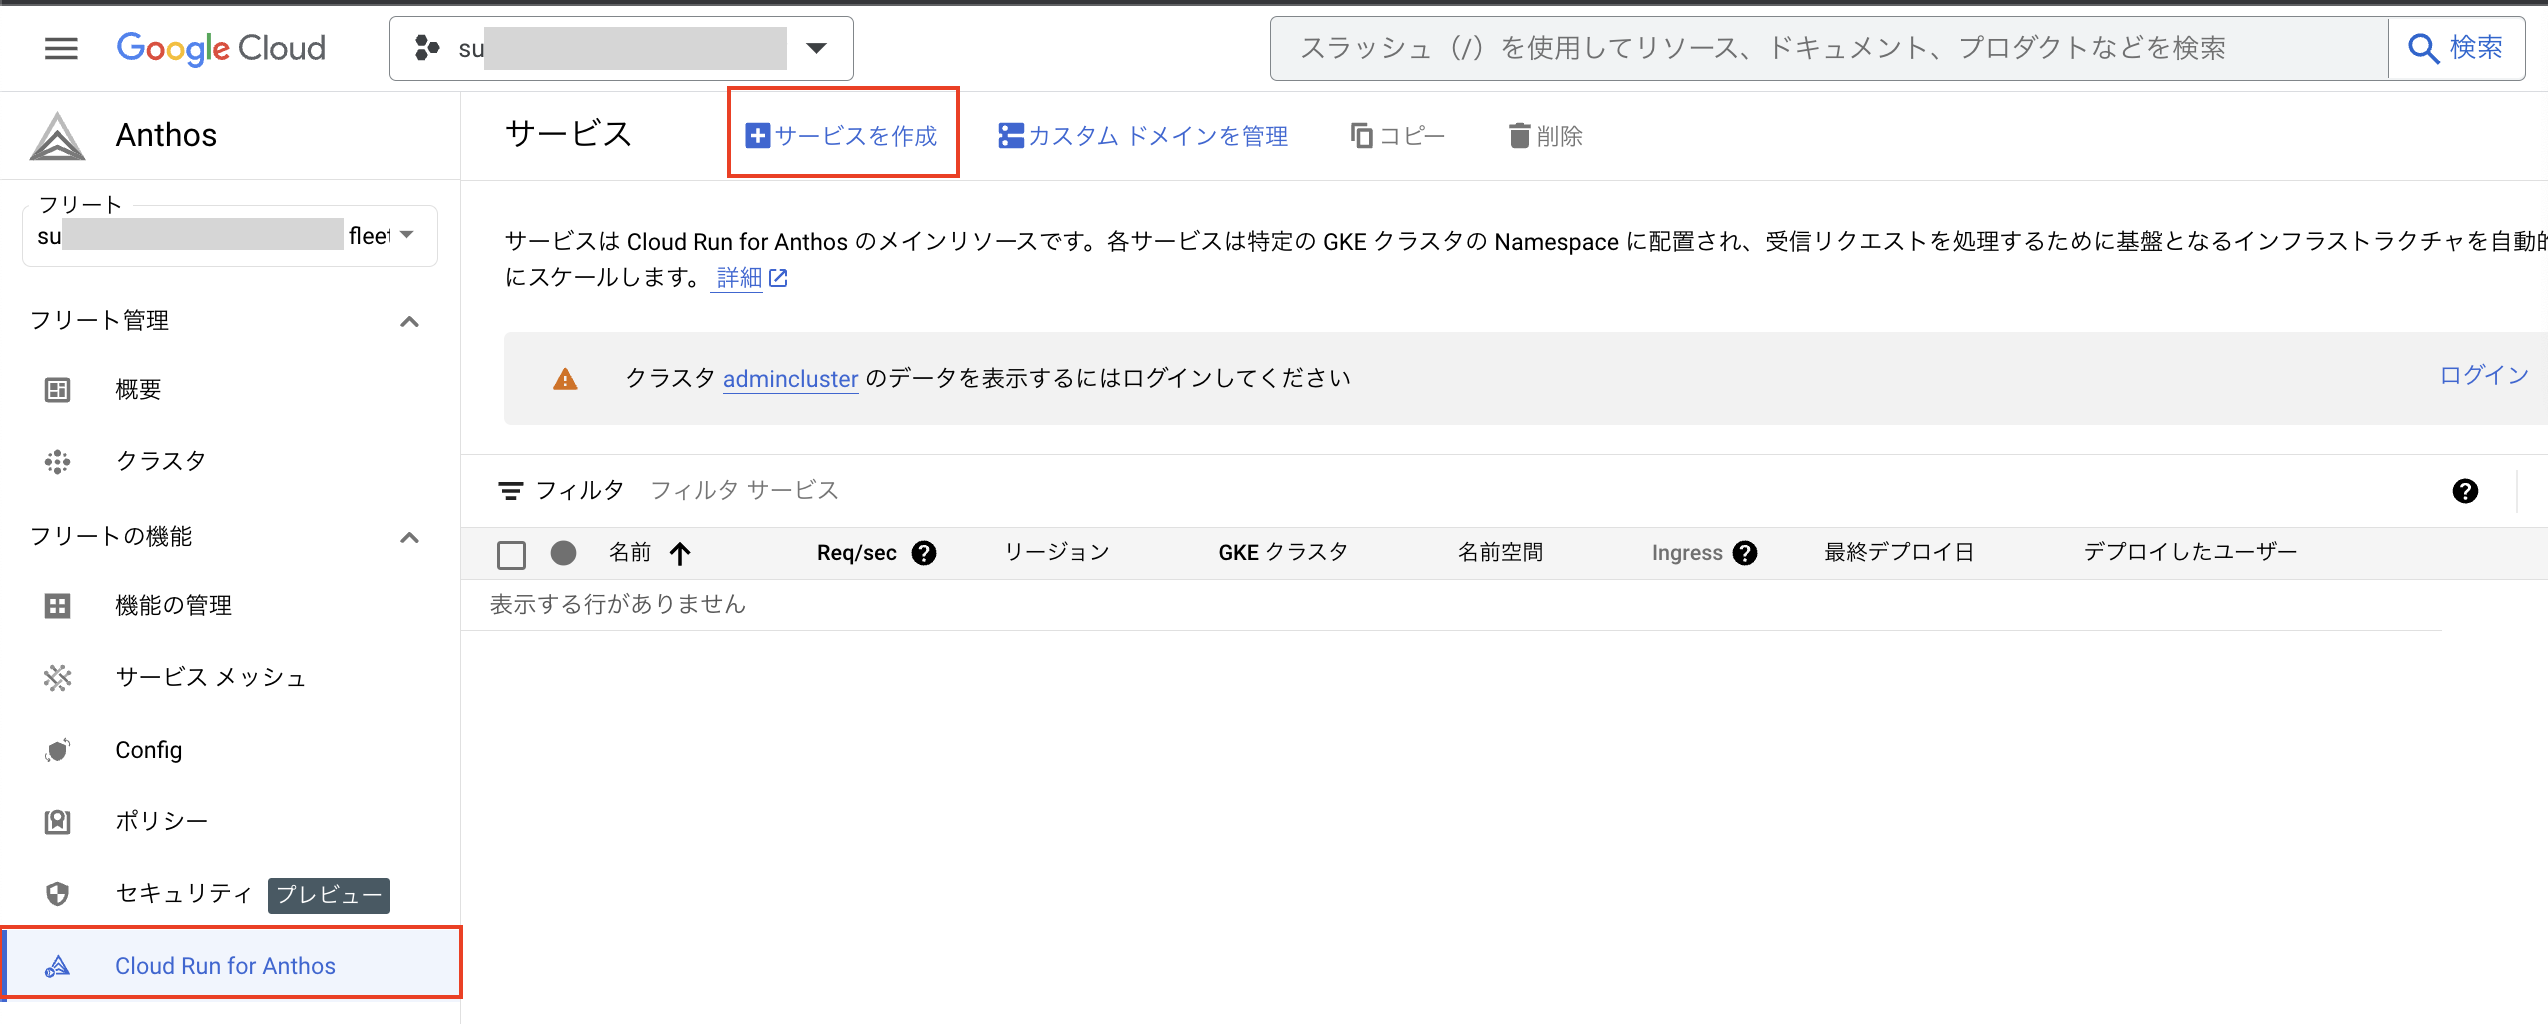
GUI
Cloud Console で Anthos > Cloud Run for Anthos > +サービスを作成 を選択
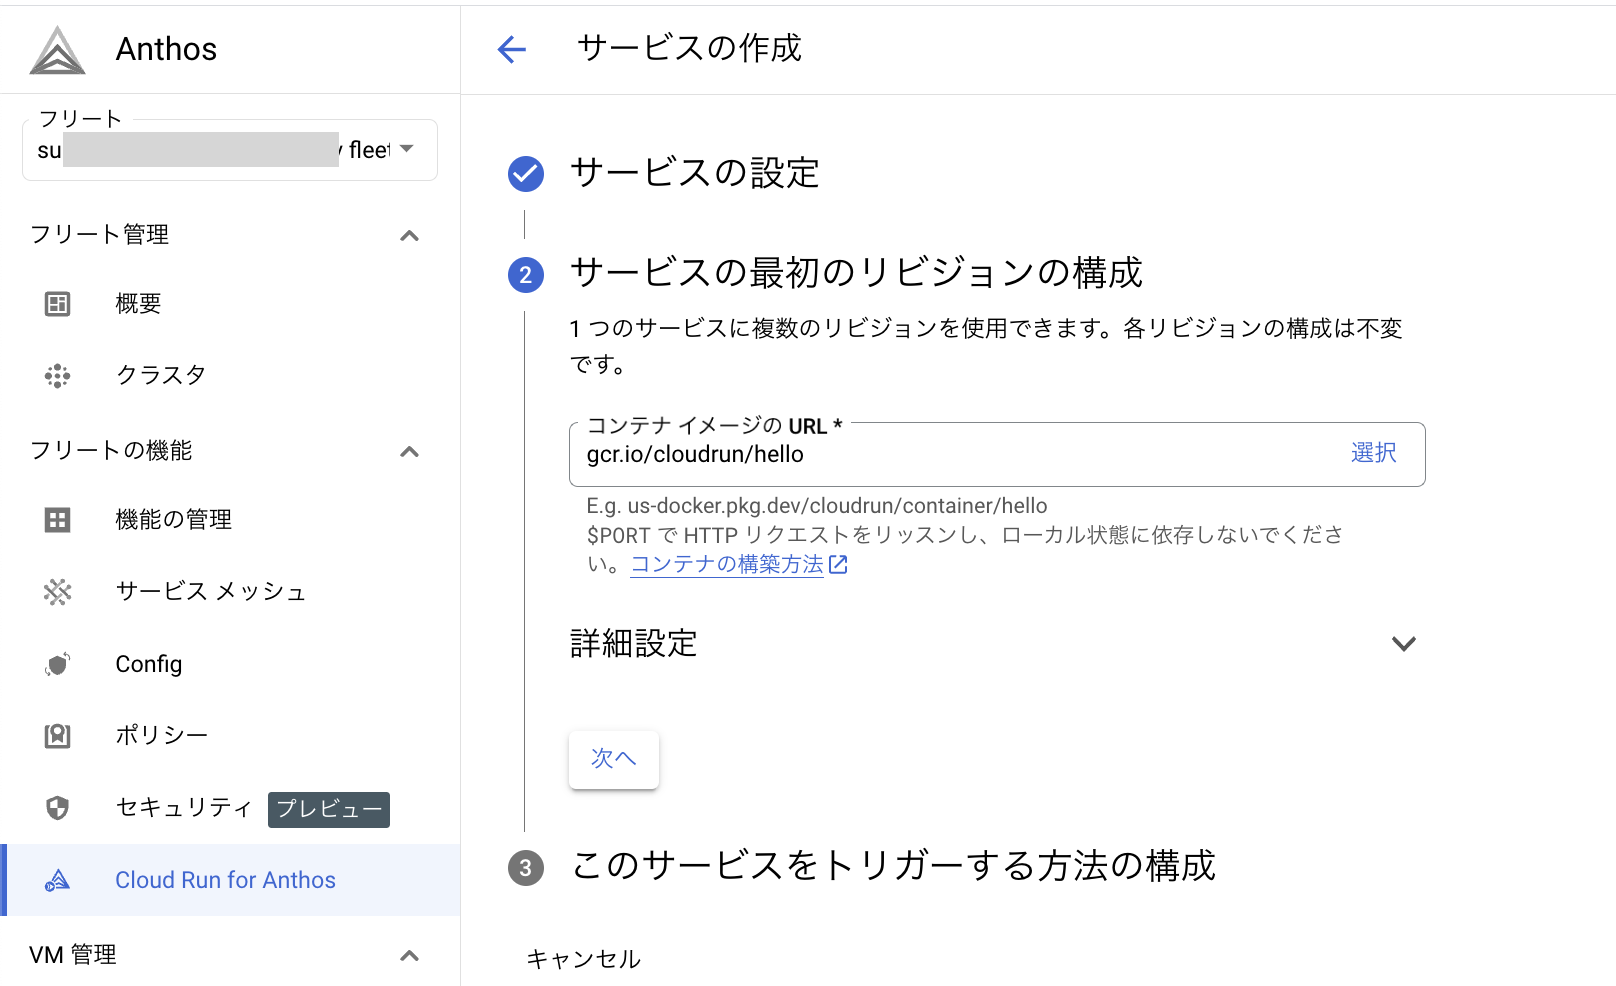
対象ユーザクラスタとネームスペース、サービス名を入力して次へ

コンテナイメージを選択して次へ
クラスタから見て外部公開用であれば外部を選択して作成
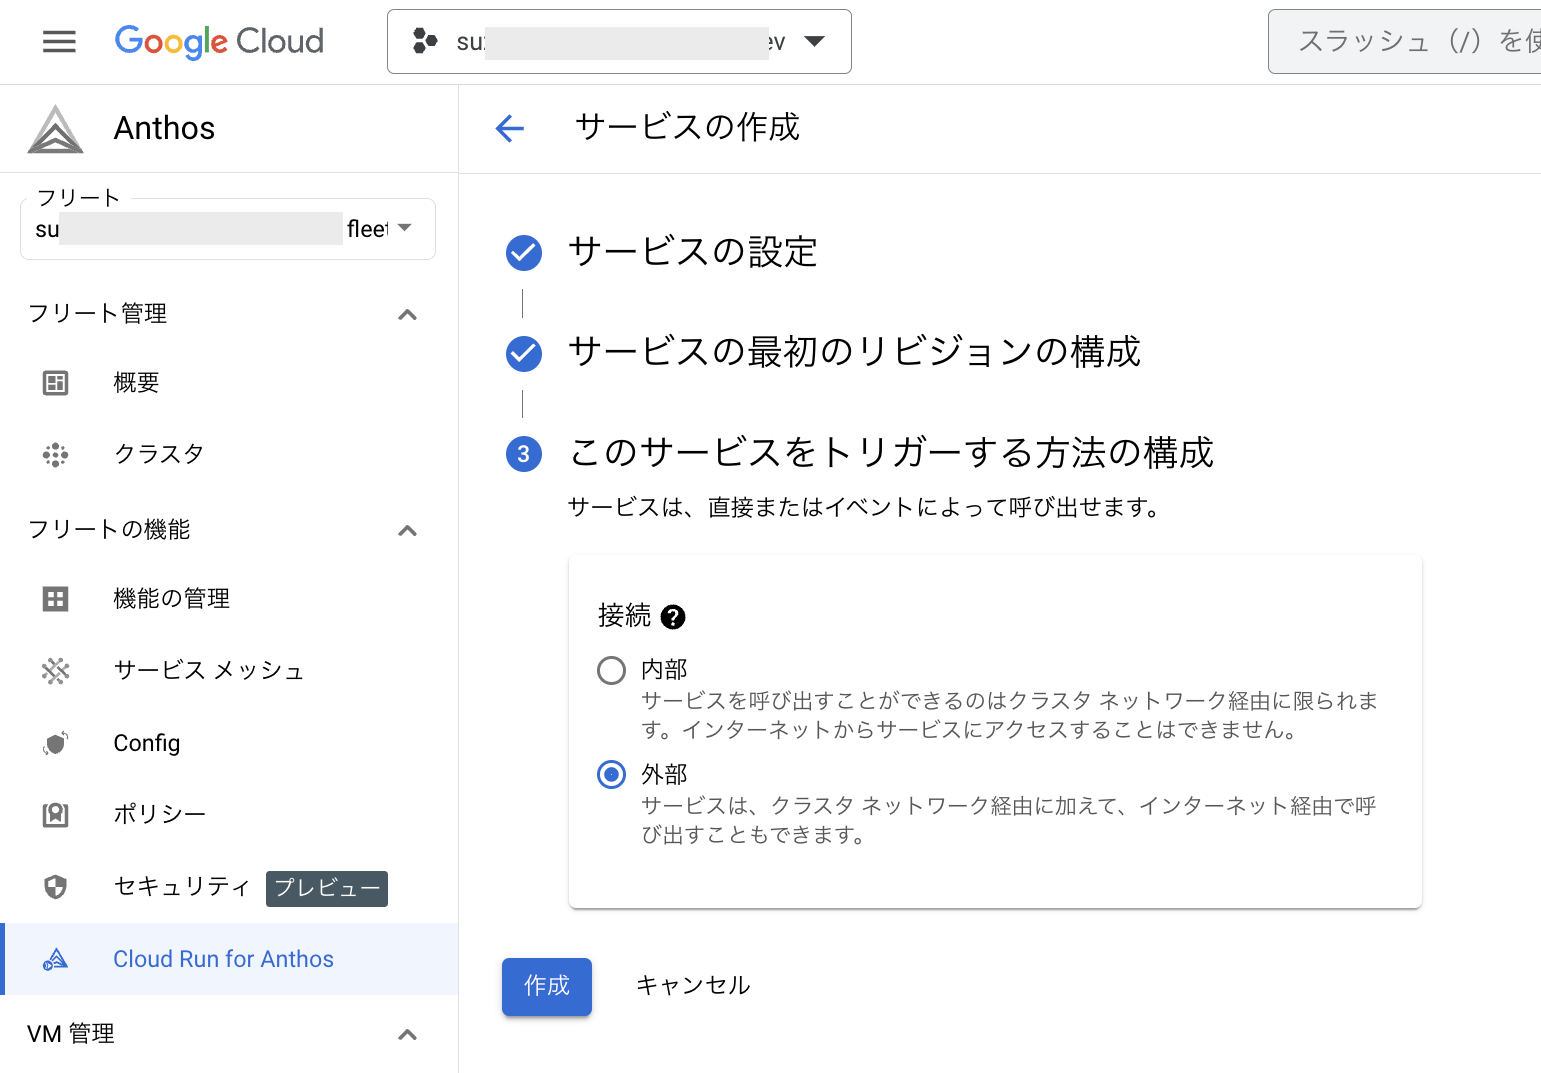
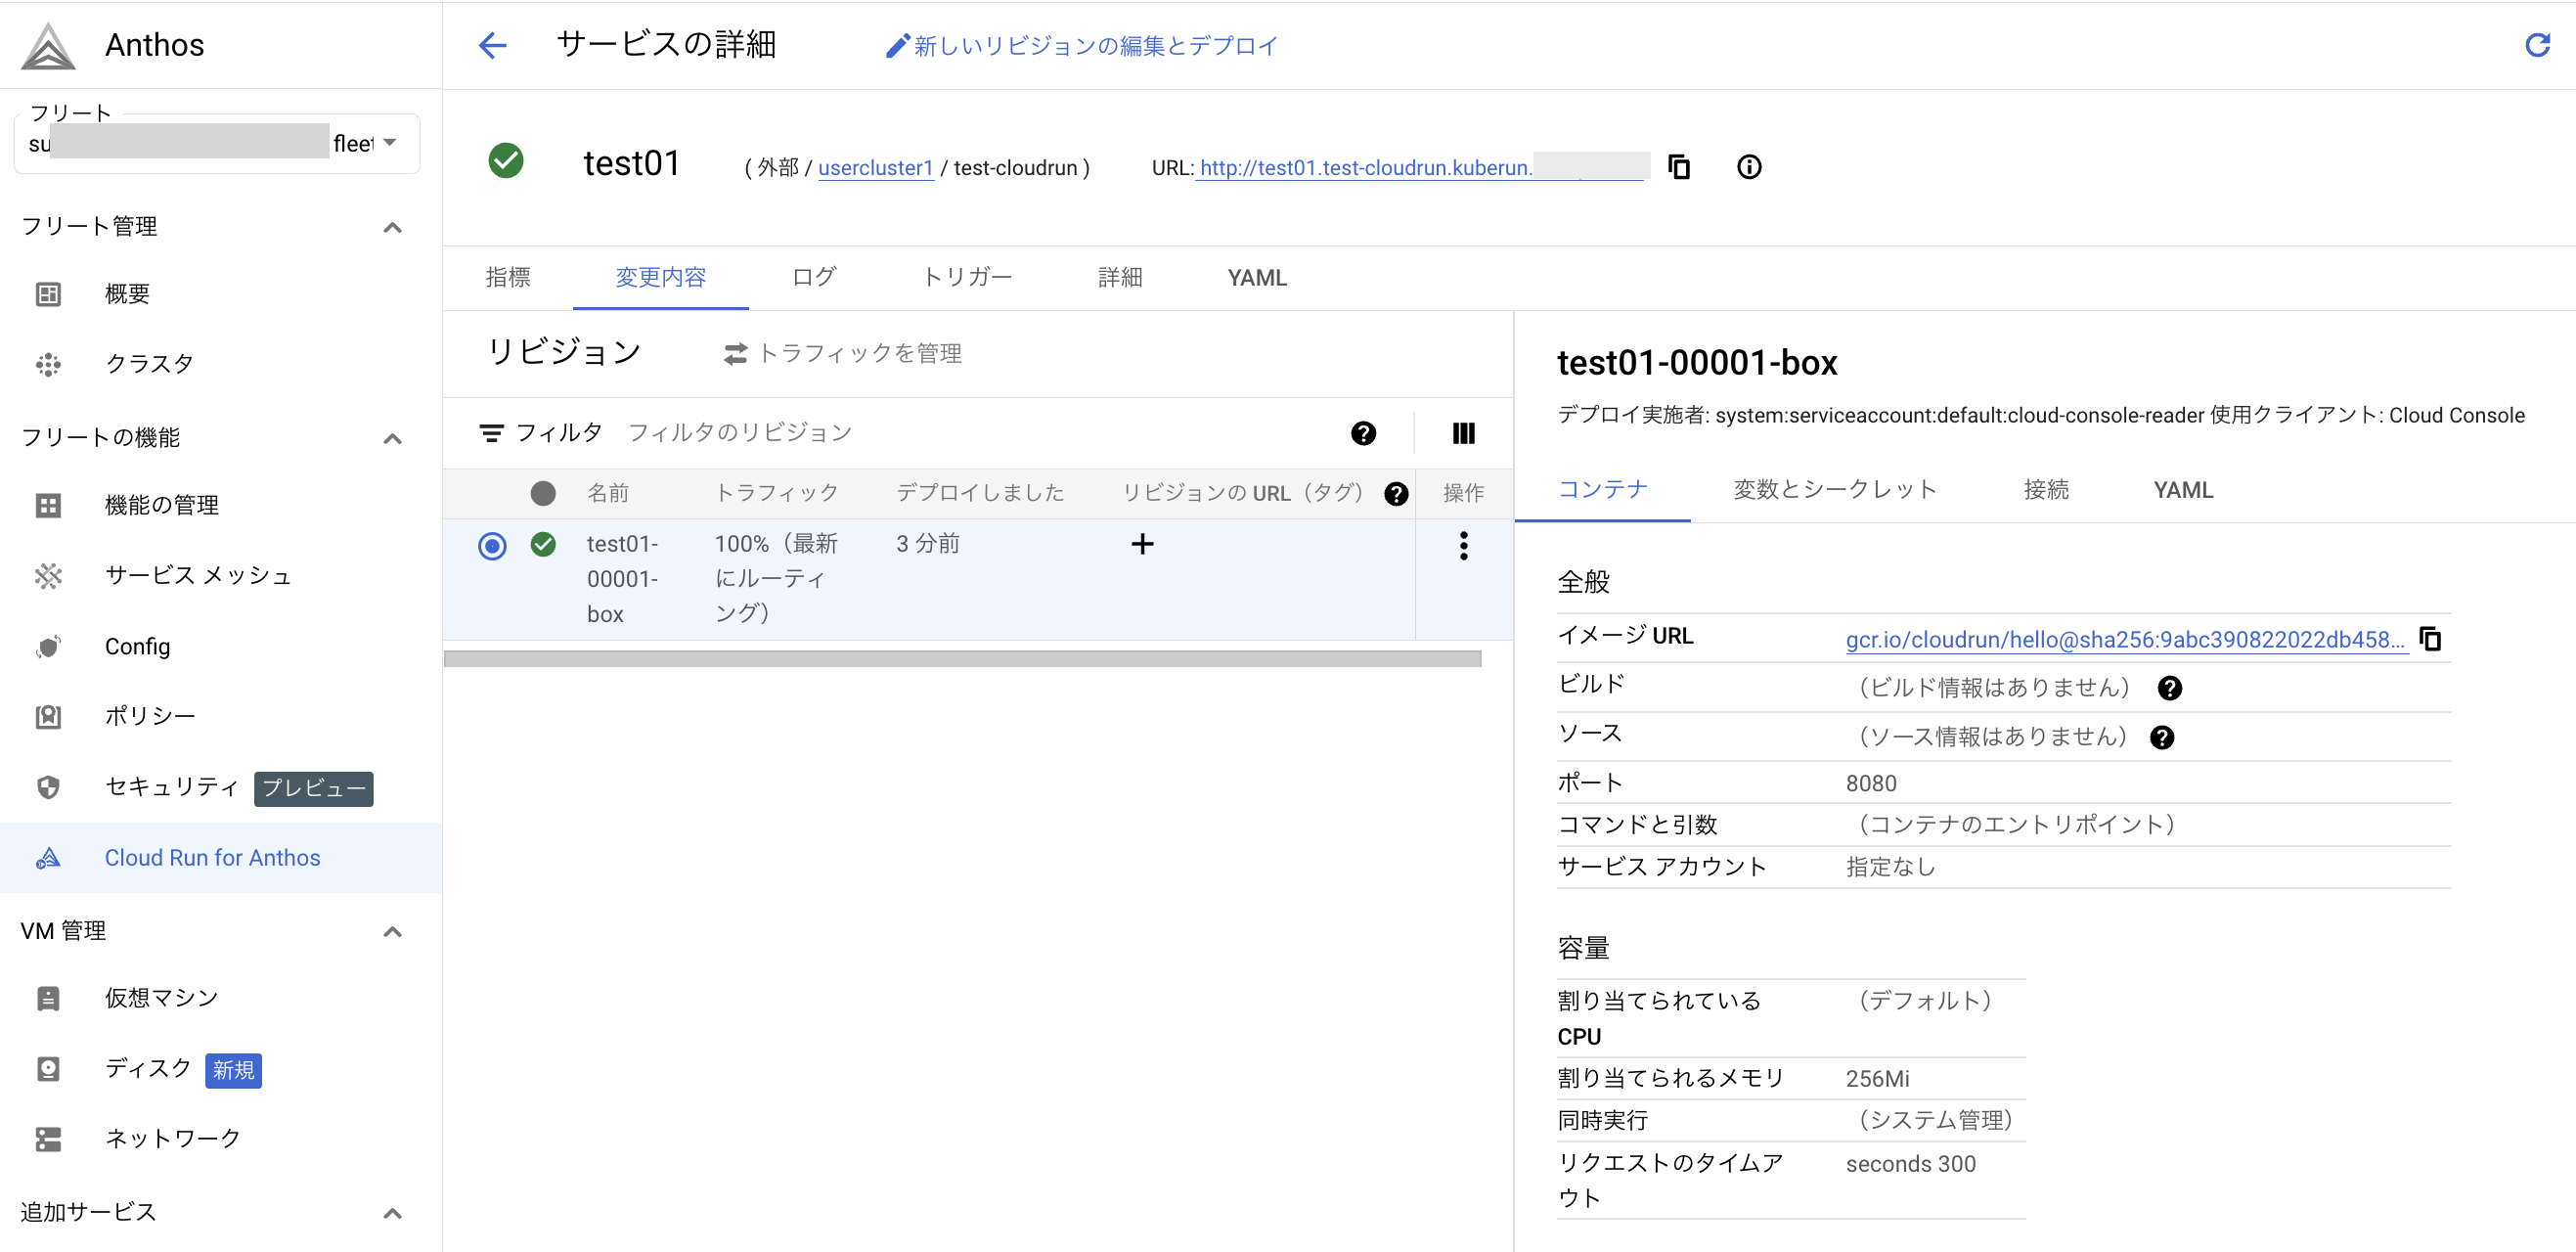
作成後には下記のような画面に遷移する
リビジョン・トラフィック切り替え動作試験
サービスを作成して同じサービス名でもう一度 gcloud run deployをすると別のリビジョンとして作成される
ここでは 2回デプロイして2回目は--no-trafficオプションでリリース前にしてトラフィック切り替え試験をする
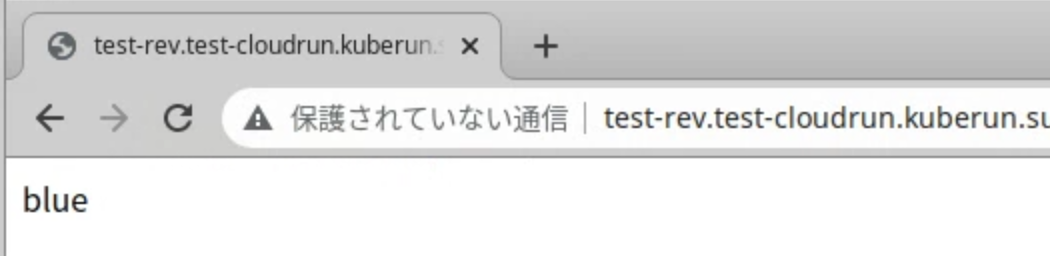
簡易的に nginx コンテナで、1回目がblue, 2回目が greenと表示されるようにする
kubectl create configmap blue --from-literal=index.html="blue" --namespace test-cloudrun
kubectl create configmap green --from-literal=index.html="green" --namespace test-cloudrun
gcloud run deploy test-rev --image nginx --port=80 --platform kubernetes --namespace test-cloudrun --kubeconfig bmctl-workspace/usercluster1/usercluster1-kubeconfig --set-config-maps=/usr/share/nginx/html/=blue --tag=blue
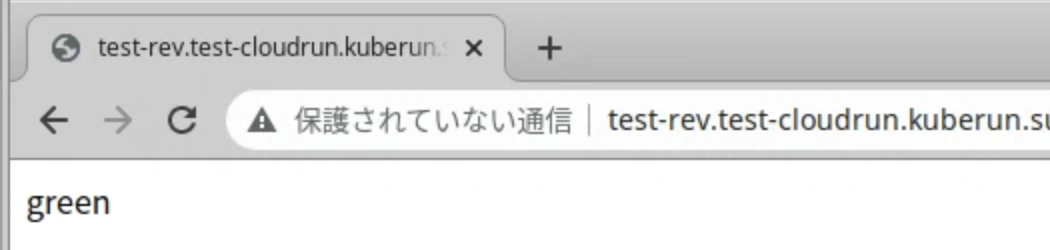
gcloud run deploy test-rev --image nginx --port=80 --platform kubernetes --namespace test-cloudrun --kubeconfig bmctl-workspace/usercluster1/usercluster1-kubeconfig --set-config-maps=/usr/share/nginx/html/=green --no-traffic --tag=green
$ gcloud run deploy test-rev --image nginx --port=80 --platform kubernetes  --namespace test-cloudrun --kubeconfig bmctl-workspace/usercluster1/usercluster1-kubeconfig  --set-config-maps=/usr/share/nginx/html/=blue --tag=blue
Deploying container to Cloud Run for Anthos service [test-rev] in namespace [test-cloudrun] of context [usercluster1-admin@usercluster1] referenced by config file [bmctl-workspace/usercluster1/usercluster1-kubeconfig]
✓ Deploying new service... Done.
  ✓ Creating Revision...
  ✓ Routing traffic...
Done.
Service [test-rev] revision [test-rev-00001-yec] has been deployed and is serving 100 percent of traffic.
Service URL: http://test-rev.test-cloudrun.[CUSTOM_DOMAIN]
The revision can be reached directly at http://blue-test-rev.test-cloudrun.[CUSTOM_DOMAIN]

$ gcloud run deploy test-rev --image nginx --port=80 --platform kubernetes  --namespace test-cloudrun --kubeconfig bmctl-workspace/usercluster1/usercluster1-kubeconfig  --set-config-maps=/usr/share/nginx/html/=green --no-traffic --tag=green
Deploying container to Cloud Run for Anthos service [test-rev] in namespace [test-cloudrun] of context [usercluster1-admin@usercluster1] referenced by config file [bmctl-workspace/usercluster1/usercluster1-kubeconfig]
✓ Deploying... Done.
  ✓ Creating Revision...
  ✓ Routing traffic...
Done.
Service [test-rev] revision [test-rev-00002-yuh] has been deployed and is serving 0 percent of traffic.
The revision can be reached directly at http://green-test-rev.test-cloudrun.[CUSTOM_DOMAIN]
リビジョン一覧は list 、トラフィック配分は desclibe オプションで表示できる
$ gcloud run revisions list --service test-rev --platform kubernetes  --namespace test-cloudrun
For cluster [usercluster1]:
   REVISION            ACTIVE  SERVICE   DEPLOYED                 DEPLOYED BY
✔  test-rev-00002-yuh          test-rev  2023-07-30 09:09:54 UTC  kubernetes-admin
✔  test-rev-00001-yec  yes     test-rev  2023-07-30 09:09:34 UTC  kubernetes-admin

$ gcloud run services describe test-rev  --platform kubernetes  --namespace test-cloudrun
✔ Service test-rev in namespace test-cloudrun

URL:     http://test-rev.test-cloudrun.[CUSTOM_DOMAIN]
Ingress: all
Traffic:
  100% test-rev-00001-yec
         blue:  http://blue-test-rev.test-cloudrun.[CUSTOM_DOMAIN]
  0%   test-rev-00002-yuh
         green: http://green-test-rev.test-cloudrun.[CUSTOM_DOMAIN]

Last updated on 2023-07-30T09:10:00Z by kubernetes-admin:
  Revision test-rev-00002-yuh
  Image:             nginx
  Port:              80
  Config Maps:
    /usr/share/nginx/html/ green
  Timeout:           300s
0%トラフィック設定でもタグをつけていると[タグ名]-[サービス名].[Namespace].[domain]でアクセス可能

最新のリビジョンへトラフィックを向けるには --to-latest でアップデートする
$ gcloud run services update-traffic test-rev --to-latest --platform kubernetes  --namespace test-cloudrun
✓ Updating traffic... Done.
  ✓ Routing traffic...
Done.
URL: http://test-rev.test-cloudrun.kuberun.[CUSTOM_DOMAIN]
Traffic:
  0%   test-rev-00001-yec
         blue:  http://blue-test-rev.test-cloudrun.[CUSTOM_DOMAIN]
  0%   test-rev-00002-yuh
         green: http://green-test-rev.test-cloudrun.[CUSTOM_DOMAIN]
  100% LATEST (currently test-rev-00002-yuh)

$ gcloud run services describe test-rev  --platform kubernetes  --namespace test-cloudrun
✔ Service test-rev in namespace test-cloudrun

URL:     http://test-rev.test-cloudrun.[CUSTOM_DOMAIN]
Ingress: all
Traffic:
  0%   test-rev-00001-yec
         blue:  http://blue-test-rev.test-cloudrun.[CUSTOM_DOMAIN]
  0%   test-rev-00002-yuh
         green: http://green-test-rev.test-cloudrun.[CUSTOM_DOMAIN]
  100% LATEST (currently test-rev-00002-yuh)

Last updated on 2023-07-30T09:16:17Z by kubernetes-admin:
  Revision test-rev-00002-yuh
  Image:             nginx
  Port:              80
  Config Maps:
    /usr/share/nginx/html/ green
  Timeout:           300s
切り替え後は最後にデプロイしたサービスへトラフィックが切り替わる
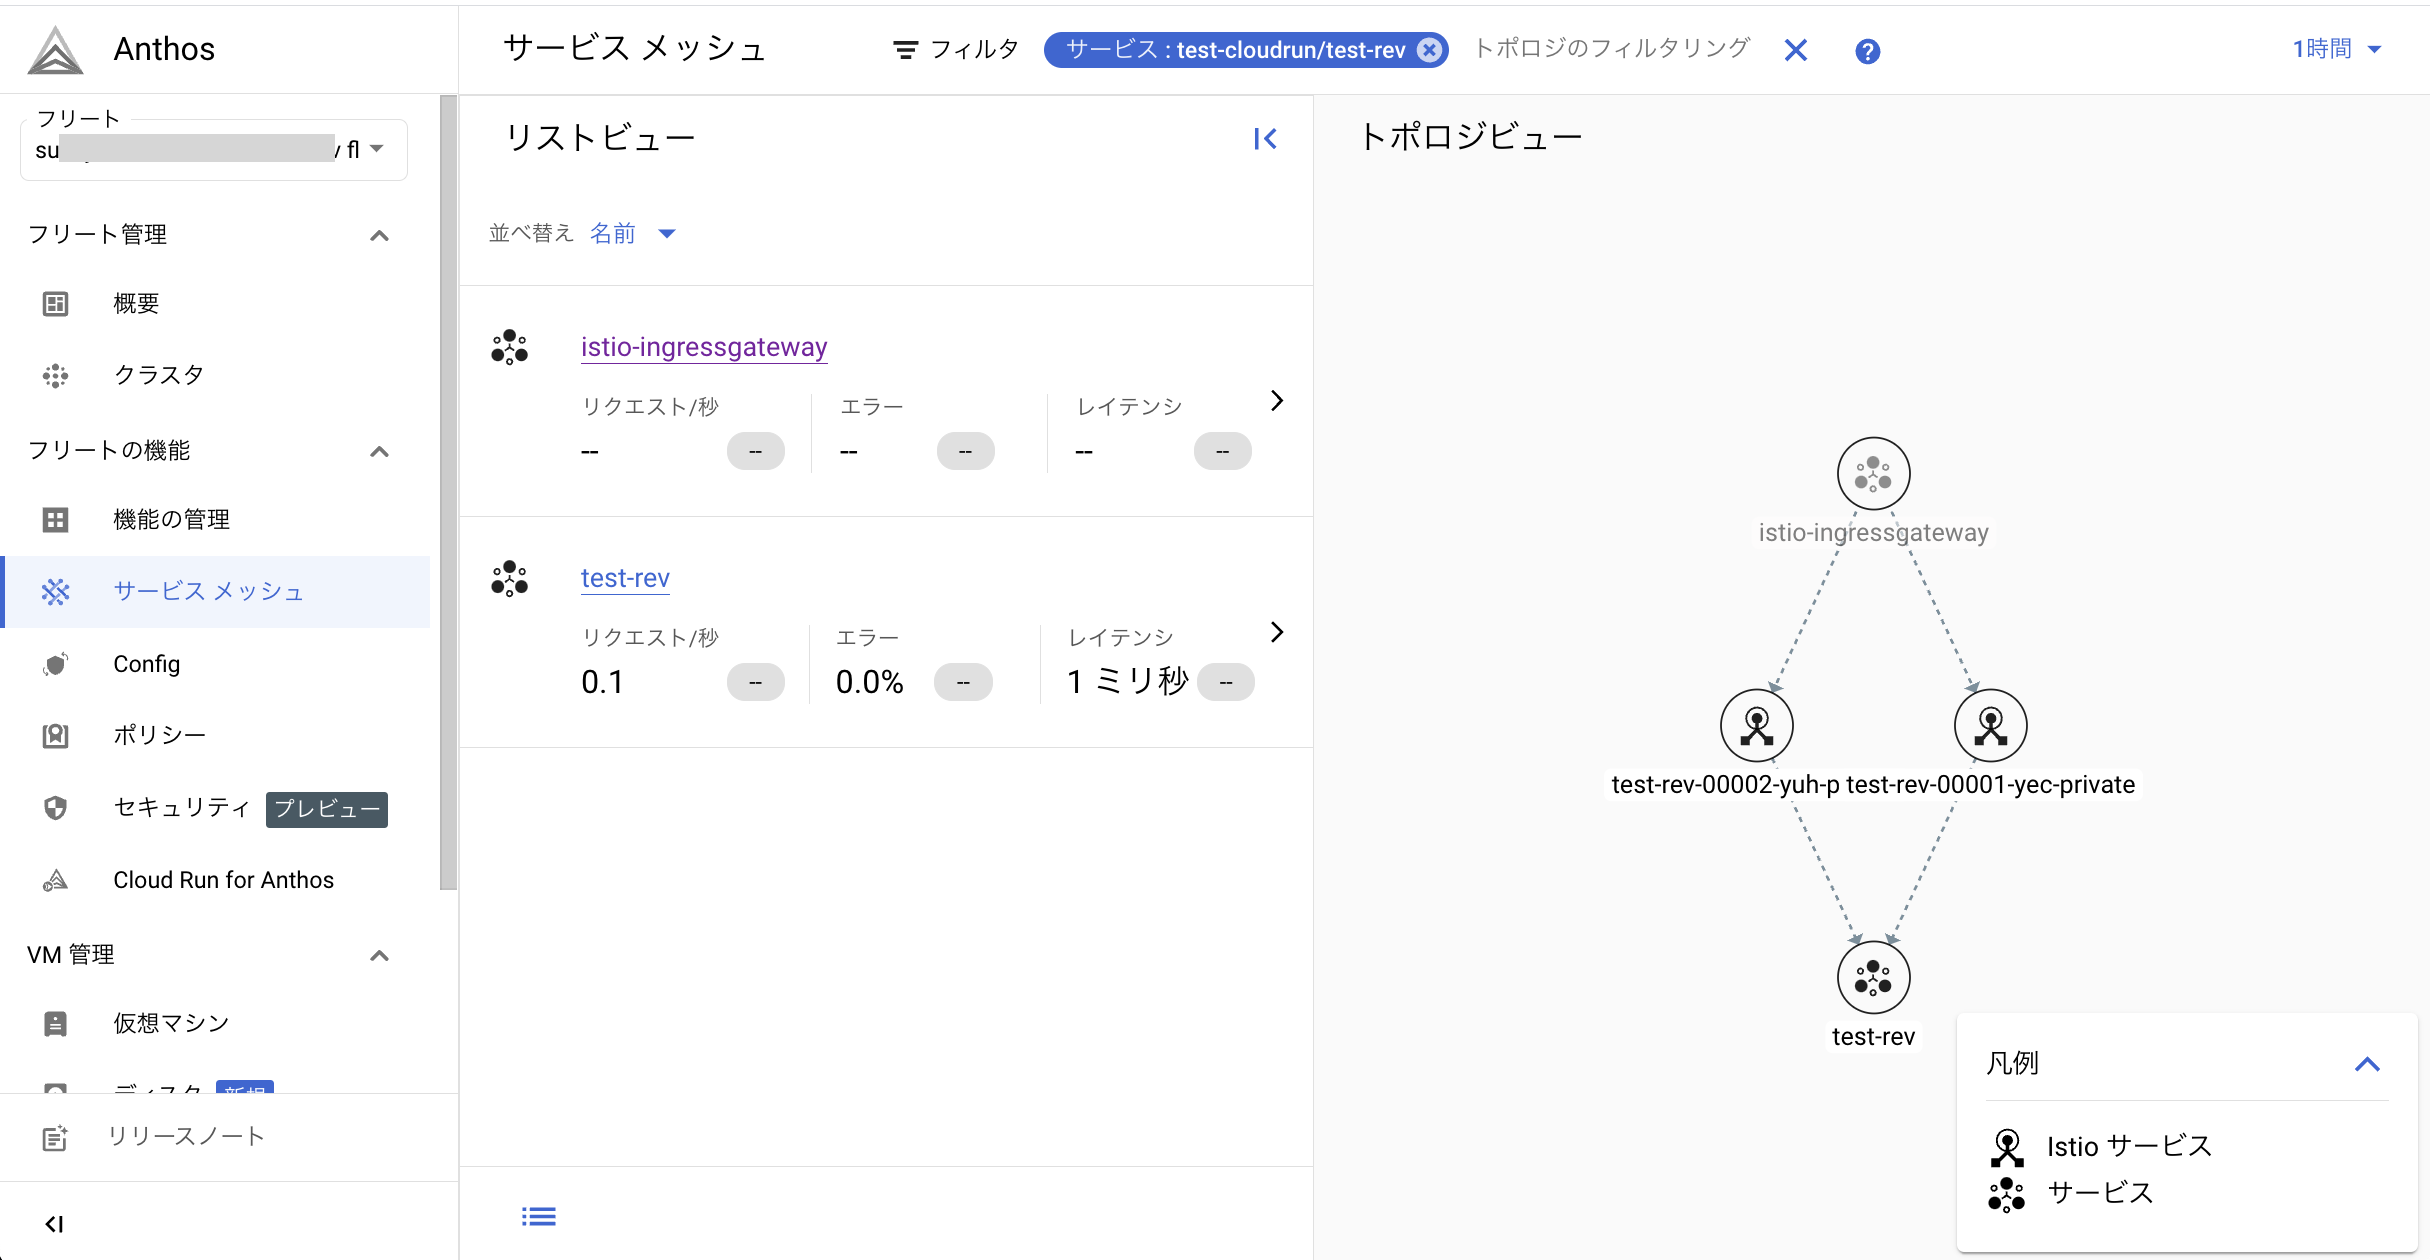
サービスメッシュを見るとトポロジーが見れる
おわりに
オンプレ環境の Anthos Baremetal 環境に Cloud Run 機能を有効化することができた
簡易的な動作試験しかしておらず、外部からのアクセスを TLS 化したり、マニフェストでのサービス管理などまだ実施してないことが多いので、実用するにはこれ以外にもさまざまな設定・試験をする必要がある
その他
再適用手順
下記は、リソース作成を省いた再適用手順
cd ~/anthos
export FREET_PROJECT_ID="[クラスタ所属のプロジェクトID]"

export KUBECONFIG=$HOME/anthos/bmctl-workspace/usercluster1/usercluster1-kubeconfig
export DIR_PATH=$HOME/anthos/asm
unset CLUSTER_NAME
unset PROJECT_ID

kubectl create ns istio-system
asmcli install \
  --fleet_id $FREET_PROJECT_ID \
  --kubeconfig $KUBECONFIG \
  --output_dir $DIR_PATH \
  --platform multicloud \
  --enable_all \
  --ca mesh_ca

kubectl label namespace istio-system istio-injection=enabled istio.io/rev-
kubectl label namespace istio-system istio-injection- istio.io/rev=asm-1173-1 --overwrite
kubectl create namespace test-cloudrun
kubectl label namespace test-cloudrun istio-injection=enabled istio.io/rev- --overwrite
kubectl apply -n istio-system -f asm/samples/gateways/istio-ingressgateway


kubectl create namespace knative-serving
kubectl create secret -n knative-serving generic cloudrun-anthos-baremetal --from-file=$PWD/cloudrun/cloudrun-anthos-baremetal.json

kubectl apply --kubeconfig=$KUBECONFIG --filename cloudrun/manifest/cloud-run.yaml

kubectl patch configmap config-domain --namespace knative-serving --patch-file cloudrun/manifest/custom_domain_patch.yaml
参考