はじめに
Cisco シミュレータの Packet Tracer を Minimal な Ubuntu 18.04 へインストールする、
Ansible Playbook を作成したのでその内容を記載する
debconf でのライセンス同意が詰まったポイントだったため、そこについては少し詳しく記載する
下記、ansible-playbook 実施後にサーバへ RDP でログインして Packet Tracer 起動した画面例

前提
Packet Tracer
Packet Tracer については下記にまとめている
(PacketTracer とは? から、手動でのインストール、利用開始まで)
Packet Tracer バージョン
2020.06.07 時点で最新な 7.3.0 を使用する
Packet Tracker .deb ファイル
まとめた記事にダウンロード方法も記載しているので、
ダウンロードまでの箇所まで進めて、Ubuntu用の.debファイルのダウンロードを完了させておくこと
使用した .deb ファイル名(2020.06.07時点で最新): PacketTracer_730_amd64.deb
使用した Ubuntu サーバスペック
vCPU: 2
Mem: 4GB
Storage: 30GB
OS: Ubuntu 18.04.4 LTS (Bionic Beaver)
※インスール時に [X] Install OpenSSH server のみチェックした最小状態
※ESXiで立てた仮想マシン, GCP の仮想マシン (OS 同じ) でも試験済
Playbook
下記が今回用意した playbook
---
- hosts: packettracer
  become: true
  gather_facts: yes

  roles:
    - update
    - desktop
    - packet-tracer
Role は下記の構成 (詳細は後述)
- update
- apt update
- desktop
- RDP 用に ubuntu-desktop や xrp を入れた設定
- packet-tracer
- packet tracer のインストール
- debconf を使用しライセンス同意を実施する(後述)
- .deb ファイルは cisco から落としてこの Role の files に置いておく
inventory
下記はiniファイルの記載例。
ubuntu はデフォルト python3 で /usr/bin/python はデフォルトないので、python3 を指定しておく。
複数サーバがいれば、[packettracer]グループに入れておく。
[all]
pt01 ansible_host=192.168.x.x ansible_python_interpreter=/usr/bin/python3
[packettracer]
pt01
Role
update
apt upgrade/update を実施する
- tasks/
- main.yml
  - name: Update apt update, upgrade
    apt:
      upgrade: dist
      update_cache: yes
    become: yes
    when:
     - ansible_distribution == "Ubuntu"
desktop
ubuntu-desktop / xrdp などをインストールして reboot する
- tasks/
- main.yml
- files/
- xrdp-color-manager.pkla
---
# tasks file for desktop
  - name: install desktop for ubuntu
    apt:
      name: "{{ packages }}"
      state: latest
      update_cache: yes
    vars:
      packages:
        - ubuntu-desktop
        - xrdp
        - language-pack-ja
    register: xrdp_install
    become: yes
    when:
     - ansible_distribution == "Ubuntu"

  - name: xrdp enable/restart
    systemd:
      name: xrdp
      state: started
      daemon_reload: yes
      enabled: yes
    become: yes

  - name: set local japanese
    command: localectl set-locale LANG=ja_JP.UTF-8 LANGUAGE="ja_JP:ja"
    become: yes
    when:
     - ansible_distribution == "Ubuntu"

  - name: set timedate Tokyo
    command: timedatectl set-timezone Asia/Tokyo
    become: yes
    when:
     - ansible_distribution == "Ubuntu"

  - name: Avoidance Authentication is required to create a color managed device
    copy:
      src: "{{ item }}"
      dest: /etc/polkit-1/localauthority/50-local.d/
      owner: root
      group: root
      mode: 0644
    become: yes
    register: pkla
    with_items:
      - xrdp-color-manager.pkla
    when:
     - ansible_distribution == "Ubuntu"
     - xrdp_install.changed

  - name: polkit restart
    systemd:
      name: polkit
      state: restarted
    become: yes
    when:
     - ansible_distribution == "Ubuntu"
     - pkla.changed

  - name: reboot if xrdp_install
    reboot:
    when: xrdp_install.changed
    become: yes
[Networkmanager]
Identity=unix-user:*
Action=org.freedesktop.color-manager.create-device
ResultAny=no
ResultInactive=no
ResultActive=yes
packet-tracer
packet tracer のインストールをする
debconf で色々聞かれる部分について、回答を事前に記載して実行時に止まらないようにしておく
使用する場合は、ライセンスの承認があるので、ライセンスを理解してから利用すること
PacketTracer_730_amd64.deb は cisco からダウンロードしたものをここに配置しておくこと
- tasks
- main.yml
- files
- PacketTracer_730_amd64.deb
---
# tasks file for packet-tracer
  - name: copy packet tracer deb file
    copy:
      src: "{{ item }}"
      dest: /tmp/
      owner: root
      group: root
      mode: 0644
    become: yes
    with_items:
      - PacketTracer_730_amd64.deb

  - name: install xz-utils,debconf,debconf-utils for ansible debconf
    apt:
      name: "{{ packages }}"
    vars:
      packages:
        - xz-utils
        - debconf
        - debconf-utils
    become: yes

  - name: set debconf packet tracer 1
    debconf:
      name: PacketTracer
      question: PacketTracer_730_amd64/show-eula
      value: ''
      vtype: note
    become: yes

  - name: set debconf packet tracer 2
    debconf:
      name: PacketTracer
      question: PacketTracer_730_amd64/accept-eula
      value: true
      vtype: boolean
    become: yes

  - name: install packet tracer for ubuntu
    apt:
      deb: /tmp/PacketTracer_730_amd64.deb
    become: yes
debconf について
この debconf は一度手動インストールを実施し、インストール済みの状態で下記コマンドを使用して、
debconfの選択した内容を grep した結果を抽出してパラメータとした
$ sudo debconf-get-selections | grep Packet
# Cisco Packet Tracer
PacketTracer	PacketTracer_730_amd64/show-eula	note
PacketTracer	PacketTracer_730_amd64/accept-eula	boolean	true
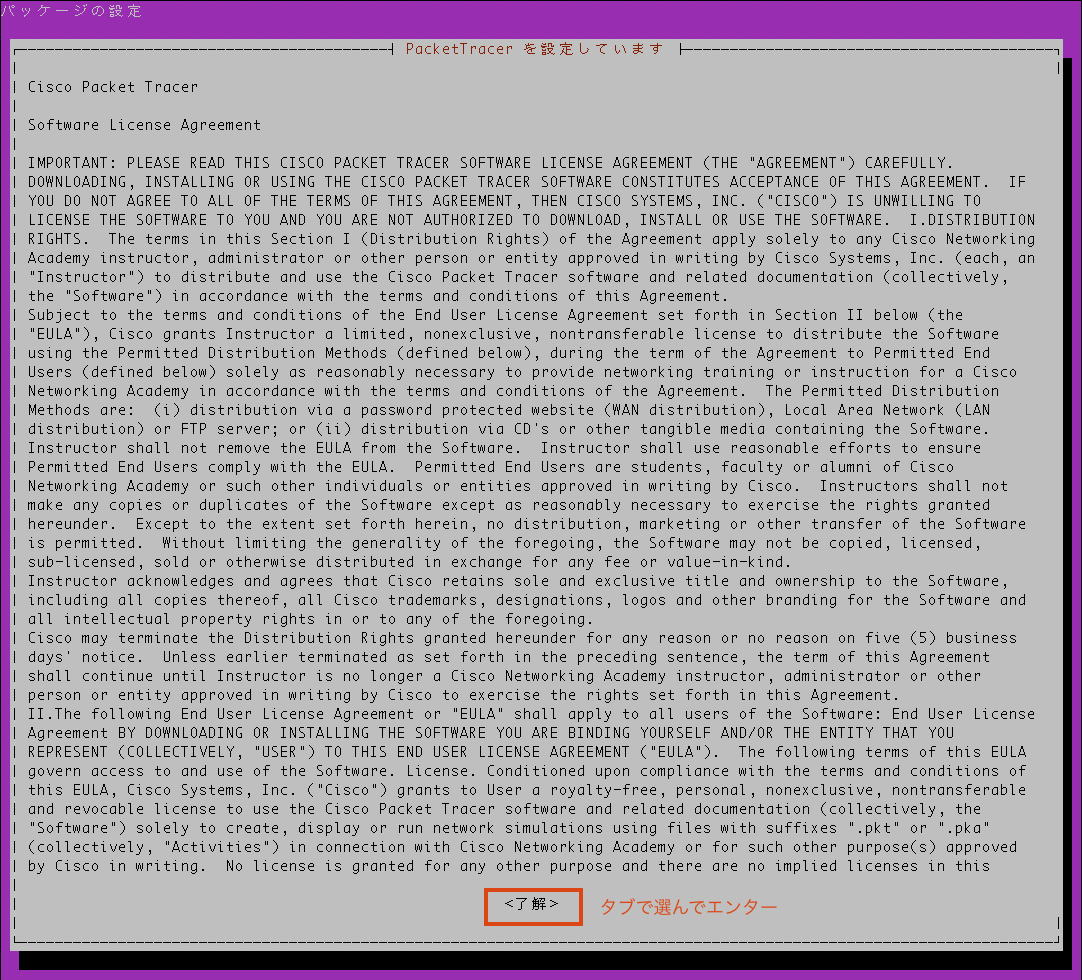
下記が該当する画面
PacketTracer_730_amd64/show-eula note にあたる画面
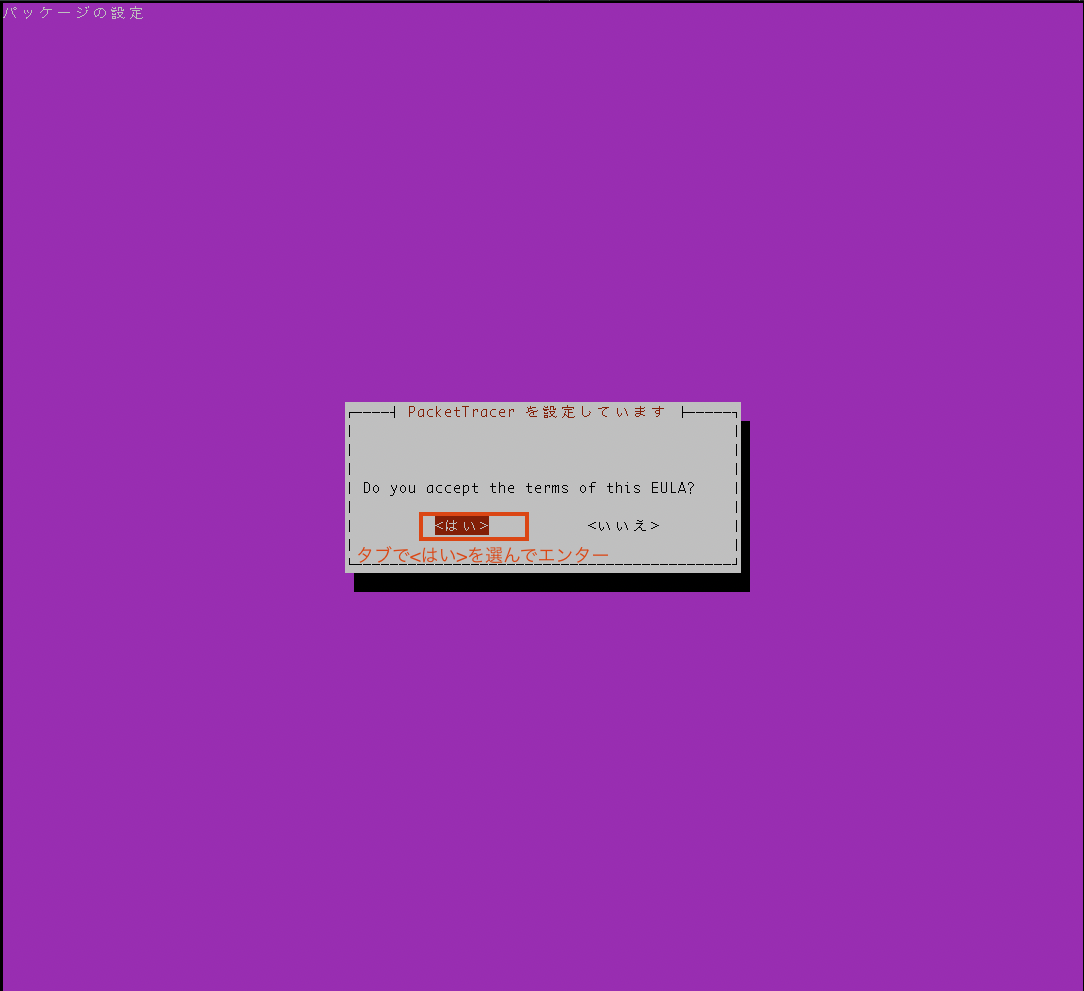
PacketTracer_730_amd64/accept-eula boolean true にあたる画面
実行方法例
ansible-playbook playbook_packettracer.yml -Kk --ask-pass
※オプションは例
※GCP 実施時は --ask-pass を入れると GatherFacts が返ってこないのが確認できたので、外して実施する
おわりに
PacketTracker を Minimal な Ubuntu サーバへインストールする ansible-playbook について記載した
普段 CentOS の扱いばかりで、Ubuntu / Debian ベースな OS はあまり扱いがなく、
debconf も普段使わない内容で詰まったポイントだったが、なんとかできた