はじめに
Docker ComposeでDB(MySQLとPostgreSQL)とAdminer(DB管理ツール)を起動して、NestJSアプリケーションと接続してみました。
本記事はその手順のメモです。
実装
実装は大きく分けてコンテナの起動とNestJSアプリケーションの接続の2つです。
コンテナの起動
MySQL, PostgreSQL, AdminerのDockerイメージは公式のものを使用します。
これらをDocker Composeで一発で起動できるように、docker-compose.ymlを以下のように記述します。
version: "3.8"

services:
  mysql:
    image: mysql:8.0.23
    command: --default-authentication-plugin=mysql_native_password
    restart: always
    environment:
      MYSQL_ROOT_PASSWORD: example
    ports:
      - 3306:3306

  postgres:
    image: postgres:13.1
    restart: always
    environment:
      POSTGRES_PASSWORD: example
    ports:
      - 5432:5432

  adminer:
    image: adminer
    restart: always
    ports:
      - 8080:8080
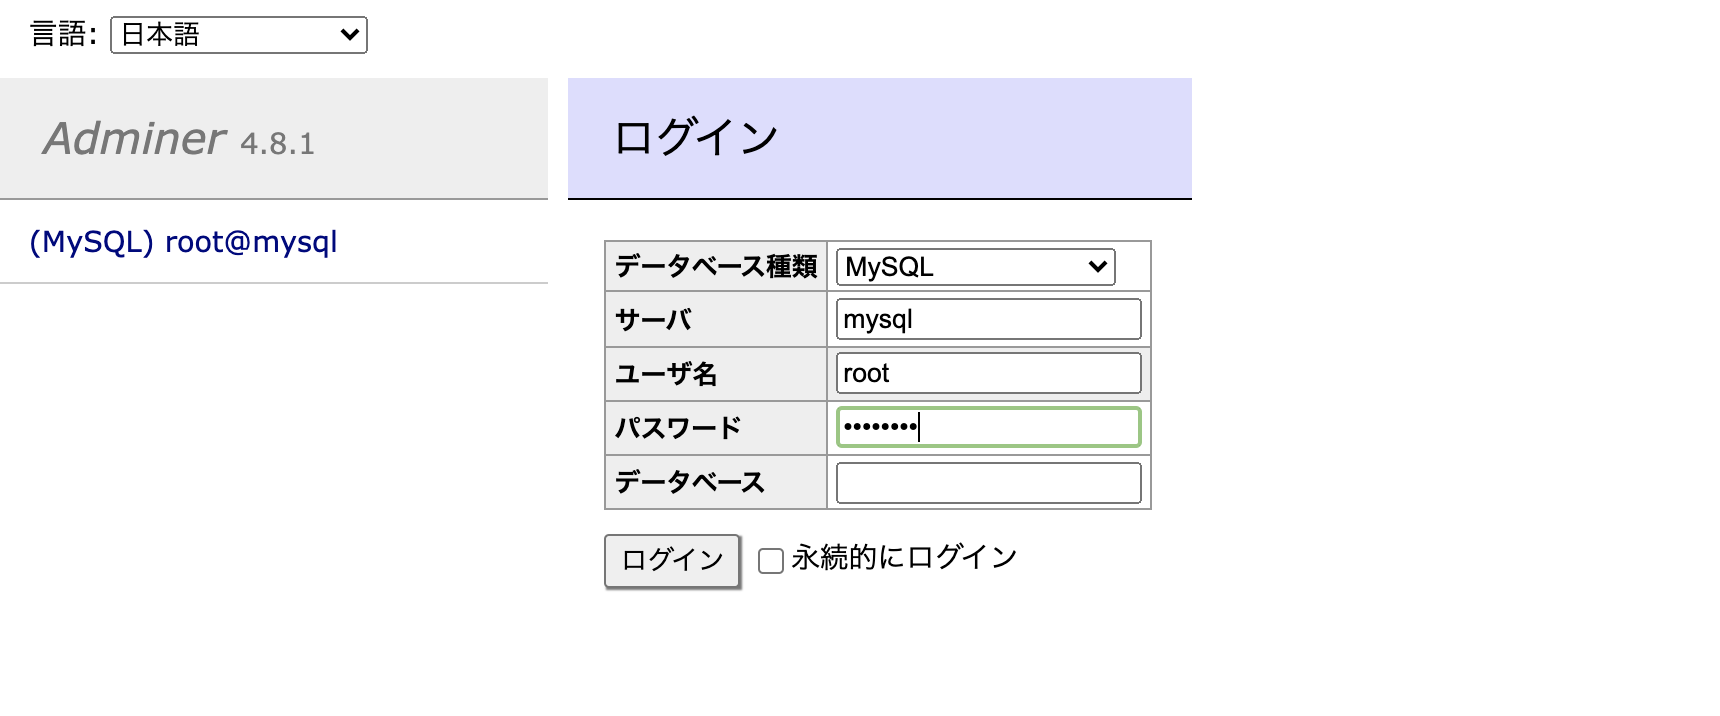
docker-compose upを実行し、localhost::8080にアクセスするとAdminerが開きます。

以下の情報を入力するとMySQLとPostgreSQLにログインすることができます。
データベース種類:MySQL (PostgreSQL)
サーバ:mysql (postgres)
ユーザ名:root (postgres)
パスワード:example
MySQLとPostgresQLでデータベースnest-eventsを作成します。

NestJSアプリケーションの接続
MySQLとの接続についてのみ記述します。
アプリケーションからDBを操作するにあたり、ORMとしてTypeORMを使用します。
そのため、まずは以下のパッケージをインストールします。
npm install @nestjs/typeorm typeorm mysql
次に、app.module.ts内でTypeOrmの設定を行います。
databaseに前項で作成したnest-events、entitiesにEventを記述することで、DBとEntityの紐付け(マッピング)を行います。
@Module({
  imports: [
    TypeOrmModule.forRoot({
      type: 'mysql',
      host: '127.0.0.1',
      port: 3306,
      username: 'root',
      password: 'example',
      database: 'nest-events',
      entities: [Event],
      synchronize: true
    }),
  ],
  controllers: [AppController, EventsController],
  providers: [AppService],
})
EntityであるEventは以下のように記述します。
各カラムにデコレータを付加することで、属性を指定しています。
@PrimaryGeneratedColumn()を付加すると、MySQLでいうAUTO_INCREMENTなカラムとなります。
import { Column, Entity, PrimaryGeneratedColumn } from 'typeorm';

@Entity()
export class Event {
  @PrimaryGeneratedColumn()
  id: number;

  @Column()
  name: string;

  @Column()
  description: string;

  @Column()
  when: Date;

  @Column()
  address: string;
}
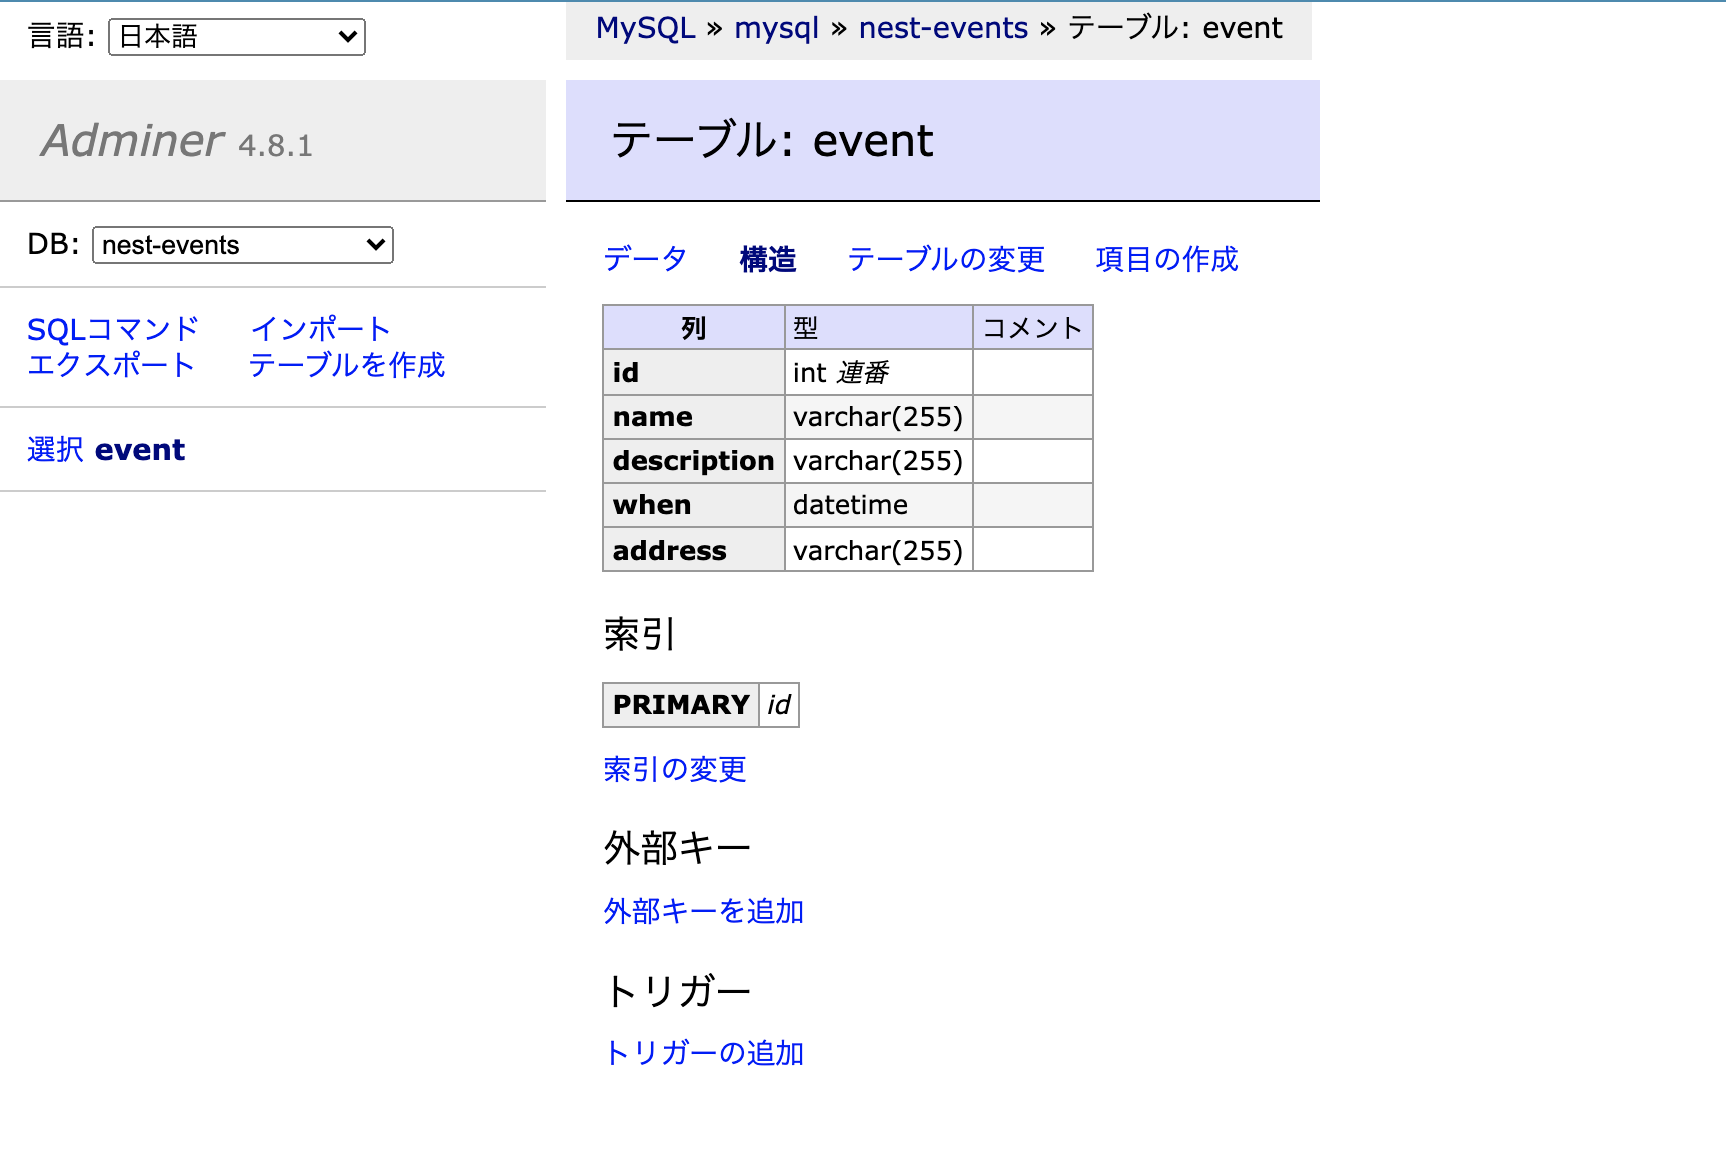
app.module.tsでsynchronize: trueを指定していたため、npm run start:devでアプリケーションを起動すると、以下のように自動的にテーブルが作られます。
参考資料
