Wantedly Advent Calendar 2015 13日目です。
iOS エンジニアの 杉上 @susieyy です。
Serverless Frameworkとは
Serverless FrameworkのV0(BETA)が12/8に遂にリリースされました。
Serverless Frameworkはサーバレスなアプリケーションサービスを構築するためのフレームワークで、AWSの各種サービスを相互活用して動作します。AWS Lambdaを中心に添えた構成によりメンテナンス性とスケーラビリティがが高いサービスを構築することができます。
Serverless (formerly JAWS): The serverless application framework – Use bleeding-edge AWS services to redefine how to build massively scalable (and cheap) apps!
歴史
Serverless Frameworkは前進であるJAWS Frameworkが装いも新たにフルリニューアルのもとローンチされた位置づけになっています。掲げていたビジョンこそ同じものの下位互換性はまったくなく、フォルダ構成やコンフィグファイルのフォーマットも変更されているためマイグレーションは難しそうなので、すでにJAWSを利用して開発を行っている場合は一から作り直すの方が良さそうです。
Serverless Frameworkの前進であるJAWS Frameworkは2015年の夏頃から開発が始まり、2015年の秋頃、AWS re:Invent 2015に登壇したことで注目を浴びます。Qiita上でもいくつか記事が書かれています。
サーバーレスアーキテクチャの有用性について参考になります。
JAWSを用いて実際にアプリケーションを作った記事です。
- JAWSフレームワークで、サーバレスな分散ロックサービス「Joumae」をつくった
- JAWS Frameworkを使ってお手軽にLambda+API GatewayでHelloWorldするメモ
- JAWS FrameworkでWebブラウザからS3にファイルをアップロードして、有効期限付きのダウンロード付きURLとパスワードを生成するサービスを作ってみた、時の開発メモ
そんな折v1.3.3のリリースを最後にJAWSの開発はコミュニティに対して沈黙します。ISSUEやPRがたくさん上がるのですが粛々とv1.4ブランチで開発を進めて、ブランチをコミットをドキドキしながら追いかけていると、Serverless: merge completedがマージされて別のフレームワークになっていました。
リニューアル後はコミュニティとの対話もあり、プルリクエストも受け入れて開発が進められています。
ロードマップ
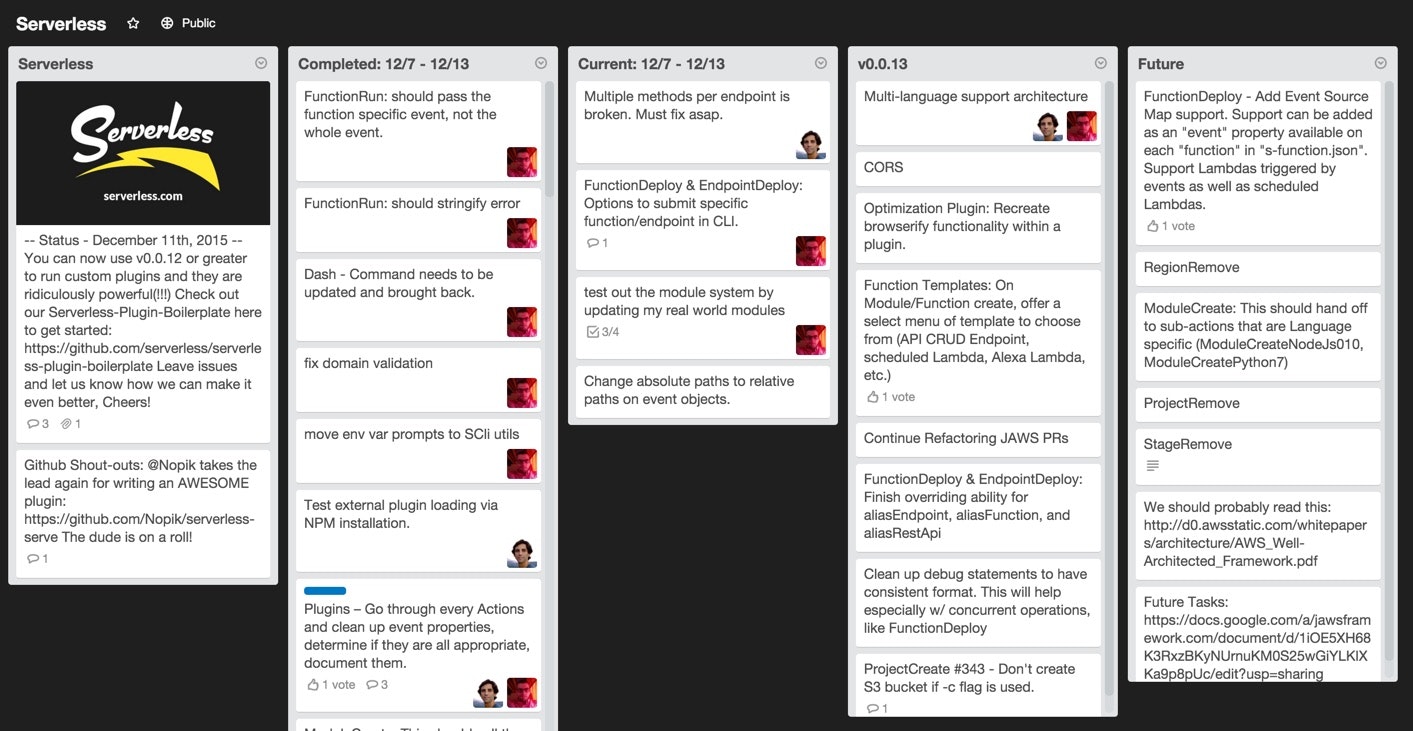
ロードマップはTrelloで管理されています。Futureのタブを覗くと未来を垣間見れるかもしれません。
インストール
$ npm install serverless -g
$ serverless version
0.0.12
Node V4 に依存いているので、必要ならバージョンを確認してインストールまたはバージョンアップします。
$ node --version
v4.1.1
AWSの準備
AWS CLIの準備
AWS CLIをインストールします。
$ pip install awscli
クレデンシャルを設定します。それぞれのKEYはご自身のものに書き換えてください。
[default]
aws_access_key_id=AKIAIOSFODNN7EXAMPLE
aws_secret_access_key=wJalrXUtnFEMI/K7MDENG/bPxRfiCYEXAMPLEKEY
デフォルトのリージョンを設定します。ここではLambdaまわりの新サービスのリリースがはやいus-east-1を指定しました。
[default]
region = us-east-1
詳細はオフィシャルドキュメントを参照ください。
使ってみる
CLIでコマンドにより操作します。コマンドはserverlessは長いので、slsがエイリアスになっています。
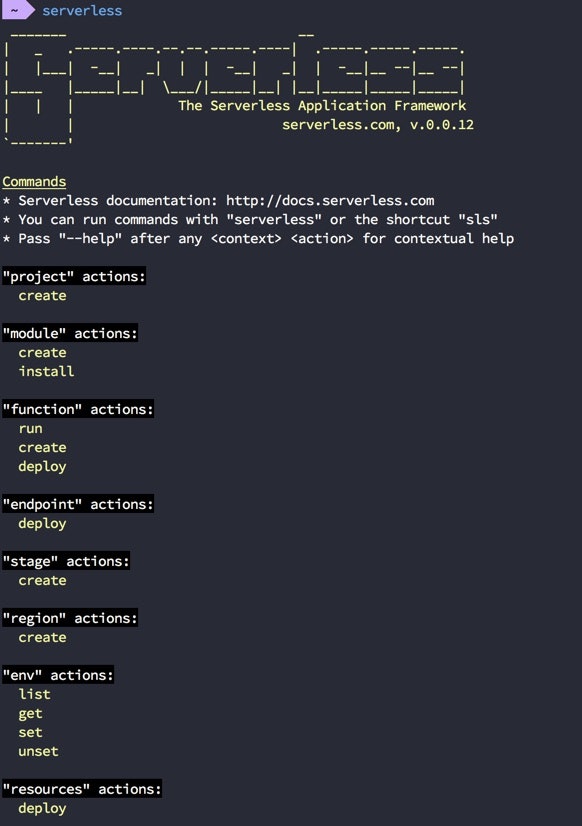
コマンドを入力すると以下のようなヘルプが見れます。ちょっとカッコイイですね。
プロジェクトの作成
まずはプロジェクトを作成します。作成は対話的に進めます。
プロジェクトの作成はAWSのCloudFormationスタックを作成するため5分ほどかかります。
$ serverless project create ServerlessTest
 _______                             __
|   _   .-----.----.--.--.-----.----|  .-----.-----.-----.
|   |___|  -__|   _|  |  |  -__|   _|  |  -__|__ --|__ --|
|____   |_____|__|  \___/|_____|__| |__|_____|_____|_____|
|   |   |             The Serverless Application Framework
|       |                          serverless.com, v.0.0.12
`-------'
Serverless: Enter a project name:  (serverless41FwFSrHx) ServerlessTest
Serverless: Enter a project domain (used for serverless regional bucket names):  (myapp.com)
Serverless: Enter an email to use for AWS alarms:  (me@myapp.com)
Serverless: Select a region for your project:
  > us-east-1
    us-west-2
    eu-west-1
    ap-northeast-1
Serverless: Select an AWS profile for your project:
  > default
Serverless: Creating a project region bucket on S3: serverless.useast1.myapp-n1jkfssr.com...
Serverless: Creating CloudFormation Stack for your new project (~5 mins)...
Serverless: Successfully created project: ServerlessTest
作成されたフォルダに移動して構成を確認してます。設定ファイルは3つほどです。
$ cd ServerlessTest
$ tree .
.
├── README.md
├── admin.env
├── back
│   └── modules
├── cloudformation
│   └── resources-cf.json
├── plugins
└── s-project.json

4 directories, 4 files
admin.envは~/.aws/credentialsを元にKEYが作られている模様です。
$ cat admin.env
SERVERLESS_ADMIN_AWS_ACCESS_KEY_ID= AKIAIOSFODNN7EXAMPLE
SERVERLESS_ADMIN_AWS_SECRET_ACCESS_KEY=wJalrXUtnFEMI/K7MDENG/bPxRfiCYEXAMPLEKEY
プロジェクトの設定ファイルは以下のようになります。(一部マスキングしています)
$ cat ./s-project.json
{
  "name": "ServerlessTest",
  "version": "0.0.1",
  "profile": "serverless-0",
  "location": "https://github.com/...",
  "author": "",
  "description": "",
  "domain": "myapp-xxxxxxxxxx.com",
  "stages": {
    "development": [
      {
        "region": "us-east-1",
        "iamRoleArnLambda": "arn:aws:iam::xxxxxxxxxx:role/ServerlessTest-development-r-IamRoleLambda-xxxxxxxxxx",
        "regionBucket": "serverless.useast1.myapp-xxxxxxxxxx.com"
      }
    ]
  },
  "custom": {},
  "plugins": []
}
Cloudformationの設定ファイルは以下のようになります。(一部マスキングしています)
$ cat cloudformation/resources-cf.json
{
  "AWSTemplateFormatVersion": "2010-09-09",
  "Description": "ServerlessTest resources",
  "Parameters": {
    "aaProjectName": {
      "Type": "String",
      "AllowedValues": [
        "ServerlessTest"
      ],
      "Default": "ServerlessTest"
    },
    "aaProjectDomain": {
      "Type": "String",
      "Default": "myapp-xxxxxxxxxx.com"
    },
    "aaStage": {
      "Type": "String",
      "AllowedValues": [
        "development"
      ]
    },
    "aaDataModelStage": {
      "Type": "String",
      "AllowedValues": [
        "development"
      ]
    },
    "aaNotficationEmail": {
      "Type": "String",
      "Default": "me@myapp.com"
    },
    "aaDefaultDynamoRWThroughput": {
      "Type": "String",
      "Default": "1"
    }
  },
  "Resources": {
    "IamRoleLambda": {
      "Type": "AWS::IAM::Role",
      "Properties": {
        "AssumeRolePolicyDocument": {
          "Version": "2012-10-17",
          "Statement": [
            {
              "Effect": "Allow",
              "Principal": {
                "Service": [
                  "lambda.amazonaws.com"
                ]
              },
              "Action": [
                "sts:AssumeRole"
              ]
            }
          ]
        },
        "Path": "/"
      }
    },
    "IamInstanceProfileLambda": {
      "Type": "AWS::IAM::InstanceProfile",
      "Properties": {
        "Path": "/",
        "Roles": [
          {
            "Ref": "IamRoleLambda"
          }
        ]
      }
    },
    "IamGroupLambda": {
      "Type": "AWS::IAM::Group",
      "Properties": {
        "Path": "/"
      }
    },
    "IamPolicyLambda": {
      "Type": "AWS::IAM::Policy",
      "Properties": {
        "PolicyName": {
          "Fn::Join": [
            "_-_",
            [
              {
                "Ref": "aaStage"
              },
              {
                "Ref": "aaProjectName"
              },
              "lambda"
            ]
          ]
        },
        "PolicyDocument": {
          "Version": "2012-10-17",
          "Statement": [
            {
              "Effect": "Allow",
              "Action": [
                "logs:CreateLogGroup",
                "logs:CreateLogStream",
                "logs:PutLogEvents"
              ],
              "Resource": {
                "Fn::Join": [
                  ":",
                  [
                    "arn:aws:logs",
                    {
                      "Ref": "AWS::Region"
                    },
                    "*:*"
                  ]
                ]
              }
            }
          ]
        },
        "Roles": [
          {
            "Ref": "IamRoleLambda"
          }
        ],
        "Groups": [
          {
            "Ref": "IamGroupLambda"
          }
        ]
      }
    }
  },
  "Outputs": {
    "IamRoleArnLambda": {
      "Description": "ARN of the lambda IAM role",
      "Value": {
        "Fn::GetAtt": [
          "IamRoleLambda",
          "Arn"
        ]
      }
    }
  }
}
モジュールの作成
$ serverless module create -m greetings -f hello
Serverless: Successfully created hello function.
Serverless: Installing "serverless-helpers" for this module via NPM...
serverless-helpers-js@0.0.3 node_modules/serverless-helpers-js
└── dotenv@1.2.0
Serverless: Successfully created new serverless module "greetings" with its first function "hello"
back フォルダ以下にmodulesフォルダが配置され、今回作成したgreetingsモジュールのフォルダと、その配下にhelloフォルダが生成されています。JAWS`ではプロジェクト単位でnode_modules`を管理していたのが、モジュール単位に変更されたようで、それぞれのモジュールで必要なライブラリだけをフレキシブルに利用できそうです。
$ tree .
.
├── README.md
├── admin.env
├── back
│   └── modules
│       └── greetings
│           ├── hello
│           │   ├── event.json
│           │   ├── handler.js
│           │   └── s-function.json
│           ├── lib
│           │   └── index.js
│           ├── node_modules
│           │   └── serverless-helpers-js
│           │       ├── README.md
│           │       ├── env
│           │       │   └── index.js
│           │       ├── index.js
│           │       ├── node_modules
│           │       │   └── dotenv
│           │       │       ├── Contributing.md
│           │       │       ├── README.md
│           │       │       ├── config.js
│           │       │       ├── dotenv.png
│           │       │       ├── lib
│           │       │       │   └── main.js
│           │       │       ├── package.json
│           │       │       └── test
│           │       │           ├── config.js
│           │       │           └── main.js
│           │       └── package.json
│           ├── package
│           ├── package.json
│           └── s-module.json
├── cloudformation
│   └── resources-cf.json
├── plugins
└── s-project.json

15 directories, 22 files
作成されたhelloファンクションのコードを覗いてみます。
$ cat back/modules/greetings/lib/index.js
/**
 * Lib
 */

module.exports.respond = function(event, cb) {

  var response = {
    message: "Your Serverless function ran successfully!"
  };

  return cb(null, response);
};
デプロイ
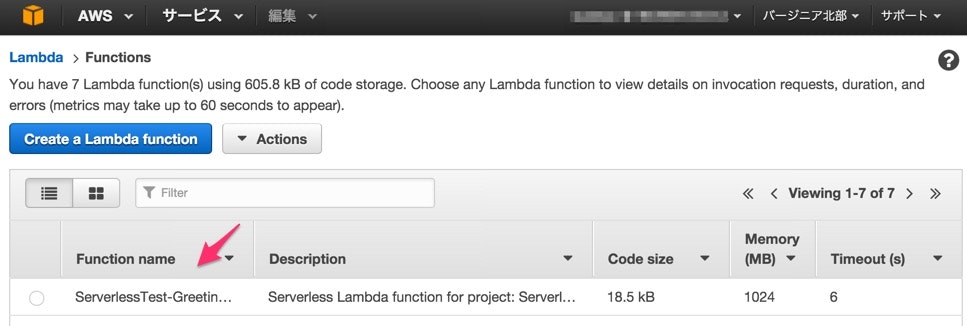
早速このファンクション(Lambda)をデプロイしてみます。
$ serverless function deploy
serverless function deploy
Serverless: Deploying functions in "development" to the following regions: us-east-1
Serverless: Successfully deployed functions in "development" to the following regions: us-east-1
AWSのコンソールで確認してみます。
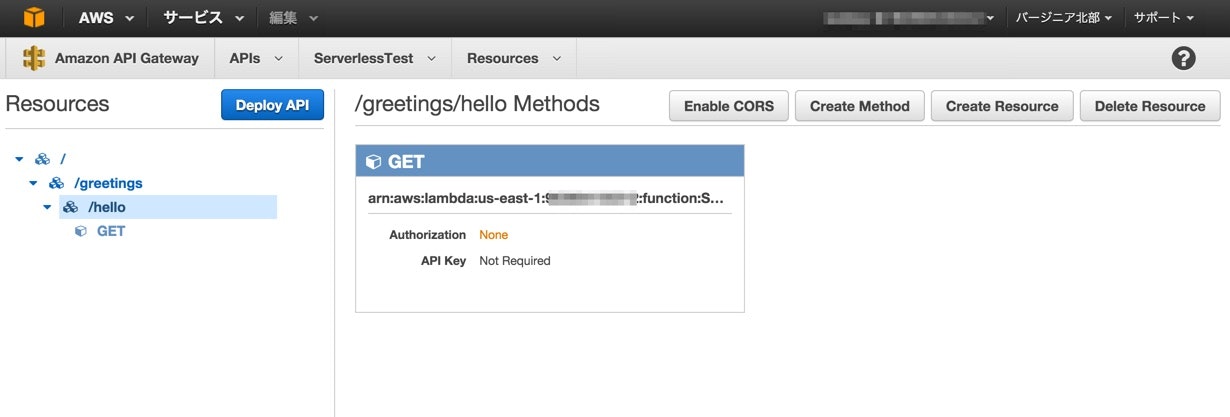
続いてエンドポイント(ApiGateway)をデプロイしてみます。(一部マスキングしています)
$ serverless endpoint deploy
Serverless: Deploying endpoints in "development" to the following regions: us-east-1
Serverless: Successfully deployed endpoints in "development" to the following regions:
Serverless: us-east-1 ------------------------
Serverless:   GET - https://xxxxxxxxxx.execute-api.us-east-1.amazonaws.com/development/greetings/hello
エンドポイントのURLが作成されたのでアクセスしてみます。(一部マスキングしています)
$ http https://xxxxxxxxxx.execute-api.us-east-1.amazonaws.com/development/greetings/hello
HTTP/1.1 200 OK
Connection: keep-alive
Content-Length: 56
Content-Type: application/json
Date: Sun, 13 Dec 2015 16:15:44 GMT
Via: 1.1 a6980301a21d33b02853b61627119c24.cloudfront.net (CloudFront)
X-Amz-Cf-Id: UH7EoPOKGZ5jilolWvqeGo0BWaBIY04pPbvB8mhXcLjKpiFu4lZldg==
X-Cache: Miss from cloudfront
x-amzn-RequestId: c1fd5ba5-a1b4-11e5-8cfa-57bae789aad5

{
    "message": "Your Serverless function ran successfully!"
}
AWSのコンソールで確認してみます。
以上で簡単なAPIを作成することができました。
ローカルでファンクションの実行
デプロイ前に開発中のファンクションの動作を確認するためにrunコマンドがあります。
$ serverless function run
serverless function run
Serverless: Running GreetingsHello...
Serverless: -----------------
Serverless: Success! - This Response Was Returned:
Serverless: {"message":"Your Serverless function ran successfully!"}
もう1つファンクションを増やしてみる
greetingsモジュール配下にbyeファンクションを追加しました。
serverless function create -m greetings -f bye
Serverless: Successfully created bye function.
もう一度runを走らせてみると、どのファンクションを実行するのか対話的に選択できるようになっています。
$ serverless function run
Serverless: Select a function to run:
    greetings
  >   GreetingsBye
      GreetingsHello
デプロイは複数選択してアップロードできます。
$ serverless function deploy
Serverless: Select the functions you wish to deploy:
    greetings
  >   GreetingsBye
      GreetingsHello
    - - - - -
    Deploy
まとめ
AWS Lambdaを活用したFrameworkとして注目されているServerless Frameworkが成熟することで、サービスの作り方に新たな一石を投じるインパクトを秘めていると感じています。
Lambdaを用いることで費用を抑えつつも、高可用でスケーラブル、そしてOSやアプリケーションサーバのメンテナンスや運用からも開放される新たな境地にわくわくしています。
