windowsで統合版マイクラのサーバーを立てる方法。PCに直接サーバーを立てて、ローカルで接続する方法を紹介します。
本記事は統合版マインクラフト Minecraft for Windows で動作確認を行っています。
Minecraft - 1.21.130 (Bedrock)
bedrock-server-1.21.130.4
Windows 11 Home 25H2
サーバーのダウンロード
サーバーをダウンロードします。下記サイトで配布されています。windowsのPCで、windows版の利用規約に同意し、ダウンロードします。
zipファイルがダウンロードされます。適当なフォルダに展開します。
server.properties
サーバーの設定を変更します。主要な項目のみ抜粋して記載します。
サーバーの名前
server-name=sumiso creative
# Used as the server name
# Allowed values: Any string without semicolon symbol.
ゲームモード
サバイバルsurvival、クリエイティブcreative、アドベンチャーadventureから指定します。
gamemode=creative
# Sets the game mode for new players.
# Allowed values: "survival", "creative", or "adventure"
難易度
ピースフルpeaceful、イージーeasy、ノーマルnormal、ハードhardから指定します。
difficulty=hard
# Sets the difficulty of the world.
# Allowed values: "peaceful", "easy", "normal", or "hard"
チート
trueで有効化します。
allow-cheats=true
# If true then cheats like commands can be used.
# Allowed values: "true" or "false"
最大アクセス人数
allowlist.jsonで指定したユーザーは満員でも入れます。
max-players=5
# The maximum number of players that can play on the server.
# Allowed values: Any positive integer
許可リストに載っているプレイヤーだけ接続許可
falseの場合、誰でも入れるようになります。
allow-list=true
# If true then all connected players must be listed in the separate allowlist.json file.
# Allowed values: "true" or "false"
ポート デフォルトは19132です。
server-port=19132
# Which IPv4 port the server should listen to.
# Allowed values: Integers in the range [1, 65535]

server-portv6=19133
# Which IPv6 port the server should listen to.
# Allowed values: Integers in the range [1, 65535]
描画距離
サーバーが配信する最大描画距離を設定します。
view-distance=12
# The maximum allowed view distance in number of chunks.
# Allowed values: Positive integer equal to 5 or greater.
シミュレーション距離
レルムだと4固定ですが、サーバーなら最大12チャンクが指定できます。
tick-distance=4
# The world will be ticked this many chunks away from any player.
# Allowed values: Integers in the range [4, 12]
無操作時間タイムアウト
放置しているプレイヤーを何分で追い出すか指定します。0で無効化します。
player-idle-timeout=0
# After a player has idled for this many minutes they will be kicked. If set to 0 then players can idle indefinitely.
# Allowed values: Any non-negative integer.
シード値
空にするとランダムで生成されます
level-seed=141
# Use to randomize the world
# Allowed values: Any string
ワールド名
level-name=sumiso creative
# Allowed values: Any string without semicolon symbol or symbols illegal for file name: /\n\r\t\f`?*\\<>|\":
allowlist.json
サーバーに接続を許可するプレイヤーを指定します。
[
    {
        "ignoresPlayerLimit": true,
        "name": "sumisoc0db8c"
    },
    {
        "ignoresPlayerLimit": false,
        "name": "friendName"
    }
]
ignoresPlayerLimitをtrueにすると、サーバーが満員でも接続できます。
permissions.json
プレイヤーの権限を設定します。オペレーターoperator、メンバーmember、ビジターvisitorから選択します。xuidはサーバーに接続すると、接続したプレイヤーの情報がターミナルに表示されるので選択して右クリックでコピーできます。
[
    {
        "permission": "operator",
        "xuid": "451298348"
    },
    {
        "permission": "member",
        "xuid": "52819329"
    },
    {
        "permission": "visitor",
        "xuid": "234114123"
    }
]
サーバー起動
bedrock_server.exeをダブルクリックして起動します。ターミナルと、windowsセキュリティのポップアップが表示されます。「パブリック ネットワークとプライベート ネットワークにこのアプリへのアクセスを許可しますか?」許可をクリックします。
停止するときは、ターミナルでstopと入力してEnterです。
接続確認
統合版マイクラ(以下クライアントと表記)を起動します。サーバータブより、サーバーを追加します。

サーバー名はお好みで。サーバーアドレスは127.0.0.1を指定します。同じPCで起動しているサーバーに接続します。ポートはserver-portに合わせます。デフォルトは19132です。
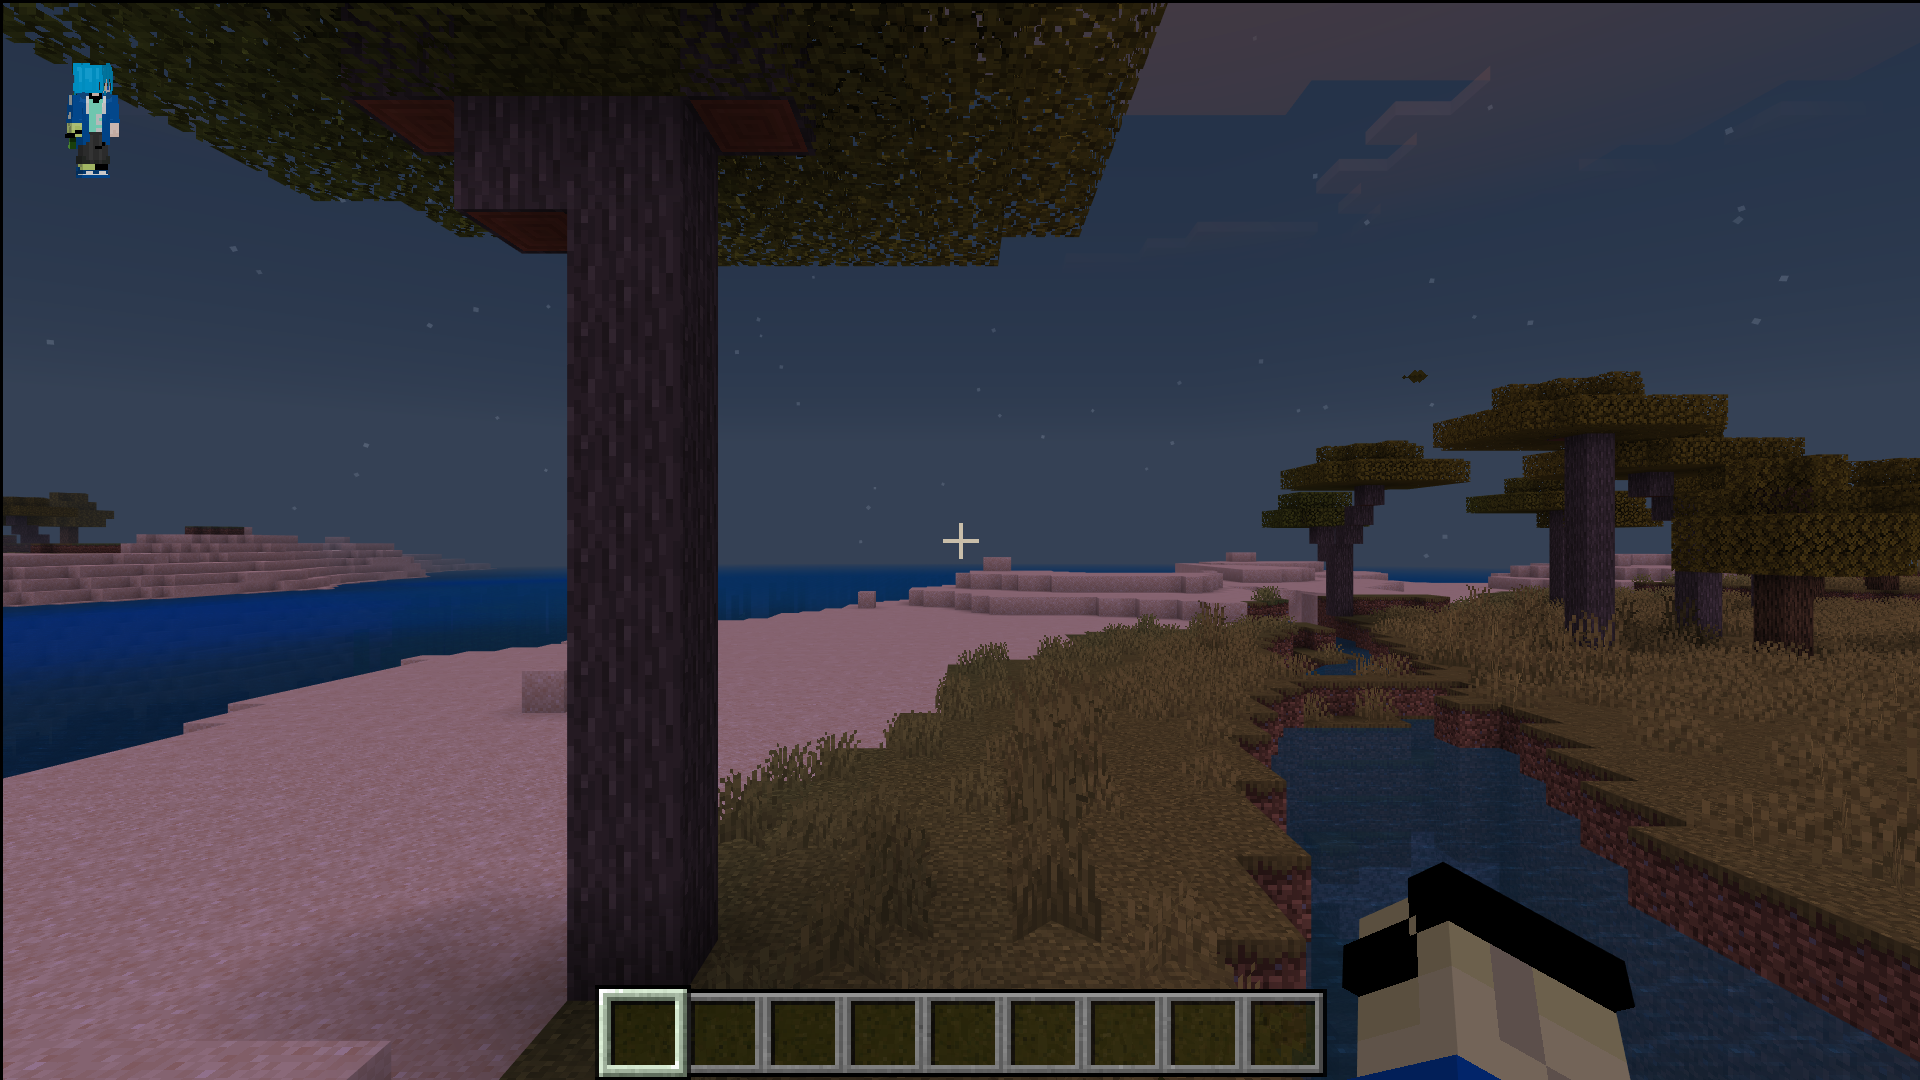
追加してプレイを選択します。
接続成功しました。サーバーが起動している限り、時が進みます。記事を書いている間に、夜になっていました。
停止するときは、サーバーが起動しているターミナルでstopと入力してEnterです。
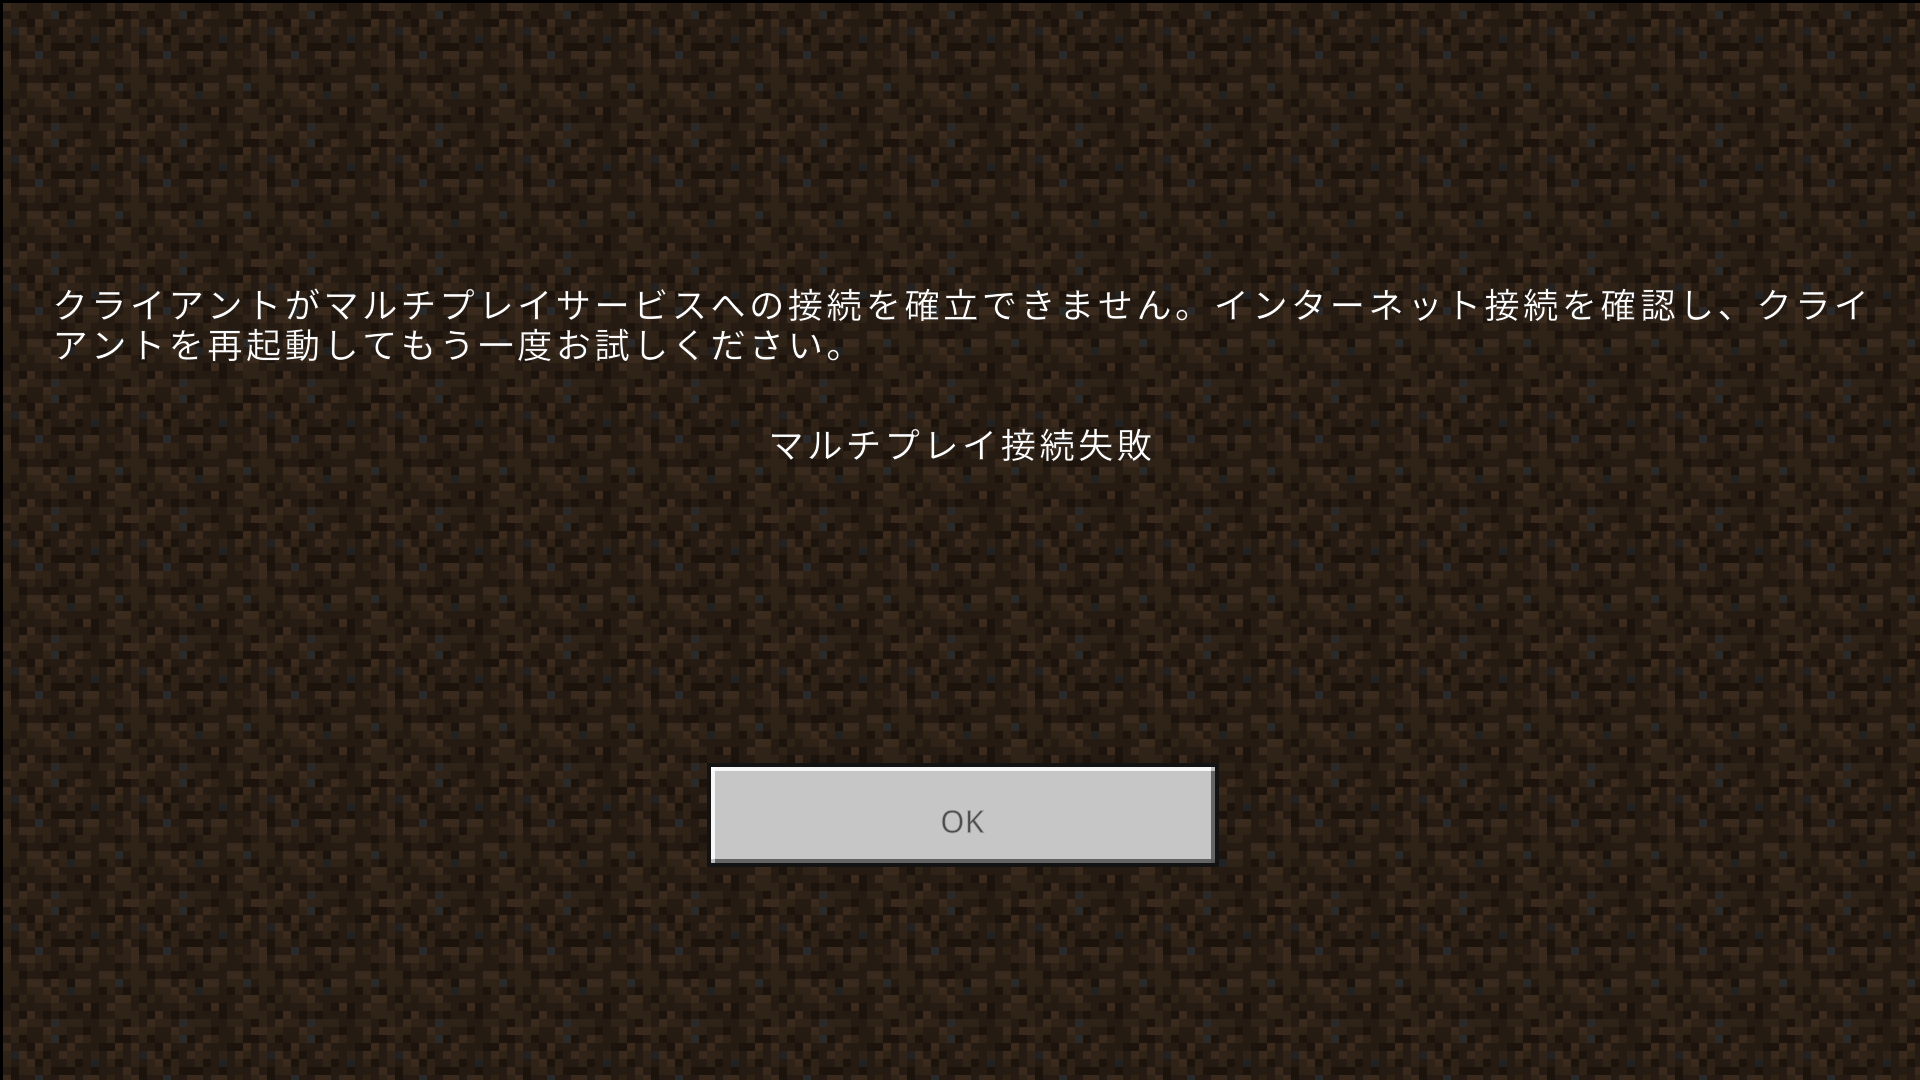
ちなみに、サーバーアドレスにlocalhostを指定すると接続できず下記画面が表示されます。127.0.0.1を指定してください。
セーブデータ
サーバーを起動するとworldsフォルダが生成され、その中にlevel-nameで指定したフォルダが生成されています。フォルダごとコピーすればバックアップできます。
ワールドデータを入れ替えれば、クライアントで遊んでいたワールドをサーバーで配信できます。クライアントのワールドデータは次の場所にあります。
%APPDATA%\Minecraft Bedrock\Users\[数字のフォルダ]\games\com.mojang\minecraftWorlds
%APPDATA%\Minecraft Bedrock\Users\からたどっていくのがオススメです。
ワールドを入れ替えた後はlevel-nameをフォルダ名に合わせて変更してください。
ちなみに、自作スーパーフラットのlevel.datを導入すると、サーバーでも反映されます。
アドオンの導入方法
bedrock_server.exeと同じフォルダにある、resource_packs behavior_packs にそれぞれアドオンを導入します。level-nameで指定したフォルダを作成し、使用するアドオンを定義するjsonファイルを作成します。
[
	{
		"pack_id" : "50429eb3-549c-4d27-bc5d-81d8b6a6df39",
		"version" : [ 1, 0, 0 ]
	}
]
[

	{
		"pack_id" : "9d949c7b-2a7d-435e-b60d-ad0d9974bfc5",
		"version" : [ 1, 0, 0 ]
	}
]
ビヘイビアーパック、リソースパックについてそれぞれ、manifest.jsonのheaderのuuidを記載します。
server.propertiesでテクスチャパックの要求を有効化します。
texturepack-required=true
# Force clients to use texture packs in the current world
# Allowed values: "true" or "false"
しかしリソースパックは配信されないので、クライアント側で別途導入します。
bedrock_server.exeをダブルクリックして起動、クライアントで接続します。
アドオンが導入できました。
使用しているアドオンはこちらで作り方を紹介しています。
まとめ
windowsで統合版マイクラのサーバーの立て方を紹介しました。クライアントと同じwindowsのPCにサーバーを立てて接続しました。
なお、オンラインでマルチプレイするには、ポート開放などさらに手順が必要です。
ポート開放の手順はこちらの記事「windows ファイアウォール」の設定と同じです。
サーバーを立てるより、ワールド設定でマルチプレイ有効化するのが簡単でセキュリティ的にも安全です。