概要
IBMのWatson Assistant(旧Conversation)によりチャットボットを作成可能だ。
IBM Bluemixにアカウント登録し開発用途で無料で作成が可能だ。
今回は、Watson Assistantの機能を使って、サービスデスクのチャットボットがチャットでユーザーまたは部門追加の要望を受け付ける対話を作成する。
作成した対話は「Try it」ですぐにブラウザー上で試す事が可能だ。
また、チャットボット用のスクリプトからは、REST Messageを通じて対話が可能だ。REST MessageもWatson AssistantのAPI Explorerを使ってすぐにお試しが可能だ。
ここでは、すでに作成済みの対話(Dialog)をJSON形式でエクスポートしたファイルをインポートすることにより対話を作成する手順を紹介する。対話(Dialog)、Intent、Entityの手動による作成方法の手順は参考資料により確認して欲しい。
前提
アカウントの作成、Watson AssistantサービスのLightプランの利用方法までは、実施済みとする。
参考資料
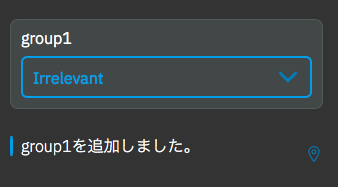
最終的にできる対話(Dialog)
手順
新規WorkspaceをAssistantに追加
ツールを「ツールの起動」から起動sるう。
Createの右横の↑のアイコンをクリックして、Workspaceファイルからインポートして追加する。
ファイル選択画面から下記のAddUserOrGroup.jsonを選択して「Import」でWorkspaceを追加する。
{
    "name": "AddUserOrGroup",
    "intents": [
        {
            "intent": "greetings",
            "examples": [
                {
                    "text": "hi"
                },
                {
                    "text": "hello"
                },
                {
                    "text": "こんばんは"
                },
                {
                    "text": "おはよう"
                },
                {
                    "text": "こんにちは"
                },
                {
                    "text": "おす"
                },
                {
                    "text": "どうも"
                },
                {
                    "text": "まいど"
                }
            ],
            "description": "hello"
        },
        {
            "intent": "add",
            "examples": [
                {
                    "text": "部門"
                },
                {
                    "text": "追加"
                },
                {
                    "text": "新規作成"
                },
                {
                    "text": "add"
                },
                {
                    "text": "ユーザー"
                }
            ],
            "description": "追加"
        },
        {
            "intent": "goodbye",
            "examples": [
                {
                    "text": "さようなら"
                },
                {
                    "text": "おわり"
                },
                {
                    "text": "end"
                },
                {
                    "text": "quit"
                },
                {
                    "text": "bye"
                },
                {
                    "text": "ばいばい"
                }
            ],
            "description": "good bye"
        }
    ],
    "entities": [
        {
            "entity": "addobject",
            "values": [
                {
                    "type": "synonyms",
                    "value": "group",
                    "metadata": null,
                    "synonyms": [
                        "group",
                        "部門",
                        "グループ"
                    ]
                },
                {
                    "type": "synonyms",
                    "value": "user",
                    "metadata": null,
                    "synonyms": [
                        "user",
                        "ユーザ",
                        "アカウント",
                        "ユーザー"
                    ]
                }
            ],
            "metadata": null,
            "description": null,
            "fuzzy_match": false
        }
    ],
    "language": "ja",
    "metadata": {
        "api_version": {
            "major_version": "v1",
            "minor_version": "2017-05-26"
        }
    },
    "description": "新しいユーザーまたはグループを追加する",
    "dialog_nodes": [
        {
            "type": "standard",
            "title": null,
            "output": {
                "text": {
                    "values": [
                        "ユーザーまたはグループですか?"
                    ],
                    "selection_policy": "sequential"
                }
            },
            "parent": "node_6_1524918911996",
            "context": null,
            "metadata": {},
            "next_step": null,
            "conditions": "true",
            "description": null,
            "dialog_node": "node_1_1524954378575",
            "previous_sibling": "node_5_1524951184739"
        },
        {
            "type": "standard",
            "title": null,
            "output": {
                "text": {
                    "values": [
                        "追加する@(addobject)名を入力してください。"
                    ]
                }
            },
            "parent": "node_6_1524918911996",
            "context": {
                "addtarget": "@addobject"
            },
            "metadata": {
                "_customization": {
                    "mcr": false
                }
            },
            "next_step": null,
            "conditions": "@addobject",
            "description": null,
            "dialog_node": "node_5_1524951184739",
            "digress_out": "allow_all",
            "previous_sibling": null
        },
        {
            "type": "response_condition",
            "title": null,
            "output": {
                "text": {
                    "values": [
                        "追加するユーザー名を入力してください。"
                    ]
                }
            },
            "parent": "node_5_1524951184739",
            "context": null,
            "disabled": true,
            "metadata": {},
            "next_step": null,
            "conditions": "@addobject:ユーザー",
            "description": null,
            "dialog_node": "node_6_1524951234855",
            "previous_sibling": "node_11_1524953286671"
        },
        {
            "type": "standard",
            "title": null,
            "output": {
                "text": {
                    "values": [
                        "$(objectname)を追加しました。"
                    ],
                    "selection_policy": "sequential"
                }
            },
            "parent": "node_5_1524951184739",
            "context": {
                "objectname": "<?input.text?>"
            },
            "metadata": {},
            "next_step": null,
            "conditions": "true",
            "description": null,
            "dialog_node": "node_11_1524953286671",
            "previous_sibling": null
        },
        {
            "type": "standard",
            "title": null,
            "output": {
                "text": {
                    "values": [
                        "こんにちは。こちらサポートデスクです。用件をどうぞ!",
                        "今晩は。こちらサポートデスクです。遅くまでご苦労様です。"
                    ],
                    "selection_policy": "sequential"
                }
            },
            "parent": null,
            "context": null,
            "metadata": {},
            "next_step": null,
            "conditions": "#greetings",
            "digress_in": "does_not_return",
            "description": null,
            "dialog_node": "node_4_1524918503718",
            "previous_sibling": "node_6_1524918911996"
        },
        {
            "type": "standard",
            "title": null,
            "output": {
                "text": {
                    "values": [
                        "またのご利用お待ちしております。"
                    ],
                    "selection_policy": "sequential"
                }
            },
            "parent": null,
            "context": null,
            "metadata": {},
            "next_step": null,
            "conditions": "#goodbye",
            "digress_in": "does_not_return",
            "description": null,
            "dialog_node": "node_5_1524918589117",
            "previous_sibling": "node_4_1524918503718"
        },
        {
            "type": "standard",
            "title": "その他",
            "output": {
                "text": {
                    "values": [
                        "解釈できませんでした。申し訳ありませんが違う表現を試していただけますか。",
                        "恐れ入りますが表現を変えていただけますか。解釈できませんでした。"
                    ],
                    "selection_policy": "sequential"
                }
            },
            "parent": null,
            "context": null,
            "metadata": {},
            "next_step": null,
            "conditions": "anything_else",
            "description": null,
            "dialog_node": "その他",
            "previous_sibling": "node_5_1524918589117"
        },
        {
            "type": "standard",
            "title": null,
            "output": {
                "text": {
                    "values": [],
                    "selection_policy": "sequential"
                }
            },
            "parent": null,
            "context": {},
            "metadata": {},
            "next_step": {
                "behavior": "jump_to",
                "selector": "condition",
                "dialog_node": "node_5_1524951184739"
            },
            "conditions": "#add",
            "description": null,
            "dialog_node": "node_6_1524918911996",
            "previous_sibling": "ようこそ"
        },
        {
            "type": "standard",
            "title": "ようこそ",
            "output": {
                "text": {
                    "values": [
                        "はい、サービスデスクです。ご用件を入力してください。"
                    ],
                    "selection_policy": "sequential"
                }
            },
            "parent": null,
            "context": {
                "addtarget": "",
                "objectname": ""
            },
            "metadata": {},
            "next_step": null,
            "conditions": "welcome",
            "description": null,
            "dialog_node": "ようこそ",
            "previous_sibling": null
        }
    ],
    "workspace_id": "fb592305-accf-4183-ae54-e78fa1a70eb0",
    "counterexamples": [],
    "learning_opt_out": false
}
追加されたWorkspaceの確認
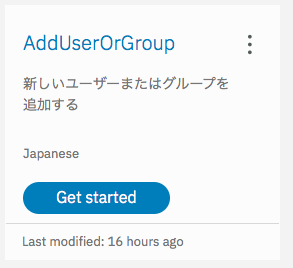
Workspacesタブに「AddUserOrGroup」Workspaceが追加されているので、「Get started」をクリックしてWorkspaceを開く。
Intents, Entities, Dialogにそれぞれ設定が追加されていることを確認する。
対話(Dialog)を試す
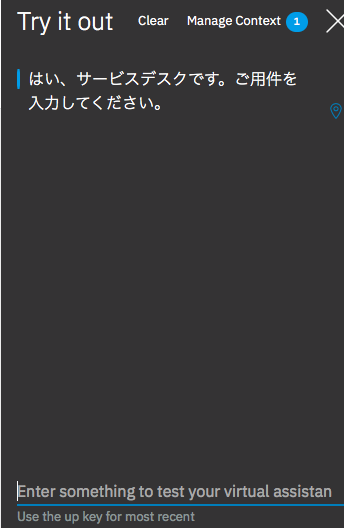
Workspace右上の「Try it」をクリックすると、作成したWatson Assistantの設定に基づいた対話を実際に試す事ができる。
表示されたら、最初に提示した通りの対話が出来ることを確認する。
Rest Message APIの起動確認
Watson API Explorerを起動する。
一番上の「Message」を選択する。
workspace-idには自分のworkspace-idを入力する。
versionはそのままで良い。(バージョン番号が日付になっている、指定した日付に最も近い最新バージョンのAPIが起動する)
workspaceIDには自分のworkspaceIDを下記の「View Details」から確認する。
bodyに対話を行うJSONメッセージを設定する。
{
  "input": {
    "text": "ユーザーを追加"
  },
  "context":{}
}
Try It Outボタンをクリックすると、Response Bodyに下記が出力される。
Contextは次回の会話を継続するためのオブジェクトだ。
次にコンテキスト部分をBodyにContextに置き換えて、input.textにユーザー名を入力することで、ユーザーの追加の対話が完了する。
{
  "intents": [
    {
      "intent": "add",
      "confidence": 0.9990630626678467
    }
  ],
  "entities": [
    {
      "entity": "addobject",
      "location": [
        0,
        4
      ],
      "value": "ユーザー",
      "confidence": 1
    }
  ],
  "input": {
    "text": "ユーザーを追加"
  },
  "output": {
    "text": [
      "追加するユーザー名を入力してください。"
    ],
    "nodes_visited": [
      "node_6_1524918911996",
      "node_5_1524951184739"
    ],
    "log_messages": []
  },
  "context": {
    "conversation_id": "79a44a4a-19ad-4e00-969c-035b45a9348d",
    "system": {
      "dialog_stack": [
        {
          "dialog_node": "node_5_1524951184739"
        }
      ],
      "dialog_turn_counter": 1,
      "dialog_request_counter": 1,
      "_node_output_map": {
        "node_5_1524951184739": [
          0,
          0
        ]
      }
    }
  }
}
また、REST Message APIを外部から起動する場合はWorkspaceIDの他に下記の資格情報表示ボタンで表示されるユーザ名とパスワードが必要となるため、控えておく。
REST Messageについて
REST Messageは、下記のURLでBasic認証によりアクセスが可能だ。
BASIC認証に使用するユーザ名とパスワードは資格情報で表示したものを設定する。
workspaceIDは作成したworkspaceのView Detailで表示されたものを使用する。
https://gateway.watsonplatform.net/assistant/api/v1/workspaces/${workspace_id}/message
REST Messageの応答について
REST Messageの応答のResponse Bodyで重要なのは、「Intent」と「Entity」だ。ここに、Watson Assistantがユーザーとの対話(Dialog)を通じて取得したユーザーのIntent(したい事)と、Entity(対象物)が設定されている。
REST Messsageを使って自作のチャットボットを作成する場合は、このIntentとEntityを使って、何らかの実際のアクションを起動することが可能となる。
コンテキストについて
IntentやEntity、その他、対話で取得できた情報についてコンテキストに保持する仕組みとしている。
コンテキストはREST Messsageで対話した場合も応答メッセージに含まれる。チャットボットのスクリプトからはこのコンテキストの情報を処理を行うように設計する。
コンテキストの初期化
Intentをコンテキストに保存
アカウント名をコンテキストに保存
REST Messageで追加するアカウント名まで入力後の応答メッセージ
{
    "intents": [],
    "entities": [],
    "input": {
        "text": "user01"
    },
    "output": {
        "text": [
            "user01を追加しました。"
        ],
        "nodes_visited": [
            "node_11_1524953286671"
        ],
        "log_messages": []
    },
    "context": {
        "addtarget": "user",
        "conversation_id": "23285c1f-87f3-49d8-b6ff-2a132c5d9d60",
        "objectname": "user01",
        "system": {
            "_node_output_map": {
                "node_11_1524953286671": [
                    0
                ],
                "node_4_1524918503718": [
                    1
                ],
                "node_5_1524951184739": [
                    0,
                    0
                ]
            },
            "dialog_request_counter": 8,
            "dialog_stack": [
                {
                    "dialog_node": "root"
                }
            ],
            "dialog_turn_counter": 8,
            "branch_exited": true,
            "branch_exited_reason": "completed"
        }
    }
}
contextのaddtargetとobjectnameが設定されているので、この値を使ってチャットボットなどのスクリプトの処理を実施する。
最後に
IntentやEntityは何らかのタイミングで初期化されており、アカウント名を入力後のメッセージには含まれていない。
そのため、IntentやEntityが確定したタイミングでContextにIntentやEntityを保持するようにする必要がある。


