はじめに
Amazon Managed Blockchain サービスは、Ethereum や Hyperledger Fabric を構成してくれるマネージドサービスです。自分たちで EC2 で構成する時と比べて、数クリックで Node を含めた環境が出来上がるので、自分たちのアプリケーションに時間を費やすことができます。
前の記事では、Hyperledger Fabric を触ってみる内容でした。今回の記事では、Ethereum を触ってみる内容になっています。Ethereum 自体を深く理解できていないので、Ethereum 自体の勉強も兼ねています。
次の URL を参考に進めています。
- AWS Document のサンプル
- クラメソさんの Blog : AWSではじめるブロックチェーン Amazon Managed Blockchain
Ethereum Node 作成
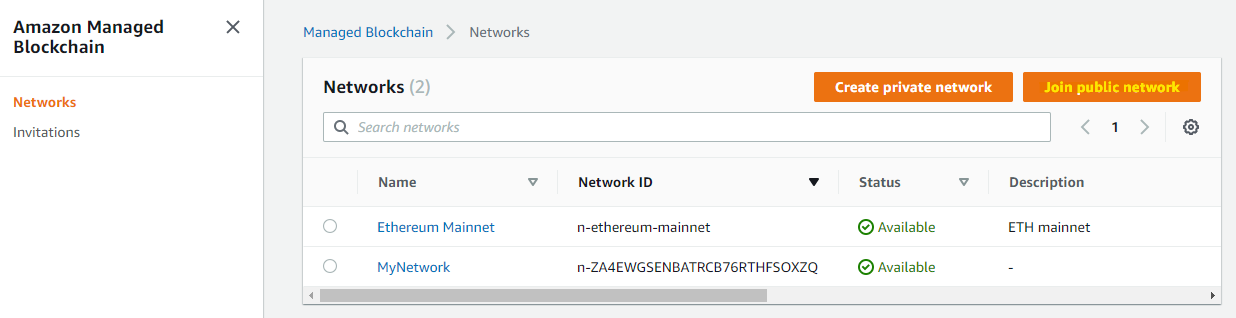
まず、Amazon Managed Blockchain のサービスページに移動して、Join public network を選択します。
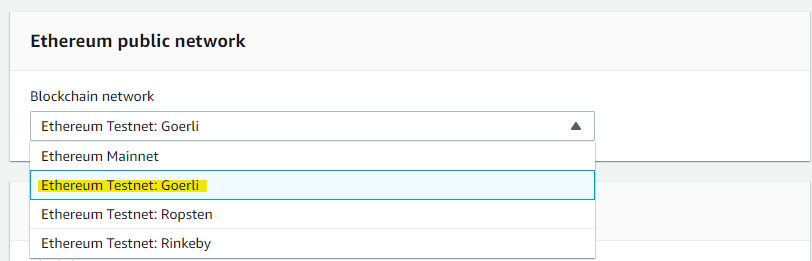
4 つのネットワークから選択できます。今回はテスト用なので、Goerli を選んでみます。AWS Document に、Goerli テスト用途としておすすめと書かれていたので、これを選びます。Mainnet は、実際にお金が掛かる本番用ネットワークなので、動作確認は Testnet を利用すると良いです。
URL : https://docs.aws.amazon.com/ja_jp/managed-blockchain/latest/ethereum-dev/ethereum-nodes.html
Ethereum node をどのように構成するのか選択して、Create node を押します
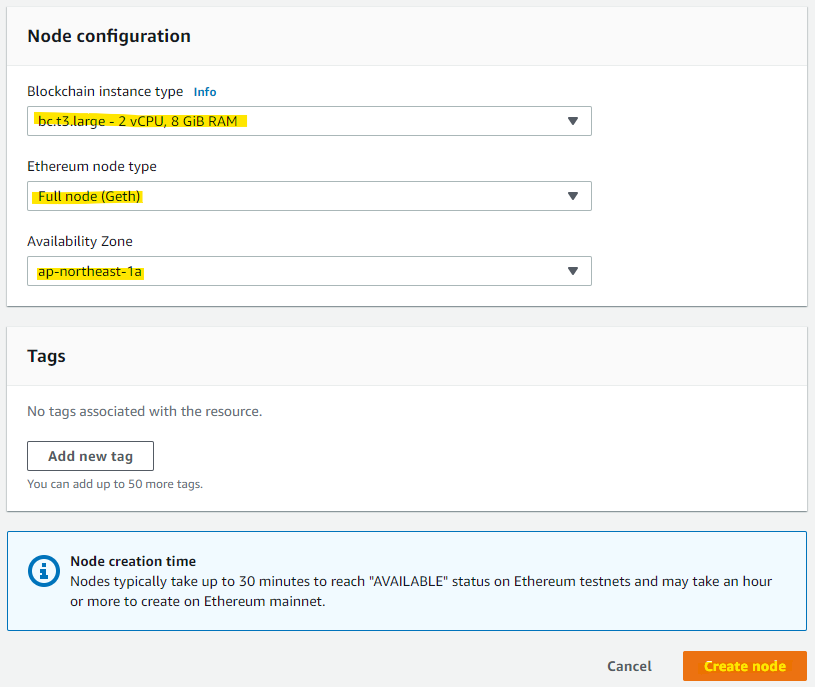
Creating になります。30 分くらいかかると表示されたので、それくらい待ちます。Create node を選択することで他の AZ に Node を構成できます。これにより高可用性が実現できます。
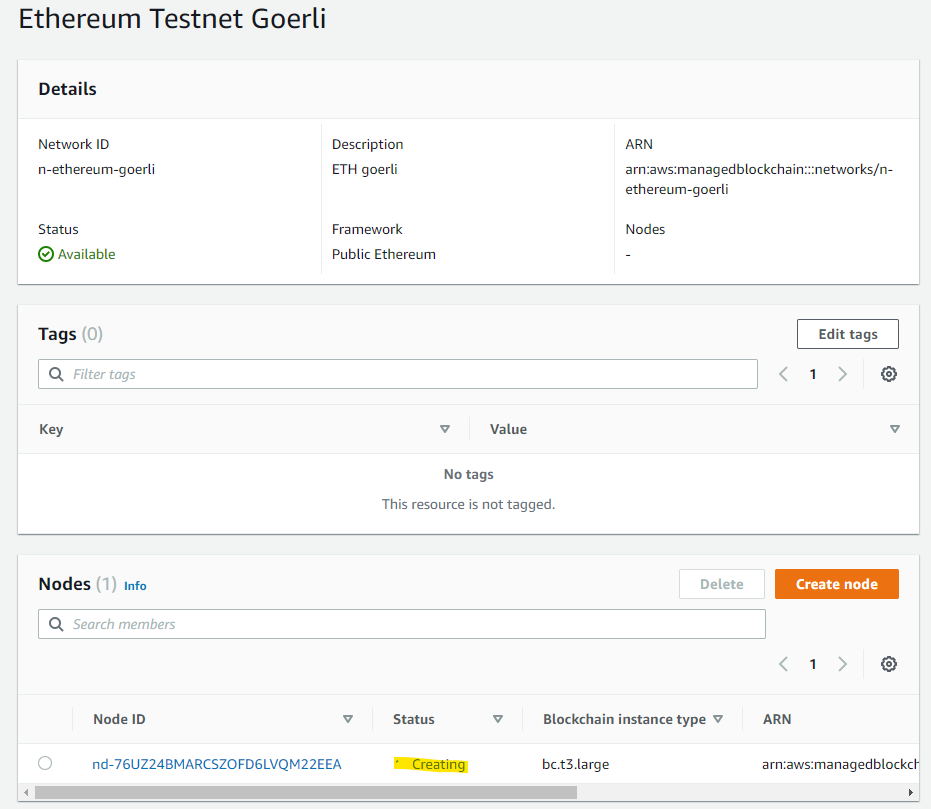
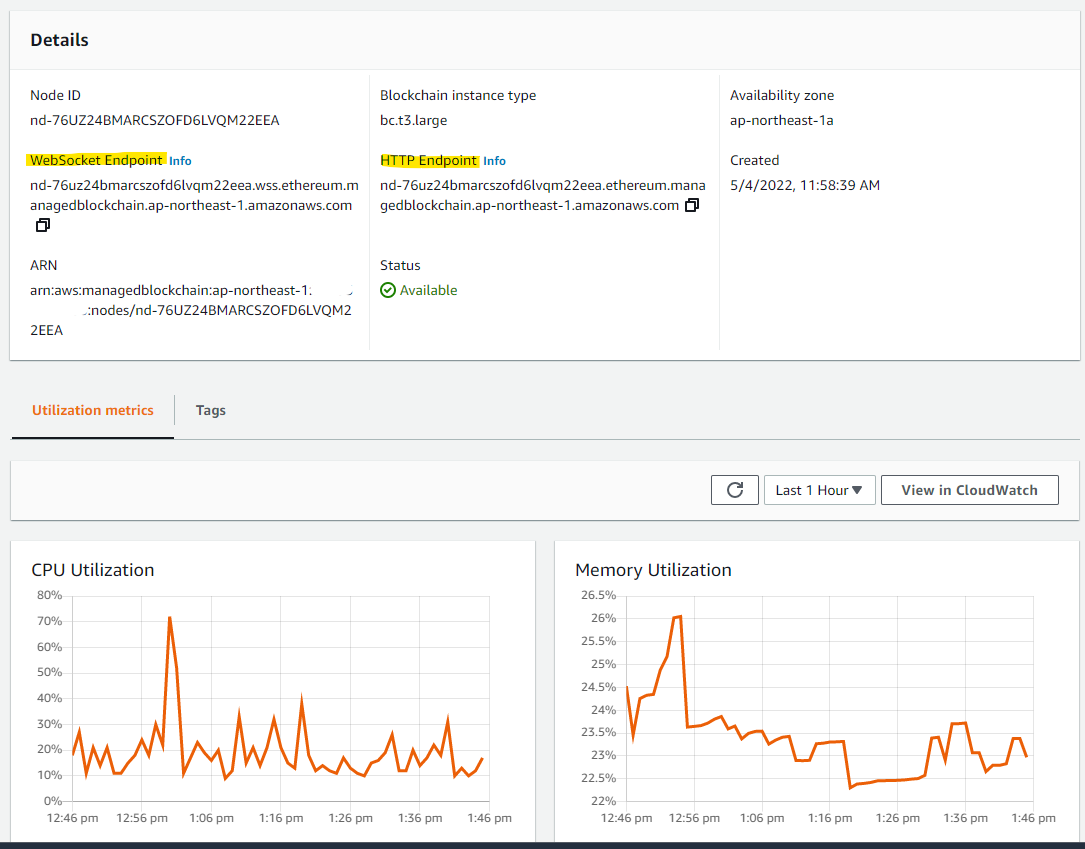
一定時間後、Available になりました。詳細画面を見てみます。

Node には、2つの Endpoint があります。後ほど利用するので、メモをしておきましょう。
- WebSocket
- HTTP
アプリケーションから Ethereum Node の API を呼びだす
Ethereum Node が作成できたので、アプリケーションから API を呼びだしてみます。
Web3.jsは、Nodeパッケージマネージャ (npm) で利用可能な JavaScript ライブラリです。以下の例を実行すると、Node.js 用の Javascript ファイルを使用して、Ethereum に JSON-RPC API 呼び出しを送信することができます。この例では、Ethereum ノードへの HTTP 接続と WebSocket 接続を行います。
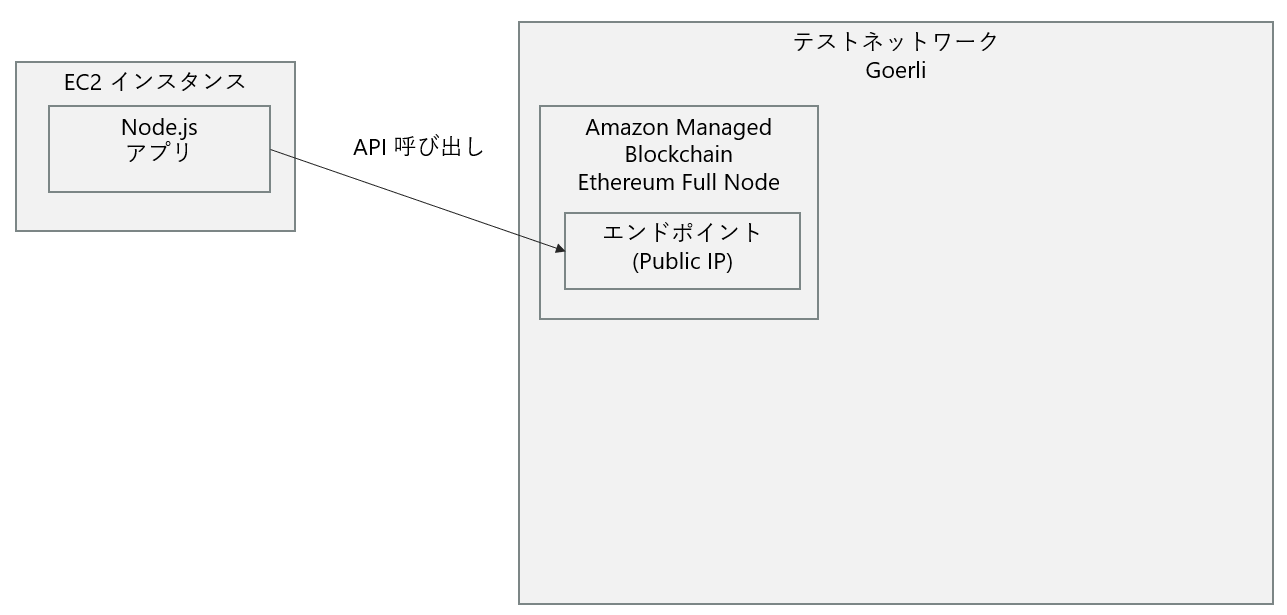
EC2 インスタンス上で、Ethereum Node にアクセスする構成を確認します。構成図でみるとこんな感じです。Amazon Managed Blockchain サービスを使って、Goerli ネットワークに参加している Ethereum Full Node を作成しました。この Node はエンドポイントを持っているので、EC2 インスタンスの Node.js アプリから API を実行してみます。
EC2 インスタンスにインストールされている Node のバージョンを確認します。存在しない場合はインストールをしてください。
> node --version
v16.13.0
必要なパッケージをインストールします。
npm install aws-sdk web3 xhr2
EC2 インスタンスの Amazon Linun2 の環境変数を指定します。環境に合わせて、アクセスキーや Endpoint の名前を変更していきましょう。
export AWS_ACCESS_KEY_ID="xxxxxx"
export AWS_SECRET_ACCESS_KEY="yyyyyy"
export AWS_DEFAULT_REGION="ap-northeast-1"
export AMB_HTTP_ENDPOINT="https://nd-76uz24bmarcszofd6lvqm22eea.ethereum.managedblockchain.ap-northeast-1.amazonaws.com"
export AMB_WS_ENDPOINT="wss://nd-76uz24bmarcszofd6lvqm22eea.wss.ethereum.managedblockchain.ap-northeast-1.amazonaws.com"
適当なディレクトリに移動します
cd ~/temp/blockchain-ethereum/
以下のファイルを作成します
aws-http-provider.mjs
/////////////////////////////////////////////////////
// Authored by Carl Youngblood
// Senior Blockchain Solutions Architect, AWS
// Adapted from web3 npm package v1.3.0
// licensed under GNU Lesser General Public License
// https://github.com/ethereum/web3.js
/////////////////////////////////////////////////////

import AWS from 'aws-sdk';
import HttpProvider from 'web3-providers-http';
import XHR2 from 'xhr2';

export default class AWSHttpProvider extends HttpProvider {
  send(payload, callback) {
    const self = this;
    const request = new XHR2(); // eslint-disable-line

    request.timeout = self.timeout;
    request.open('POST', self.host, true);
    request.setRequestHeader('Content-Type', 'application/json');

    request.onreadystatechange = () => {
      if (request.readyState === 4 && request.timeout !== 1) {
        let result = request.responseText; // eslint-disable-line
        let error = null; // eslint-disable-line

        try {
          result = JSON.parse(result);
        } catch (jsonError) {
          let message;
          if (!!result && !!result.error && !!result.error.message) {
            message = `[aws-ethjs-provider-http] ${result.error.message}`;
          } else  {
            message = `[aws-ethjs-provider-http] Invalid JSON RPC response from host provider ${self.host}: ` +
              `${JSON.stringify(result, null, 2)}`;
          }
          error = new Error(message);
        }

        callback(error, result);
      }
    };

    request.ontimeout = () => {
      callback(`[aws-ethjs-provider-http] CONNECTION TIMEOUT: http request timeout after ${self.timeout} ` +
        `ms. (i.e. your connect has timed out for whatever reason, check your provider).`, null);
    };

    try {
      const strPayload = JSON.stringify(payload);
      const region = process.env.AWS_DEFAULT_REGION || 'us-east-1';
      const credentials = new AWS.EnvironmentCredentials('AWS');
      const endpoint = new AWS.Endpoint(self.host);
      const req = new AWS.HttpRequest(endpoint, region);
      req.method = request._method;
      req.body = strPayload;
      req.headers['host'] = request._url.host;
      const signer = new AWS.Signers.V4(req, 'managedblockchain');
      signer.addAuthorization(credentials, new Date());
      request.setRequestHeader('Authorization', req.headers['Authorization']);
      request.setRequestHeader('X-Amz-Date', req.headers['X-Amz-Date']);
      request.send(strPayload);
    } catch (error) {
      callback(`[aws-ethjs-provider-http] CONNECTION ERROR: Couldn't connect to node '${self.host}': ` +
        `${JSON.stringify(error, null, 2)}`, null);
    }
  }
}
同じフォルダに次のファイルを作成します。このファイルは、Ethereum Node に対して、getNodeInfo API を呼びだすものになっています。
web3-example-http.mjs
import Web3 from 'web3';
import AWSHttpProvider from './aws-http-provider.mjs';
const endpoint = process.env.AMB_HTTP_ENDPOINT
const web3 = new Web3(new AWSHttpProvider(endpoint));
web3.eth.getNodeInfo().then(console.log);
動作確認です。以下のコマンドで、EC2 インスタンス上にある Node から、Amazon Managed Blockchain の Ethereum Node に接続します。Geth/v1.10.16-stable/linux-amd64/go1.17.5 みたいな文字が表示されていれば正常です。
> node web3-example-http.mjs
Geth/v1.10.16-stable/linux-amd64/go1.17.5
Ethereum Node でアカウントを作成
Amazon Managed Blockchain で作成した Ethereum Node を使って、テストネットワーク上でのアカウントを作成してみましょう。以下のファイルを作成します。web3.eth.accounts.create(); と呼び出しており、アカウント作成を実行しているプログラムです。
web3-create-account.mjs
import Web3 from "web3";
import AWSHttpProvider from "./aws-http-provider.mjs";
const endpoint = process.env.AMB_HTTP_ENDPOINT;
const web3 = new Web3(new AWSHttpProvider(endpoint));
web3.eth.getNodeInfo().then(console.log);

// create account
const account = web3.eth.accounts.create();
console.log(account);
実行結果です。作成したアカウントの address が表示されます。作成したアカウントの ID みたいなものなので、メモっておくと良いです。
> node web3-create-account.mjs
{
  address: '0x9cf240b6b81C05507cF3BD5D4fe9de4f1BB98142',
  privateKey: '0x111111111111111111111111111',
  signTransaction: [Function: signTransaction],
  sign: [Function: sign],
  encrypt: [Function: encrypt]
}
MetaMask で Goerli に接続
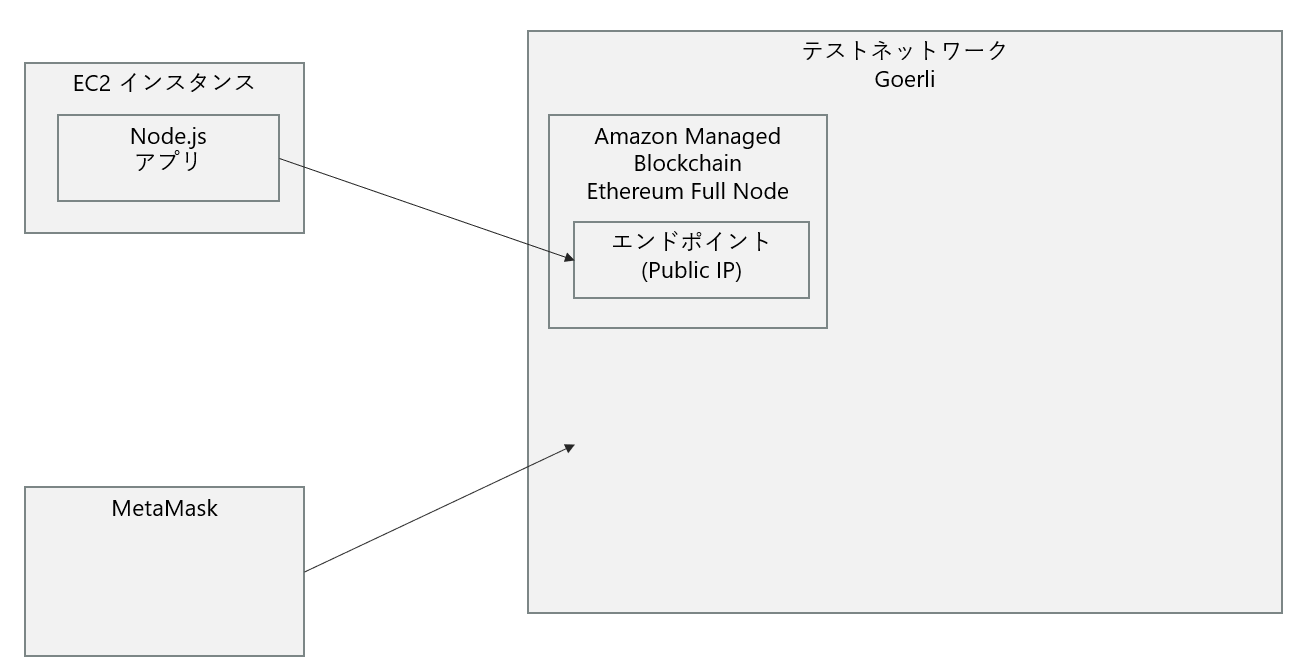
Amazon Managed Block の外から、Georli ネットワークに対するリクエストを通じて、テストネットワークとしての動作をみていきましょう。システム構成図的にはこんな感じです。MetaMask からの接続先は、Ethereum Node は意識しておらず、あくまで Georli ネットワークに対してのリクエストになっています。
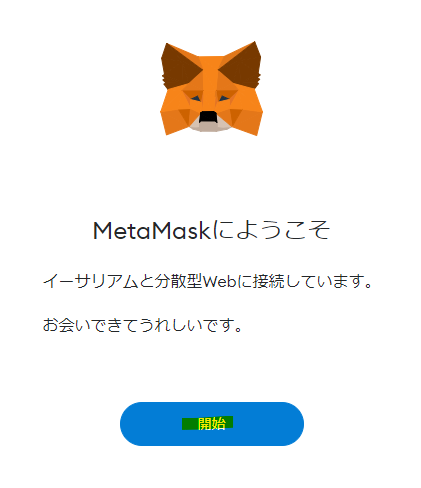
MetaMask は、Ethereum を用いる分散型アプリケーション(DApps)にアクセスしやすくするためのソフトウェアです。ブラウザ拡張機能版とモバイルアプリ版があり、Chrome の拡張を利用して、テストネットである Goerli にアクセスしてみます。
開始を押す
ウォレットを作成
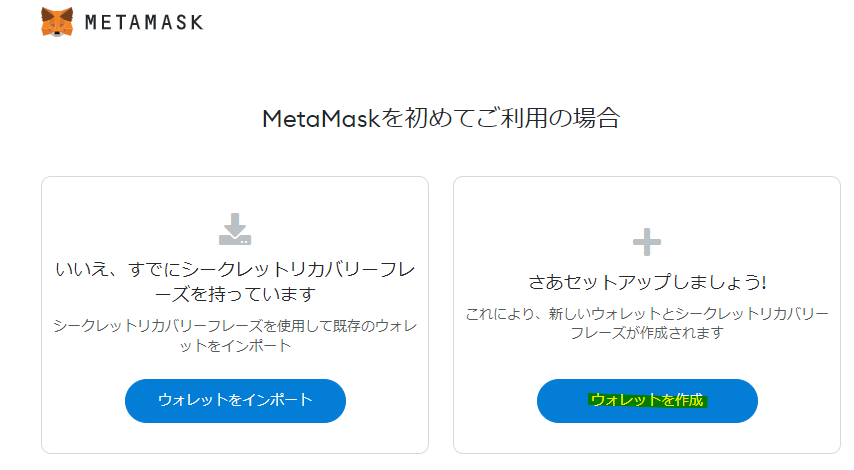
同意する

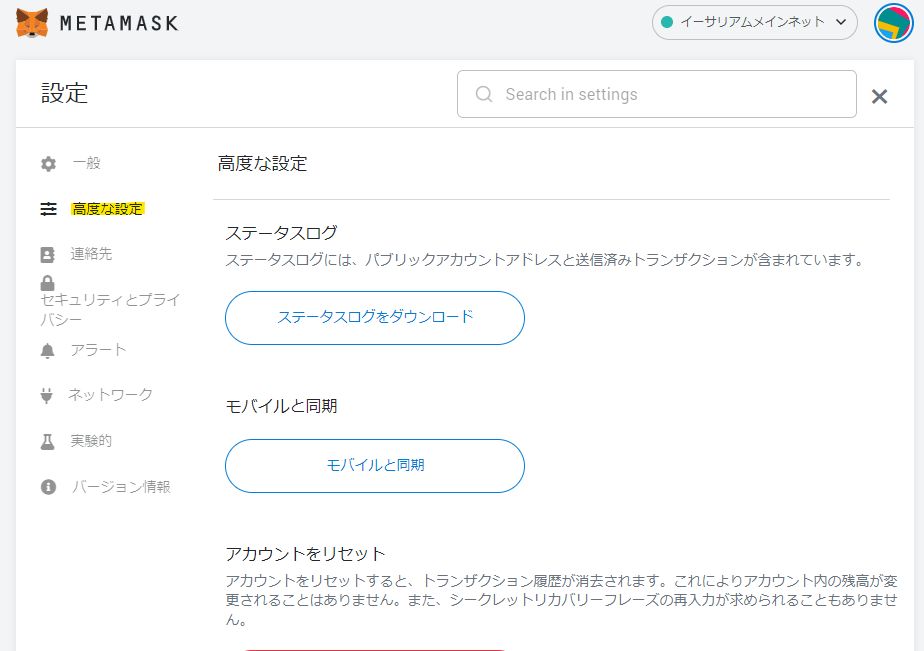
設定

高度な設定
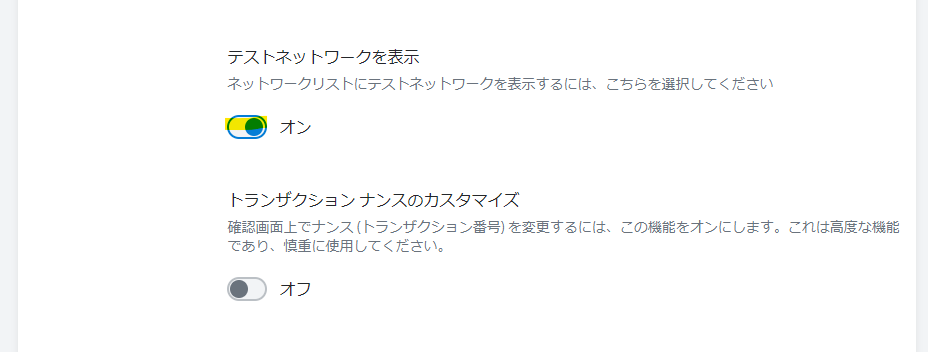
テストネットワークを表示
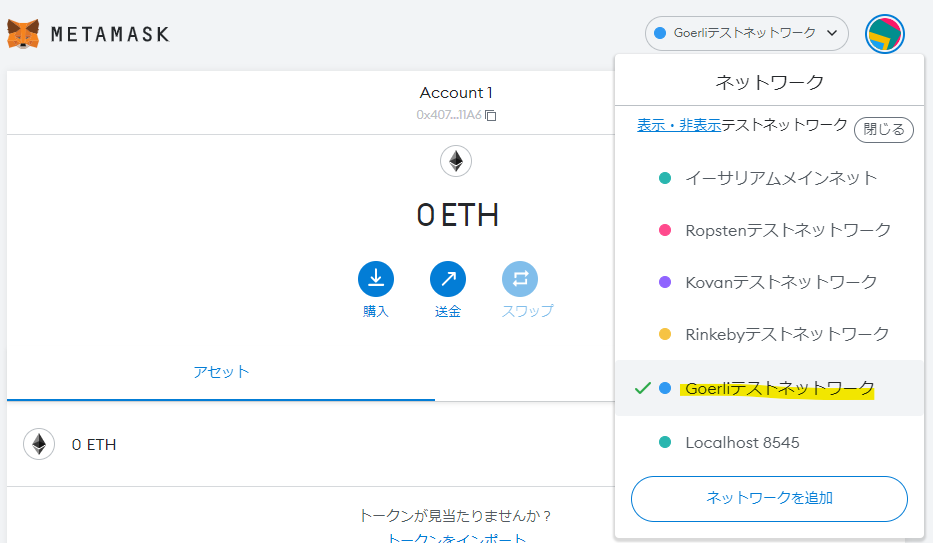
Goerli テストネットワークを指定
Goerli で GOETH の取得
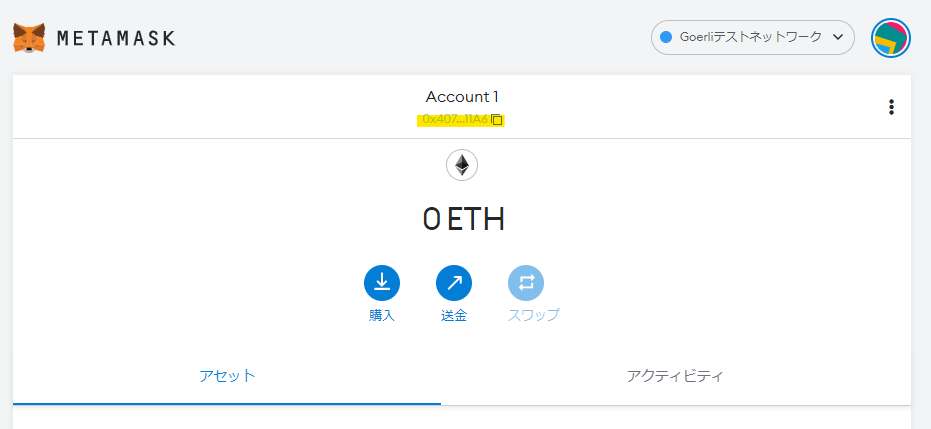
MetaMask としてのアカウントを持っています。Ethereum Node 上で API を呼びだして作成したアカウントとは別物です。作成直後で、ETH を持っていないので、取得するためにアドレスをコピーしておきましょう。
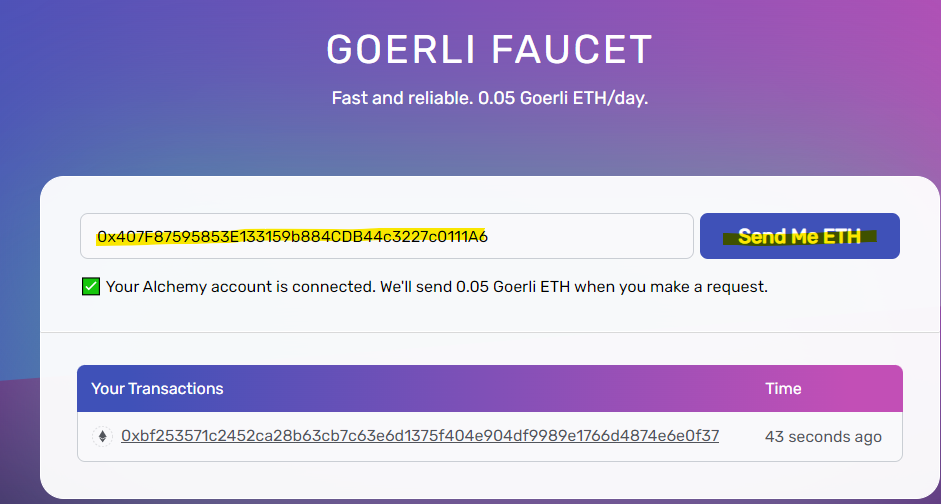
次の URL にアクセスしてリクエストを投げると、ETH を取得できます。
MetaMask のアカウントのアドレスを入力して、Send Me ETH を押します。
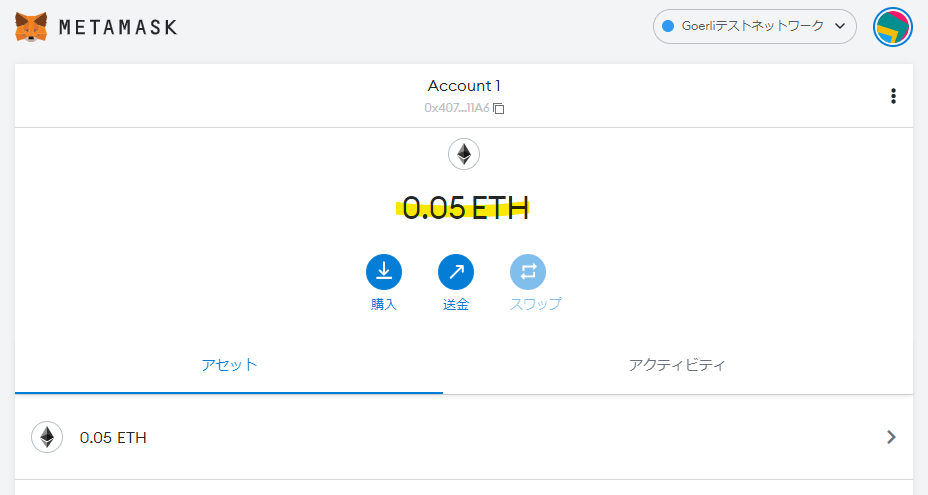
Metamask 上の自分のアカウントに、0.05 ETH が追加されていることがわかります。
Ethereum Node で作成した Account に送金
MetaMask の持っているアカウントから、Ethereum Node で作成した Account に送金をしてみます。
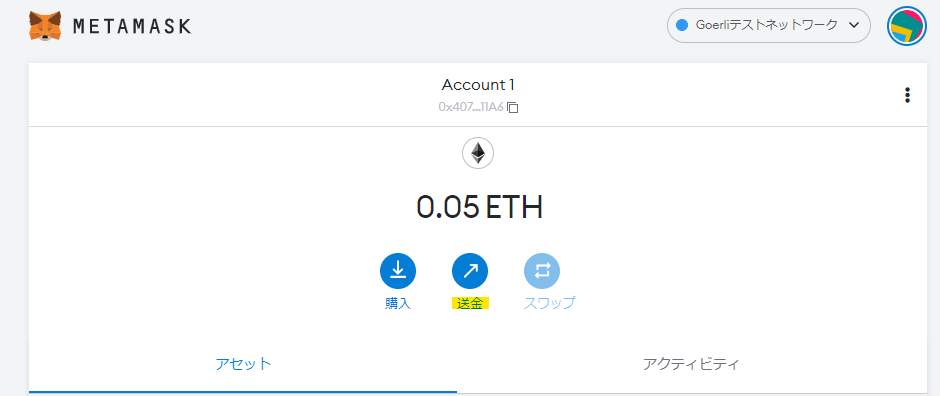
Ethereum Node で作成した Account の Address を指定して、送金金額を指定します。0.001 ETH を送ってみます。
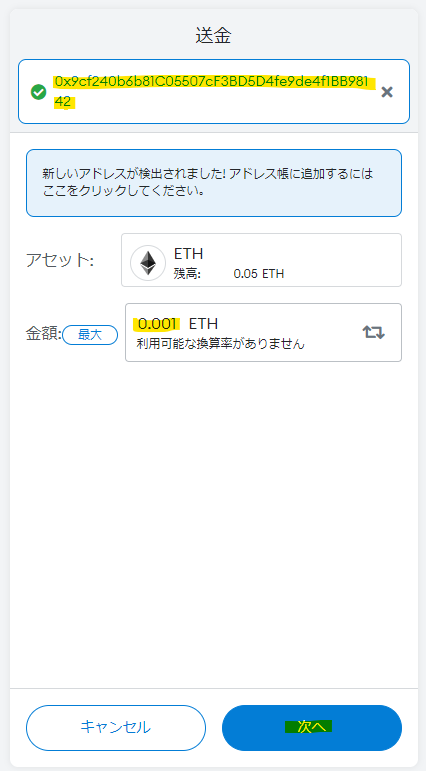
Ethereum では、送金などのトランザクションで GAS 代が掛かります。今回はテストネットなので実際にはお金は掛かっていません。このまま確認を押します。
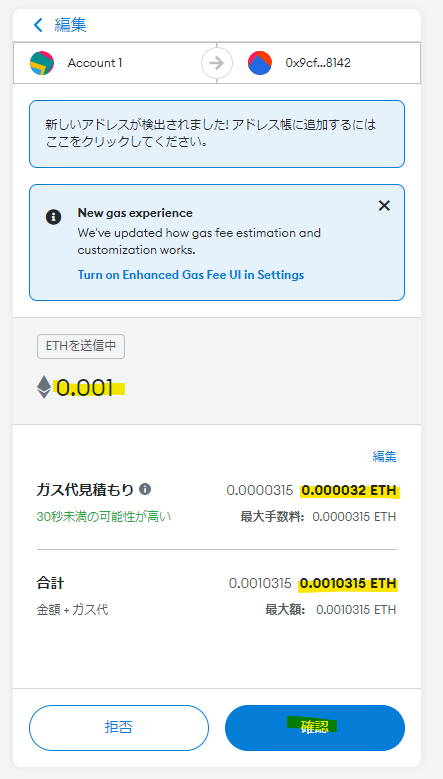
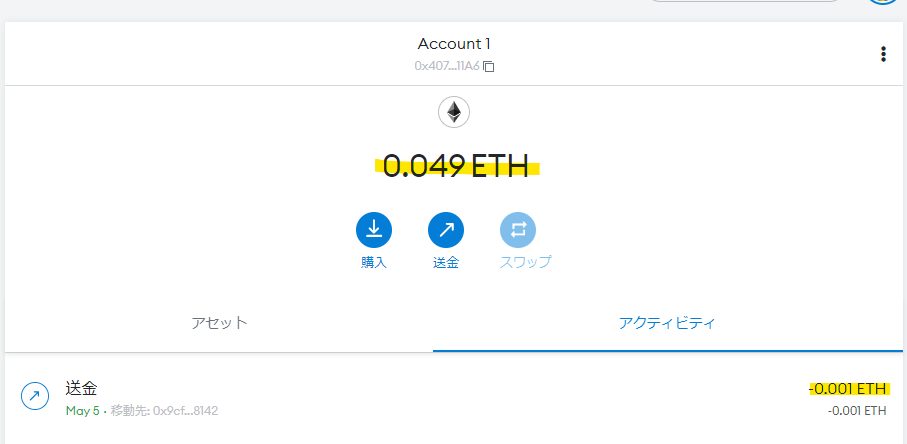
送金されました。
Amazon Managed Blockchain の Ethereum Node 上で、送金された ETH を getBalance API で確認してみます。Node.js のファイルを作成します。
web3-get-balance.mjs
account は自分のアカウントの address を指定します。
import Web3 from "web3";
import AWSHttpProvider from "./aws-http-provider.mjs";
const endpoint = process.env.AMB_HTTP_ENDPOINT;
const web3 = new Web3(new AWSHttpProvider(endpoint));
web3.eth.getNodeInfo().then(console.log);

// get balance
const account = "0x9cf240b6b81C05507cF3BD5D4fe9de4f1BB98142";
web3.eth.getBalance(account).then(console.log);
実行例です。単位は異なりますが、0.001 ETH が送られてきていることがわかります。
> node web3-get-balance.mjs
1000000000000000
検証を通じてわかったこと
-
Ethereum の Private Network はサポートしていない
-
Private Network が必要な場合は、Hyperledger Fabric を検討するのが良さそう
-
https://docs.aws.amazon.com/ja_jp/managed-blockchain/latest/ethereum-dev/ethereum-concepts.html
-
Private networks are not supported.
-
-
サポートしているネットワーク
- Mainnet : 本番用のネットワーク。メインネット上の取引は、実際のコストが発生します。
- Goerli : これは、パブリッククロスクライアントのプルーフオブオーソリティネットワークです。このネットワーク上のEtherは実際の貨幣価値を持たない。これは、使用することが推奨されるテストネットです。
- Rinkeby : これはGo Ethereum (Geth)クライアント向けのパブリックなテストネットです。このネットワーク上のイーサは実際の貨幣価値を持ちません。
- Ropsten : Mainnet に似ているテストネットです。このネットワーク上のイーサは実際の貨幣価値を持ちません。
- https://docs.aws.amazon.com/ja_jp/managed-blockchain/latest/ethereum-dev/ethereum-concepts.html
-
Amazon Managed Blockchain で作成された Ethereum Node はマイニングをサポートしていない
-
https://docs.aws.amazon.com/ja_jp/managed-blockchain/latest/ethereum-dev/ethereum-concepts.html
-
Ethereum nodes created using Managed Blockchain do not support mining.
-
-
サポートしているエンドポイント
- Ethereum JSON-RPC API over HTTP
- Ethereum JSON-RPC API over Webwocket
- https://docs.aws.amazon.com/ja_jp/managed-blockchain/latest/ethereum-dev/ethereum-concepts.html
-
サポートしている JSON-RPC Method
- 全てのEthereum JSON-RPC APIメソッドをサポートしているわけではない。次の Document にかかれている API のみサポートしている。
- https://docs.aws.amazon.com/ja_jp/managed-blockchain/latest/ethereum-dev/ethereum-json-rpc.html#supported-json-rpc
-
APIコールのペイロード制限
-
https://docs.aws.amazon.com/ja_jp/managed-blockchain/latest/ethereum-dev/ethereum-concepts.html
-
WebSocketコールのペイロードは512KBに制限されています。一部のコールではこの制限を超え、「メッセージの応答が大きすぎます」というエラーが発生する場合があります。これらのリクエストには、WebSocketの代わりにHTTPを使用してください。HTTPリクエストには、6MBのペイロード制限があります。HTTP を超えるレスポンスも "message response is too large" エラーが発生します。
-
-
1アカウントあたりのノード数制限
- Managed Blockchainは、1アカウントあたり最大50のEthereumノードをサポートしています。
- https://docs.aws.amazon.com/ja_jp/managed-blockchain/latest/ethereum-dev/ethereum-concepts.html
-
1 Eth の価格(円) が、つぎの URL で整理されている
-
フロントエンドから直接 Amazon Managed Blockchain の Node にリクエストは推奨されない
- https://docs.aws.amazon.com/ja_jp/managed-blockchain/latest/ethereum-dev/ethereum-json-rpc.html#supported-json-rpc
- フロントエンドから直接コントラクトを呼ばないってことだと思われる
-
The Signature Version 4 signing process requires credentials associated with an AWS account. Some examples in this section export these sensitive credentials to the shell environment of the client. Only use these examples on a client running in a trusted context. Do not use these examples in an untrusted context, such as in a web browser or mobile app. Client credentials should never be embedded in user-facing applications. To expose an Ethereum node on Managed Blockchain to anonymous users visiting from trusted web domains, you can set up a separate endpoint in Amazon API Gateway backed by a Lambda function that forwards requests to your node using the proper IAM credentials.
参考URL
AWS Document
https://docs.aws.amazon.com/ja_jp/managed-blockchain/latest/ethereum-dev/managed-blockchain-ethereum-overview.html
Ethereum 入門
https://book.ethereum-jp.net/
Ethereum Network Stats
https://ethstats.net/
ブロックチェーンEthereum入門 3
https://www.intellilink.co.jp/column/fintech/2016/061700.aspx
AWSではじめるブロックチェーン Amazon Managed Blockchain
https://dev.classmethod.jp/articles/amb-tutorial/
自宅サバで作る! イーサリアム 2.0 TestnetのValidatorノード(Prysm版)~資産の減少を防ぐにはどう運用管理する?
https://internet.watch.impress.co.jp/docs/column/shimizu/1319649.html
意外と簡単?Ethereum Blockchain アプリのローカル開発手順。
https://blog.vivita.io/entry/2018/08/06/070000
スマホさえあれば自由に使える!イーサリウムでブロックチェーンを体験する方法
https://dime.jp/genre/989928/
Learn to Code Blockchain DApps By Building Simple Games
https://cryptozombies.io/
「早起きは0.003ETHの得」ってほんと!?→ほんとです
https://qiita.com/Shoyu_N/items/b765344bae9305f29c76
web3.jsでデプロイしたコントラクトをReactで使う(前編)
https://zenn.dev/shunp110/articles/630a0166f468e4
Deploy NFT on Ethereum using Amazon Managed Blockchain
https://github.com/aws-samples/nft-deployment-amazon-managed-blockchain
- スマートコントラクトのデプロイ部分
https://github.com/aws-samples/nft-deployment-amazon-managed-blockchain/blob/main/serverless/lambdas/nftmain/deploy_contract.js - スマートコントラクトの呼び出し
https://github.com/aws-samples/nft-deployment-amazon-managed-blockchain/blob/main/serverless/lambdas/nftmain/get_owner.js - スマートコントラクトの Solidity コード
https://github.com/aws-samples/nft-deployment-amazon-managed-blockchain/blob/main/serverless/lambdas/nftmain/NFTSamples/contracts/NFTSample.sol
Simple NFT Marketplace (日本語のドキュメントもあり)
https://github.com/aws-samples/simple-nft-marketplace