はじめに
AWS App Runner は、AWS 上でコンテナ化されたアプリケーションを簡単に構築・運用できるフルマネージドサービスです。オーケストレーションワークフローや CI/CD の整備を App Runner に任せて、利用者はアプリケーション開発に集中することができます。
App Runner は、「サービス」という概念で、アプリケーションの作成や管理を行います。「サービス」は、2 種類の作成方法があります。
- Code-based service
- Image-based service
1 つ目の Code-based service は、App Runner 側で用意されたランタイムを利用してアプリケーションを動かします。ユーザー側ではアプリケーションのソースコードを GitHub Repository に用意するだけで、あとは App Runner 側で自動的に環境作成やデプロイを行ってくれます。また、GitHub Repository を更新することで、自動的に App Runner に反映してくれます。
2 つ目の Image-based service は、独自に用意したコンテナイメージを使って App Runner 上でアプリケーションを動かせます。コンテナイメージには、独自のランタイムや依存するライブラリなどをパッケージングできるため、カスタマイズ性が高いです。
1 つ目の Code-based service は、2022 年 10 月 28 日のアップデートで、PHP, Go, .Net, Ruby のランタイムが新たにサポートされました。既存の Python, Node.js, Java と合わせて 7 個のランタイムがサポートされています。今回の記事は、App Runner で PHP フレームワークの Laravel を動かしてみる記事です。Code-based service で簡単に PHP を動かせられるようになったので、Laravel の動作を確認してみる記事となっています。
GitHub Repository を準備
まず、App Runner で Code-based service を利用するために、GitHub に Repository が必要です。手元の Linux 環境で、適当に Laravel Project を作成し、それを Repository に Push します。
まず、example という名前で Laravel の Project を作成します。
composer create-project laravel/laravel example
作成した Project を Repository に追加します。.env.example を使うので、忘れないように git add で追加しましょう。
cd example
git init
git add *
git add .env.example
git commit -m "first commit"
git branch -M main
git remote add origin git@github.com:Sugi275/apprunner-laravel-test.git
git push -u origin main
App Runner の Configure File を作成
App Runner では、PHP がサポートされるようになりましたが、そのままで Laravel を使えるわけではありません。Nginx のインストールや Apache の設定など、様々なカスタマイズが必要です。App Runner では、Code-based service で環境のカスタマイズが出来る仕組みが用意されています。
GitHub Repository に apprunner.yaml という名前の Configuration File を用意することで、カスタマイズが可能です。詳細が気になる方は、次の Document を参照ください。
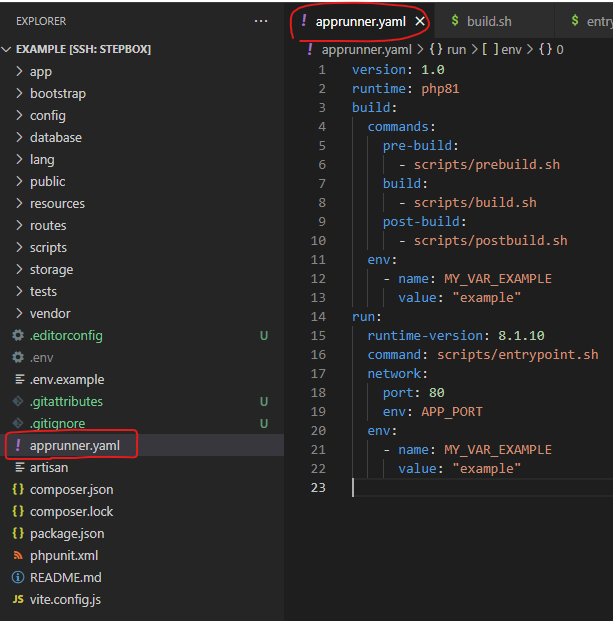
Laravel Project の一番上のディレクトリで、apprunner.yaml を作成します。
apprunner.yaml ファイルに、次の値を入れていきます。
version: 1.0
runtime: php81
build:
  commands:
    pre-build:
      - scripts/prebuild.sh
    build:
      - scripts/build.sh
    post-build:
      - scripts/postbuild.sh
  env:
    - name: MY_VAR_EXAMPLE
      value: "example"
run:
  runtime-version: 8.1.10
  command: scripts/entrypoint.sh
  network:
    port: 80
    env: APP_PORT
  env:
    - name: MY_VAR_EXAMPLE
      value: "example"
重要なポイントは、次の 4 点です。アプリケーションのビルドや、起動を命令するための、シェルスクリプトを指定しています。pre-build, build, post-build を独自に変更することで、アプリケーションの動作に必要な前準備を行うことができます。今回の記事では、ここで Laravel の動作に必要な前提条件を整えていきます。
- pre-build
- build
- post-build
- command
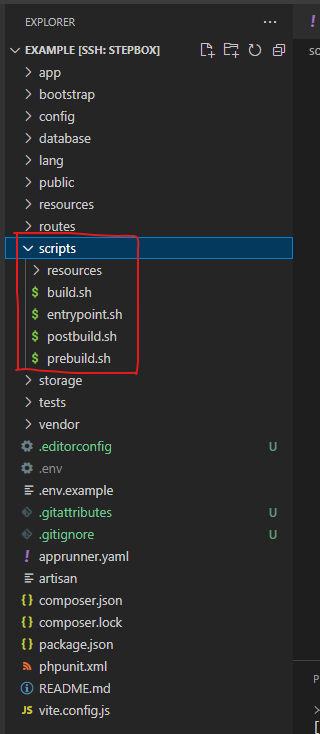
まず、シェルスクリプトを格納するためのディレクトリを作成し、4 種類のシェルスクリプトを格納します。
prebuild.sh の中身を、次のようにします。
- 動作確認のため、echo するだけのシェルスクリプトとしています。Laravel の実行には不要なので、作成しなくても良いです。
#!/usr/bin/env bash

echo "pre build"
build.sh の中身を、次のようにします。この記事で最も重要な部分です。
- Laravel の動作に必要なソフトウェアをインストール
- Nginx や PHP-FPM の設定ファイルを格納
- ログ設定
#!/usr/bin/env bash

echo "build"

# Laravel の動作に必要なソフトウェアをインストール
composer --version
yum install php-mbstring php-xml -y
amazon-linux-extras install nginx1 -y
composer install
cp -p .env.example .env
php artisan key:generate

# Nginx や PHP-FPM の設定ファイルを格納
cp -p ./scripts/resources/nginx.conf /etc/nginx/nginx.conf
cp -p ./scripts/resources/www.conf /etc/php-fpm.d/www.conf

# ディレクトリの権限設定
chown -R :nginx ./storage
chown -R :nginx ./bootstrap/cache
chown -R :nginx ./public

find ./storage -type d -exec chmod 775 {} \;
find ./storage -type f -exec chmod 664 {} \;

find ./bootstrap/cache -type d -exec chmod 775 {} \;
find ./bootstrap/cache -type f -exec chmod 664 {} \;

find ./storage -type d -exec chmod g+s {} \;
find ./bootstrap/cache -type d -exec chmod g+s {} \;

setfacl -R -d -m g::rwx ./storage
setfacl -R -d -m g::rwx ./bootstrap/cache

# アプリケーションのログ出力先を設定
ln -s /dev/stdout /var/log/nginx/error.log
ln -s /dev/stdout /var/log/nginx/access.log

ln -s /dev/stdout /var/log/php-fpm/error.log
ln -s /dev/stdout /var/log/php-fpm/www-access.log
ln -s /dev/stdout /var/log/php-fpm/www-error.log
postbuild.sh の中身を、次のようにします。
- 動作確認のため、echo するだけのシェルスクリプトとしています。Laravel の実行には不要なので、作成しなくても良いです。
#!/usr/bin/env bash

echo "post build"
entrypoint.sh の中身を、次のようにします。
- PHP-FPM や Nginx を起動
- 注意点があり、1 個のコンテナの中で、アプリケーションの提供に必要なプロセスを 2 つ起動しています。この指定方法は、Docker のベストプラクティスに沿っていません。2 つのプロセスのうち、どちらか片方が起動しなくなったときに、コンテナを正しく終了させるために、ラッパースクリプトなどを準備することがベストプラクティスです。詳細が気になる方は、こちらの Document を参考にしてください。
- 今回の記事では、Laravel の動作確認に軸足を置いた記事となっています。
#!/usr/bin/env bash

php-fpm -D
/usr/sbin/nginx -g "daemon off;"
scripts/resources/nginx.conf の中身を次のようにします。
- 基本的には、Nginx のデフォルトの設定を尊重
- PHP-FPM と連携するための server の指定を変更
# For more information on configuration, see:
#   * Official English Documentation: http://nginx.org/en/docs/
#   * Official Russian Documentation: http://nginx.org/ru/docs/

user nginx;
worker_processes auto;
error_log /var/log/nginx/error.log;
pid /run/nginx.pid;

# Load dynamic modules. See /usr/share/doc/nginx/README.dynamic.
include /usr/share/nginx/modules/*.conf;

events {
    worker_connections 1024;
}

http {
    log_format  main  '$remote_addr - $remote_user [$time_local] "$request" '
                      '$status $body_bytes_sent "$http_referer" '
                      '"$http_user_agent" "$http_x_forwarded_for"';

    access_log  /var/log/nginx/access.log  main;

    sendfile            on;
    tcp_nopush          on;
    tcp_nodelay         on;
    keepalive_timeout   65;
    types_hash_max_size 4096;

    include             /etc/nginx/mime.types;
    default_type        application/octet-stream;

    # Load modular configuration files from the /etc/nginx/conf.d directory.
    # See http://nginx.org/en/docs/ngx_core_module.html#include
    # for more information.
    include /etc/nginx/conf.d/*.conf;

    server {
        root /app/public;
        index index.php index.html index.htm;

        location / {
            try_files $uri $uri/ /index.php?$query_string;
        }

        location ~* \.(jpg|jpeg|gif|css|png|js|ico|svg)$ {
            expires 30d;
            log_not_found off;
            access_log off;
        }

        location ~ \.php$ {
            fastcgi_pass unix:/run/php-fpm/www.sock;
            fastcgi_index index.php;

            fastcgi_param SCRIPT_FILENAME $realpath_root$fastcgi_script_name;
            include fastcgi_params;
        }
    }
}
scripts/resources/www.conf の中身を次のようにします。(長いので読み飛ばしてください)
- user と group を nginx にしているだけ。それ以外はデフォルトのまま。
; Start a new pool named 'www'.
; the variable $pool can we used in any directive and will be replaced by the
; pool name ('www' here)
[www]

; Per pool prefix
; It only applies on the following directives:
; - 'access.log'
; - 'slowlog'
; - 'listen' (unixsocket)
; - 'chroot'
; - 'chdir'
; - 'php_values'
; - 'php_admin_values'
; When not set, the global prefix (or @php_fpm_prefix@) applies instead.
; Note: This directive can also be relative to the global prefix.
; Default Value: none
;prefix = /path/to/pools/$pool

; Unix user/group of processes
; Note: The user is mandatory. If the group is not set, the default user's group
;       will be used.
; RPM: apache user chosen to provide access to the same directories as httpd
user = nginx
; RPM: Keep a group allowed to write in log dir.
group = nginx

; The address on which to accept FastCGI requests.
; Valid syntaxes are:
;   'ip.add.re.ss:port'    - to listen on a TCP socket to a specific IPv4 address on
;                            a specific port;
;   '[ip:6:addr:ess]:port' - to listen on a TCP socket to a specific IPv6 address on
;                            a specific port;
;   'port'                 - to listen on a TCP socket to all addresses
;                            (IPv6 and IPv4-mapped) on a specific port;
;   '/path/to/unix/socket' - to listen on a unix socket.
; Note: This value is mandatory.
listen = /run/php-fpm/www.sock

; Set listen(2) backlog.
; Default Value: 511
;listen.backlog = 511

; Set permissions for unix socket, if one is used. In Linux, read/write
; permissions must be set in order to allow connections from a web server.
; Default Values: user and group are set as the running user
;                 mode is set to 0660
;listen.owner = nobody
;listen.group = nobody
;listen.mode = 0660

; When POSIX Access Control Lists are supported you can set them using
; these options, value is a comma separated list of user/group names.
; When set, listen.owner and listen.group are ignored
listen.acl_users = apache,nginx
;listen.acl_groups =

; List of addresses (IPv4/IPv6) of FastCGI clients which are allowed to connect.
; Equivalent to the FCGI_WEB_SERVER_ADDRS environment variable in the original
; PHP FCGI (5.2.2+). Makes sense only with a tcp listening socket. Each address
; must be separated by a comma. If this value is left blank, connections will be
; accepted from any ip address.
; Default Value: any
listen.allowed_clients = 127.0.0.1

; Specify the nice(2) priority to apply to the pool processes (only if set)
; The value can vary from -19 (highest priority) to 20 (lower priority)
; Note: - It will only work if the FPM master process is launched as root
;       - The pool processes will inherit the master process priority
;         unless it specified otherwise
; Default Value: no set
; process.priority = -19

; Choose how the process manager will control the number of child processes.
; Possible Values:
;   static  - a fixed number (pm.max_children) of child processes;
;   dynamic - the number of child processes are set dynamically based on the
;             following directives. With this process management, there will be
;             always at least 1 children.
;             pm.max_children      - the maximum number of children that can
;                                    be alive at the same time.
;             pm.start_servers     - the number of children created on startup.
;             pm.min_spare_servers - the minimum number of children in 'idle'
;                                    state (waiting to process). If the number
;                                    of 'idle' processes is less than this
;                                    number then some children will be created.
;             pm.max_spare_servers - the maximum number of children in 'idle'
;                                    state (waiting to process). If the number
;                                    of 'idle' processes is greater than this
;                                    number then some children will be killed.
;  ondemand - no children are created at startup. Children will be forked when
;             new requests will connect. The following parameter are used:
;             pm.max_children           - the maximum number of children that
;                                         can be alive at the same time.
;             pm.process_idle_timeout   - The number of seconds after which
;                                         an idle process will be killed.
; Note: This value is mandatory.
pm = dynamic

; The number of child processes to be created when pm is set to 'static' and the
; maximum number of child processes when pm is set to 'dynamic' or 'ondemand'.
; This value sets the limit on the number of simultaneous requests that will be
; served. Equivalent to the ApacheMaxClients directive with mpm_prefork.
; Equivalent to the PHP_FCGI_CHILDREN environment variable in the original PHP
; CGI. The below defaults are based on a server without much resources. Don't
; forget to tweak pm.* to fit your needs.
; Note: Used when pm is set to 'static', 'dynamic' or 'ondemand'
; Note: This value is mandatory.
pm.max_children = 50

; The number of child processes created on startup.
; Note: Used only when pm is set to 'dynamic'
; Default Value: min_spare_servers + (max_spare_servers - min_spare_servers) / 2
pm.start_servers = 5

; The desired minimum number of idle server processes.
; Note: Used only when pm is set to 'dynamic'
; Note: Mandatory when pm is set to 'dynamic'
pm.min_spare_servers = 5

; The desired maximum number of idle server processes.
; Note: Used only when pm is set to 'dynamic'
; Note: Mandatory when pm is set to 'dynamic'
pm.max_spare_servers = 35

; The number of seconds after which an idle process will be killed.
; Note: Used only when pm is set to 'ondemand'
; Default Value: 10s
;pm.process_idle_timeout = 10s;

; The number of requests each child process should execute before respawning.
; This can be useful to work around memory leaks in 3rd party libraries. For
; endless request processing specify '0'. Equivalent to PHP_FCGI_MAX_REQUESTS.
; Default Value: 0
;pm.max_requests = 500

; The URI to view the FPM status page. If this value is not set, no URI will be
; recognized as a status page. It shows the following informations:
;   pool                 - the name of the pool;
;   process manager      - static, dynamic or ondemand;
;   start time           - the date and time FPM has started;
;   start since          - number of seconds since FPM has started;
;   accepted conn        - the number of request accepted by the pool;
;   listen queue         - the number of request in the queue of pending
;                          connections (see backlog in listen(2));
;   max listen queue     - the maximum number of requests in the queue
;                          of pending connections since FPM has started;
;   listen queue len     - the size of the socket queue of pending connections;
;   idle processes       - the number of idle processes;
;   active processes     - the number of active processes;
;   total processes      - the number of idle + active processes;
;   max active processes - the maximum number of active processes since FPM
;                          has started;
;   max children reached - number of times, the process limit has been reached,
;                          when pm tries to start more children (works only for
;                          pm 'dynamic' and 'ondemand');
; Value are updated in real time.
; Example output:
;   pool:                 www
;   process manager:      static
;   start time:           01/Jul/2011:17:53:49 +0200
;   start since:          62636
;   accepted conn:        190460
;   listen queue:         0
;   max listen queue:     1
;   listen queue len:     42
;   idle processes:       4
;   active processes:     11
;   total processes:      15
;   max active processes: 12
;   max children reached: 0
;
; By default the status page output is formatted as text/plain. Passing either
; 'html', 'xml' or 'json' in the query string will return the corresponding
; output syntax. Example:
;   http://www.foo.bar/status
;   http://www.foo.bar/status?json
;   http://www.foo.bar/status?html
;   http://www.foo.bar/status?xml
;
; By default the status page only outputs short status. Passing 'full' in the
; query string will also return status for each pool process.
; Example:
;   http://www.foo.bar/status?full
;   http://www.foo.bar/status?json&full
;   http://www.foo.bar/status?html&full
;   http://www.foo.bar/status?xml&full
; The Full status returns for each process:
;   pid                  - the PID of the process;
;   state                - the state of the process (Idle, Running, ...);
;   start time           - the date and time the process has started;
;   start since          - the number of seconds since the process has started;
;   requests             - the number of requests the process has served;
;   request duration     - the duration in µs of the requests;
;   request method       - the request method (GET, POST, ...);
;   request URI          - the request URI with the query string;
;   content length       - the content length of the request (only with POST);
;   user                 - the user (PHP_AUTH_USER) (or '-' if not set);
;   script               - the main script called (or '-' if not set);
;   last request cpu     - the %cpu the last request consumed
;                          it's always 0 if the process is not in Idle state
;                          because CPU calculation is done when the request
;                          processing has terminated;
;   last request memory  - the max amount of memory the last request consumed
;                          it's always 0 if the process is not in Idle state
;                          because memory calculation is done when the request
;                          processing has terminated;
; If the process is in Idle state, then informations are related to the
; last request the process has served. Otherwise informations are related to
; the current request being served.
; Example output:
;   ************************
;   pid:                  31330
;   state:                Running
;   start time:           01/Jul/2011:17:53:49 +0200
;   start since:          63087
;   requests:             12808
;   request duration:     1250261
;   request method:       GET
;   request URI:          /test_mem.php?N=10000
;   content length:       0
;   user:                 -
;   script:               /home/fat/web/docs/php/test_mem.php
;   last request cpu:     0.00
;   last request memory:  0
;
; Note: There is a real-time FPM status monitoring sample web page available
;       It's available in: @EXPANDED_DATADIR@/fpm/status.html
;
; Note: The value must start with a leading slash (/). The value can be
;       anything, but it may not be a good idea to use the .php extension or it
;       may conflict with a real PHP file.
; Default Value: not set
;pm.status_path = /status

; The ping URI to call the monitoring page of FPM. If this value is not set, no
; URI will be recognized as a ping page. This could be used to test from outside
; that FPM is alive and responding, or to
; - create a graph of FPM availability (rrd or such);
; - remove a server from a group if it is not responding (load balancing);
; - trigger alerts for the operating team (24/7).
; Note: The value must start with a leading slash (/). The value can be
;       anything, but it may not be a good idea to use the .php extension or it
;       may conflict with a real PHP file.
; Default Value: not set
;ping.path = /ping

; This directive may be used to customize the response of a ping request. The
; response is formatted as text/plain with a 200 response code.
; Default Value: pong
;ping.response = pong

; The access log file
; Default: not set
;access.log = log/$pool.access.log

; The access log format.
; The following syntax is allowed
;  %%: the '%' character
;  %C: %CPU used by the request
;      it can accept the following format:
;      - %{user}C for user CPU only
;      - %{system}C for system CPU only
;      - %{total}C  for user + system CPU (default)
;  %d: time taken to serve the request
;      it can accept the following format:
;      - %{seconds}d (default)
;      - %{miliseconds}d
;      - %{mili}d
;      - %{microseconds}d
;      - %{micro}d
;  %e: an environment variable (same as $_ENV or $_SERVER)
;      it must be associated with embraces to specify the name of the env
;      variable. Some exemples:
;      - server specifics like: %{REQUEST_METHOD}e or %{SERVER_PROTOCOL}e
;      - HTTP headers like: %{HTTP_HOST}e or %{HTTP_USER_AGENT}e
;  %f: script filename
;  %l: content-length of the request (for POST request only)
;  %m: request method
;  %M: peak of memory allocated by PHP
;      it can accept the following format:
;      - %{bytes}M (default)
;      - %{kilobytes}M
;      - %{kilo}M
;      - %{megabytes}M
;      - %{mega}M
;  %n: pool name
;  %o: output header
;      it must be associated with embraces to specify the name of the header:
;      - %{Content-Type}o
;      - %{X-Powered-By}o
;      - %{Transfert-Encoding}o
;      - ....
;  %p: PID of the child that serviced the request
;  %P: PID of the parent of the child that serviced the request
;  %q: the query string
;  %Q: the '?' character if query string exists
;  %r: the request URI (without the query string, see %q and %Q)
;  %R: remote IP address
;  %s: status (response code)
;  %t: server time the request was received
;      it can accept a strftime(3) format:
;      %d/%b/%Y:%H:%M:%S %z (default)
;      The strftime(3) format must be encapsuled in a %{<strftime_format>}t tag
;      e.g. for a ISO8601 formatted timestring, use: %{%Y-%m-%dT%H:%M:%S%z}t
;  %T: time the log has been written (the request has finished)
;      it can accept a strftime(3) format:
;      %d/%b/%Y:%H:%M:%S %z (default)
;      The strftime(3) format must be encapsuled in a %{<strftime_format>}t tag
;      e.g. for a ISO8601 formatted timestring, use: %{%Y-%m-%dT%H:%M:%S%z}t
;  %u: remote user
;
; Default: "%R - %u %t \"%m %r\" %s"
;access.format = "%R - %u %t \"%m %r%Q%q\" %s %f %{mili}d %{kilo}M %C%%"

; The log file for slow requests
; Default Value: not set
; Note: slowlog is mandatory if request_slowlog_timeout is set
slowlog = /var/log/php-fpm/www-slow.log

; The timeout for serving a single request after which a PHP backtrace will be
; dumped to the 'slowlog' file. A value of '0s' means 'off'.
; Available units: s(econds)(default), m(inutes), h(ours), or d(ays)
; Default Value: 0
;request_slowlog_timeout = 0

; The timeout for serving a single request after which the worker process will
; be killed. This option should be used when the 'max_execution_time' ini option
; does not stop script execution for some reason. A value of '0' means 'off'.
; Available units: s(econds)(default), m(inutes), h(ours), or d(ays)
; Default Value: 0
;request_terminate_timeout = 0

; Set open file descriptor rlimit.
; Default Value: system defined value
;rlimit_files = 1024

; Set max core size rlimit.
; Possible Values: 'unlimited' or an integer greater or equal to 0
; Default Value: system defined value
;rlimit_core = 0

; Chroot to this directory at the start. This value must be defined as an
; absolute path. When this value is not set, chroot is not used.
; Note: you can prefix with '$prefix' to chroot to the pool prefix or one
; of its subdirectories. If the pool prefix is not set, the global prefix
; will be used instead.
; Note: chrooting is a great security feature and should be used whenever
;       possible. However, all PHP paths will be relative to the chroot
;       (error_log, sessions.save_path, ...).
; Default Value: not set
;chroot =

; Chdir to this directory at the start.
; Note: relative path can be used.
; Default Value: current directory or / when chroot
;chdir = /var/www

; Redirect worker stdout and stderr into main error log. If not set, stdout and
; stderr will be redirected to /dev/null according to FastCGI specs.
; Note: on highloaded environement, this can cause some delay in the page
; process time (several ms).
; Default Value: no
;catch_workers_output = yes

; Clear environment in FPM workers
; Prevents arbitrary environment variables from reaching FPM worker processes
; by clearing the environment in workers before env vars specified in this
; pool configuration are added.
; Setting to "no" will make all environment variables available to PHP code
; via getenv(), $_ENV and $_SERVER.
; Default Value: yes
;clear_env = no

; Limits the extensions of the main script FPM will allow to parse. This can
; prevent configuration mistakes on the web server side. You should only limit
; FPM to .php extensions to prevent malicious users to use other extensions to
; exectute php code.
; Note: set an empty value to allow all extensions.
; Default Value: .php
;security.limit_extensions = .php .php3 .php4 .php5 .php7

; Pass environment variables like LD_LIBRARY_PATH. All $VARIABLEs are taken from
; the current environment.
; Default Value: clean env
;env[HOSTNAME] = $HOSTNAME
;env[PATH] = /usr/local/bin:/usr/bin:/bin
;env[TMP] = /tmp
;env[TMPDIR] = /tmp
;env[TEMP] = /tmp

; Additional php.ini defines, specific to this pool of workers. These settings
; overwrite the values previously defined in the php.ini. The directives are the
; same as the PHP SAPI:
;   php_value/php_flag             - you can set classic ini defines which can
;                                    be overwritten from PHP call 'ini_set'.
;   php_admin_value/php_admin_flag - these directives won't be overwritten by
;                                     PHP call 'ini_set'
; For php_*flag, valid values are on, off, 1, 0, true, false, yes or no.

; Defining 'extension' will load the corresponding shared extension from
; extension_dir. Defining 'disable_functions' or 'disable_classes' will not
; overwrite previously defined php.ini values, but will append the new value
; instead.

; Note: path INI options can be relative and will be expanded with the prefix
; (pool, global or @prefix@)

; Default Value: nothing is defined by default except the values in php.ini and
;                specified at startup with the -d argument
;php_admin_value[sendmail_path] = /usr/sbin/sendmail -t -i -f www@my.domain.com
;php_flag[display_errors] = off
php_admin_value[error_log] = /var/log/php-fpm/www-error.log
php_admin_flag[log_errors] = on
;php_admin_value[memory_limit] = 128M

; Set the following data paths to directories owned by the FPM process user.
;
; Do not change the ownership of existing system directories, if the process
; user does not have write permission, create dedicated directories for this
; purpose.
;
; See warning about choosing the location of these directories on your system
; at http://php.net/session.save-path
php_value[session.save_handler] = files
php_value[session.save_path]    = /var/lib/php/session
php_value[soap.wsdl_cache_dir]  = /var/lib/php/wsdlcache
;php_value[opcache.file_cache]  = /var/lib/php/opcache
作成した script 群に、実行権限を付与します。
chmod 744 scripts/*
上記の作成したファイルを、適当に GitHub Repository に反映します。
git add *
git commit -m "App Runner Test01"
git push -u origin main
App Runner の作成
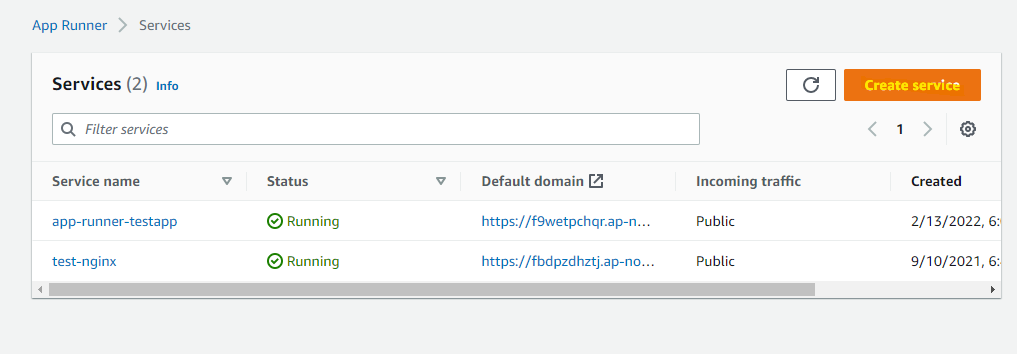
これで準備が整いました。App Runner を作成していきます。Create service を選択します。
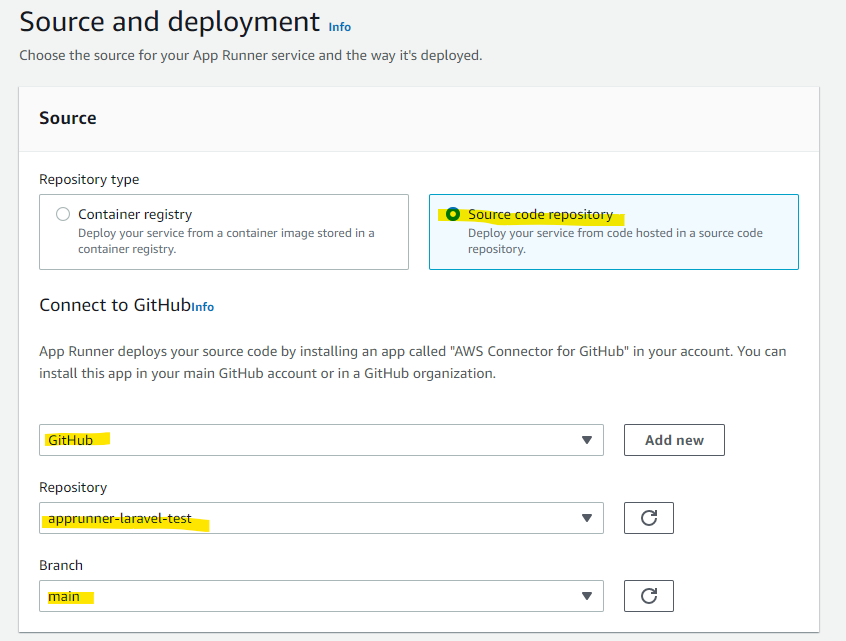
Source code repository を選択し、作成した GitHub Repository を指定します。
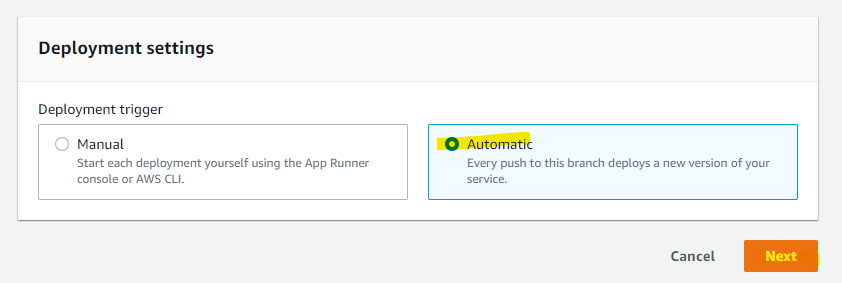
Automatic を選び、Next を押します。
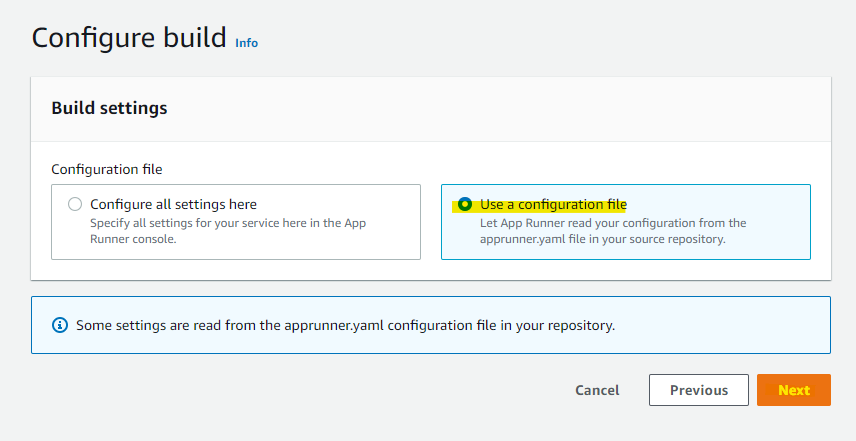
Use a configuration file を選択します。
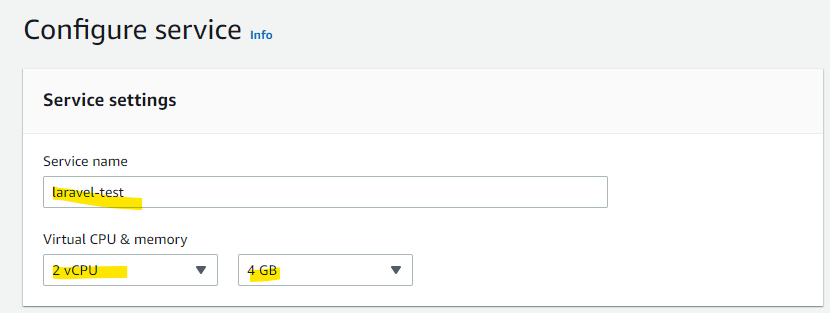
名前やリソースを指定します。
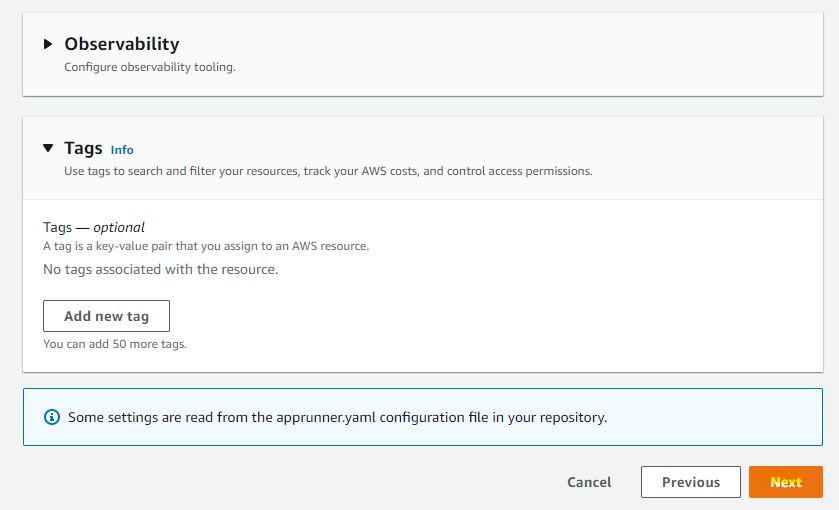
これ以外はデフォルトで Next を押します。
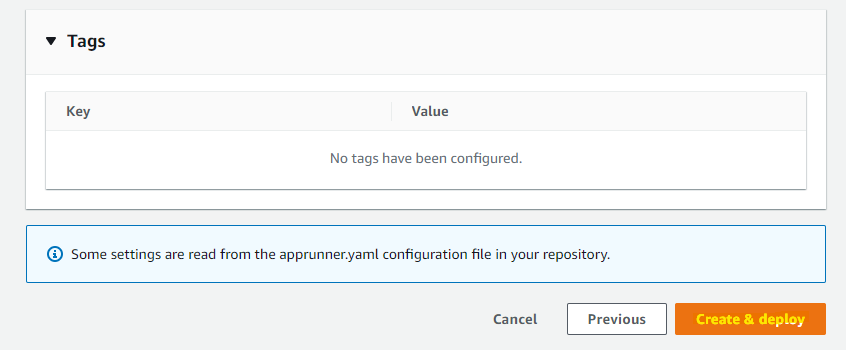
Create & Deploy を押します。
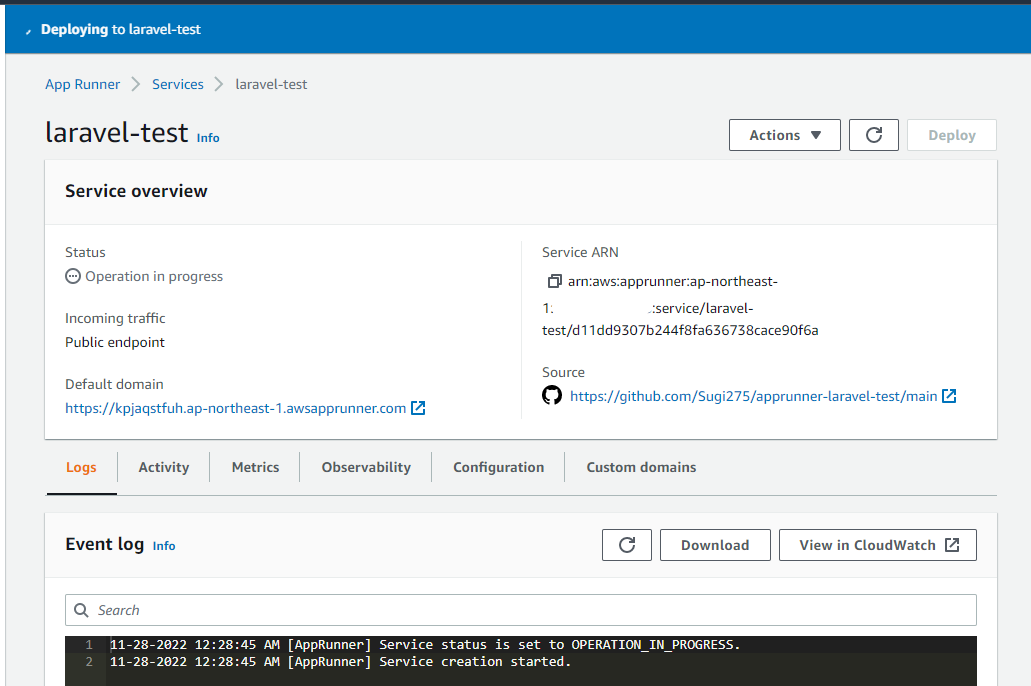
Deploy が始まります。
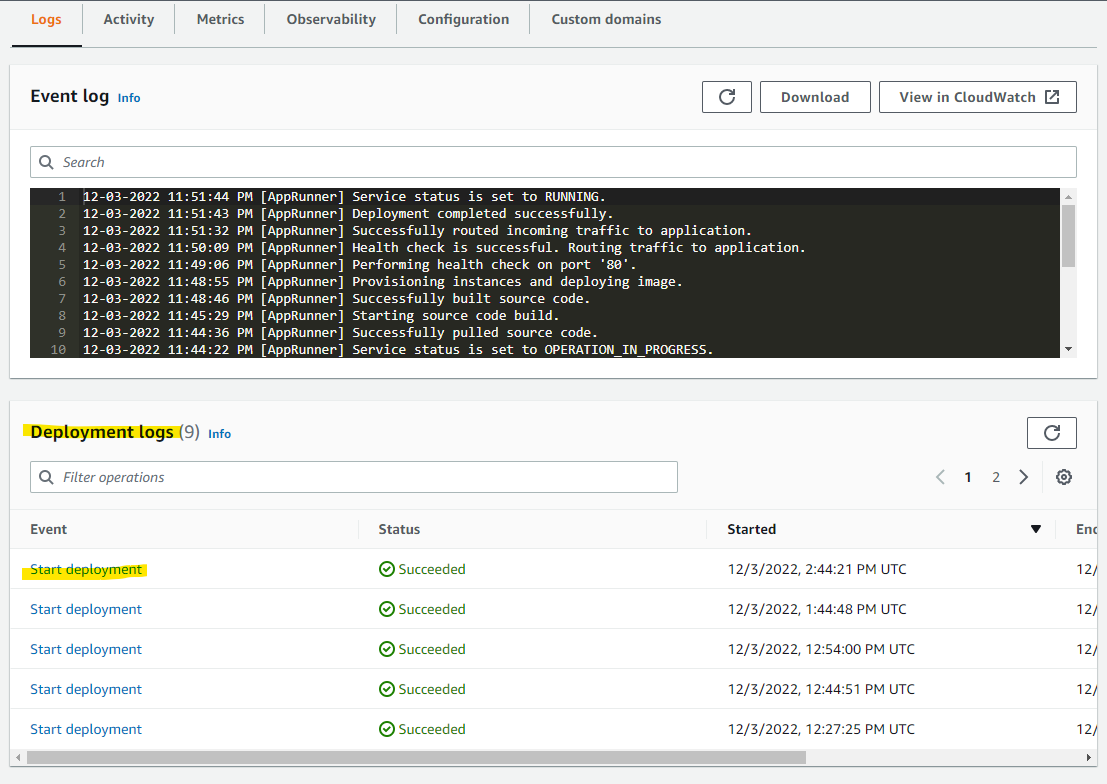
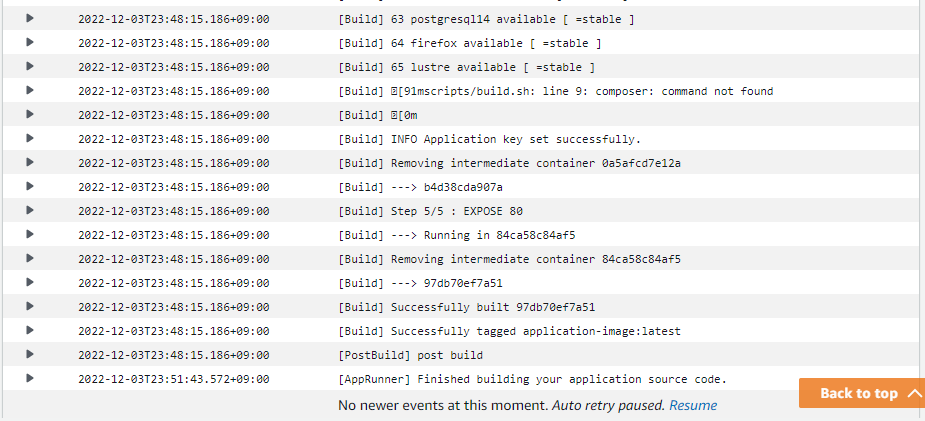
Deploy 中にエラーになることがあり、App Runner の画面上でログを確認できます。Deployment logs にある Start deployment を押します。
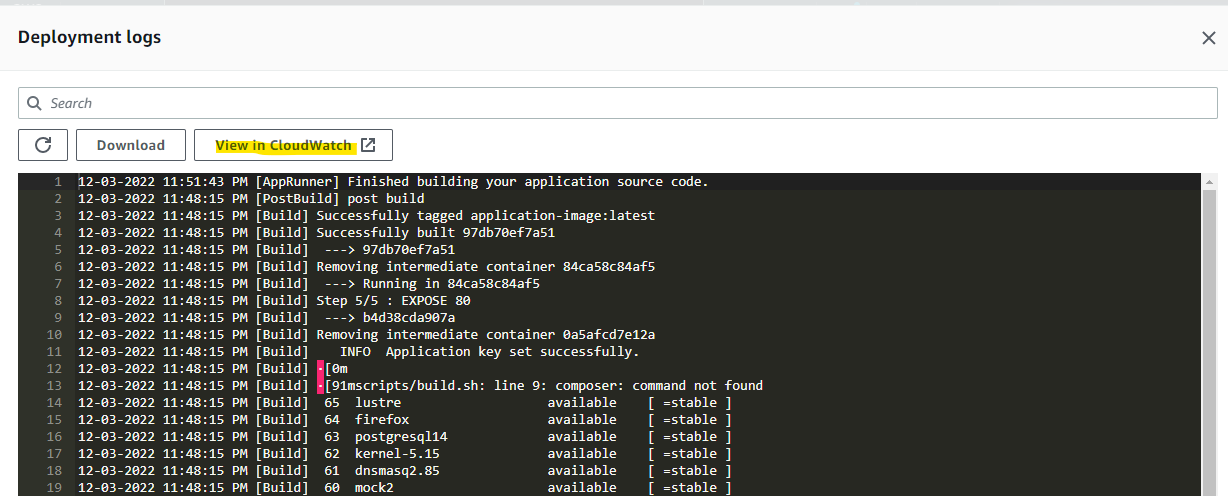
デプロイ中のログが見えます。この黒い画面の中でログを見ても良いですし、CloudWatch Logs 上でログを見てもよいです。個人的には、CloudWatch Logs で見るほうが好きです。
CloudWatch Logs ではこんな感じに見えます。
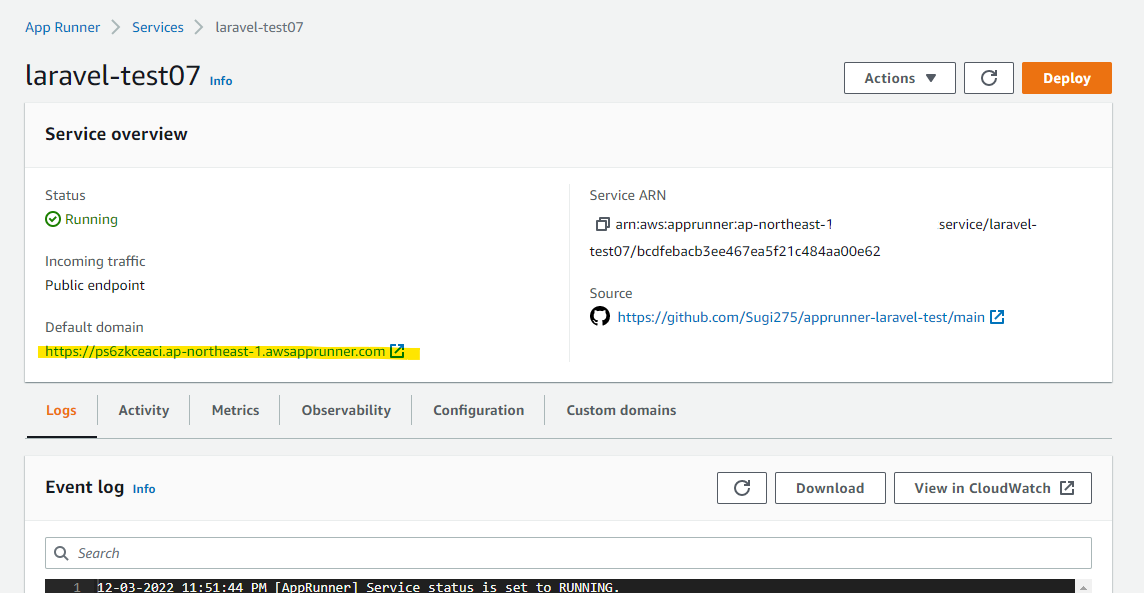
一定時間後、Status が Running と変わります。これでデプロイが完了です。
動作確認
デプロイが完了したので、Default domain の URL をクリックします。
Laravel の画面が開きました。
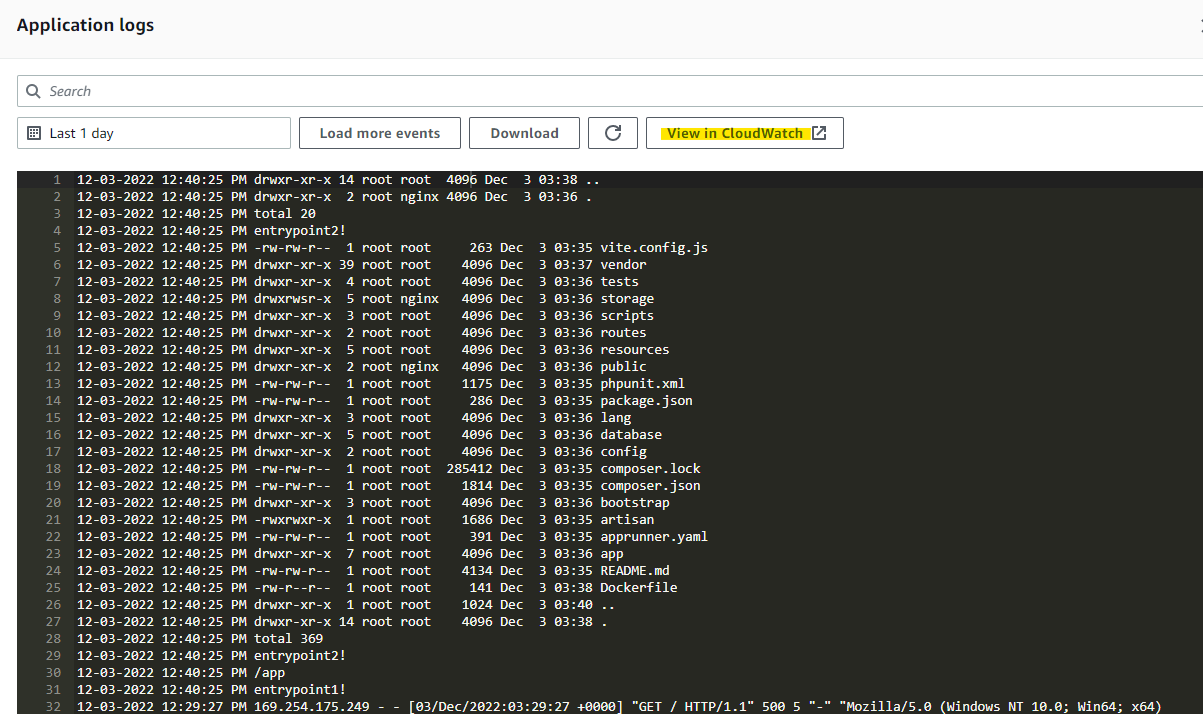
Nginx や PHP-FPM のログを標準出力に出しているため、マネージメントコンソール上でアプリケーションのログを確認できます。
黒い画面で、いろいろログがみえますが、CloudWatch Logs で見るのが個人的に好みです。
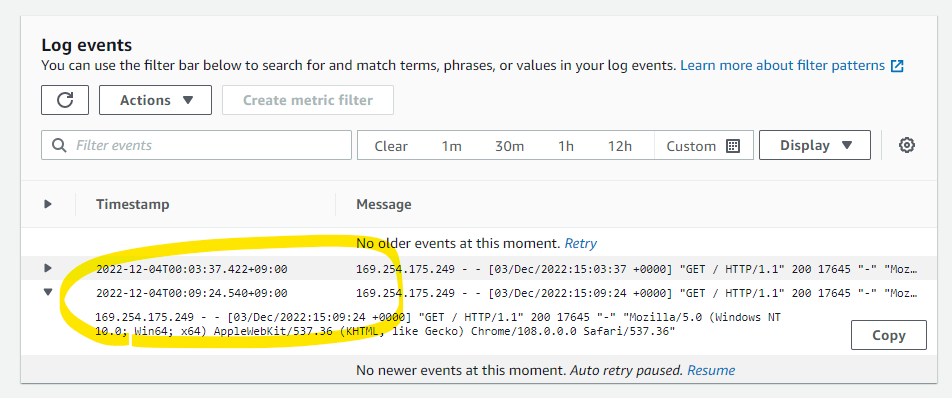
こんな感じで、アクセスログが見えたりします。
検証を通じてわかったこと
- App Runner で提供されている PHP のビルド用コンテナイメージには、デフォルトで Composer 2.4.4 がインストールされている
- コンテナイメージのカレントディレクトリは
/appとなっている - コンテナイメージのユーザーは
rootとなっている -
apprunner.yamlのビルドステージで yum install が可能 - ビルドに利用される環境の OS は Amazon Linux 2
- ビルドに約 10 分かかる。試行錯誤がちょっと大変
- App Runner には、ECS Exec のようなリモートアクセスが提供されていないため、若干デバッグが手間取る。コンテナに慣れている方は、Image-based service の利用が楽かもしれない
参考 URL
