ローカル環境に色々入れずに開発環境をDocker上で構築したいけど、コーディングはIDEを使いたいので自分が辿り着いた手順をまとめました。
似たようなことをすればIntelliJ, PyCharm, GoLand, RubyMine, PhpStormでもできそう。
できること
- ローカルPCにnodeなどを入れずにReactやFirebaseのアプリを開発できる
- Firebaseの複数プロジェクトに対してデプロイしたい場合、ディレクトリごとにFirebaseプロジェクトを割り当てることで
firebase useで切り替えずに複数のアプリケーションをデプロイできる
前提
- WebStorm(or IntelliJ)をインストールしている
- MacでDocker for Macをインストールしている
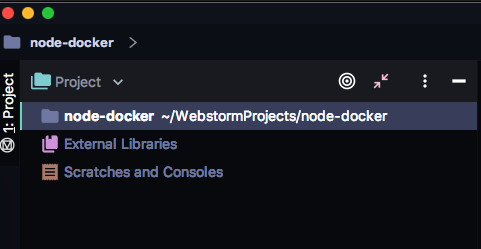
WebStormで新規Project作成
[File] -> [New] -> [Project]

[Empty Project]を選択し、Locationにプロジェクト名を設定して[CREATE]
| Setting | Value | Remark |
|---|---|---|
| Location: | {PROJECT PATH} | PATHの末尾がプロジェクト名 |

空のプロジェクトが作成される
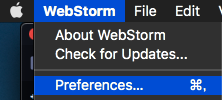
Dockerの設定
コマンドラインかWebStormのGUIのどちらかで設定すれば良い
Dockerコマンドラインで設定する場合
Terminalで以下を実行したあと、Ctrl + p->Ctrl + qで接続したコンテナから抜ける
[LOCAL]$ docker run \
-it \
-p 13000:3000 \
-v {PROJECT PATH}:/app \
--name {CONTAINER NAME} \
-w /app \
node:lts-alpine
| Setting | Value | Remarks |
|---|---|---|
| -p | 13000:3000 |
HOST:DOCKERの順で設定し、DockerコンテナのportへLocalからアクセスできるようにする。何個も起動させる場合、HOST側のportは重ならないように変えること。 |
| -v | {PROJECT PATH}:/app |
HOST:DOCKERの順で設定し、Dockerコンテナの/appディレクトリと先ほどLocalで作成したWebStormのプロジェクトディレクトリへ同期させることができる。 |
| --name | {CONTAINER NAME} |
起動したコンテナにつける名前。今回はnode-dockerとしている。 |
| -w | app |
コンテナ起動時に/appディレクトリを作成してコンテナへ接続した時のデフォルトディレクトリになる |
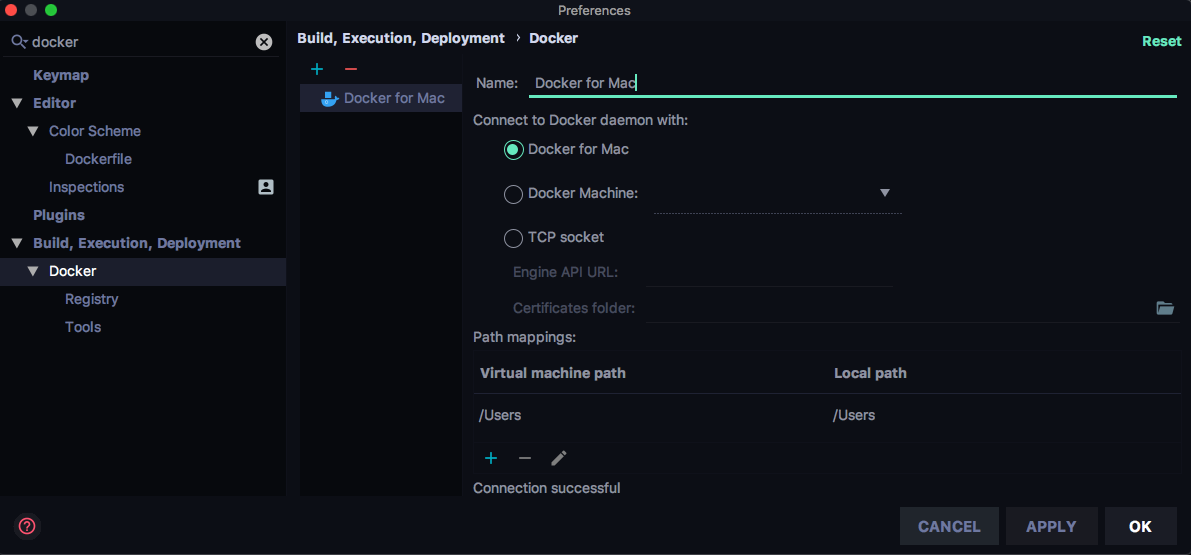
WebStormのDockerプラグインで設定する場合
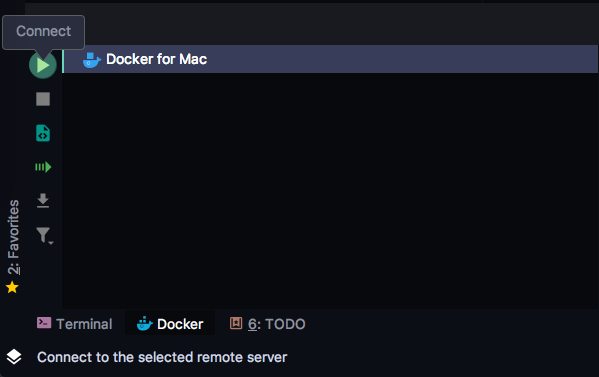
[WebStorm] -> [Preferences...] で [Build, Execution, Deployment]にあるDockerの設定画面を選択し、+ボタンで新規作成
Docker for Macを利用しているので、これを選択し適当に名前をつけて[OK]を選択
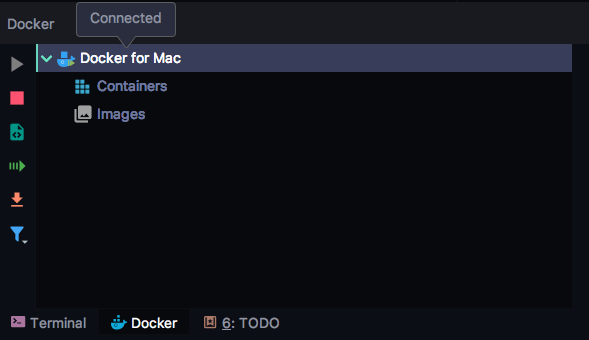
(今回は画面の左下に)Dockerのタブが現れたので▷(Connect)を押すと、ConnectedとなりContainersとImagesというのが表示される
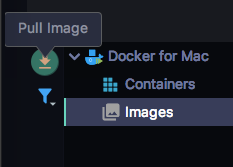
Imagesを選択してPull Image
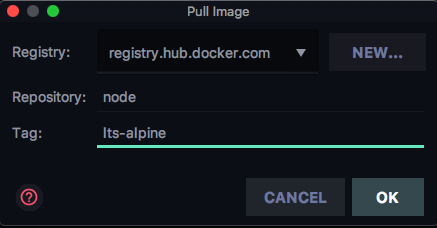
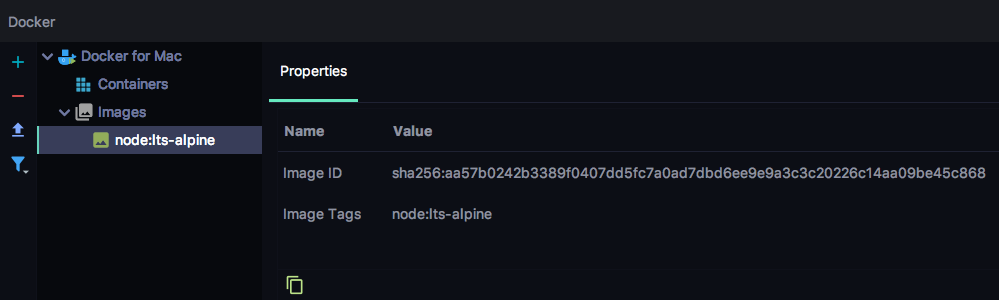
今回はnode:lts-alpineを利用
| Setting | Value | Remarks |
|---|---|---|
| Registry: | registry.hub.docker.com | デフォルトの設定 |
| Repository: | node | |
| Tag: | lts-alpine | ここは好きなのを選んで良い。今回は軽量と聞くalpineのlts版にした |
Imagesに選択したDockerのimageが表示される
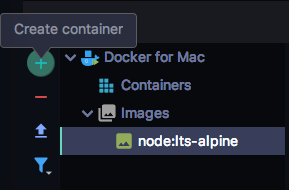
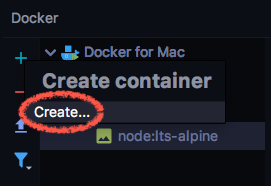
このimageからコンテナ作成のため+->Create..
コンテナ起動の設定を以下のようにしてRUN
| Setting | Value | Remarks |
|---|---|---|
| Container name: | {CONTAINER NAME} |
起動したコンテナにつける名前。今回はnode-dockerとしている。 |
| Bind ports: | 13000:3000 |
HOST:DOCKERの順で設定し、DockerコンテナのportへLocalからアクセスできるようにする |
| Bind mounts: | {PROJECT PATH}:/app |
HOST:DOCKERの順で設定し、Dockerコンテナの/appディレクトリとLocalで作成したWebStormのプロジェクトディレクトリへ同期させることができる |
| Run options: | -w app |
コンテナ起動時に/appディレクトリを作成してコンテナへ接続した時のデフォルトディレクトリになる |
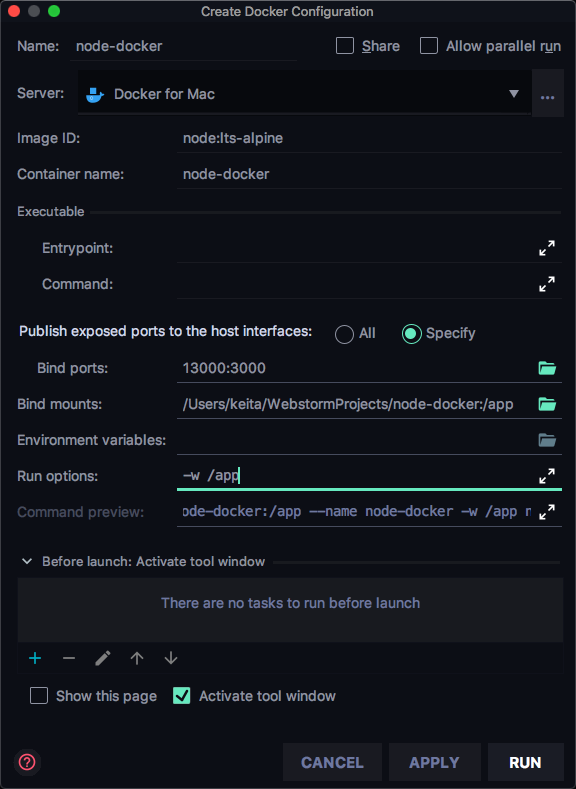
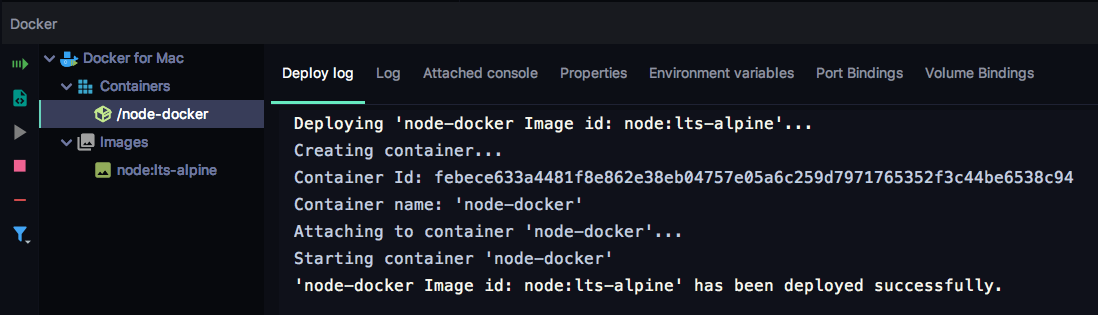
Deploy logにコンテナ作成が成功されたログが表示されればOK
Reactのプロジェクト作成
TerminalからDockerコンテナに接続して、Docker上にReactプロジェクトを作成する
# コンテナの起動確認
[LOCAL]$ docker ps
CONTAINER ID        IMAGE               COMMAND             CREATED              STATUS              PORTS                     NAMES
febece633a44        aa57b0242b33        "node"              About a minute ago   Up About a minute   0.0.0.0:13000->3000/tcp   node-docker

# コンテナへ接続
[LOCAL]$ docker exec -it node-docker /bin/sh
/app #
ここからdocker上での実行コマンド
コンテナシェルのPS1部分/app #は[DOCKER]$に読みかえてる
https://facebook.github.io/create-react-app/docs/adding-typescript を参考にtypescriptのReactプロジェクトを作成
# nodeのversion確認
[DOCKER]$ node --version
v10.15.3

# /appディレクトリにプロジェクト作成
[DOCKER]$ npx create-react-app /app --typescript
npx: installed 63 in 3.522s

Creating a new React app in /app.

Installing packages. This might take a couple of minutes.
Installing react, react-dom, and react-scripts...

yarn add v1.13.0
[1/4] Resolving packages...
[2/4] Fetching packages...
info fsevents@1.2.7: The platform "linux" is incompatible with this module.
info "fsevents@1.2.7" is an optional dependency and failed compatibility check. Excluding it from installation.
info fsevents@1.2.4: The platform "linux" is incompatible with this module.
info "fsevents@1.2.4" is an optional dependency and failed compatibility check. Excluding it from installation.
[3/4] Linking dependencies...
[4/4] Building fresh packages...
success Saved lockfile.
success Saved 13 new dependencies.
info Direct dependencies
├─ @types/jest@24.0.11
├─ @types/node@11.13.4
~ 省略 ~

Your tsconfig.json has been populated with default values.


Success! Created app at /app
Inside that directory, you can run several commands:

  yarn start
    Starts the development server.

  yarn build
    Bundles the app into static files for production.

  yarn test
    Starts the test runner.

  yarn eject
    Removes this tool and copies build dependencies, configuration files
    and scripts into the app directory. If you do this, you can’t go back!

We suggest that you begin by typing:

  cd /app
  yarn start

Happy hacking!
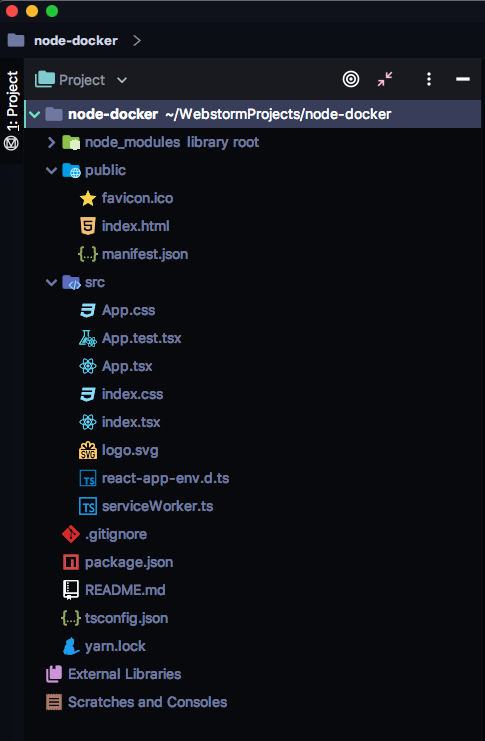
Dockerコンテナの/appディレクトリに作成されたプロジェクトがWebStorm上からも見えるようになった!!
動作確認
# デフォルトプロジェクトの起動
[DOCKER]$ yarn start
~省略
Compiled successfully!

You can now view app in the browser.

  Local:            http://localhost:3000/
  On Your Network:  http://172.17.0.2:3000/

Note that the development build is not optimized.
To create a production build, use yarn build.
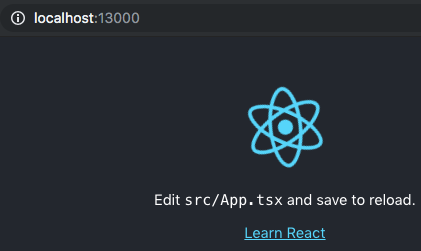
ブラウザでhttp://localhost:13000/ へアクセスし、デフォルトアプリが表示されることが確認できた!
あとは好きに開発するだけ!!
FirebaseプロジェクトごとにDocker開発環境を作成
# firebaseを利用するためまずはnodeのimageからコンテナを起動させる
[LOCAL]$ docker run \
-it \
--name firebase-skeleton \
-v {WEBSTORM PROJECTPATH}:/app \
-w /app \
node:lts-alpine

# 起動したコンテナに接続する
[LOCAL]$ docker exec -it firebase-skeleton /bin/sh

# firebaseのツールをインストール
[DOCKER]$ npm install -g firebase-tools
# 手順にしたがって利用したいgoogleアカウントでログインする
[DOCKER]$ firebase login --no-localhost
# Firebaseプロジェクトを選択or新規作成し、セットアップする(今回はCloud Functionsをセットアップ)
[DOCKER]$ firebase init functions

# ログイン状態のコンテナをcommitしてimage化する
[LOCAL]$ docker stop firebase-skeleton
[LOCAL]$ docker commit firebase-skeleton {FIREBASE PROJECT NAME}:{YOUR TAG}
# 不要になったコンテナは削除
[LOCAL]$ docker rm firebase-skeleton

# imageが作成されていることの確認
[LOCAL]$ docker images
REPOSITORY                  TAG                 IMAGE ID            CREATED             SIZE
{FIREBASE PROJECT NAME}     {YOUR TAG}          c939d073f6a0        8 seconds ago       297MB
node                        lts-alpine          aa57b0242b33        4 days ago          71MB
# 指定したFirebaseプロジェクトにログイン状態のimageをコンテナ起動
[LOCAL}$ docker run \
-it \
--name {CONTAINER NAME} \
-v {WEBSTORM PROJECTPATH}:/app \
-w /app \
myfirebase/{FIREBASE PROJECT NAME}:{YOUR TAG}
WebStormでファイルを修正できるようになるのでfunctionを作成
今回はTypeScriptでCloud Functionsを作成するのでfunctions/src/index.tsをWebStormから変更
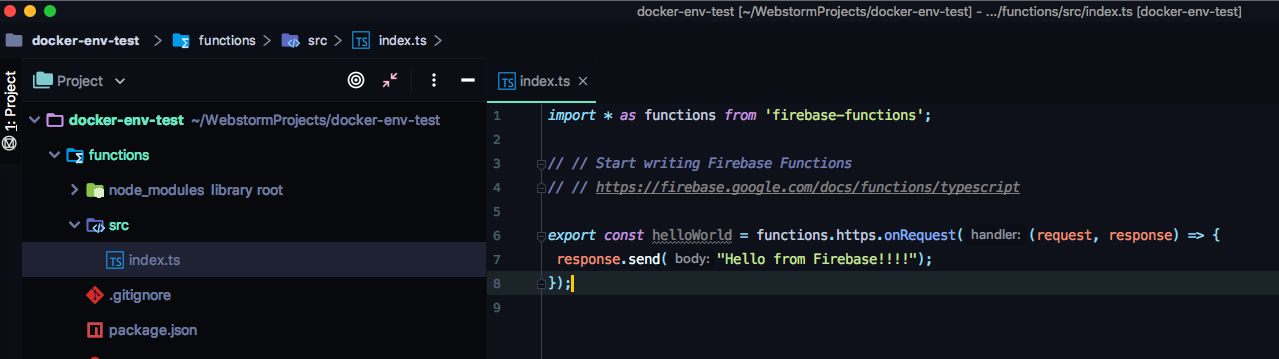
import * as functions from 'firebase-functions';

export const helloWorld = functions.https.onRequest((request, response) => {
 response.send("Hello from Firebase!!!!");
});
動作確認
ログイン状態のimageを利用しているのでloginせずにFirebaseへデプロイできる!!
# 起動したコンテナに接続する
[LOCAL]$ docker exec -it {CONTAINER NAME} /bin/sh

# functionを作成してデプロイ(init時にTypeScriptを選択していると、このコマンド内でtsのコンパイルもしてくれる)
[DOCKER]$ firebase deploy --only functions
~省略~
✔  functions: Finished running predeploy script.
i  functions: ensuring necessary APIs are enabled...
✔  functions: all necessary APIs are enabled
i  functions: preparing functions directory for uploading...
i  functions: packaged functions (33.39 KB) for uploading
✔  functions: functions folder uploaded successfully
i  functions: creating Node.js 6 function helloWorld(us-central1)...
✔  functions[helloWorld(us-central1)]: Successful create operation.
Function URL (helloWorld): https://XXXXXXX.cloudfunctions.net/helloWorld

✔  Deploy complete!

Please note that it can take up to 30 seconds for your updated functions to propagate.
Project Console: https://console.firebase.google.com/project/{FIREBASE PROJECT NAME}/overview
Function URLで表示されたURLへアクセス

これで複数のFirebaseプロジェクトへデプロイしたい場合に、ローカルでloginを切り替えずに実行できる!!