概要
M5StackからLINEに通知するやり方を調べていたらIFTTT(If This Then That)を使うやり方があることを知りました。
名前は知っていたけど、使ったことなかったので試してみた時のメモです。
やること
シンプルにM5StackのボタンAが押された時にLINEへ通知がいくのを確認できるようにしたいですね。
手順
IFTTTのアカウント作成
↓こちらからアカウントを作成します。
https://ifttt.com/
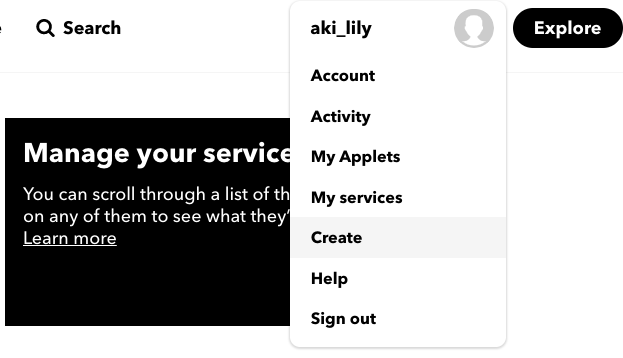
作成しましたら、↓のcreateを押します
そして、↓の画面から接続していきます
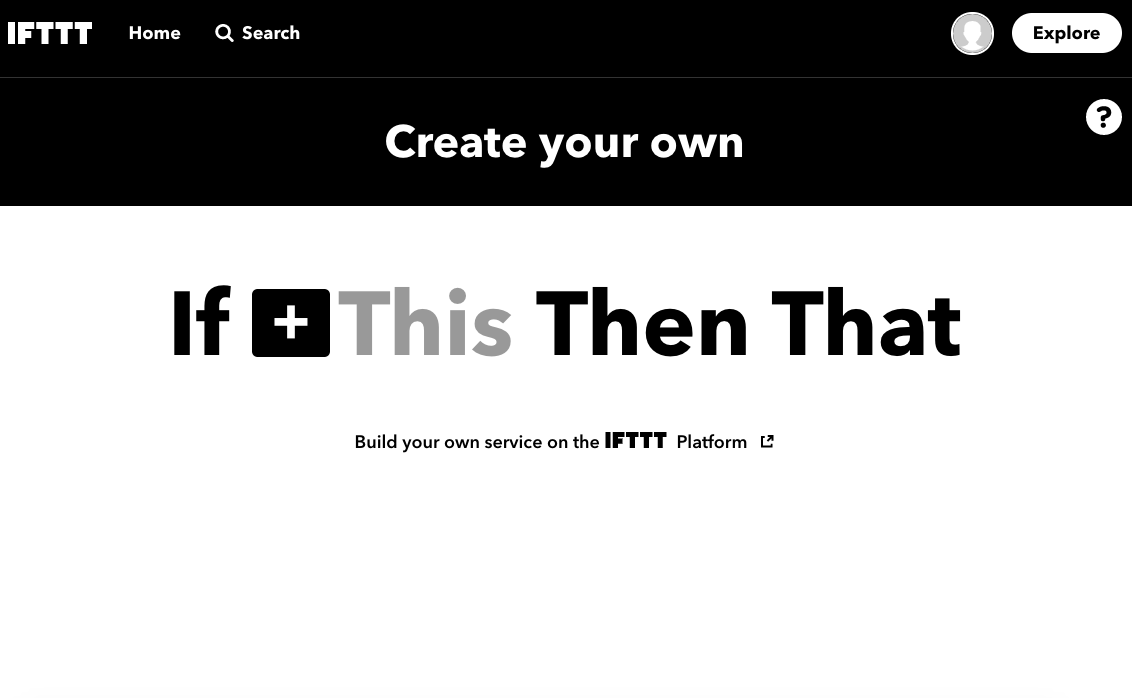
とっても分かりやすいUIですね。
Thisをwebhookに設定し、ThatにLINEを設定していきます。
LINE Notifyの開発ページに飛ぶ必要すらないってのは簡単ですね。
あとはこちらのコードをArduino IDEから書き込めば完了です!
* IFTTTを使ってm5stackとlineを連携させるプログラム
 * 参照元:https://thousandiy.wordpress.com/2017/10/17/esp32_ifttt_line/
 */

# include <M5Stack.h>
# include <WiFi.h>
# include <WiFiClient.h>

const char* ssid     = "****";
const char* password = "****";

String makerEvent = "push_line"; // Maker Webhooks
String makerKey = "****"; // Maker Webhooks

const char* server = "maker.ifttt.com";  // Server URL
WiFiClient client;

bool checkWifiConnected() {
  // attempt to connect to Wifi network:
  while (WiFi.status() != WL_CONNECTED) {
    Serial.print(".");
    // wait 1 second for re-trying
    delay(1000);
  }

  Serial.print("Connected to ");
  Serial.println(ssid);
  return true;
}

void send(String value1, String value2, String value3) {
  while (!checkWifiConnected()) {
    Serial.print("Attempting to connect to WiFi");
    WiFi.begin(ssid, password);
  }

  Serial.println("\nStarting connection to server...");
  if (!client.connect(server, 80)) {
    Serial.println("Connection failed!");
  } else {
    Serial.println("Connected to server!");
    // Make a HTTP request:
    String url = "/trigger/" + makerEvent + "/with/key/" + makerKey;
    url += "?value1=" + value1 + "&value2=" + value2 + "&value3=" + value3;
    client.println("GET " + url + " HTTP/1.1");
    client.print("Host: ");
    client.println(server);
    client.println("Connection: close");
    client.println();
    Serial.print("Waiting for response "); //WiFiClientSecure uses a non blocking implementation

    int count = 0;
    while (!client.available()) {
      delay(50); //
      Serial.print(".");
    }
    // if there are incoming bytes available
    // from the server, read them and print them:
    while (client.available()) {
      char c = client.read();
      Serial.write(c);
    }

    // if the server's disconnected, stop the client:
    if (!client.connected()) {
      Serial.println();
      Serial.println("disconnecting from server.");
      client.stop();
    }
  }
}

void setup() {
  //Initialize serial and wait for port to open:
  Serial.begin(115200);
  delay(100);

   WiFi.begin(ssid, password);
  while (!checkWifiConnected()) {
    WiFi.begin(ssid, password);
  }
}

void loop() {
  M5.update();
  if (M5.BtnA.wasReleased()) {
   send("LINE","test1","test2"); //任意の文字列3つ
   M5.Lcd.println("send");
  }
  delay(20);
}
*こちらは参考サイトのサンプルと同じものです。