2020/10/11
以下を目指します。
- Dockerで構築
- Elasticsearch: 3ノードで起動
- Logstash: Twitterデータ取得
- Kibana: Twitterデータ可視化
最終形のソースは以下に保存しています。
準備
以下に沿って進みます
Install Elasticsearch with Docker | Elasticsearch Reference [7.9] | Elastic
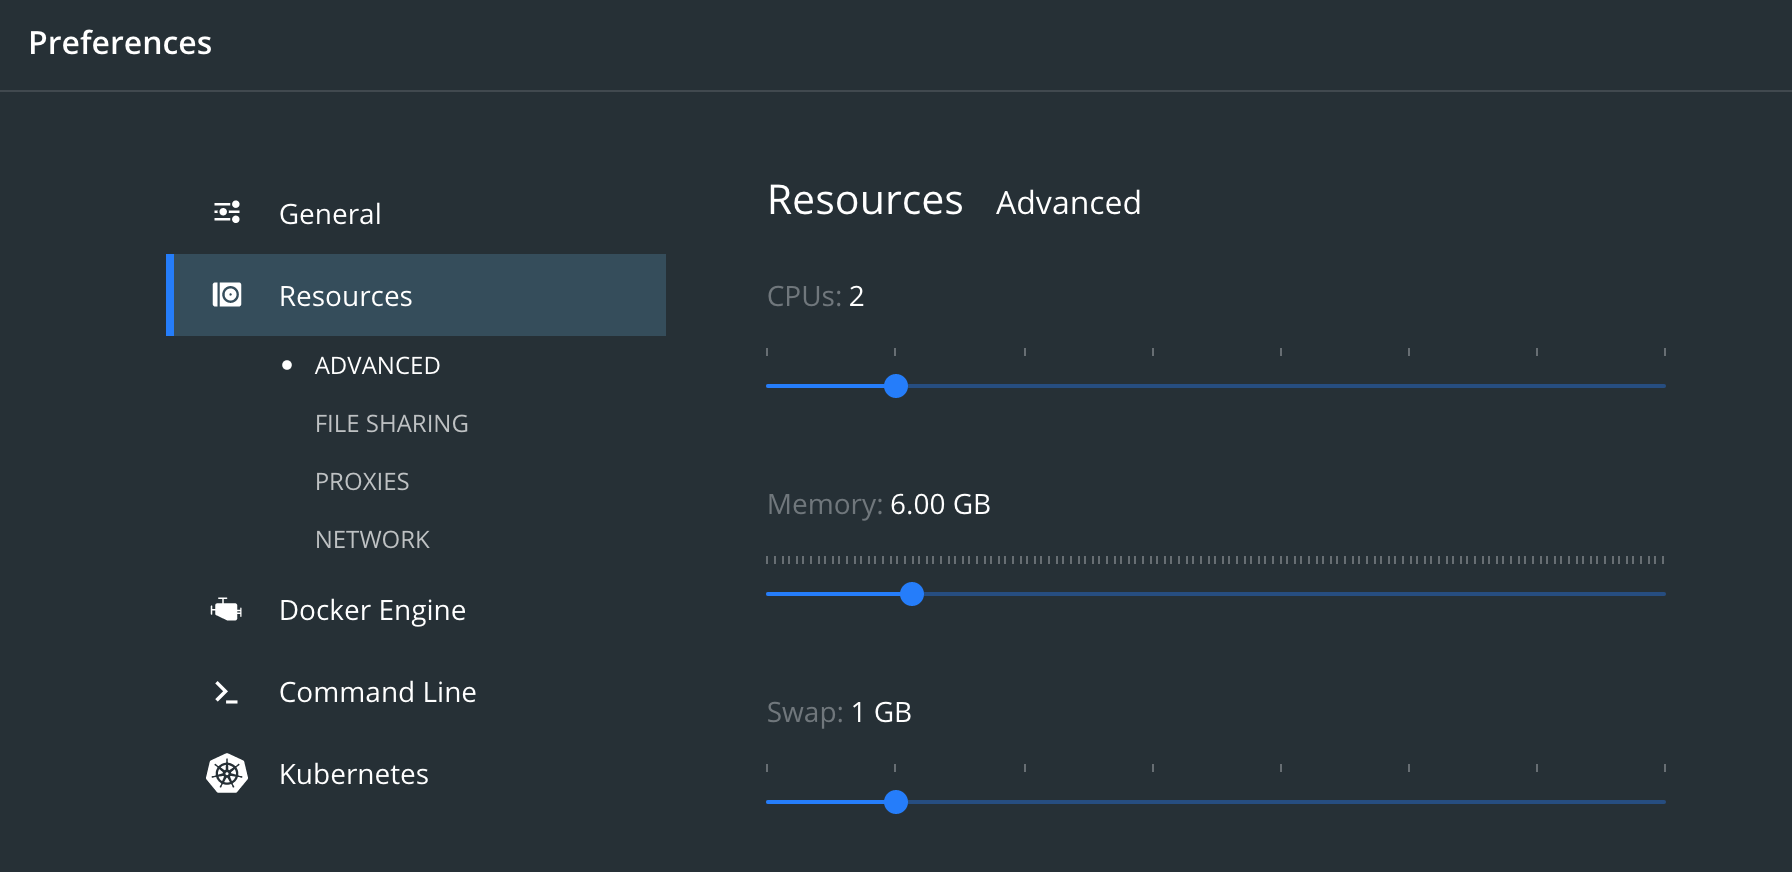
メモリの割り当て
Make sure Docker Engine is allotted at least 4GiB of memory. In Docker Desktop, you configure resource usage on the Advanced tab in Preference (macOS) or Settings (Windows).
DockerEngineに少なくとも4GiBのメモリが割り当てられていることを確認してください。
Docker Desktopでは、[設定](macOS)または[設定](Windows)の[詳細設定]タブでリソースの使用を構成します。
割当メモリが少ないとノードの起動に失敗したりします。
Elasticsearch
シングルノードの開始
他にも、いろんな紹介記事があるので、割愛します。
dockerでElasticSearch立ち上げとお試し操作 - Qiita
マルチノードの開始
DockerComposeを使用して3ノードのクラスター稼働します。
1. docker-compose.ymlの作成
作業用フォルダを用意し直下にdocker-compose.ymlを作成します。
3ノードのElasticsearchクラスターを起動します。
ノードes01はlocalhost:9200でリッスンし、es02とes03はDockerネットワークを介してes01と通信します。
version: "2.2"
services:
  # 1st node port=9200
  elasticsearch01:
    image: docker.elastic.co/elasticsearch/elasticsearch:7.9.2
    container_name: es01
    environment:
      - node.name=es01
      - cluster.name=es-docker-cluster
      - discovery.seed_hosts=es02,es03
      - cluster.initial_master_nodes=es01,es02,es03
      - bootstrap.memory_lock=true
      - "ES_JAVA_OPTS=-Xms512m -Xmx512m"
    ulimits:
      memlock:
        soft: -1
        hard: -1
    volumes:
      - elasticsearch_multinode_data01:/usr/share/elasticsearch/data
    ports:
      - 9200:9200
    networks:
      - elastic
    healthcheck:
      interval: 20s
      retries: 10
      test: curl -s http://localhost:9200/_cluster/health | grep -vq '"status":"red"'

  # 2nd node
  elasticsearch02:
    image: docker.elastic.co/elasticsearch/elasticsearch:7.9.2
    container_name: es02
    environment:
      - node.name=es02
      - cluster.name=es-docker-cluster
      - discovery.seed_hosts=es01,es03
      - cluster.initial_master_nodes=es01,es02,es03
      - bootstrap.memory_lock=true
      - "ES_JAVA_OPTS=-Xms512m -Xmx512m"
    ulimits:
      memlock:
        soft: -1
        hard: -1
    volumes:
      - elasticsearch_multinode_data02:/usr/share/elasticsearch/data
    networks:
      - elastic

  # 3rd node
  elasticsearch03:
    image: docker.elastic.co/elasticsearch/elasticsearch:7.9.2
    container_name: es03
    environment:
      - node.name=es03
      - cluster.name=es-docker-cluster
      - discovery.seed_hosts=es01,es02
      - cluster.initial_master_nodes=es01,es02,es03
      - bootstrap.memory_lock=true
      - "ES_JAVA_OPTS=-Xms512m -Xmx512m"
    ulimits:
      memlock:
        soft: -1
        hard: -1
    volumes:
      - elasticsearch_multinode_data03:/usr/share/elasticsearch/data
    networks:
      - elastic

volumes:
  elasticsearch_multinode_data01:
    driver: local
  elasticsearch_multinode_data02:
    driver: local
  elasticsearch_multinode_data03:
    driver: local

networks:
  elastic:
    driver: bridge
※この構成では、ポート9200が公開され、パブリックにアクセス可能であることに注意してください。
ポート9200を公開せず、代わりにリバースプロキシを使用する場合は、docker-compose.ymlファイルで9200:9200を127.0.0.1:9200:9200に置き換えます。 Elasticsearchは、ホストマシン自体からのみアクセスできるようになります。
※ ボリュームelasticsearch_multinode_data01〜03は再起動後も保持されます。
それらがまだ存在しない場合は、クラスターを起動したときにdocker-composeによって作成されます。
起動
elasticsearch起動
docker-compose up
稼働確認
ヘルスチェック
$ curl -X GET "localhost:9200/_cat/health?v&pretty"

epoch      timestamp cluster           status node.total node.data shards pri relo init unassign pending_tasks max_task_wait_time active_shards_percent
1602390892 04:34:52  es-docker-cluster green           3         3      0   0    0    0        0             0                  -                100.0%
各ノードのステータス確認
$ curl -X GET "localhost:9200/_cat/nodes?v&pretty"

ip         heap.percent ram.percent cpu load_1m load_5m load_15m node.role master name
172.19.0.4           37          63  47    2.44    1.47     1.18 dilmrt    -      es03
172.19.0.3           18          63  46    2.44    1.47     1.18 dilmrt    *      es01
172.19.0.2           24          63  48    2.44    1.47     1.18 dilmrt    -      es02
ボリュームが作成されたことを確認
$ docker volume ls

DRIVER              VOLUME NAME
local               docker_elasticsearch_multinode_data01
local               docker_elasticsearch_multinode_data02
local               docker_elasticsearch_multinode_data03
data01の詳細確認
$ docker volume inspect docker_elasticsearch_multinode_data01

[
    {
        "CreatedAt": "2020-10-11T04:20:26Z",
        "Driver": "local",
        "Labels": {
            "com.docker.compose.project": "docker",
            "com.docker.compose.version": "1.27.4",
            "com.docker.compose.volume": "elasticsearch_multinode_data01"
        },
        "Mountpoint": "/var/lib/docker/volumes/docker_elasticsearch_multinode_data01/_data",
        "Name": "docker_elasticsearch_multinode_data01",
        "Options": null,
        "Scope": "local"
    }
]
さらに、ボリュームの中を確認
ターミナルを立ち上げて、以下のコマンドでdockerの中に入って確認する
$ docker run -it --privileged --pid=host debian nsenter -t 1 -m -u -n -i sh
lsコマンドで確認
/ # ls -ll /var/lib/docker/volumes/
total 44
drwxr-xr-x    3 root     root          4096 Oct 11 04:20 docker_elasticsearch_multinode_data01
drwxr-xr-x    3 root     root          4096 Oct 11 04:20 docker_elasticsearch_multinode_data02
drwxr-xr-x    3 root     root          4096 Oct 11 04:20 docker_elasticsearch_multinode_data03
-rw-------    1 root     root         65536 Oct 11 04:20 metadata.db
満足したらexitコマンドで終了
参考
データの作成
customerというIndexを作成しデータ投入して確認します。
途中でElasticsearchを終了した後、再実行してデータが永続化されているかも確認します。
index 作成
curl -X PUT "localhost:9200/customer?pretty&pretty"
確認
$ curl -X GET "localhost:9200/_cat/indices?v&pretty"

health status index    uuid                   pri rep docs.count docs.deleted store.size pri.store.size
green  open   customer FIT3eS3YSR2UEE0np3BnwA   1   1          0            0       416b           208b
データ投入
_id を1指定でデータを投入します
curl --include -XPOST "http://localhost:9200/customer/_doc/1?pretty" \
-H 'Content-Type: application/json' \
-d '{
  "name": "John Doe",
  "message": "The night was young, and so was he. But the night was sweet, and he was sour."
}'
確認
$ curl -X GET 'localhost:9200/customer/_doc/1?pretty'

{
  "_index" : "customer",
  "_type" : "_doc",
  "_id" : "1",
  "_version" : 1,
  "_seq_no" : 2,
  "_primary_term" : 1,
  "found" : true,
  "_source" : {
    "name" : "John Doe",
    "message" : "The night was young, and so was he. But the night was sweet, and he was sour."
  }
}
データの永続化確認
Elasticsearchを終了して再度実行します。
$ docker-compose down
$ docker-compose up
データの永続化確認
$ curl -X GET "localhost:9200/_cat/indices?v&pretty"

health status index    uuid                   pri rep docs.count docs.deleted store.size pri.store.size
green  open   customer oD3E_VXqSWy7I0F1NSIlyQ   1   1          1            0      9.6kb          4.8kb


$ curl -X GET 'localhost:9200/customer/_doc/1?pretty'

{
  "_index" : "customer",
  "_type" : "_doc",
  "_id" : "1",
  "_version" : 1,
  "_seq_no" : 2,
  "_primary_term" : 1,
  "found" : true,
  "_source" : {
    "name" : "John Doe",
    "message" : "The night was young, and so was he. But the night was sweet, and he was sour."
  }
}
kibanaの追加
参考: Install Kibana with Docker | Kibana Guide [7.9] | Elastic
設定追加
docker-compose.ymlのVolumesセクションの上らへんに以下を追加します。
  # kibana
  kibana:
    image: docker.elastic.co/kibana/kibana:7.9.2
    container_name: kibana
    ports:
      - "5601:5601"
    environment:
      - ELASTICSEARCH_HOSTS=http://es01:9200 # container_nameを参照する
      - "I18N_LOCALE=ja-JP" # 日本語表示にする
    depends_on:
      - elasticsearch01
      - elasticsearch02
      - elasticsearch03
    networks:
      - elastic
    healthcheck:
      interval: 10s
      retries: 20
      test: curl --write-out 'HTTP %{http_code}' --fail --silent --output /dev/null http://localhost:5601/api/status
    restart: always
environmentに日本語かの設定も追加しています。
実行
$ docker-compose up
確認
以下へアクセスする
http://localhost:5601/
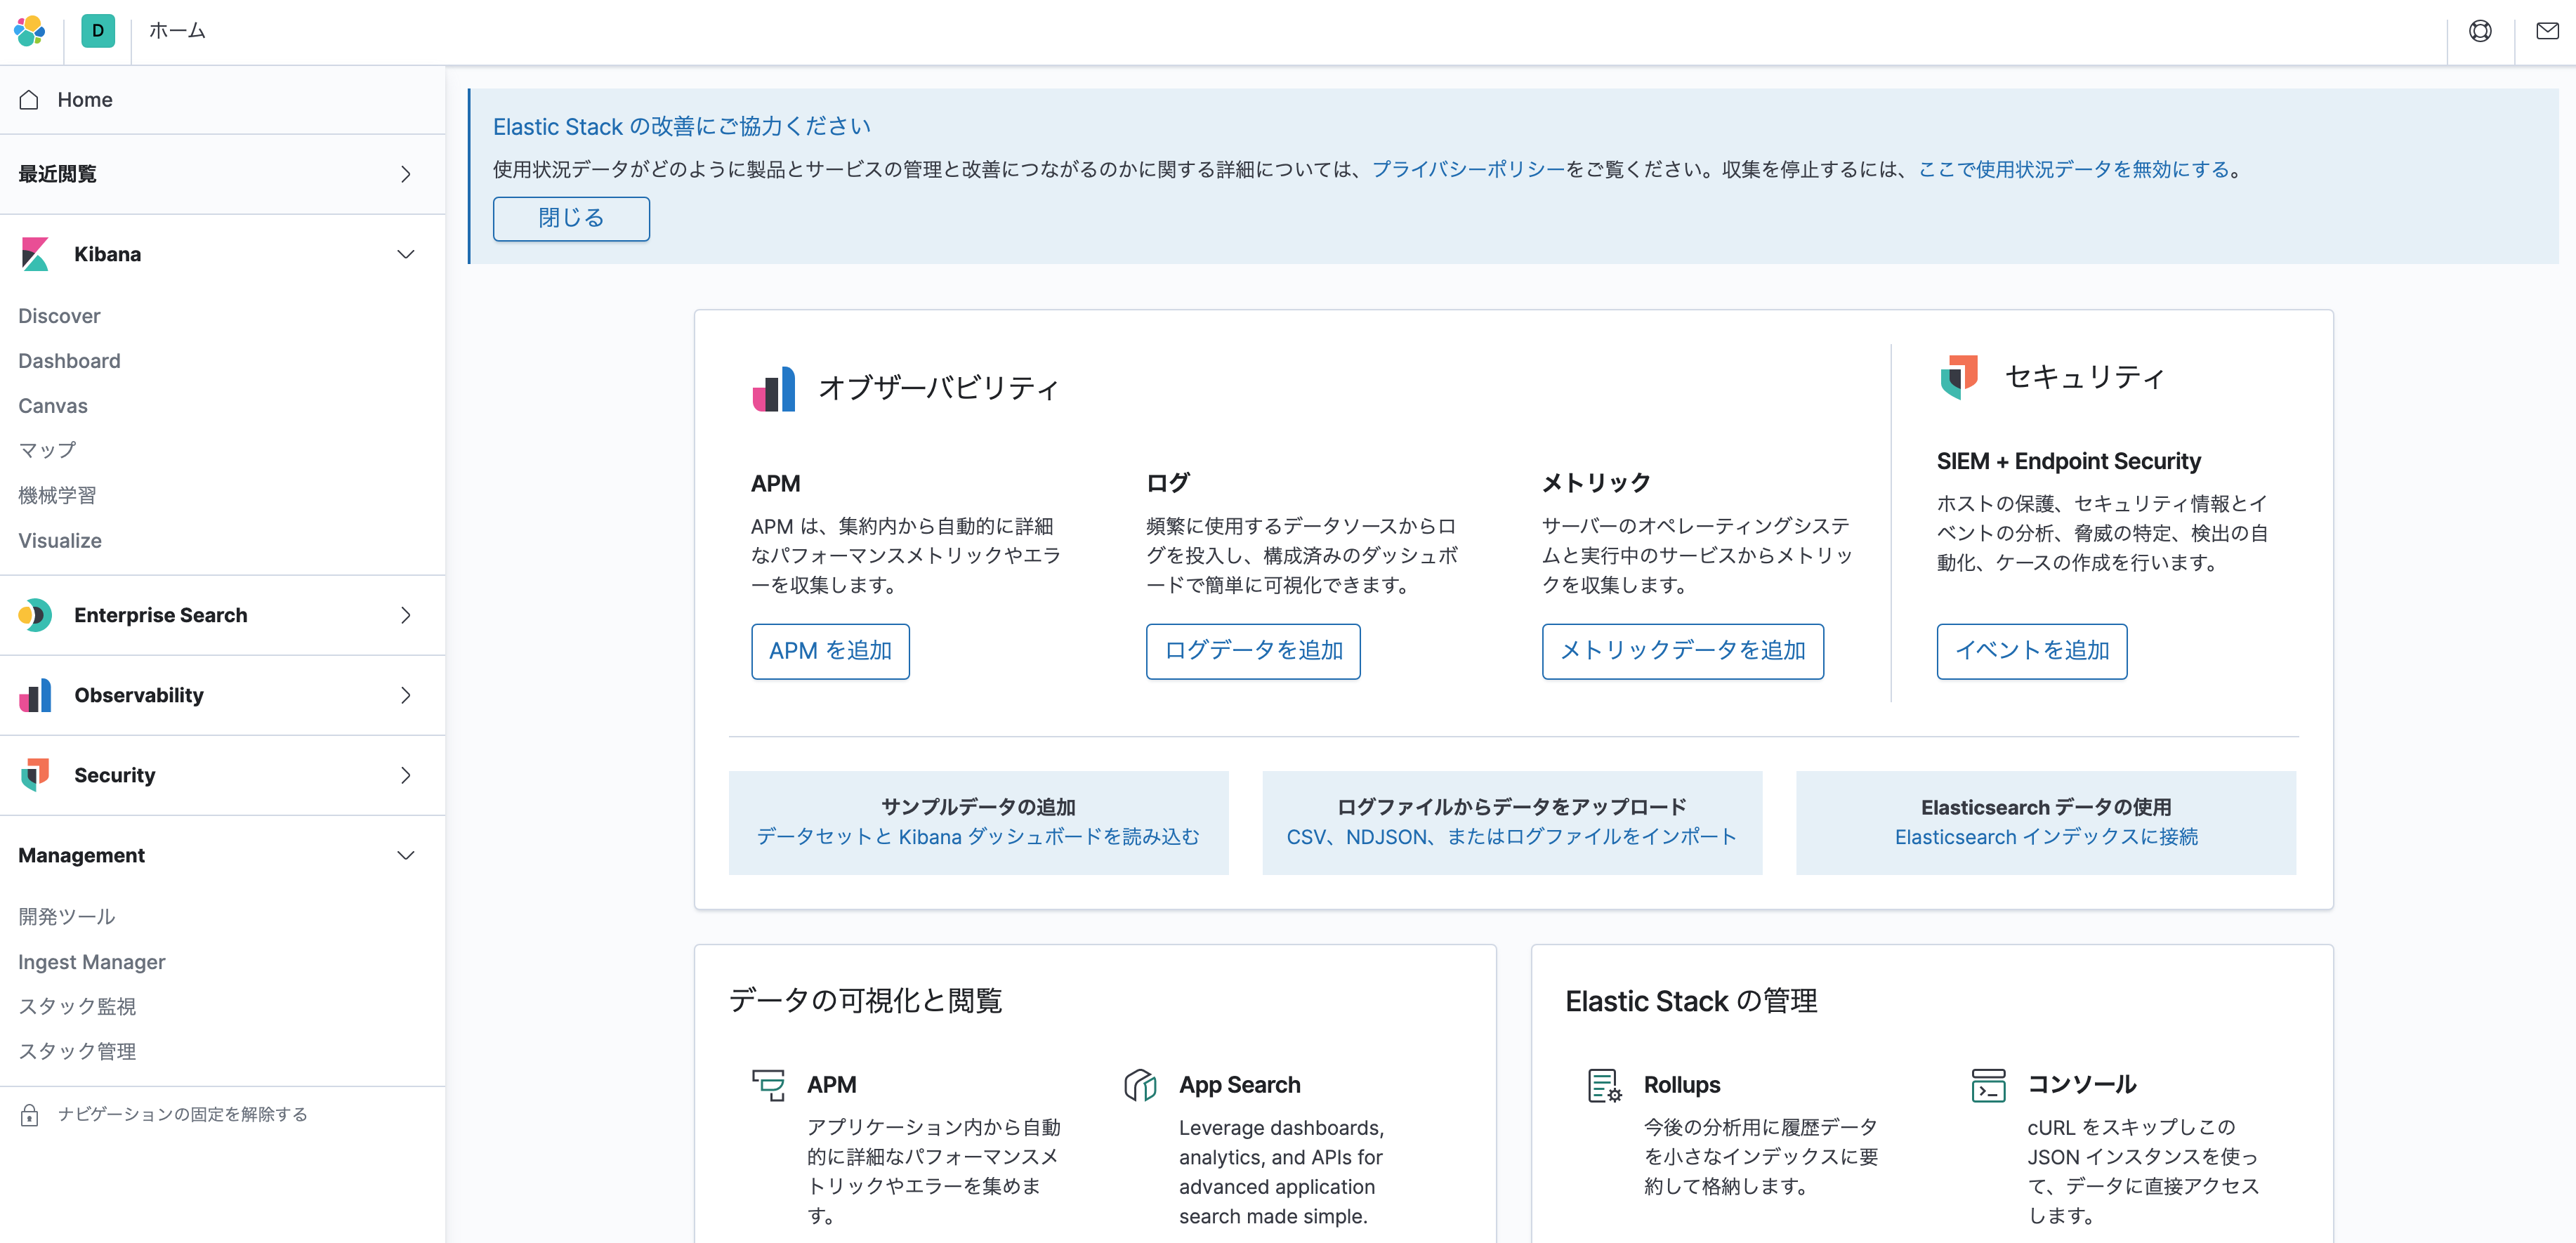
ブラウザでKibana画面が表示されます
確認
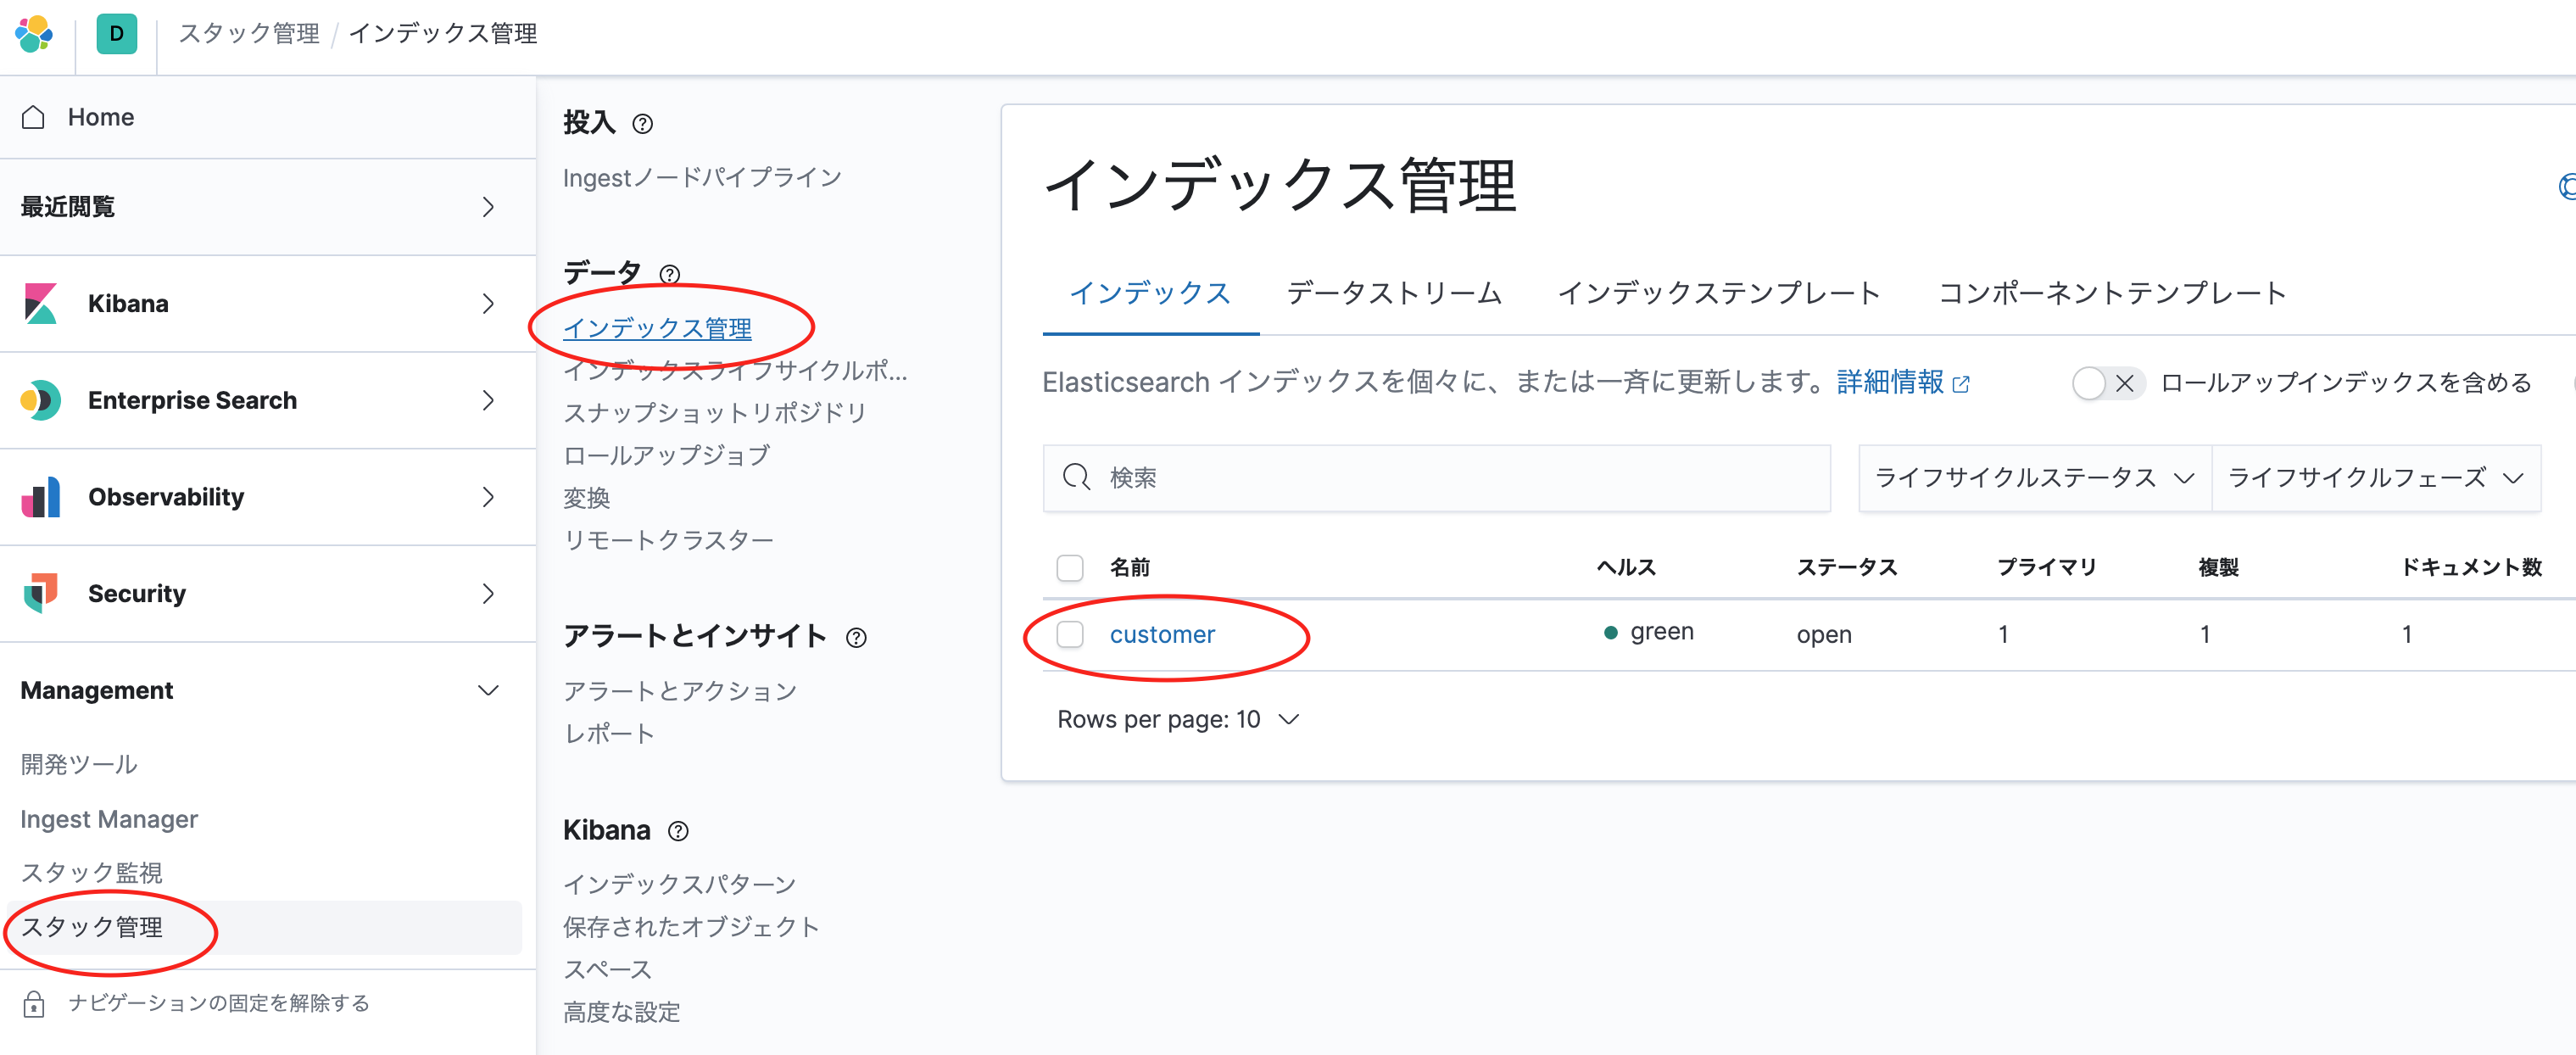
kibanaメニュー > Management > Stack管理
データメニューからインデックス管理を選択します。
先ほど作成したcustomerインデックスが表示されていると思います。
ひとしきり満足したらElasticsearchを終了してLogstashに移ります。
Logstash
参考: Running Logstash on Docker | Logstash Reference [7.9] | Elastic
設定追加
docker-compose.ymlの、Kibanaの設定の後ろ、Volumesセクションの上らへんに以下を追加します。
  # logstash
  logstash:
    image: docker.elastic.co/logstash/logstash:7.9.2
    container_name: logstash
    networks:
      - elastic
    depends_on:
      - elasticsearch01
      - elasticsearch02
      - elasticsearch03
    restart: always
実行
$ docker-compose up
確認
起動しているか確認してみる
$ docker ps

CONTAINER ID        IMAGE                                                 COMMAND                  CREATED             STATUS                    PORTS                              NAMES
072d509e37f0        docker.elastic.co/kibana/kibana:7.9.2                 "/usr/local/bin/dumb…"   16 minutes ago      Up 16 minutes (healthy)   0.0.0.0:5601->5601/tcp             kibana
7bd68ec00995        docker.elastic.co/logstash/logstash:7.9.2             "/usr/local/bin/dock…"   16 minutes ago      Up 16 minutes             5044/tcp, 9600/tcp                 logstash
7bff0bddb7e1        docker.elastic.co/elasticsearch/elasticsearch:7.9.2   "/tini -- /usr/local…"   16 minutes ago      Up 16 minutes             9200/tcp, 9300/tcp                 es02
e32fcf67c1c3        docker.elastic.co/elasticsearch/elasticsearch:7.9.2   "/tini -- /usr/local…"   16 minutes ago      Up 16 minutes             9200/tcp, 9300/tcp                 es03
60f489bf0dc8        docker.elastic.co/elasticsearch/elasticsearch:7.9.2   "/tini -- /usr/local…"   16 minutes ago      Up 16 minutes (healthy)   0.0.0.0:9200->9200/tcp, 9300/tcp   es01
Twitter開発者登録
Twitter APIの開発者登録がまだの人は以下で登録
以下を参考にして登録しました。
2020年度版 Twitter API利用申請の例文からAPIキーの取得まで詳しく解説 | 新宿のホームページ制作会社 ITTI(イッティ)
以下からアプリを追加し、consumer_key等を控えます
Logstash設定追加
フォルダ構成
以下のようなフォルダ構成になるように進めていきます。
$ tree --charset=C

.
|-- docker-compose.yml
|-- logstash
|   |-- config
|   |   |-- logstash.yml
|   |   |-- pipelines.yml
|   `-- pipeline
|       `-- twitter.conf
logstashの設定を以下のようにvolumesを追加する。
  logstash:
    image: docker.elastic.co/logstash/logstash:7.9.2
    container_name: logstash
    volumes:
      - ./logstash/pipeline/:/usr/share/logstash/pipeline/
      - ./logstash/config/:/usr/share/logstash/config/
    networks:
      - elastic
    depends_on:
      - elasticsearch01
      - elasticsearch02
      - elasticsearch03
    restart: always
./logstash/config/ フォルダを作成し、配下に以下を置く
- logstash.yml
pipeline.ordered: auto
http.host: "0.0.0.0"
xpack.monitoring.elasticsearch.hosts: ["http://es01:9200"]
- pipelines.yml
- pipeline.id: twitter_pipeline
  path.config: "/usr/share/logstash/pipeline/twitter.conf"
  queue.type: persisted
パイプライン設定
- twitter.conf
input {
  twitter {
    consumer_key => "<your_consumer_key>" ← TwitterAPI管理画面で取得したキーを設定
    consumer_secret => "<your_consumer_secret>"
    oauth_token => "your_oauth_token"
    oauth_token_secret => "your_oauth_token_secret"
    keywords => ["前澤さん", "前澤社長"]
    ignore_retweets => true
    full_tweet => true
  }
}

output {
  elasticsearch {
    hosts => ["http://es01:9200/"]
    index => "twitter_maezawa"
  }
}
参考:Sentiment analysis on twitter data with ELK | Clément’s blog
2020/10/11現在、「前澤さん」というキーワードがツイッターのトレンド入りになっていたので、Twitterから取得するキーワードに["前澤さん", "前澤社長"]を設定しています。
インデックス名も"twitter_maezawa"としてみました。
実行
docker-compose up
確認
Kibanaにアクセスします。
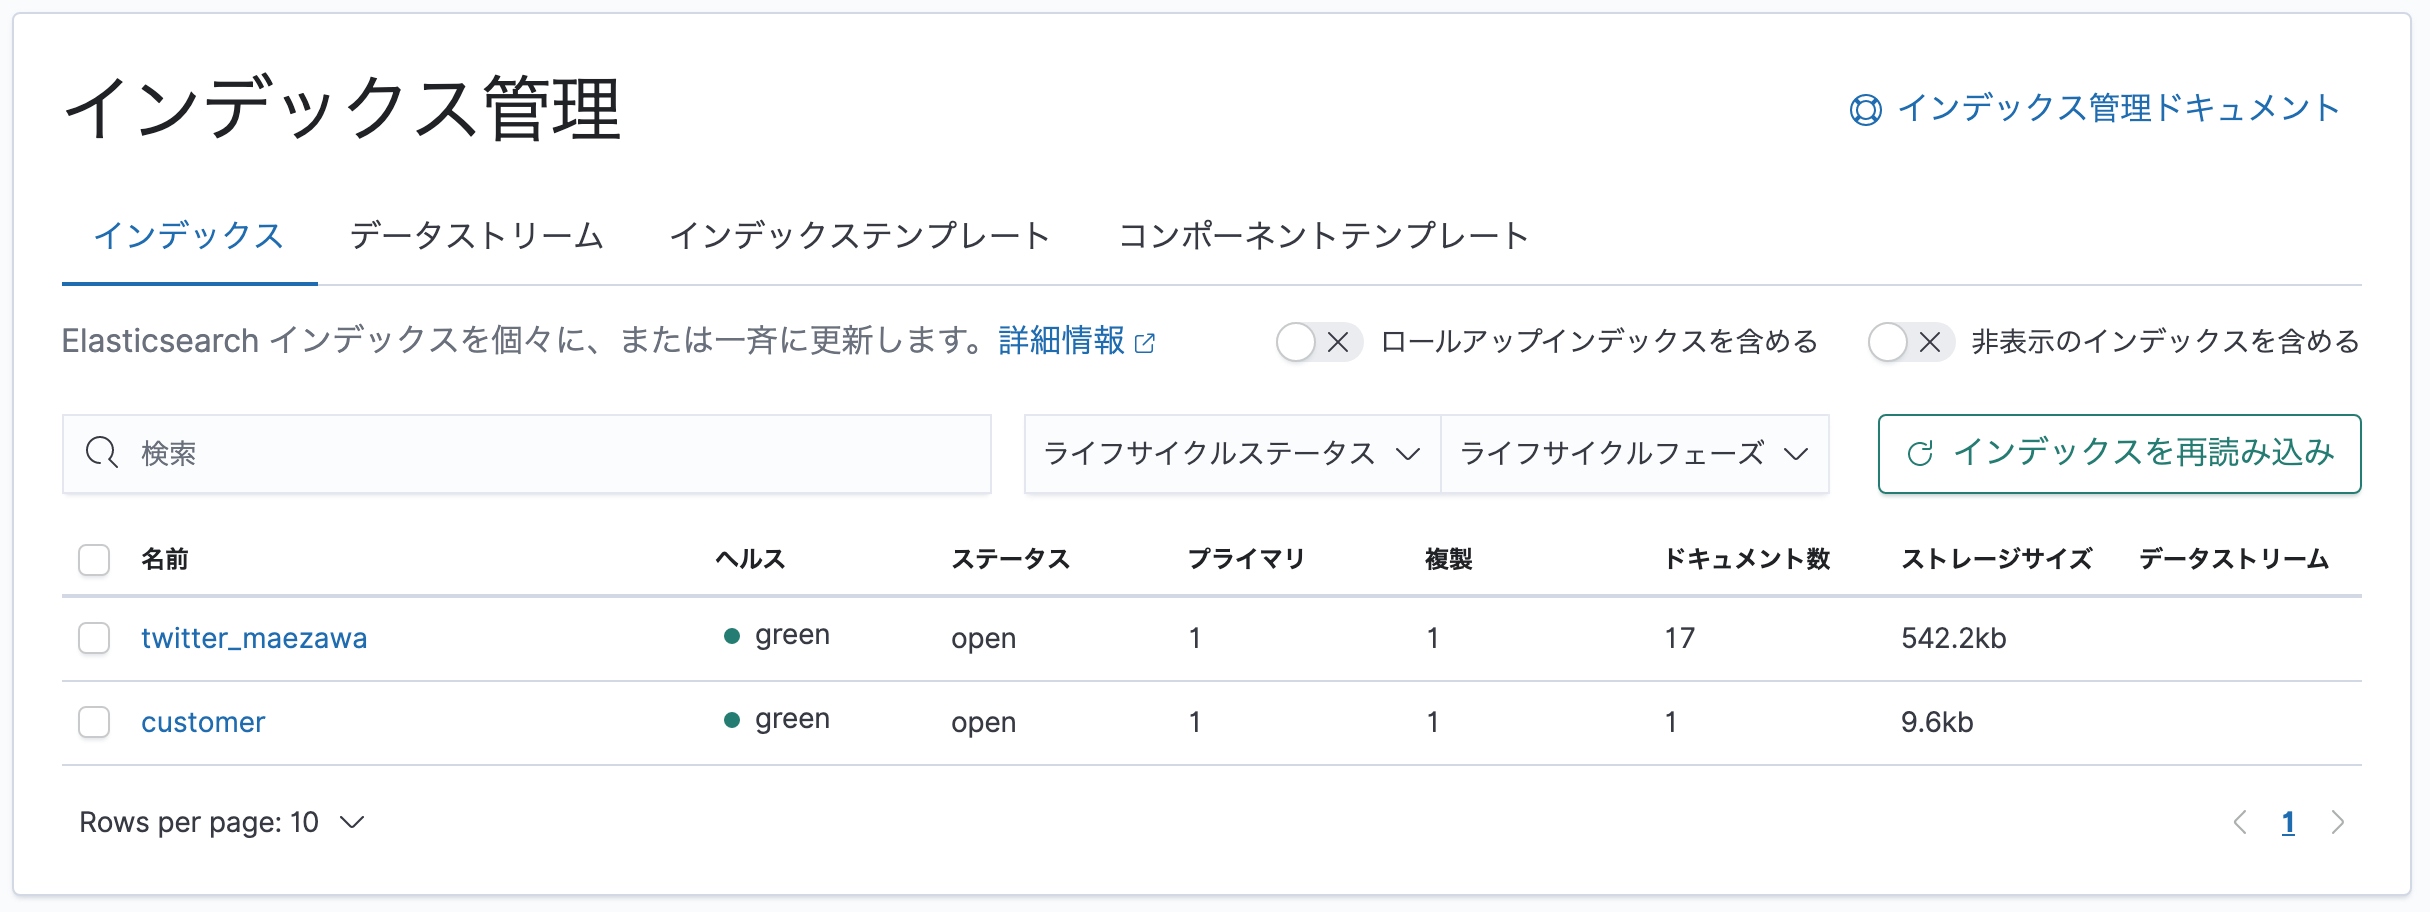
インデックス管理に以下のようにIndexが追加されていれば成功です。
インデックスパターンの作成
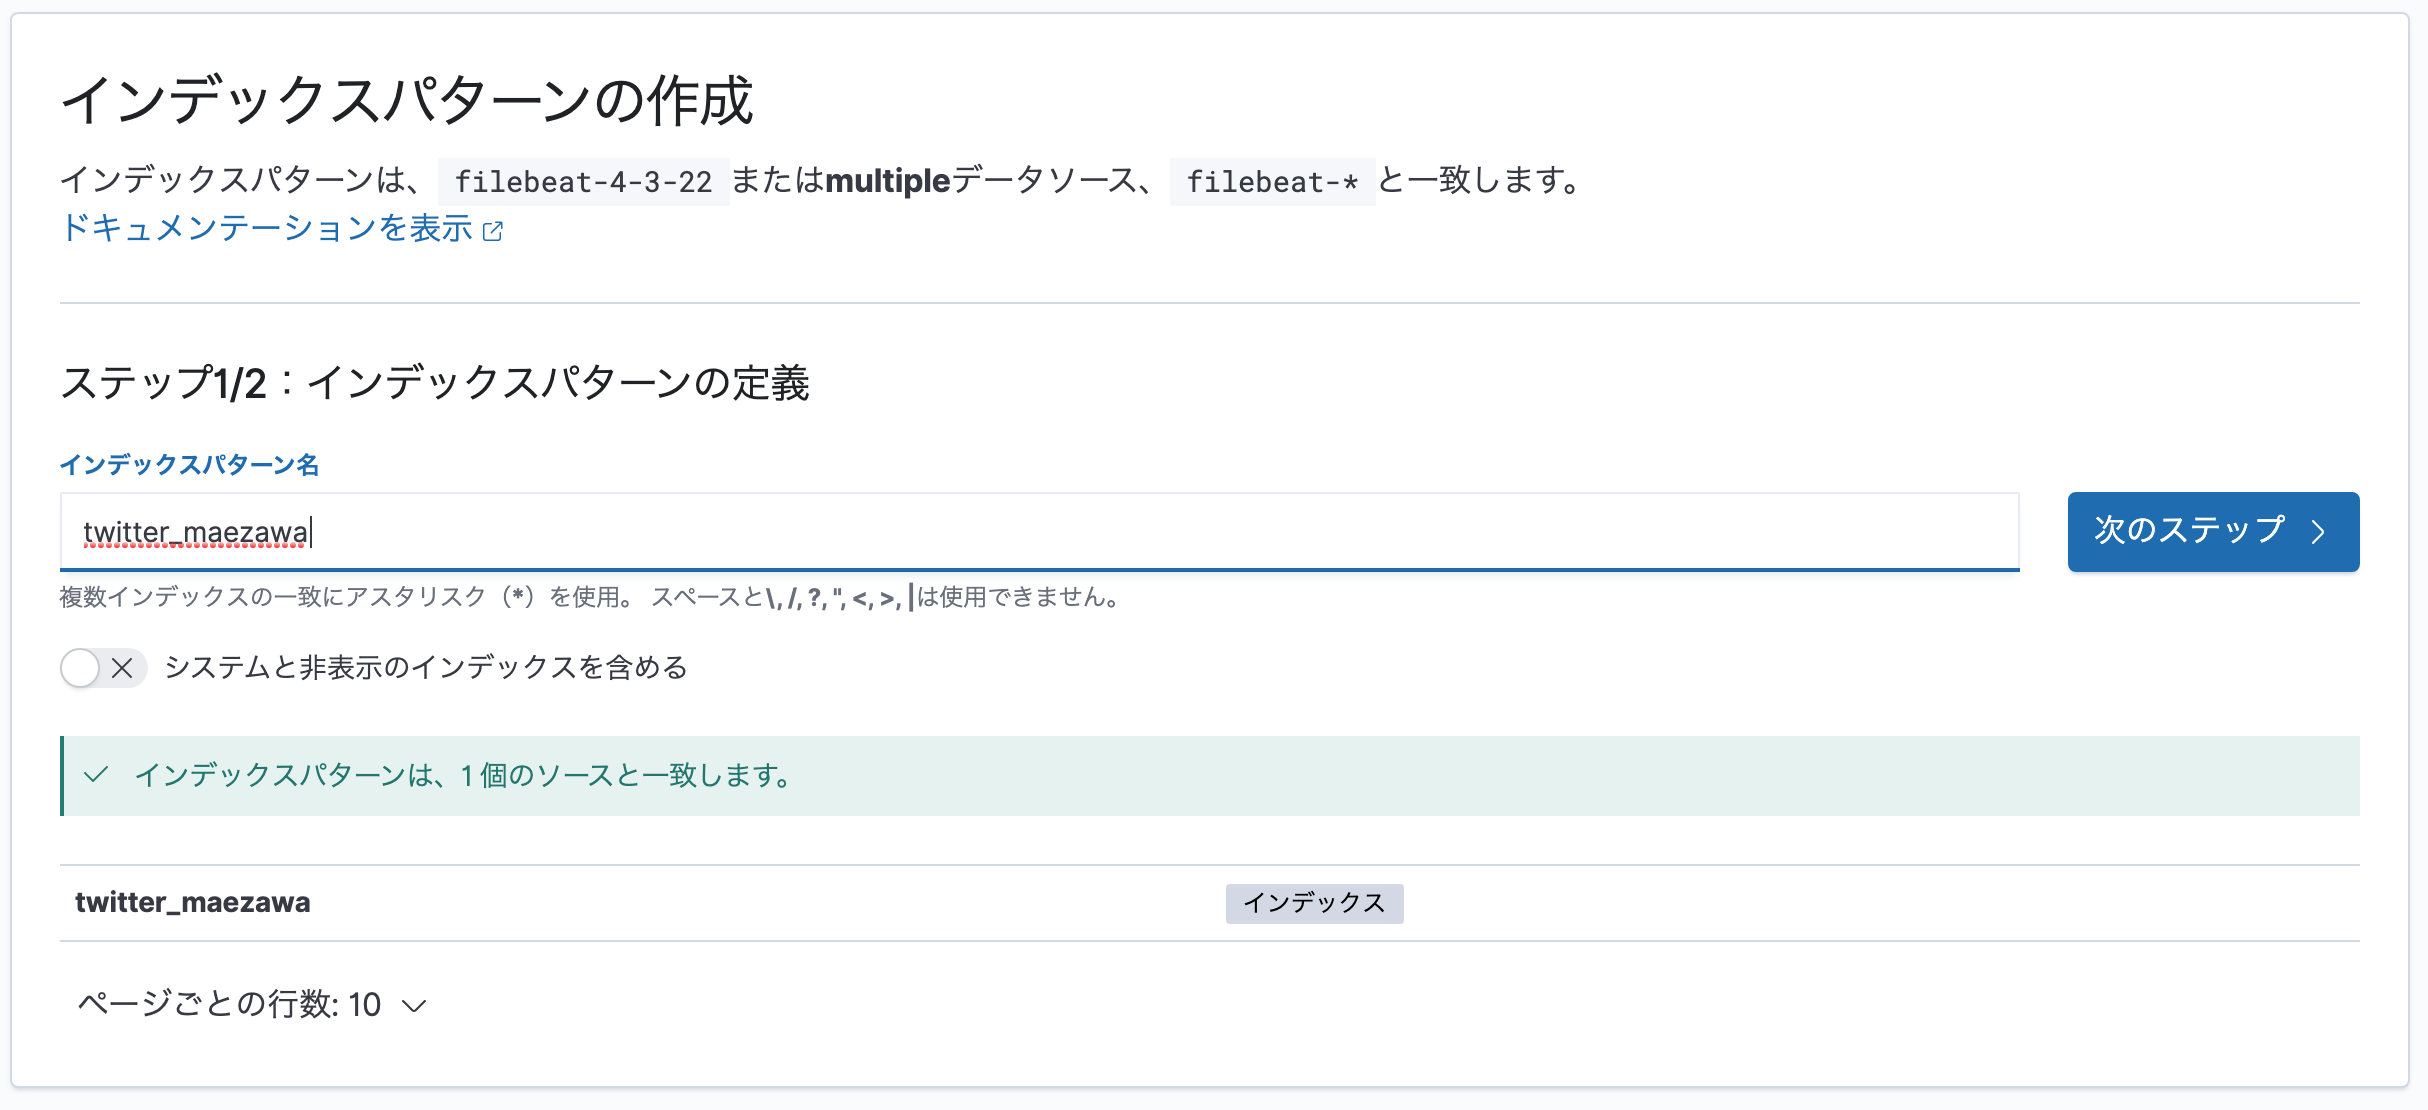
集まったデータを閲覧するために、インデックスパターンを作成します。
http://localhost:5601/app/management/kibana/indexPatterns/create
インデックスパターン名にtwitter_maezawaと入れて次のステップを押します。
時間フィールドは@timestampを選択して、インデックスパターンを作成を押します。
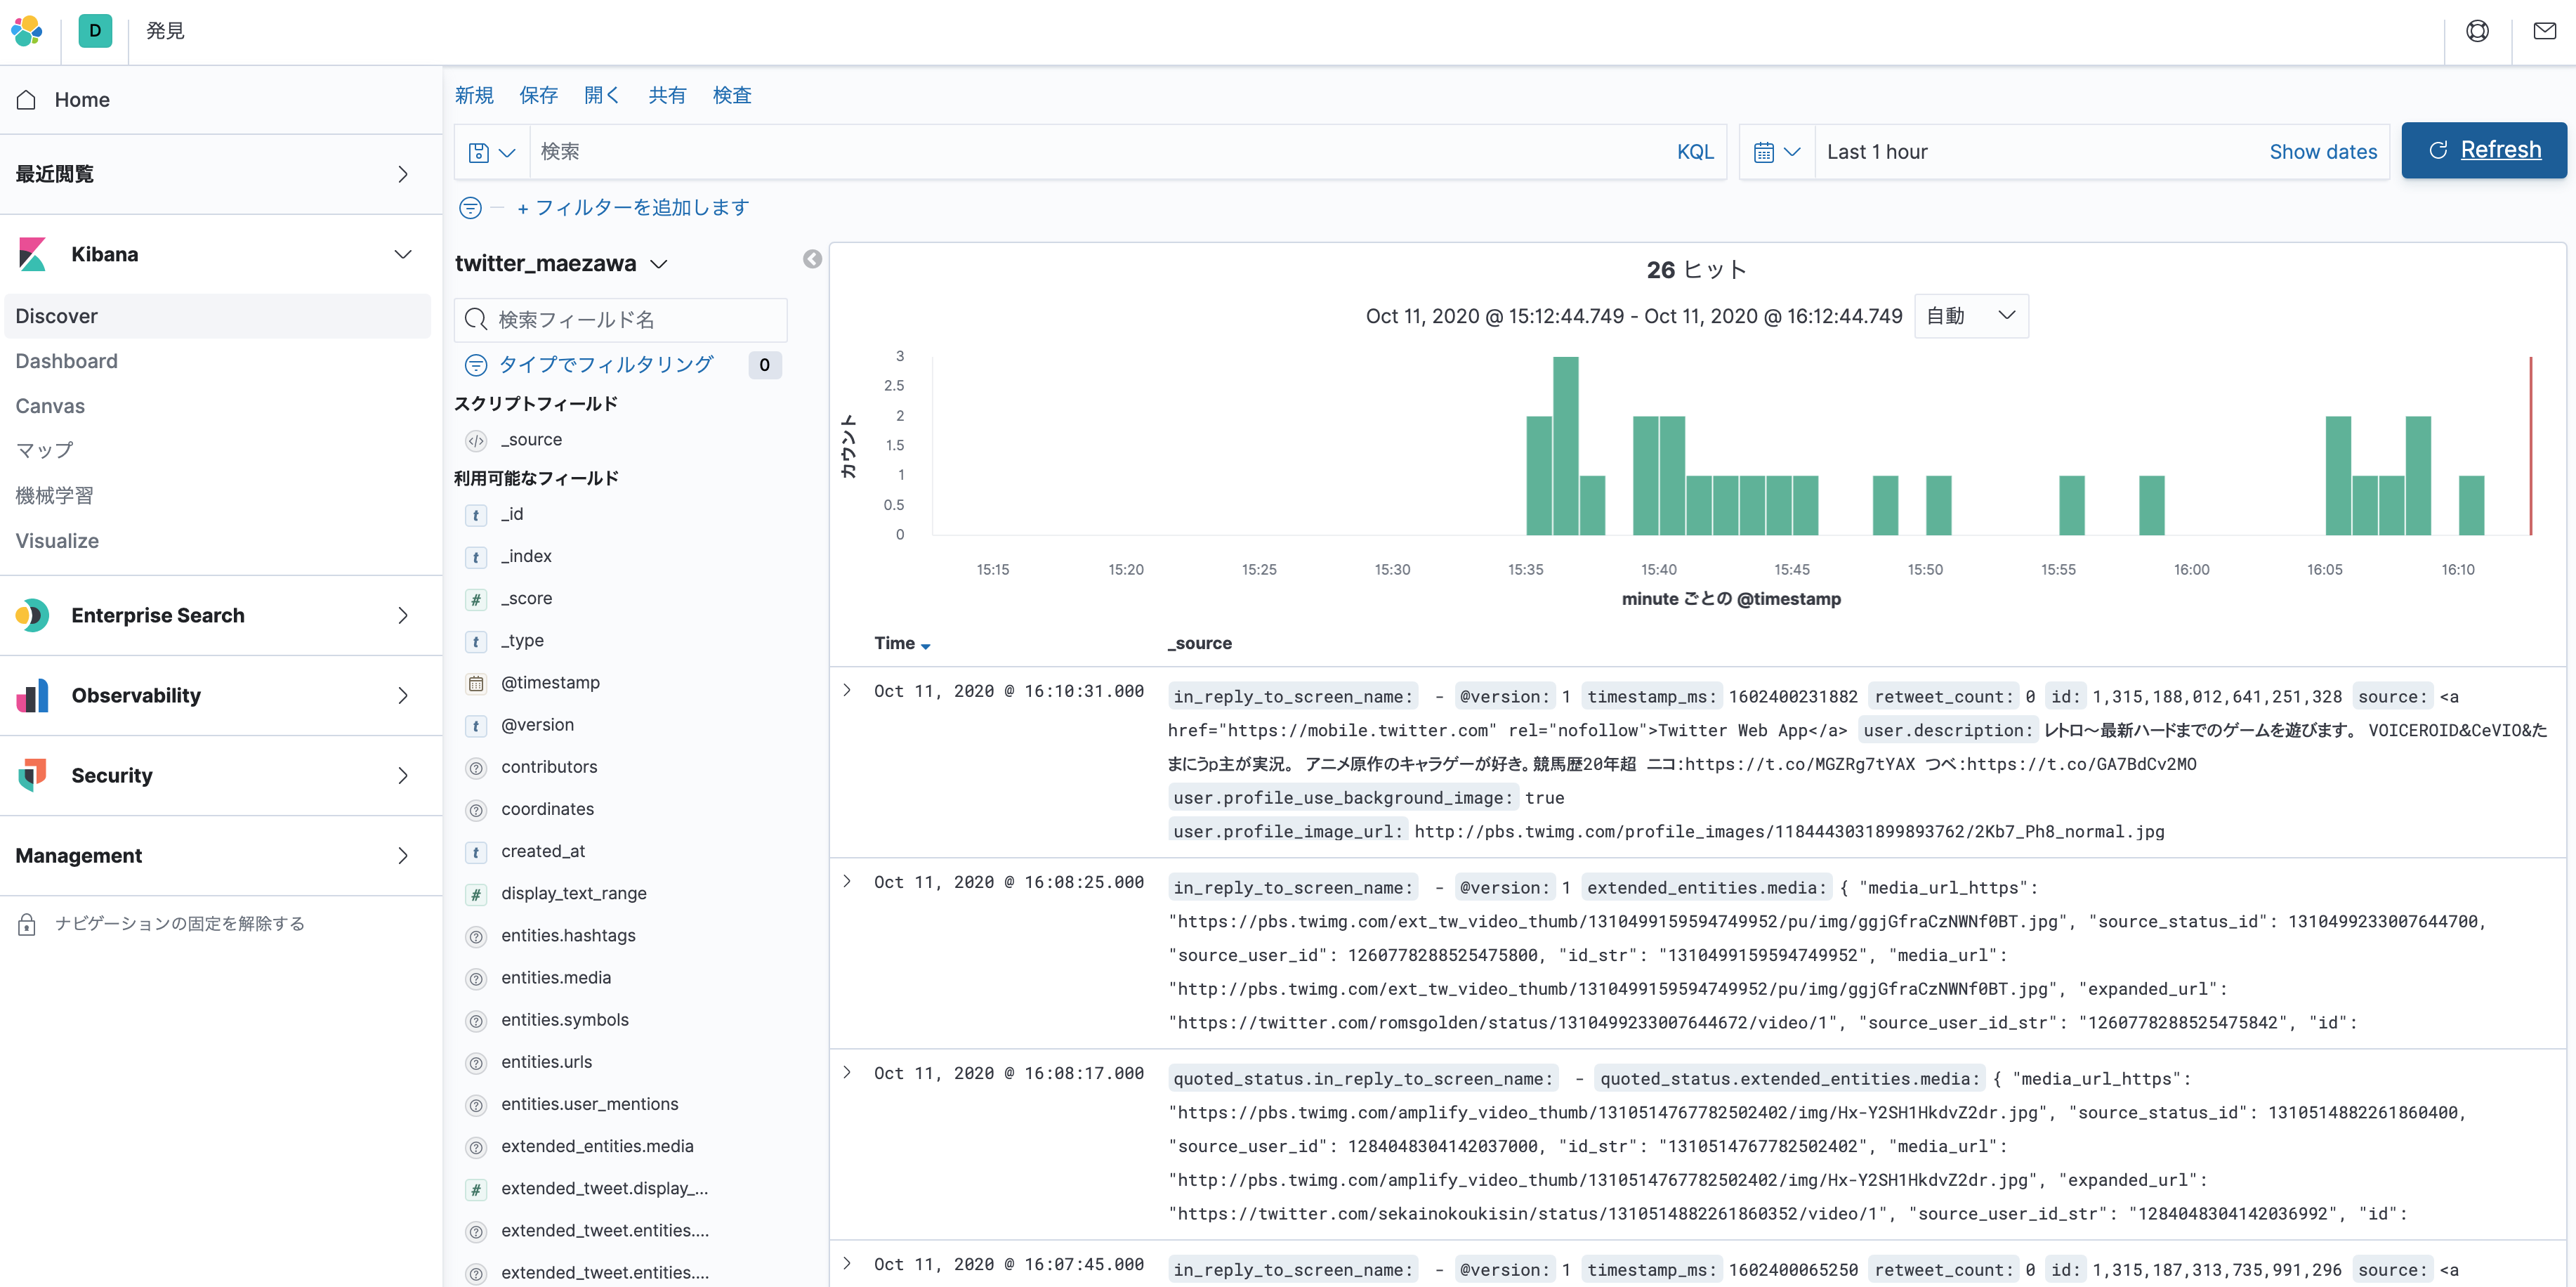
データの詳細確認
Discover を開くとデータの詳細が確認できます。
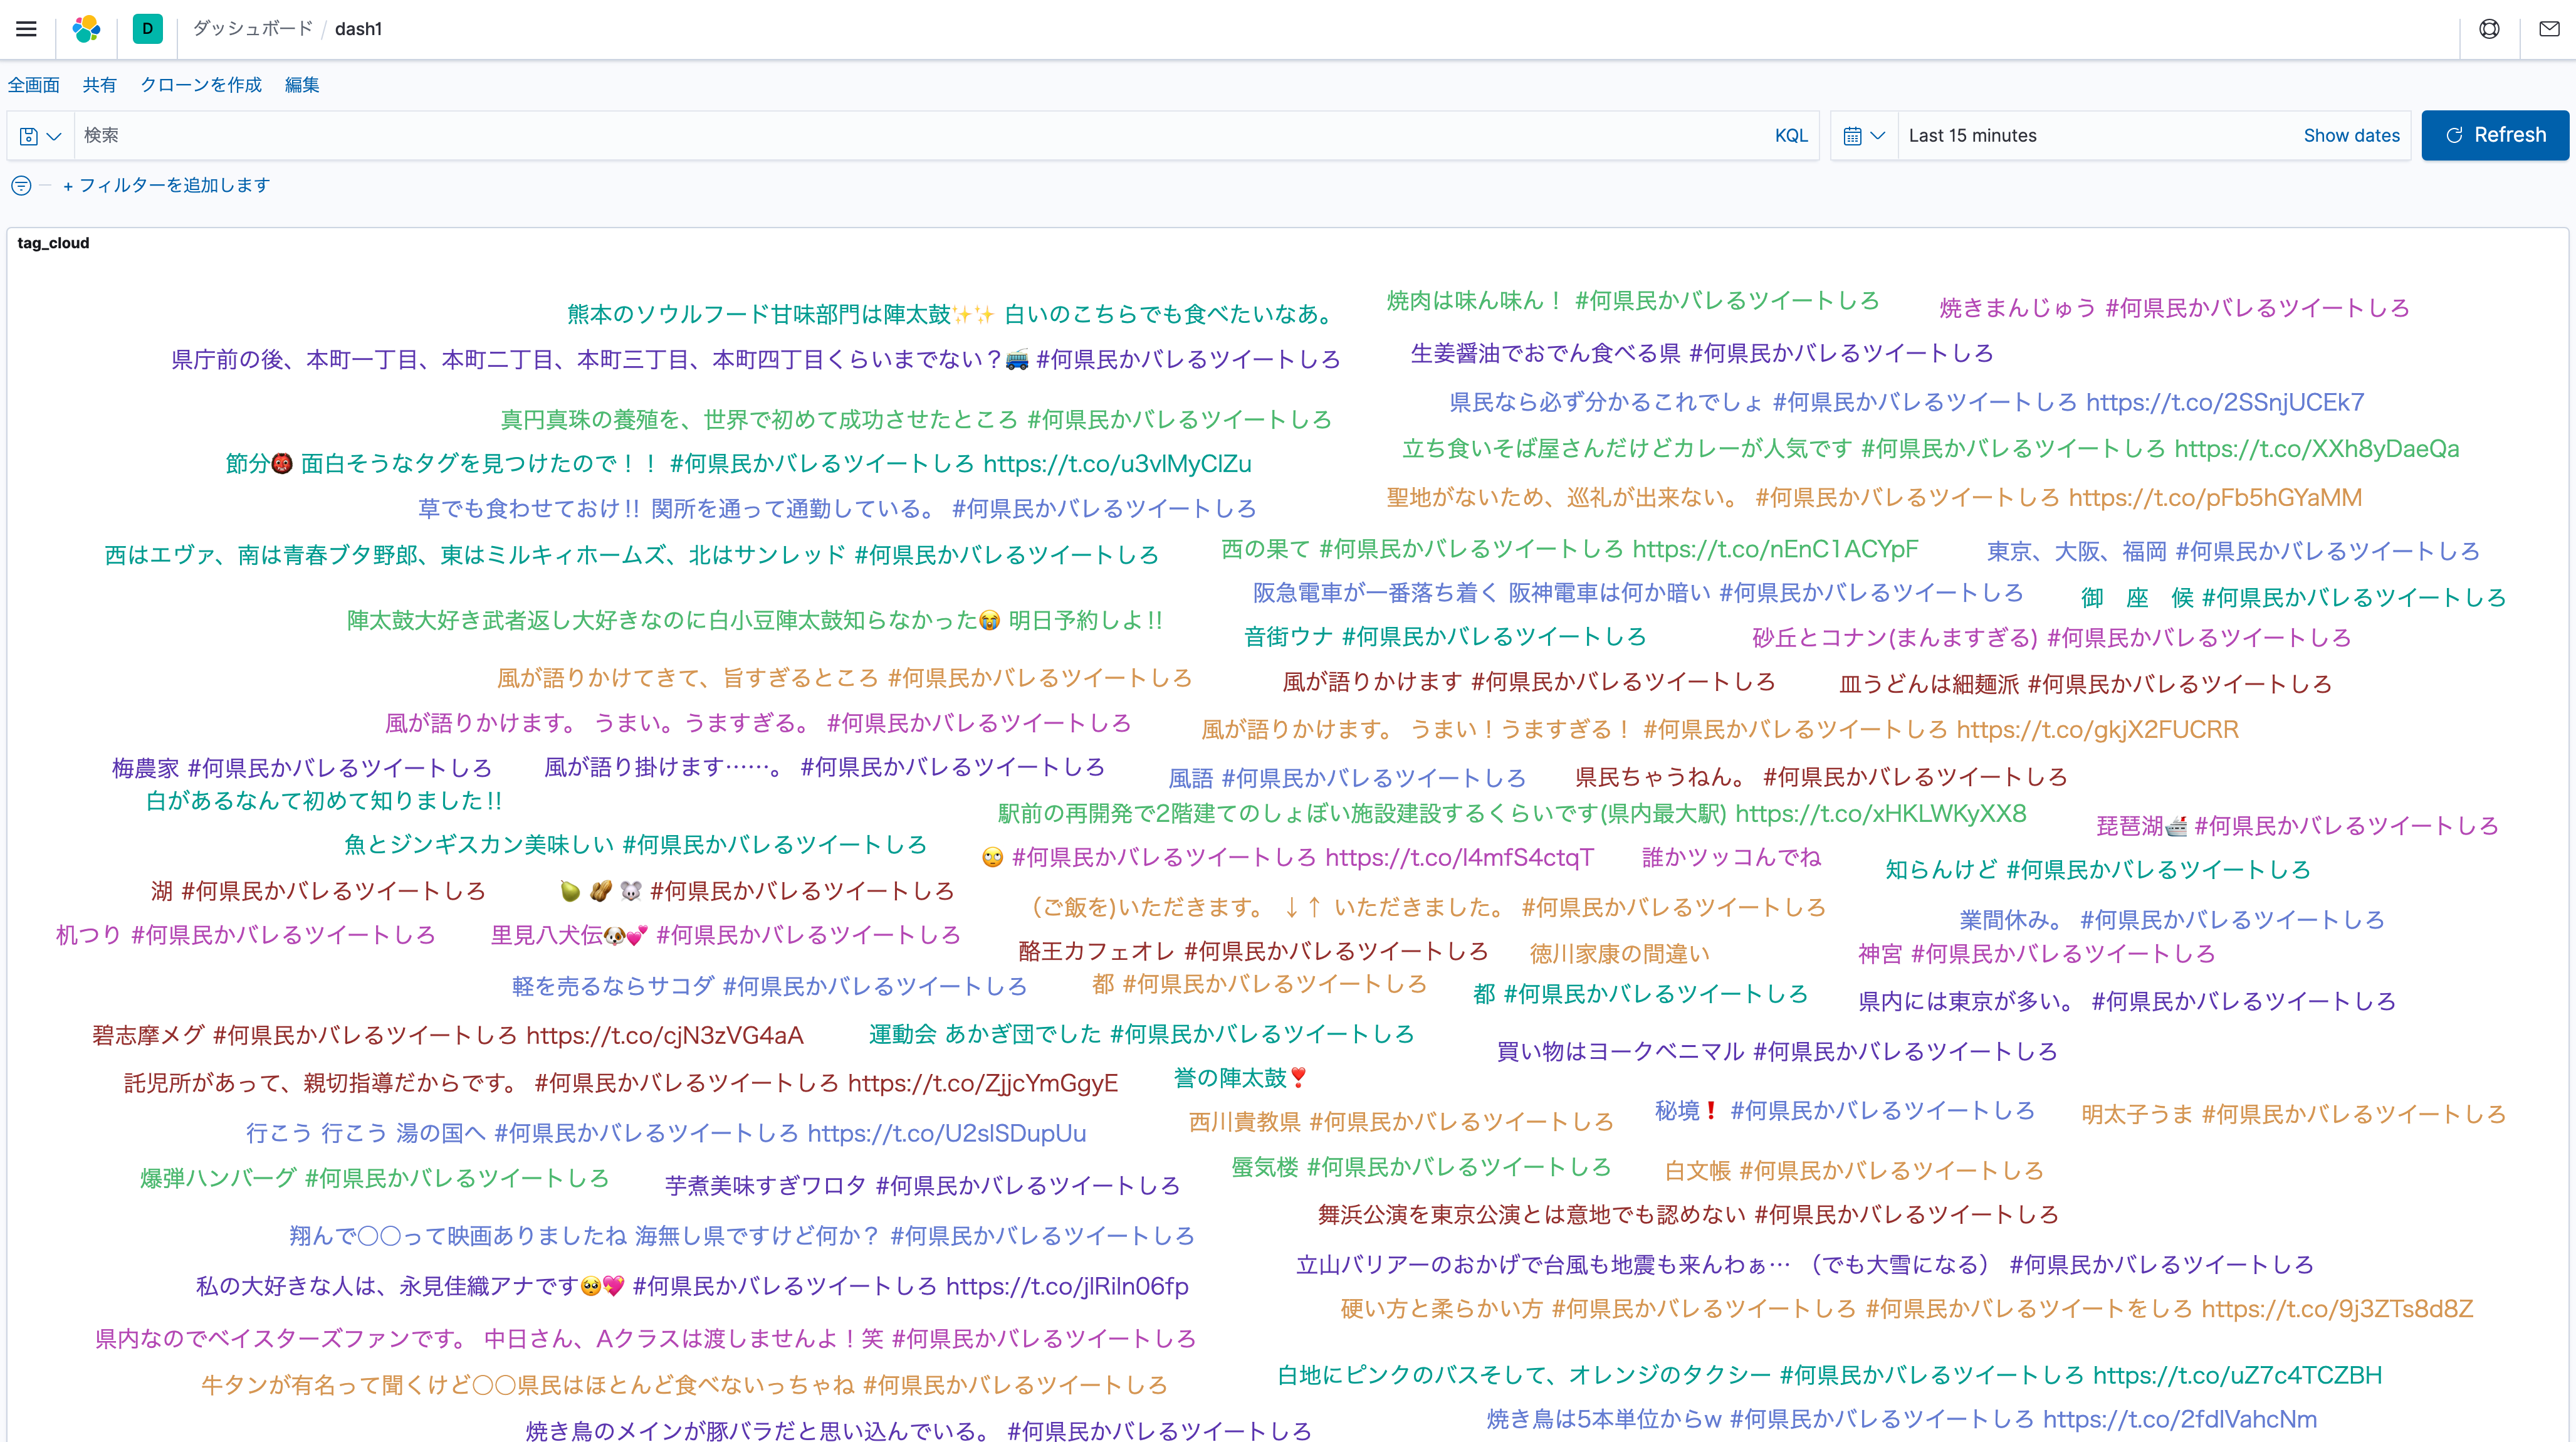
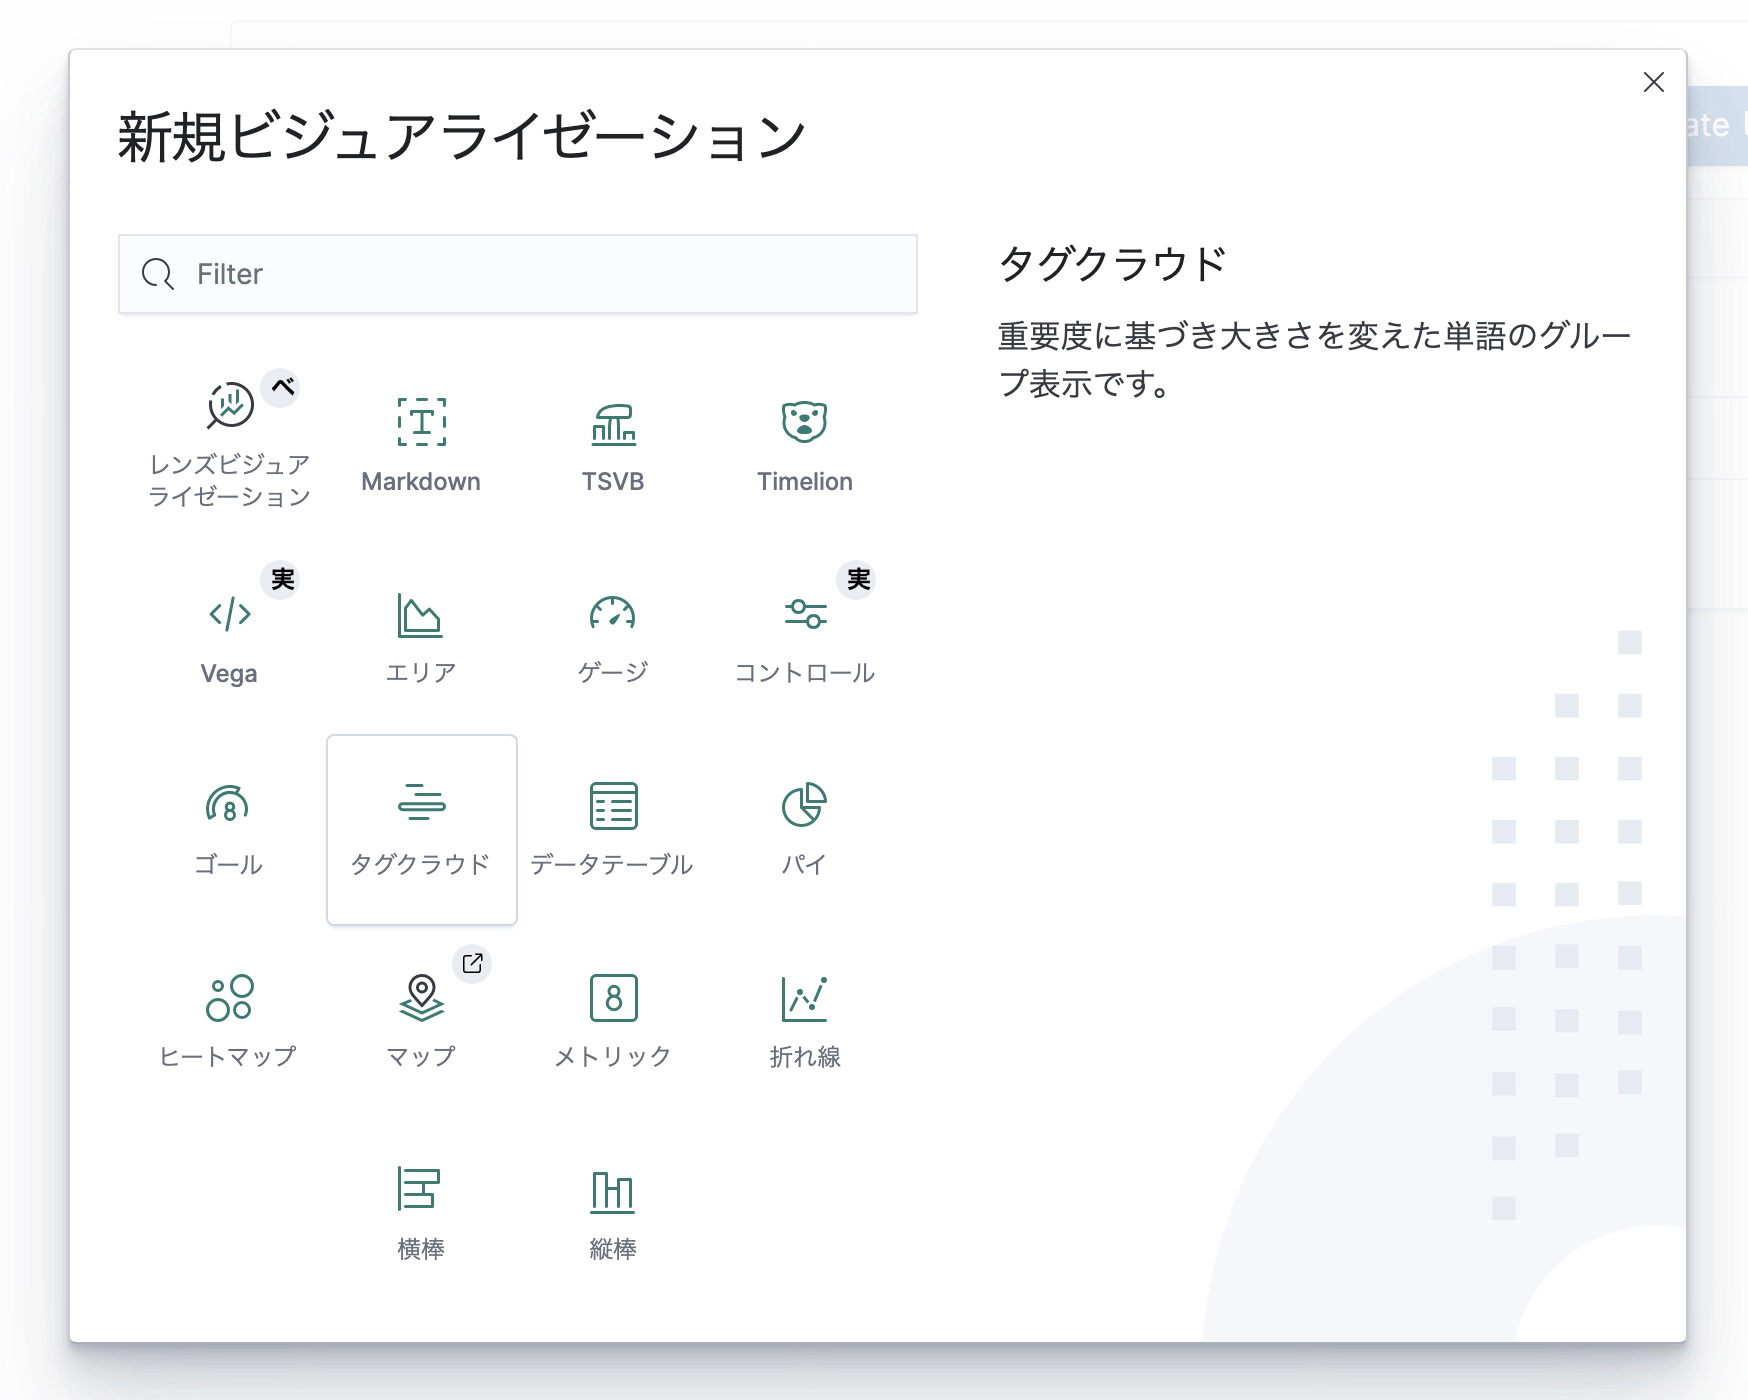
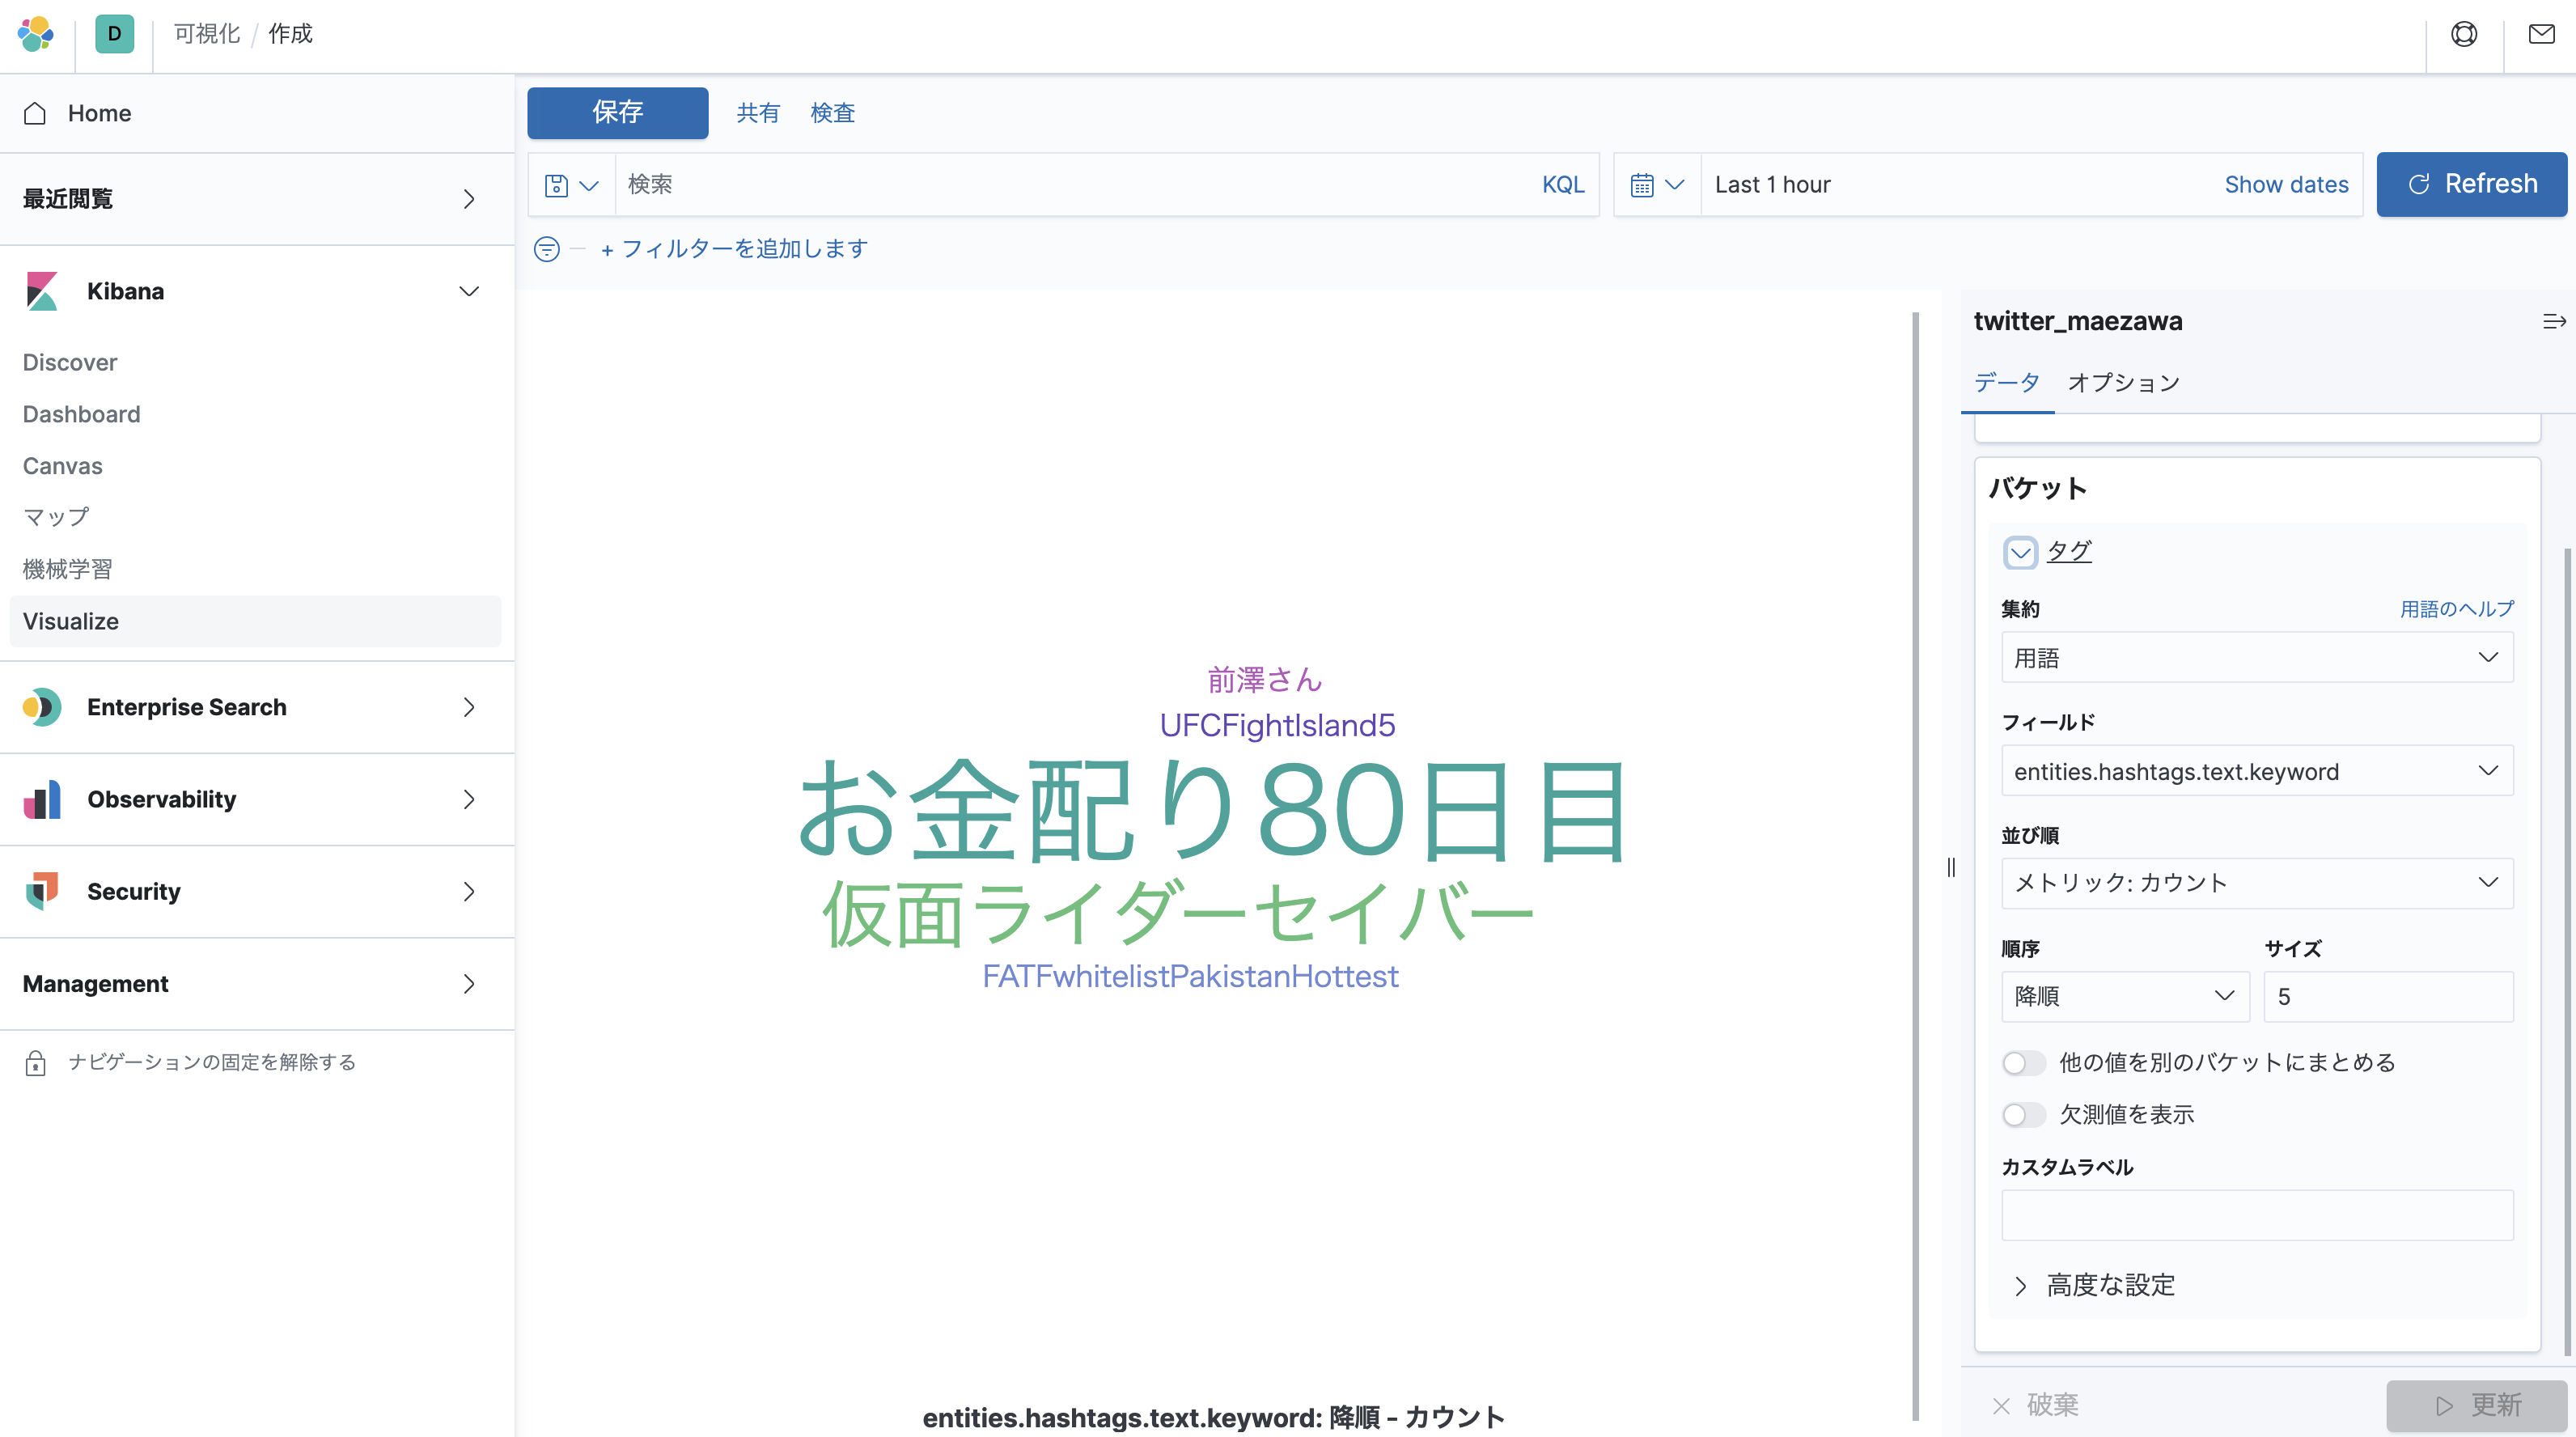
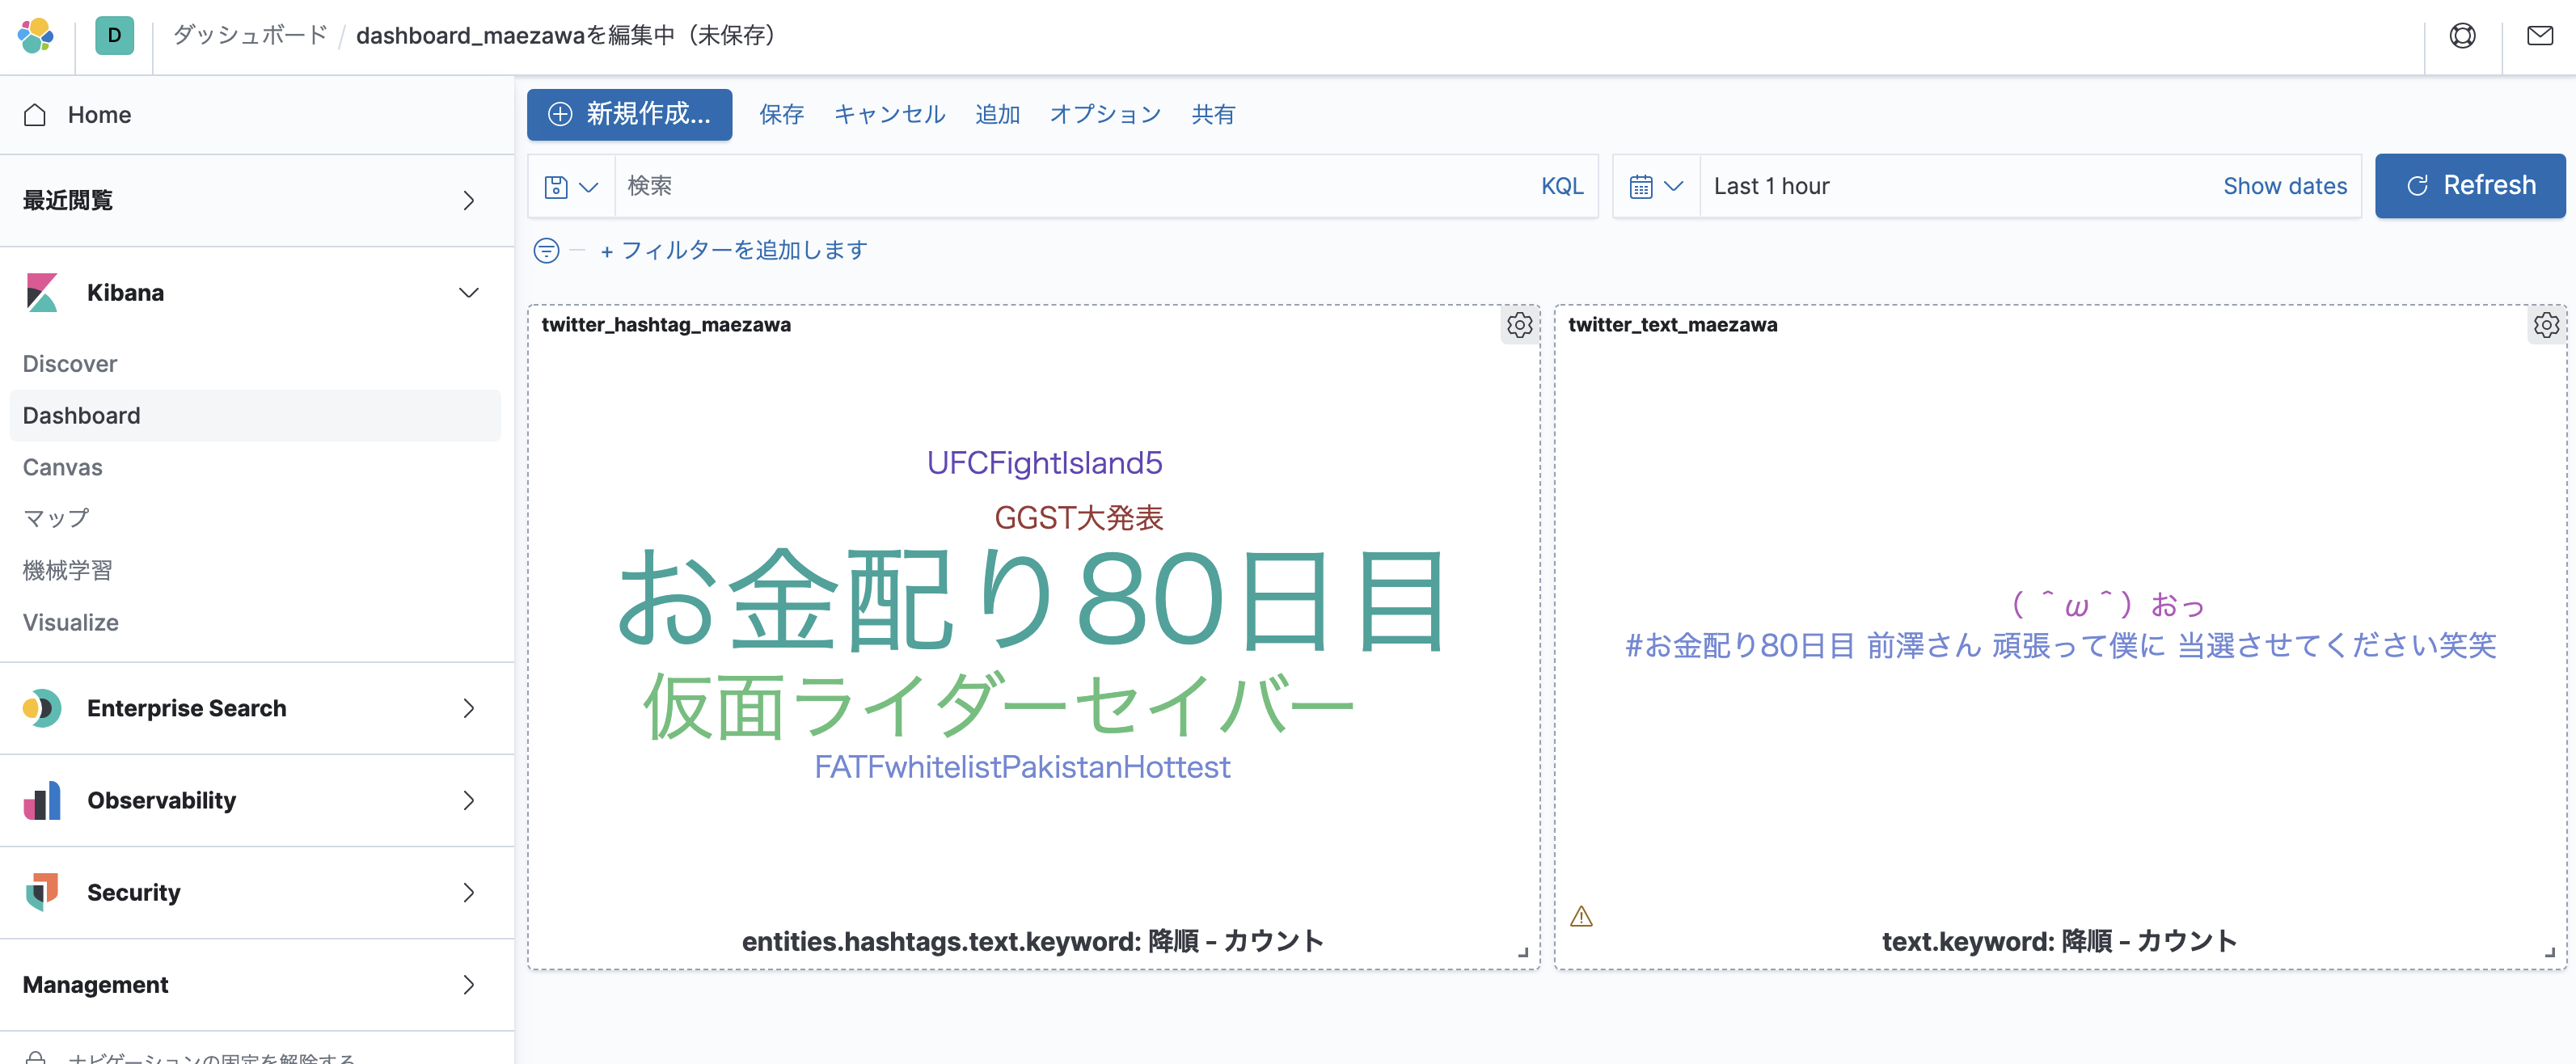
可視化 (タグクラウド)
Visualizeメニューから作成
ダッシュボードに追加されました。
プラグインの追加
日本語形態素解析エンジン
せっかくなので、日本語形態素解析エンジン「kuromoji」と「icu」も入れてみる。
elasticsearchフォルダを作成し、その配下にDockerfileを作成します。
ついでにelasticsearch.ymlも読み込むようにしてみます。
FROM docker.elastic.co/elasticsearch/elasticsearch:7.9.2

COPY ./config/elasticsearch.yml /usr/share/elasticsearch/config/elasticsearch.yml

# remove plugin ↓既に入っているエラーが表示されたら有効にする
# RUN elasticsearch-plugin remove analysis-icu
# RUN elasticsearch-plugin remove analysis-kuromoji

# install plugin
RUN elasticsearch-plugin install analysis-icu
RUN elasticsearch-plugin install analysis-kuromoji
docker-compose.yml修正
docker-compose.ymlの
  elasticsearch01:
    image: docker.elastic.co/elasticsearch/elasticsearch:7.9.2

  ↓へ変更する

  elasticsearch01:
    build: ./elasticsearch/
同様に、elasticsearch02、elasticsearch03も変更します。
elasticsearch.yml
elasticsearch/configフォルダ配下にelasticsearch.ymlを作成します。中身はからっぽでOK
.
|-- docker-compose.yml
|-- elasticsearch
|   |-- Dockerfile
|   `-- config
|       `-- elasticsearch.yml
実行
build
docker-compose build
起動
docker-compose up
確認
各ノードのステータス確認
為念確認します。
$ curl -X GET "localhost:9200/_cat/nodes?v&pretty"

ip         heap.percent ram.percent cpu load_1m load_5m load_15m node.role master name
172.24.0.2           73          81  51    2.27    2.20     1.23 dilmrt    -      es03
172.24.0.3           58          81  52    2.27    2.20     1.23 dilmrt    *      es02
172.24.0.4           49          81  52    2.27    2.20     1.23 dilmrt    -      es01
プラグイン確認
以下コマンドでプラグインが入っているかを確認します。
$ curl -X GET "http://localhost:9200/_nodes/es01/plugins?pretty"

...省略
      },
      "plugins" : [
        {
          "name" : "analysis-icu",
          "version" : "7.9.2",
          "elasticsearch_version" : "7.9.2",
          "java_version" : "1.8",
          "description" : "The ICU Analysis plugin integrates the Lucene ICU module into Elasticsearch, adding ICU-related analysis components.",
          "classname" : "org.elasticsearch.plugin.analysis.icu.AnalysisICUPlugin",
          "extended_plugins" : [ ],
          "has_native_controller" : false
        },
        {
          "name" : "analysis-kuromoji",
          "version" : "7.9.2",
          "elasticsearch_version" : "7.9.2",
          "java_version" : "1.8",
          "description" : "The Japanese (kuromoji) Analysis plugin integrates Lucene kuromoji analysis module into elasticsearch.",
          "classname" : "org.elasticsearch.plugin.analysis.kuromoji.AnalysisKuromojiPlugin",
          "extended_plugins" : [ ],
          "has_native_controller" : false
        }
      ],
Elasticのフォーラムを可視化してみよう - Qiita
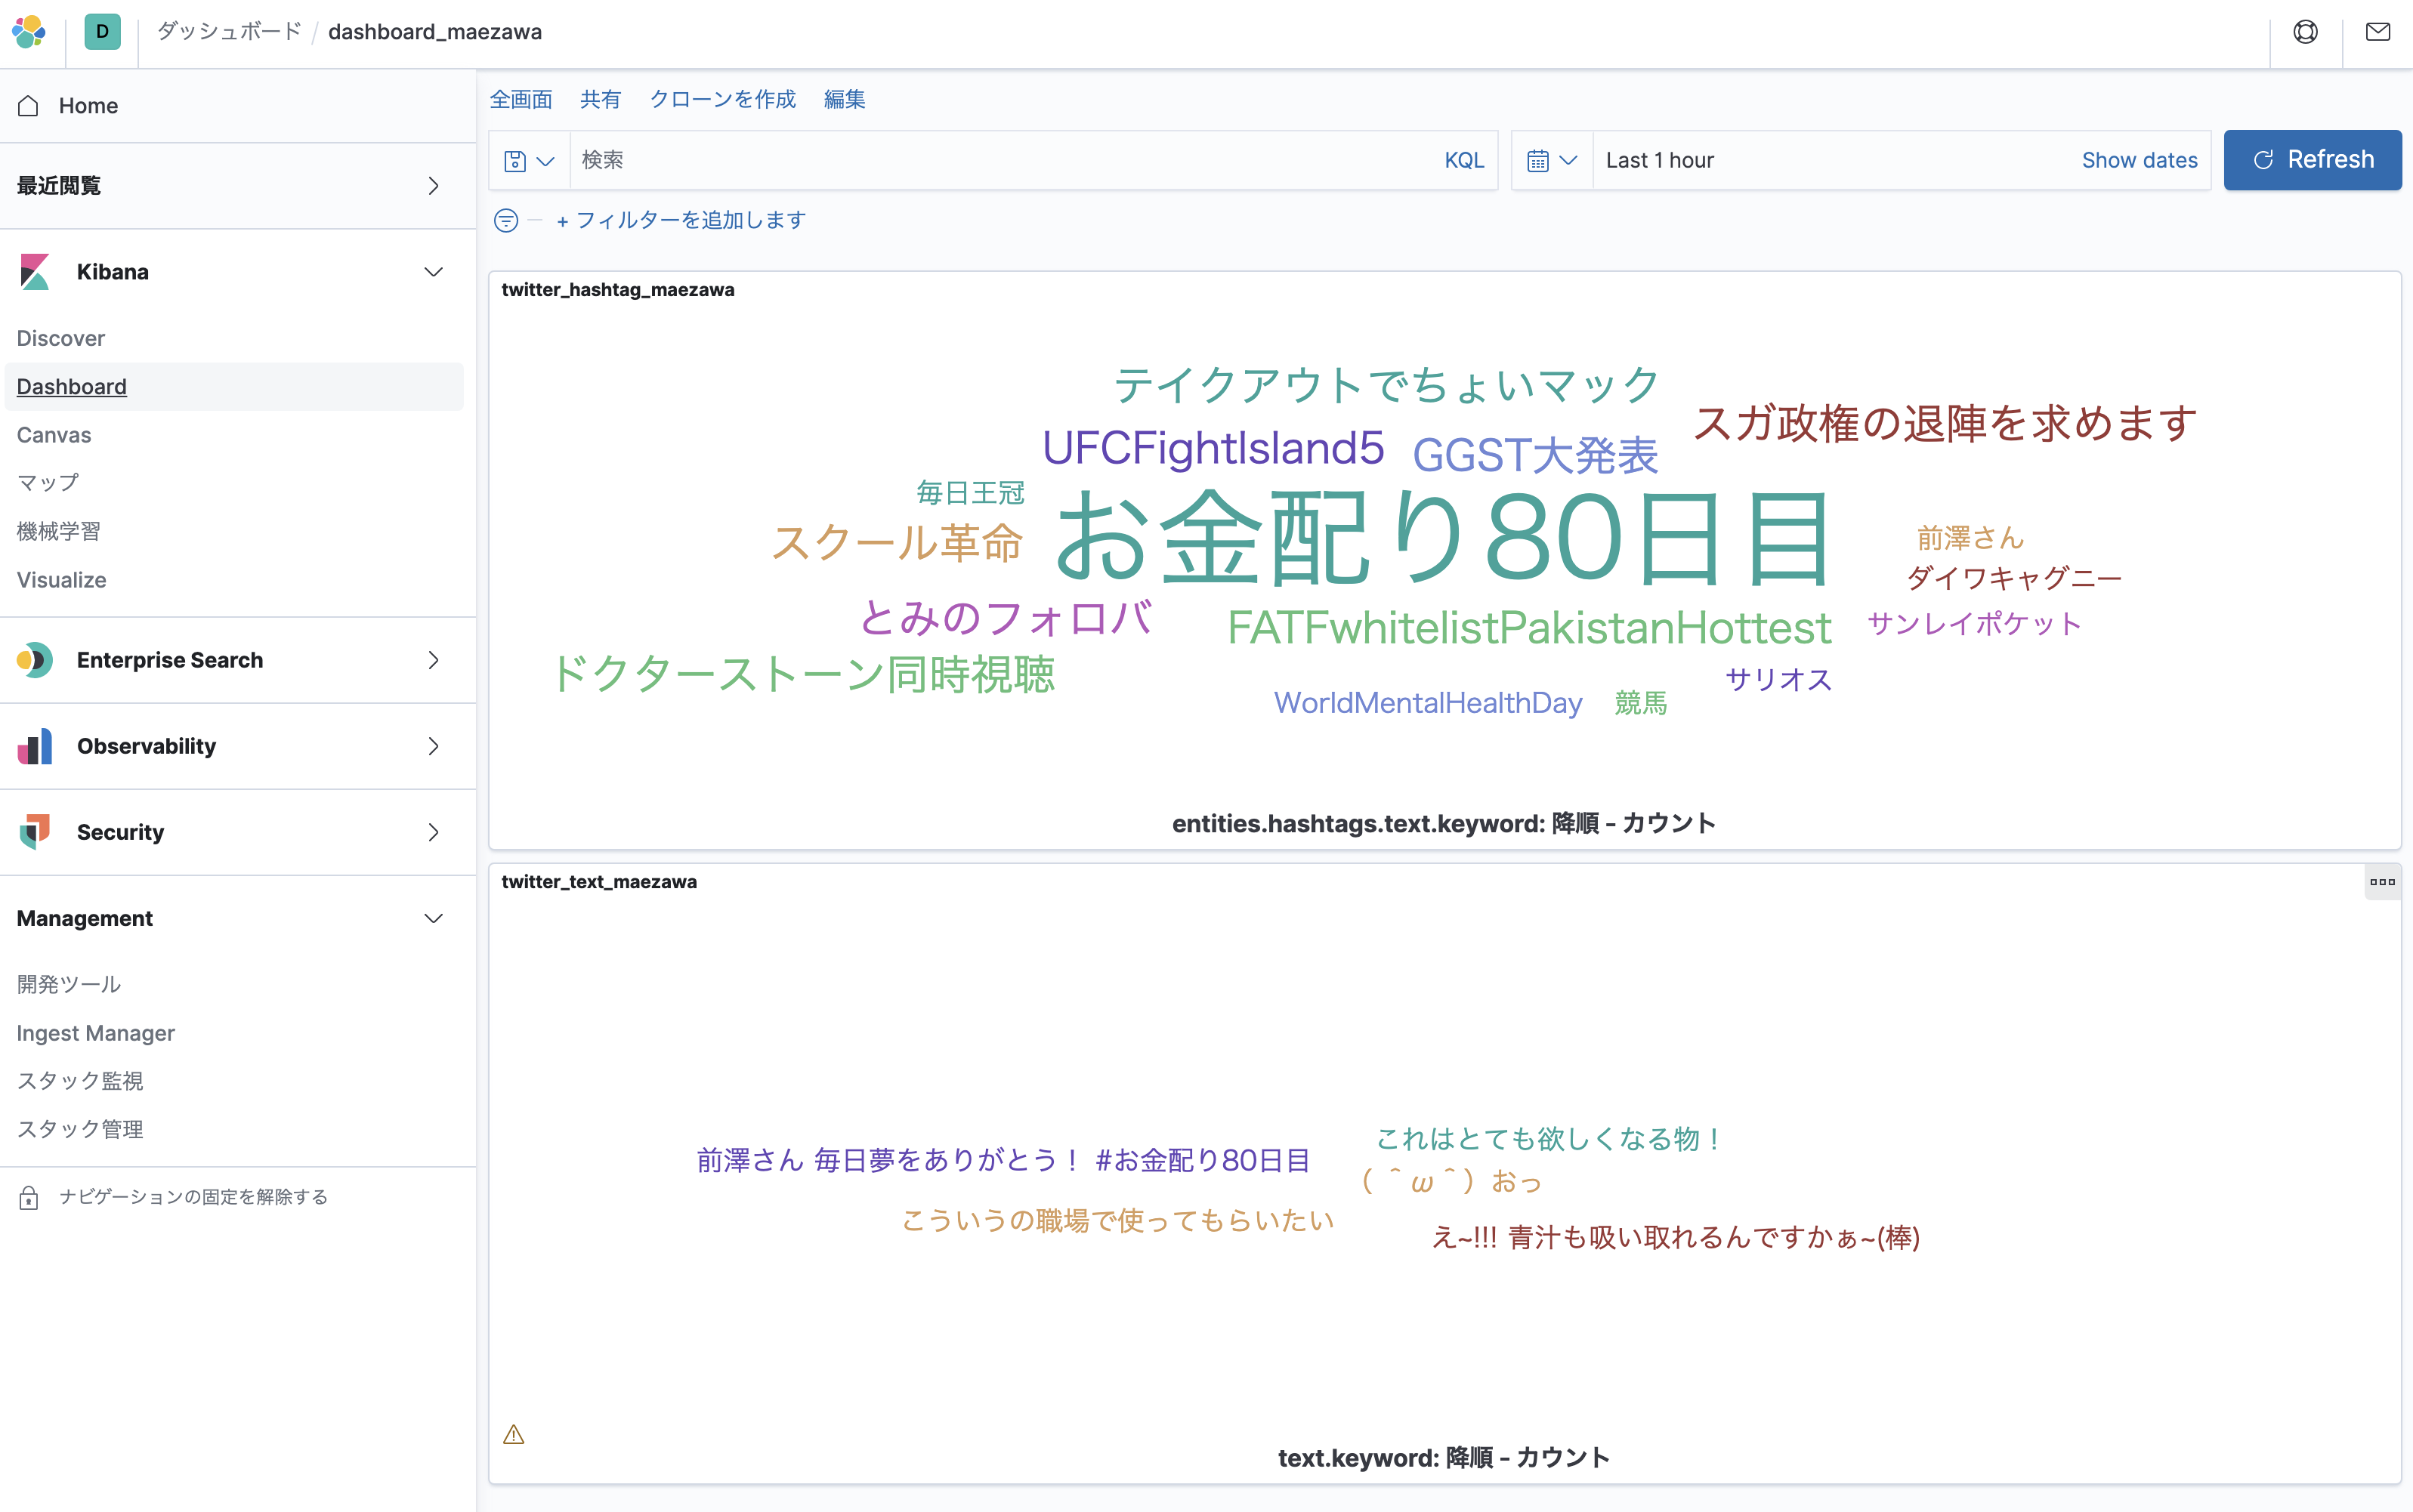
画面確認
ダッシュボードで確認します。
タグクラウドで可視化ができました。
docker compose ファイル
最終的には以下のようになりました。
version: "2.2"
services:
  # 1st node port=9200
  elasticsearch01:
    # image: docker.elastic.co/elasticsearch/elasticsearch:7.9.2
    build: ./elasticsearch/
    container_name: es01
    environment:
      - node.name=es01
      - cluster.name=es-docker-cluster
      - discovery.seed_hosts=es02,es03
      - cluster.initial_master_nodes=es01,es02,es03
      - bootstrap.memory_lock=true
      - "ES_JAVA_OPTS=-Xms512m -Xmx512m"
    ulimits:
      memlock:
        soft: -1
        hard: -1
    volumes:
      - elasticsearch_multinode_data01:/usr/share/elasticsearch/data
    ports:
      - 9200:9200
    networks:
      - elastic
    healthcheck:
      interval: 20s
      retries: 10
      test: curl -s http://localhost:9200/_cluster/health | grep -vq '"status":"red"'

  # 2nd node
  elasticsearch02:
    # image: docker.elastic.co/elasticsearch/elasticsearch:7.9.2
    build: ./elasticsearch/
    container_name: es02
    environment:
      - node.name=es02
      - cluster.name=es-docker-cluster
      - discovery.seed_hosts=es01,es03
      - cluster.initial_master_nodes=es01,es02,es03
      - bootstrap.memory_lock=true
      - "ES_JAVA_OPTS=-Xms512m -Xmx512m"
    ulimits:
      memlock:
        soft: -1
        hard: -1
    volumes:
      - elasticsearch_multinode_data02:/usr/share/elasticsearch/data
    networks:
      - elastic

  # 3rd node
  elasticsearch03:
    # image: docker.elastic.co/elasticsearch/elasticsearch:7.9.2
    build: ./elasticsearch/
    container_name: es03
    environment:
      - node.name=es03
      - cluster.name=es-docker-cluster
      - discovery.seed_hosts=es01,es02
      - cluster.initial_master_nodes=es01,es02,es03
      - bootstrap.memory_lock=true
      - "ES_JAVA_OPTS=-Xms512m -Xmx512m"
    ulimits:
      memlock:
        soft: -1
        hard: -1
    volumes:
      - elasticsearch_multinode_data03:/usr/share/elasticsearch/data
    networks:
      - elastic

  # kibana
  kibana:
    image: docker.elastic.co/kibana/kibana:7.9.2
    container_name: kibana
    ports:
      - "5601:5601"
    environment:
      - ELASTICSEARCH_HOSTS=http://es01:9200 # container_nameを参照する
      - "I18N_LOCALE=ja-JP"
    depends_on:
      - elasticsearch01
      - elasticsearch02
      - elasticsearch03
    networks:
      - elastic
    healthcheck:
      interval: 10s
      retries: 20
      test: curl --write-out 'HTTP %{http_code}' --fail --silent --output /dev/null http://localhost:5601/api/status
    restart: always

  # logstash
  logstash:
    image: docker.elastic.co/logstash/logstash:7.9.2
    container_name: logstash
    volumes:
      - ./logstash/pipeline/:/usr/share/logstash/pipeline/
      - ./logstash/config/:/usr/share/logstash/config/
    networks:
      - elastic
    depends_on:
      - elasticsearch01
      - elasticsearch02
      - elasticsearch03
    restart: always

volumes:
  elasticsearch_multinode_data01:
    driver: local
  elasticsearch_multinode_data02:
    driver: local
  elasticsearch_multinode_data03:
    driver: local

networks:
  elastic:
    driver: bridge
フォルダ階層
$ tree --charset=C

.
|-- docker-compose.yml
|-- elasticsearch
|   |-- Dockerfile
|   `-- config
|       `-- elasticsearch.yml
`-- logstash
    |-- config
    |   |-- logstash.yml
    |   |-- pipelines.yml
    `-- pipeline
        `-- twitter.conf
後片付け
Elasticsearch終了
以下のコマンド
docker-compose down
ボリュームも消す
ボリュームも消す時は以下
docker-compose down --volumes
全て消す
全て消す時は以下(コンテナ、イメージ、ボリュームそしてネットワーク、全て)
docker-compose down --rmi all --volumes
ボリュームの削除
docker volume prune
参考
初めてのElasticsearch with Docker - Qiita
ElasticStack環境をDocker上で構築して、「コロナ」に関するツイートをタグクラウド化した話 - Qiita
