
この設定で実現できること
ヘッドレス運用のalmalinux10サーバーで、複数ユーザーが同時にremote desktopを利用する。
LAN内のクライアントからremote desktopを利用する。
公式を参考に、説明の足りないところを解説します。
サーバーの設定方法
前提条件
almalinux10がサーバーに入っている。(RHEL 10系なら共通)
root権限で自由に設定できる。
以下のコマンドは、特筆しない限りrootで実行してください。
SELinuxは無効にしてください。
準備
必要なものをinstall
dnf -y install gnome-remote-desktop gdm freerdp
dnf groupinstall "Workstation"
この後、再起動する。すると、gnome-remote-desktopというユーザーが作成される。
自己証明書を作る
ディレクトリを作る。
sudo -u gnome-remote-desktop mkdir -p ~gnome-remote-desktop/.local/share/gnome-remote-desktop
RDP サービス用の自己署名 TLS 証明書を生成する
sudo -u gnome-remote-desktop winpr-makecert -silent -rdp -path ~gnome-remote-desktop/.local/share/gnome-remote-desktop tls
RDPのなにかを設定する。
sudo grdctl --system rdp set-tls-key ~gnome-remote-desktop/.local/share/gnome-remote-desktop/tls.key
sudo grdctl --system rdp set-tls-cert ~gnome-remote-desktop/.local/share/gnome-remote-desktop/tls.crt
sudo grdctl --system rdp set-credentials
sudo grdctl --system rdp enable
コマンドを実行すると、
Init TPM credentials failed because Failed to initialize transmission
みたいなエラーが出るけど、無視していいです。
また、3行目を実行したときに、usernameとpasswordを聞かれます。
これはRDPで接続するときに、最初にログイン画面を表示するために必要な共通のuserです(サーバーのアカウントとは別)。任意に設定してください。
サービス起動
サービスを登録して起動します。
sudo systemctl enable --now gdm
sudo systemctl enable --now gnome-remote-desktop.service
以下で、グラッフィクの設定をする(らしい?)。
sudo systemctl set-default graphical.target
確認
sudo systemctl status gnome-remote-desktop.service
これでactiveになっていたら完了です。
firewall
外部からアクセスするために、rdpの標準ポートの3389/tcpを許可します。
firewall-cmd --permanent --add-port=3389/tcp
firewall-cmd --reload
クライアントの設定、接続
ここでは、macのクライアントで、windows appを使った接続方法を説明します。
windowsはわからん
appstoreから、widows appをインストールしてください。
起動すると、
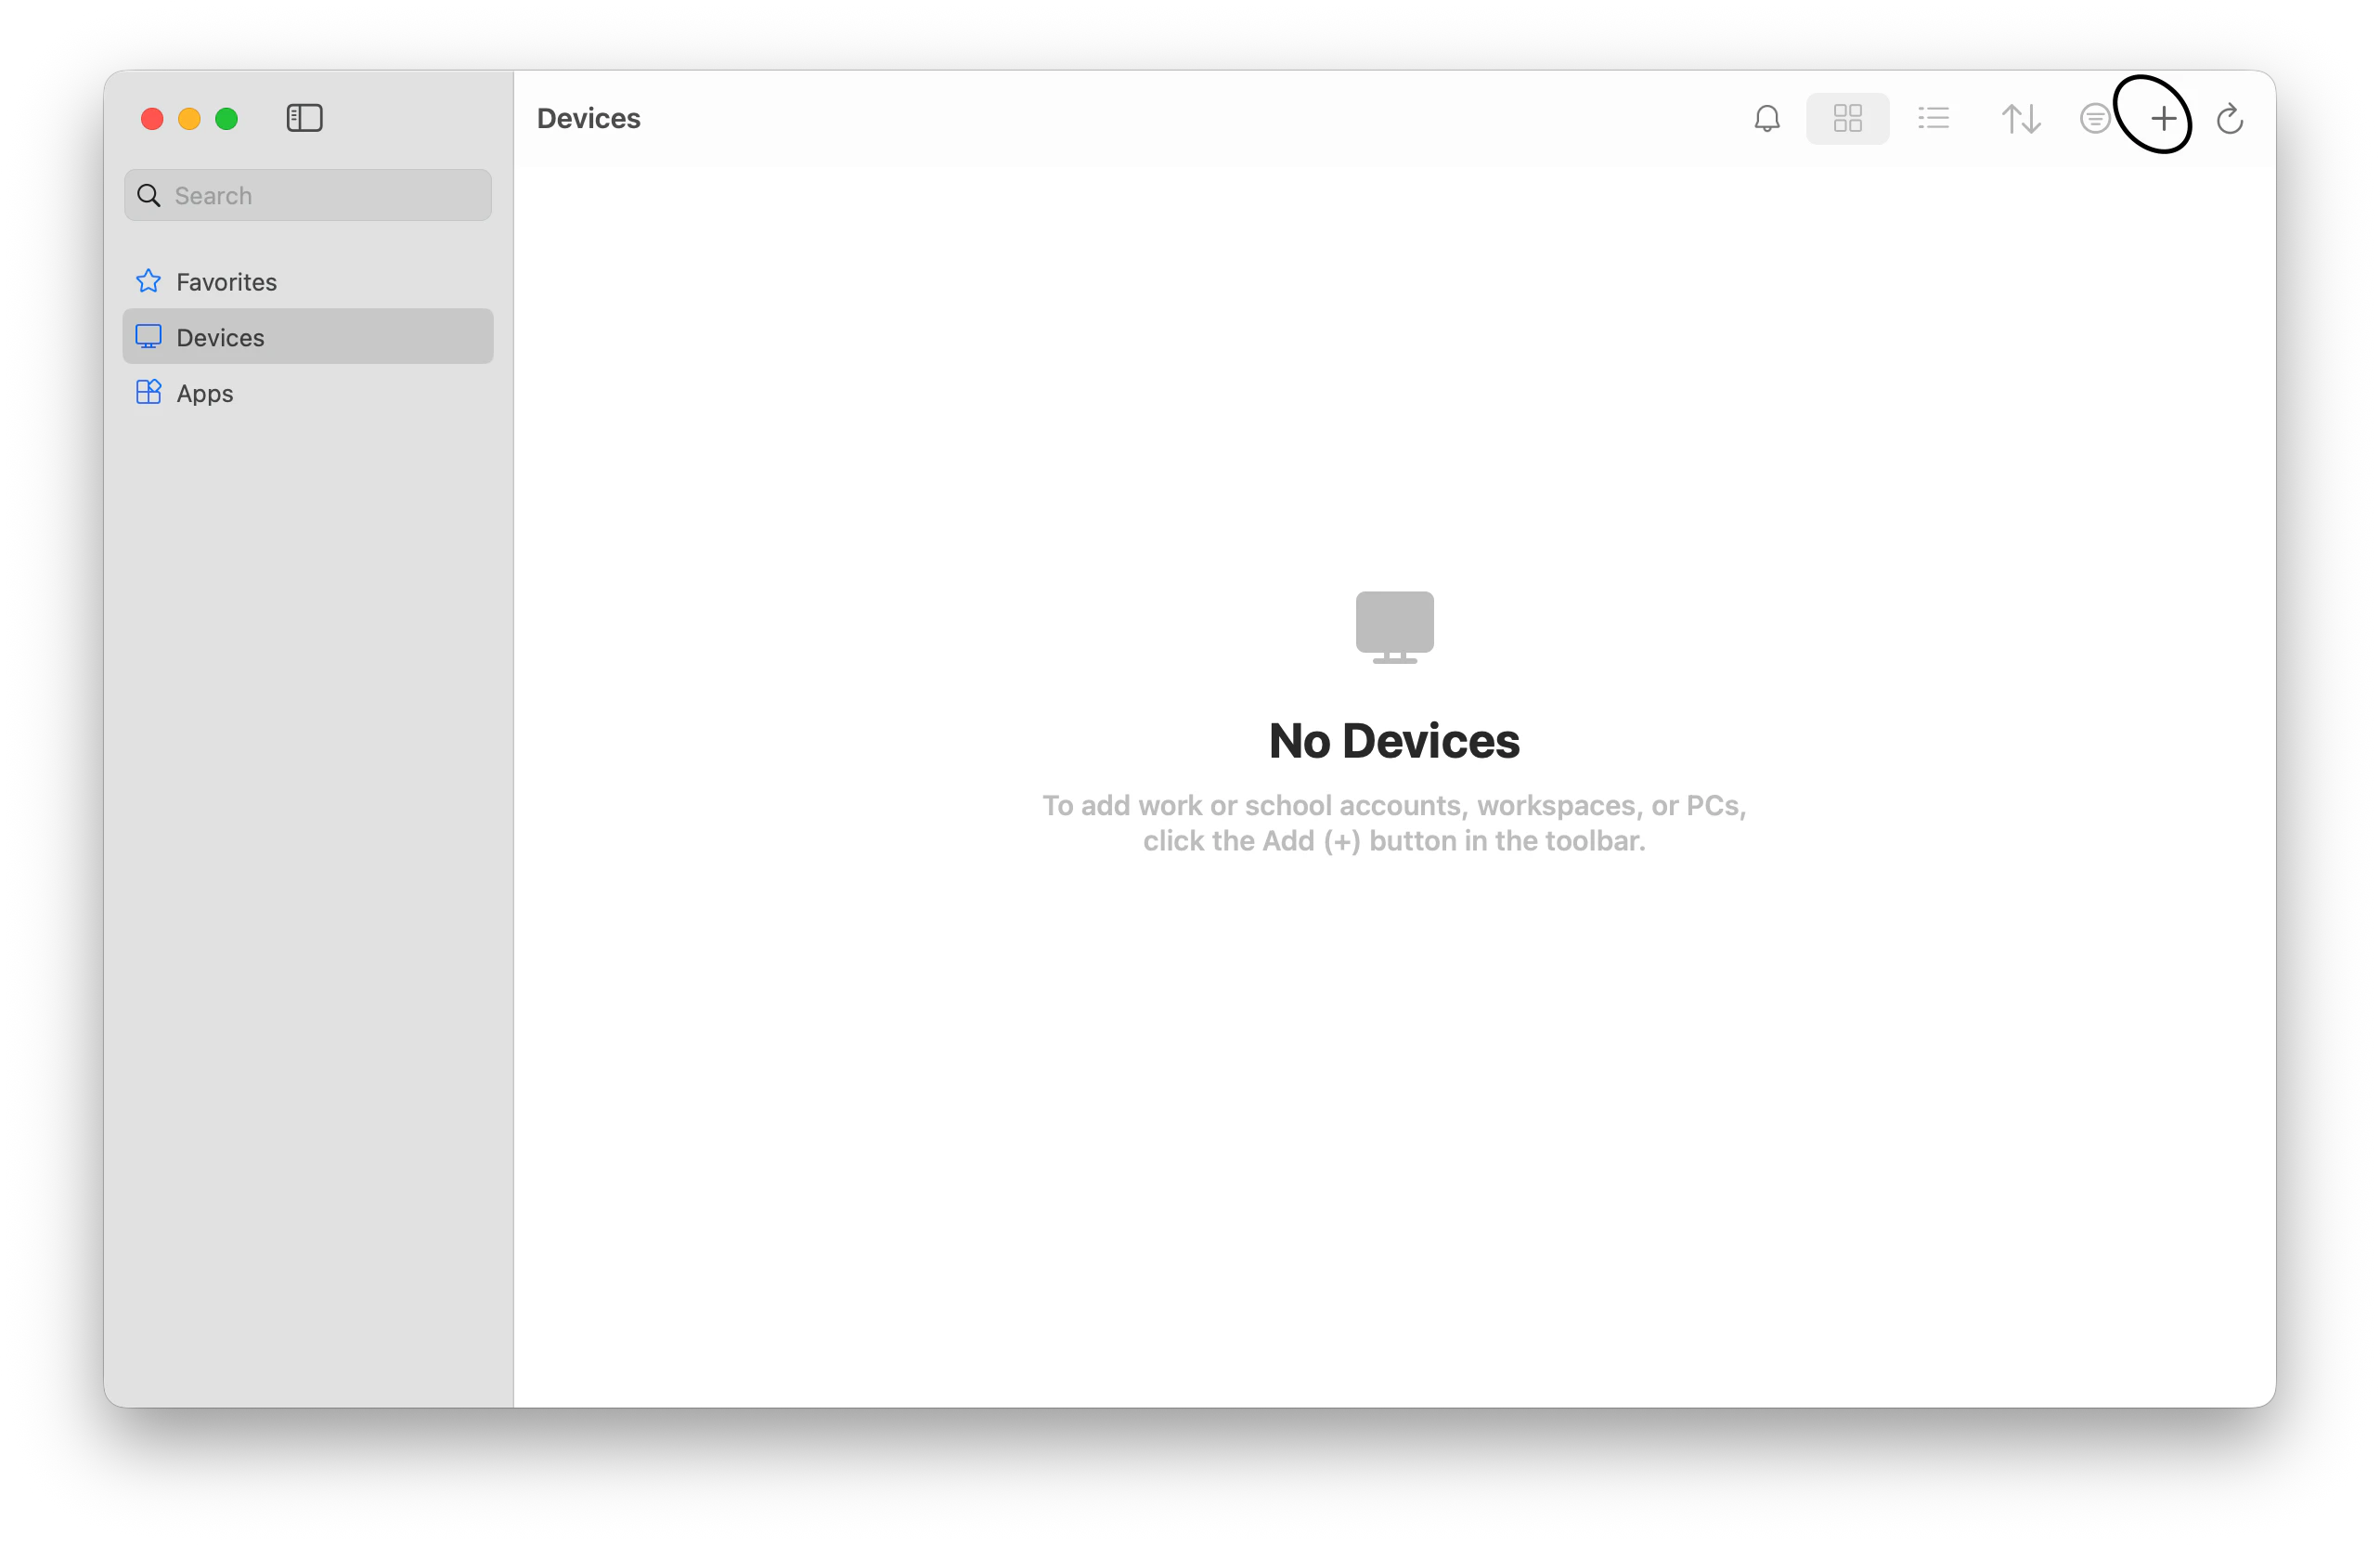
という画面になるので、黒丸の+ボタンから、Add PCを選択。RDPサーバーのipアドレスを入力してください。
ただ、このままではバグで接続できないので参考、一度下記画像のようにexportします。
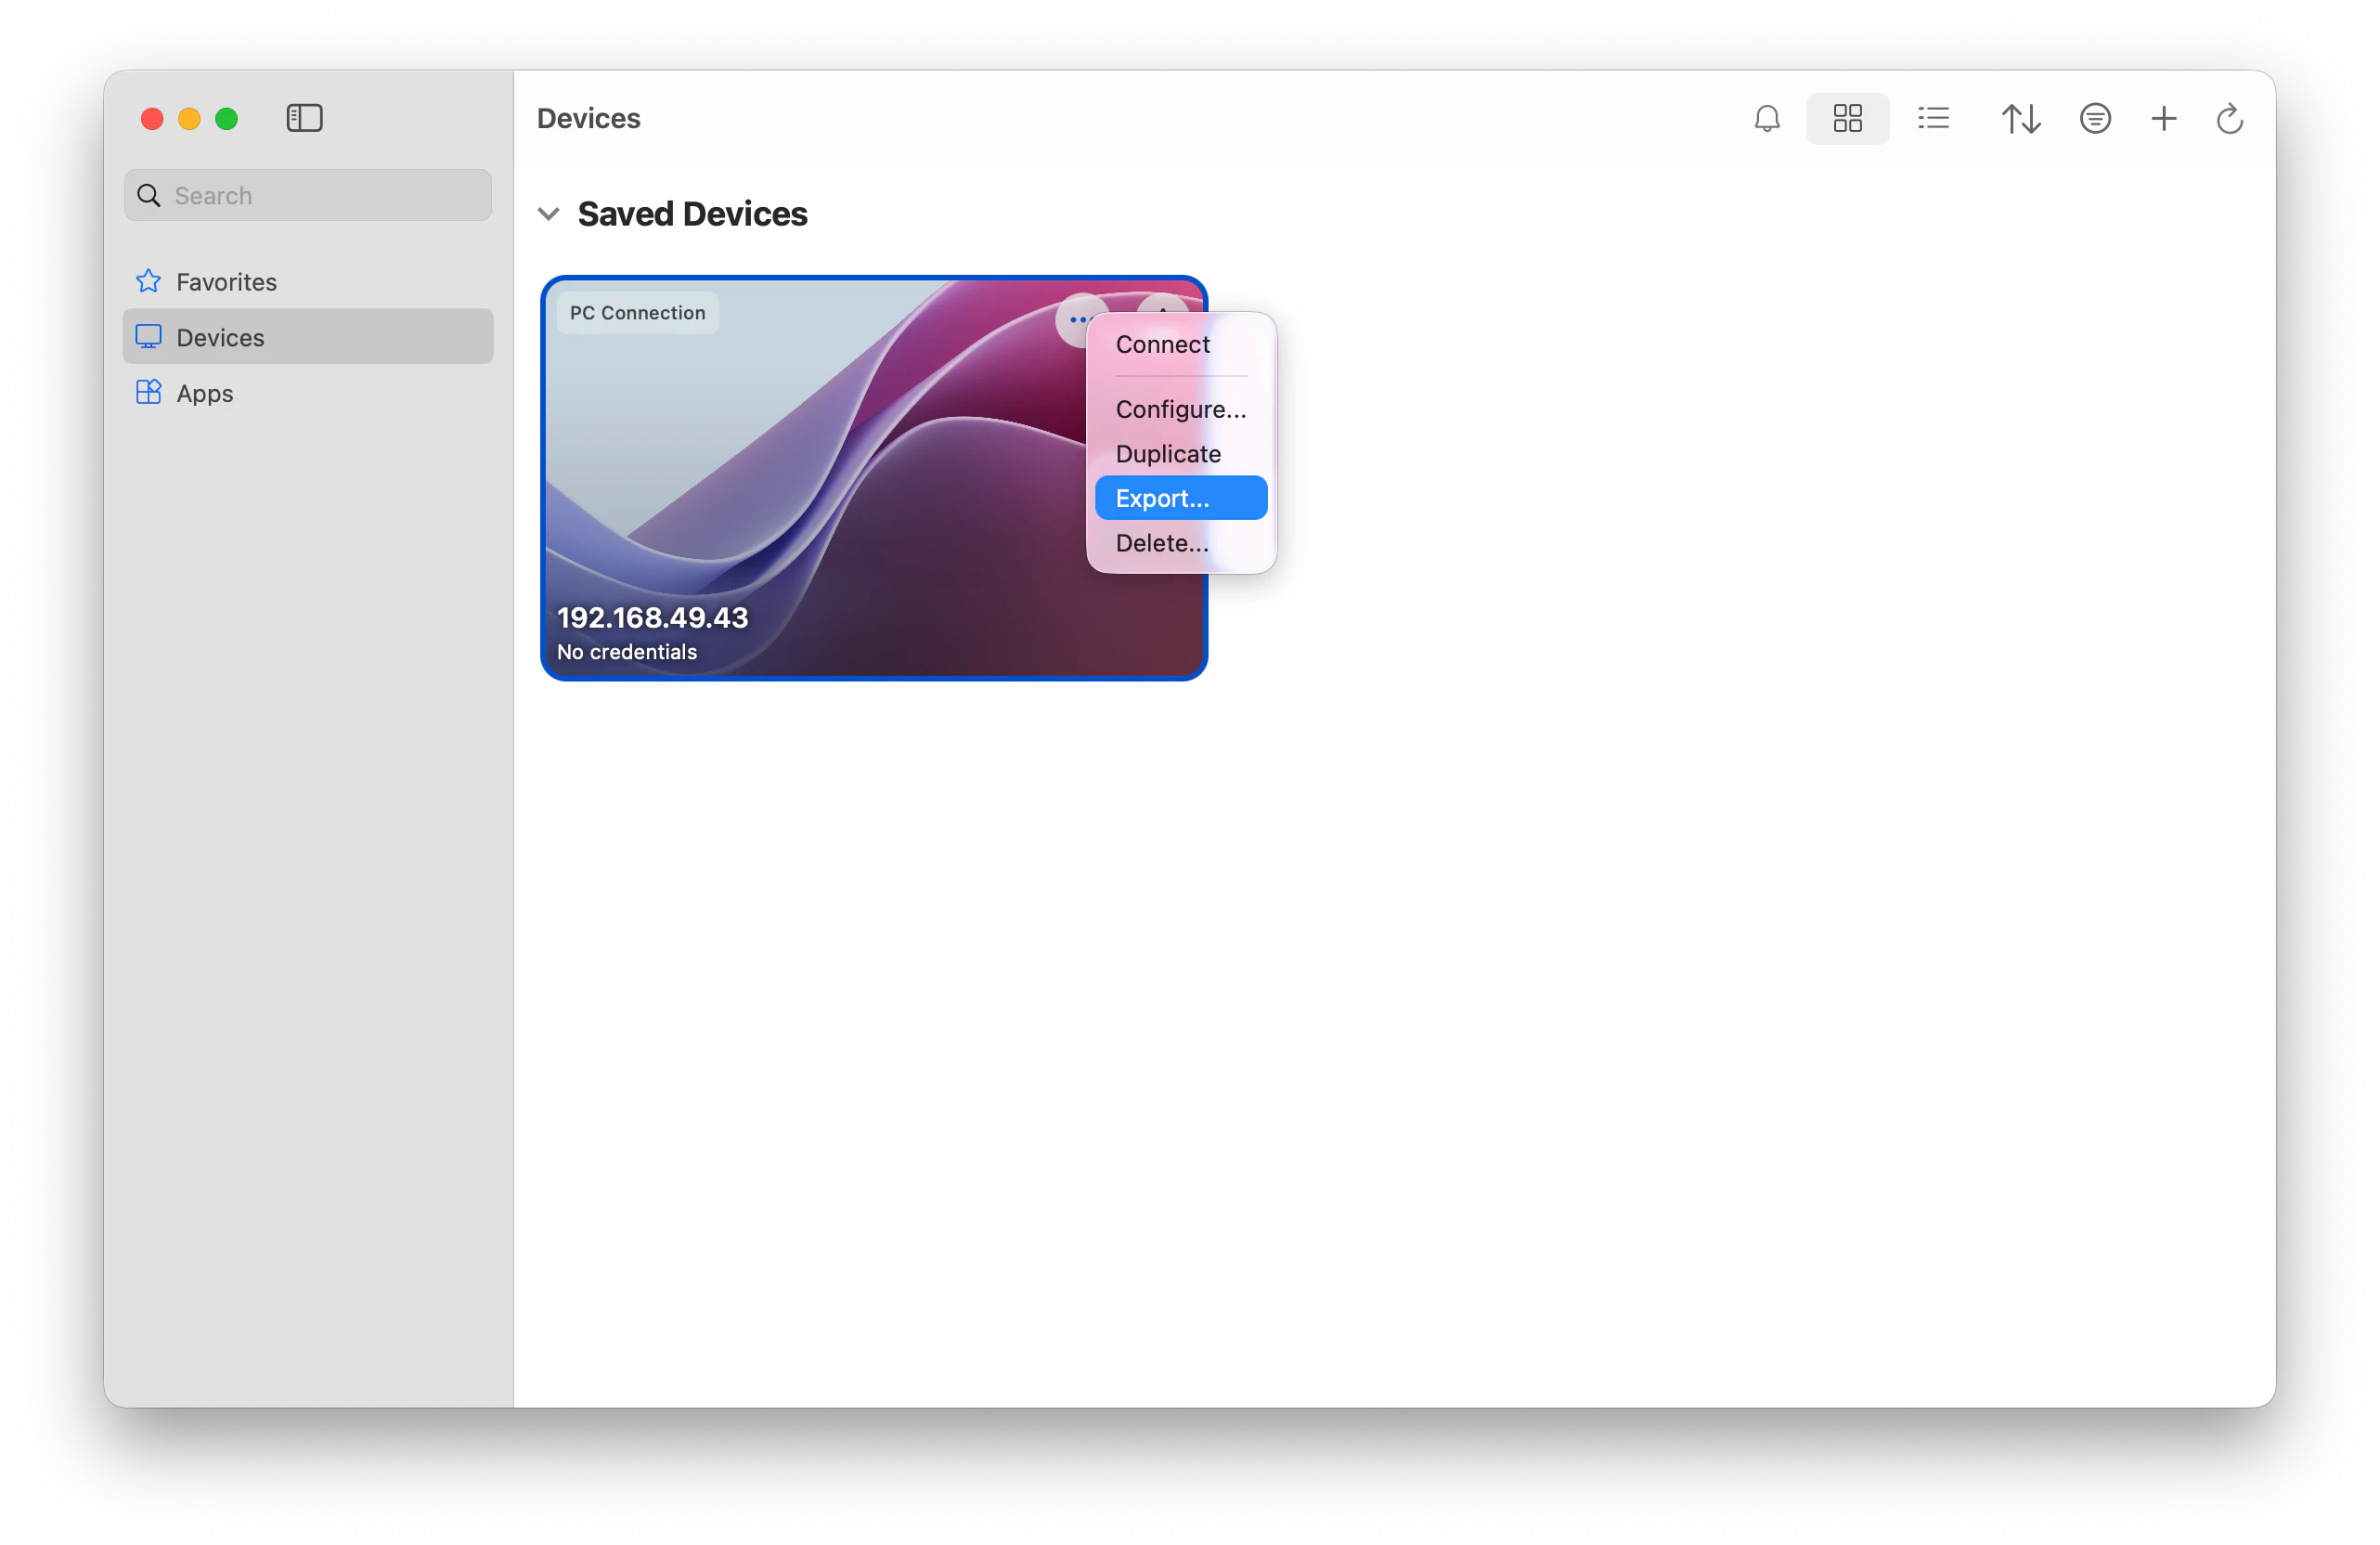
適当なところにエクスポートしたファイルを保存したら、テキストエディタで編集します。
以下のように、最後の行にuse redirection server name:i:1を追記します。
(...前略)
username:s:
allow font smoothing:i:1
connect to console:i:0
disable wallpaper:i:0
gatewayaccesstoken:s:
use redirection server name:i:1
保存してテキストエディタを閉じます。
以下のように、一度devicesから登録したものを削除したあと、編集したファイルをdrag&dropで登録します。
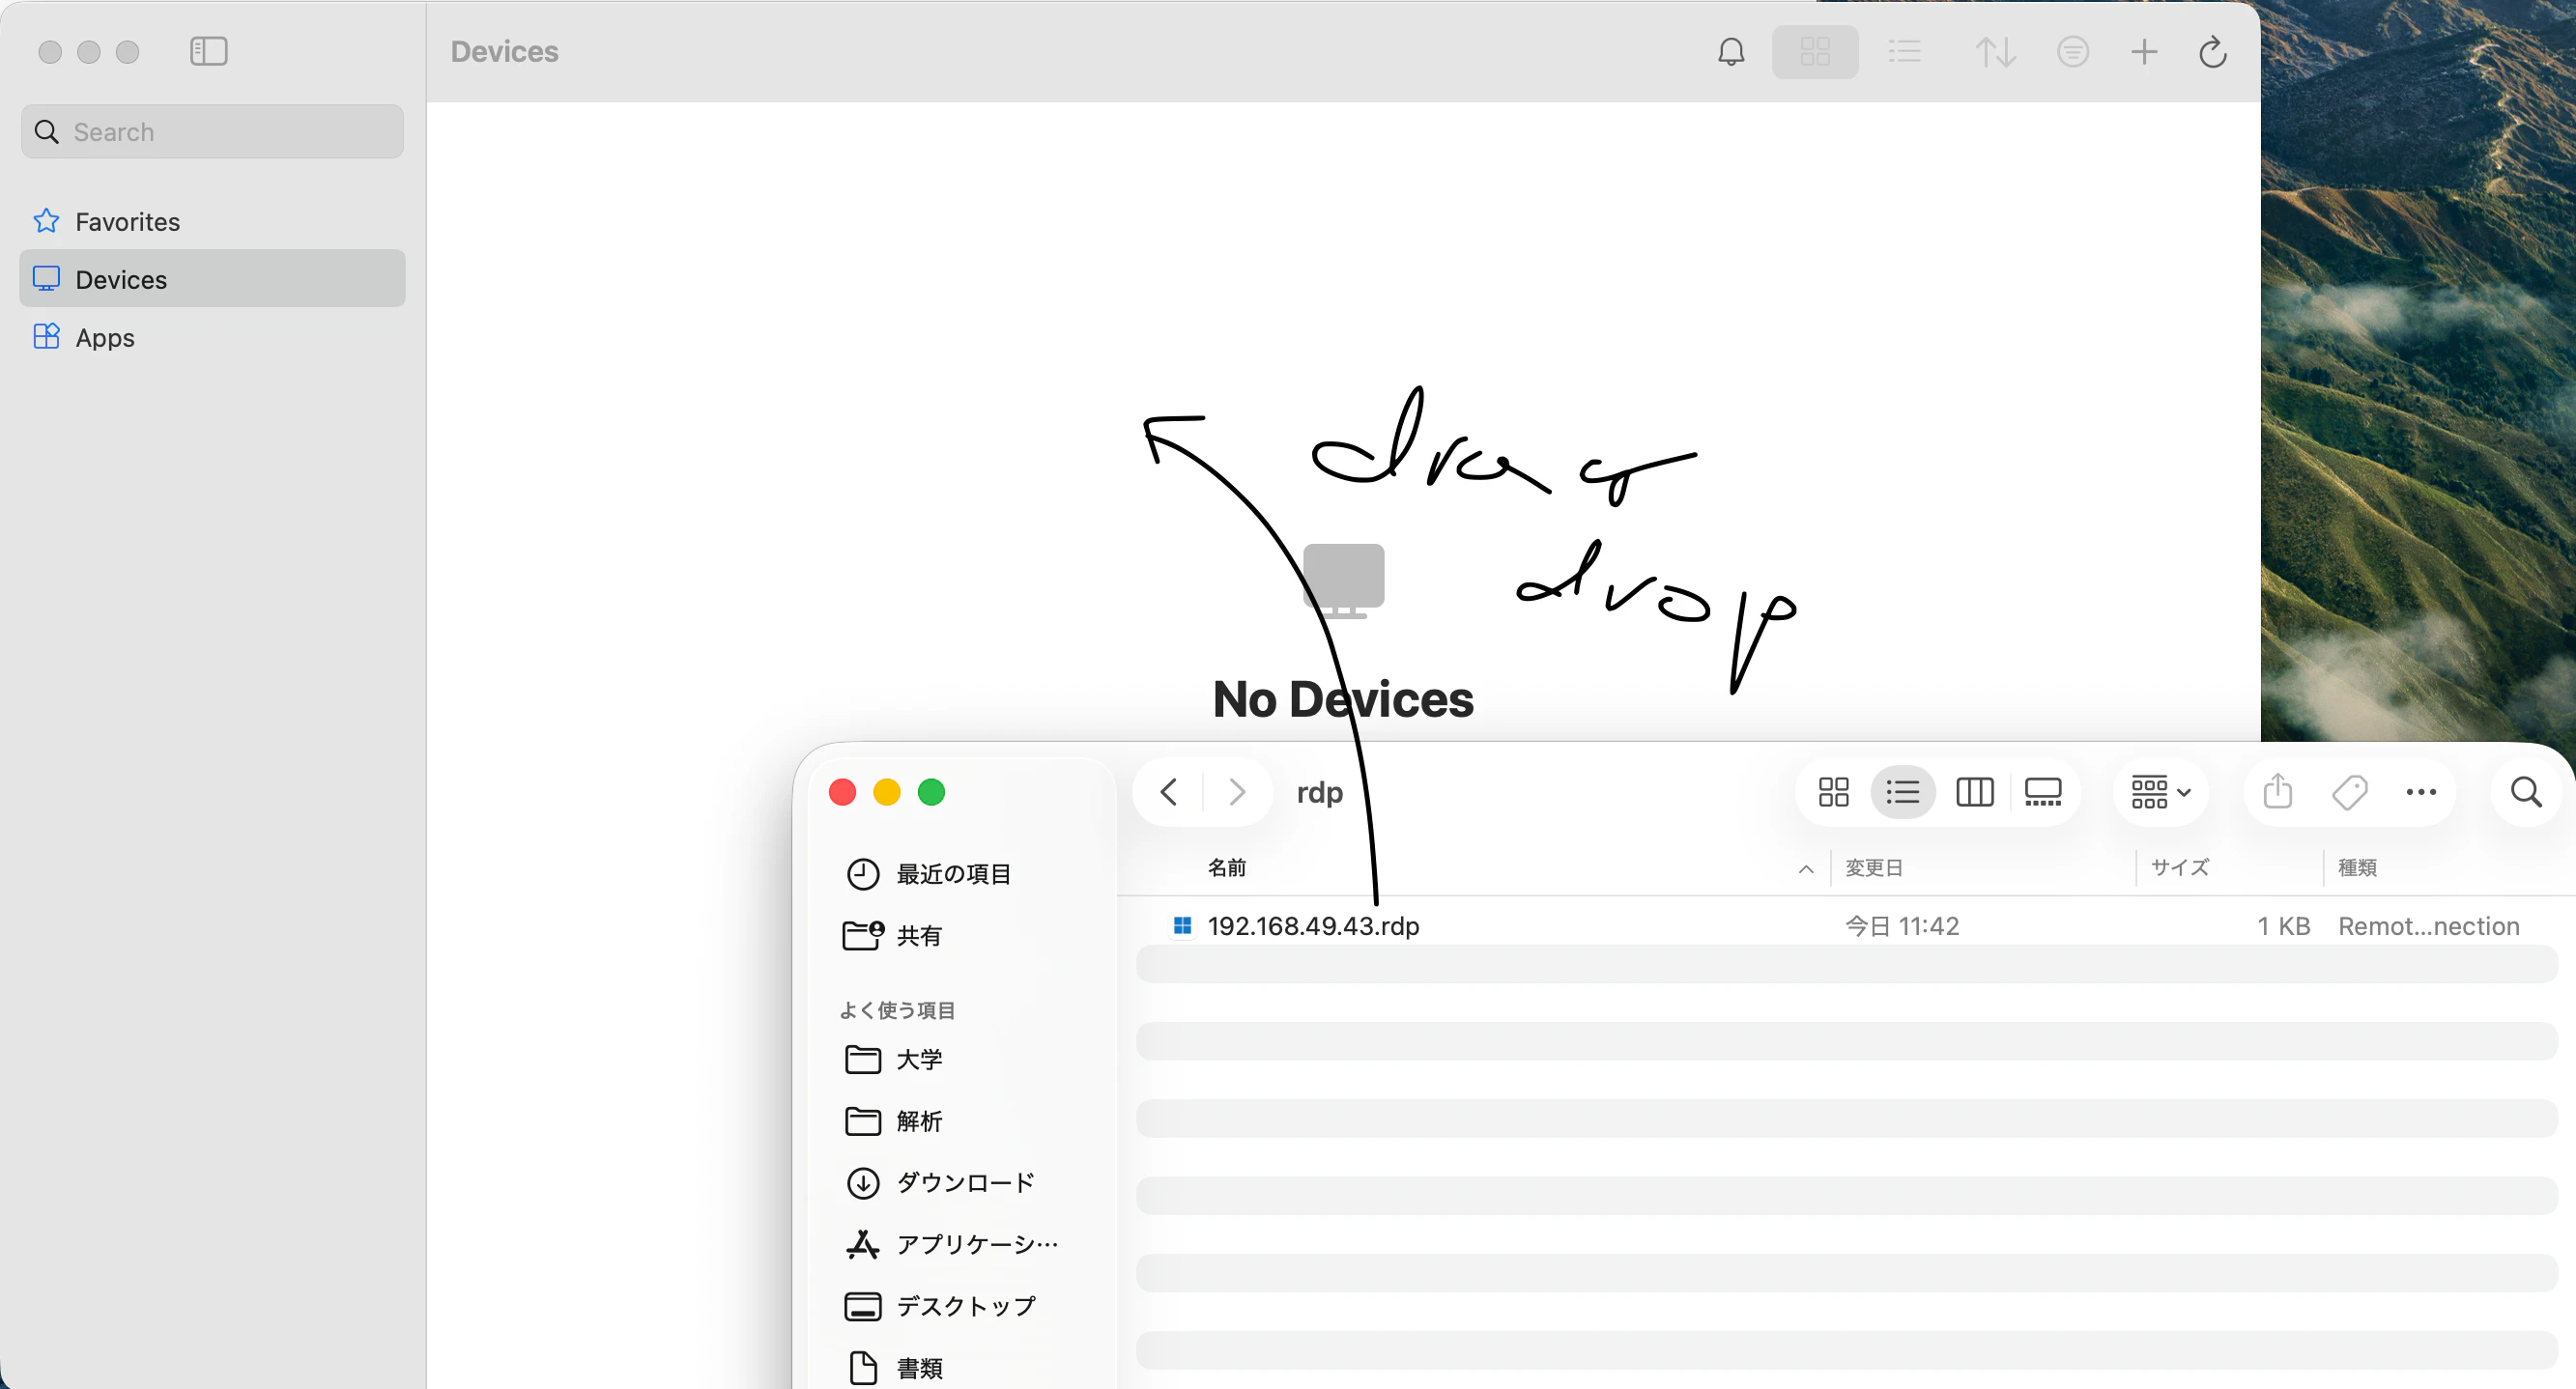
サーバーが登録されるので、ダブルクリックで接続を開始できます。
はじめに聞かれるusername, passwordで設定した共通のuserのものを入力すると、サーバーのログイン画面を見れるようになります。