概要
最近少し触っているTanzu Developer Portal (以後TDP) に用意されたTDP Configuratorというものを軽く試してみましたので流れ等をまとめます。
TDP ConfiguratorはTanzu Developer Portalに任意のBackstageプラグイン等を適用できる機能となります。
今回は簡易的なWebアプリケーションをBackstageのプラグインとして準備し、TDPに適用するまでをゴールとします。
そもそもTanzu Developer Portalとは
Spotify の Backstage オープン ソース開発者ポータルに基づいた VMware Tanzu Developer Portal は、エンタープライズ ソフトウェア開発者が複数のチームやビジネス ユニットにわたってソフトウェア アプリケーションを作成、検出、管理する方法を簡素化します。
引用元: https://tanzu.vmware.com/developer-portal
本記事の対象
- TDPに任意のプラグインを追加してみたい方
- TAPを触っている方
※ TDPの展開元となるTanzu Application Platform (TAP)の知識はある程度ある方が望ましい
実施の流れ
以下手順で進めます。
※ 開発用のBackstageやTDP (TAP環境)自体はあらかじめ用意済みとします。
- Backstage プラグインの準備
- Wrapperプラグインの作成
- TDP ConfiguratorのImage作成
- TAPへの適用 (TDPへの適用と同義)
Backstage プラグインの準備
まず対象とするプラグインを何かしら準備します。今回はせっかくなので簡易的なプラグインを作成してみました。
まず、BackstageではFrontとBackendにコンポーネントが分かれており、それぞれプラグインを作成していく形になります。
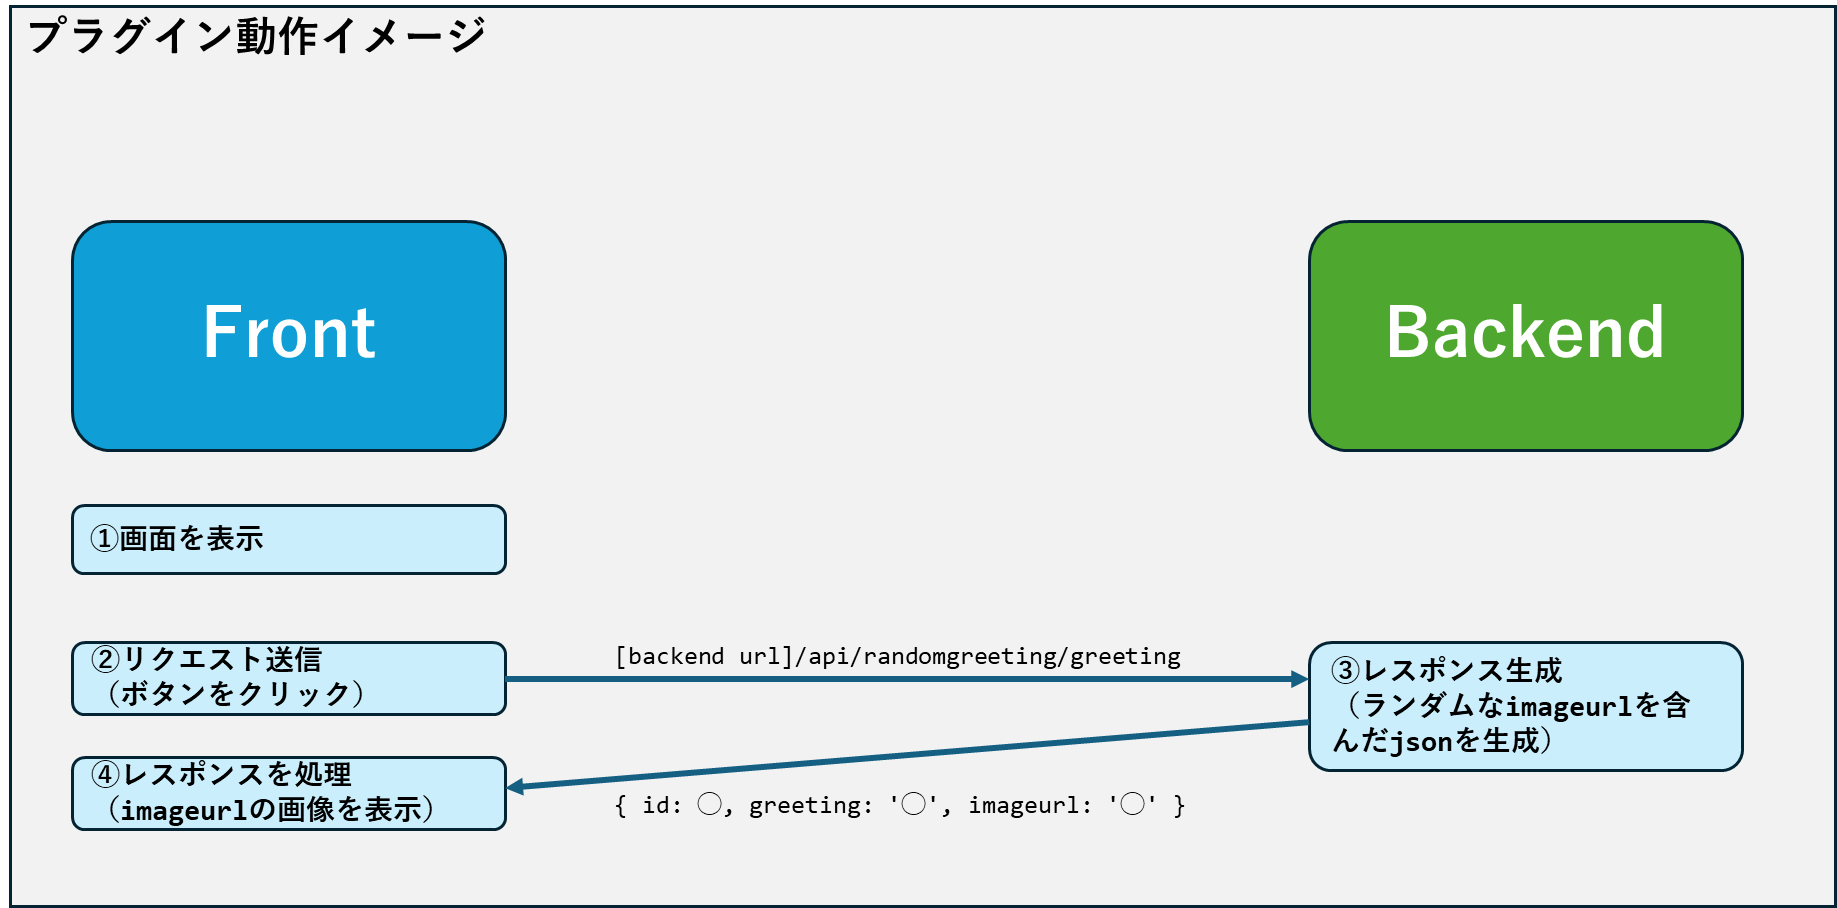
今回はFront側で表示したボタンをクリックしたら、Backendにリクエストを送信し、Backendからはランダムな画像のURLをレスポンスとして返す、フロントで表示する形とします。

実際に作成したもののソースコード等は以下githubを閲覧いただけたらと思いますが、機能の中心部分だけそれぞれ記載します。
Front github
Backend github
Front
ボタンを表示しておき、クリックがされたら[/api/randomgreeting/greeting]宛にリクエストを行う実装になります。その後レスポンスの内容をHTML上のテキストと画像URLに都度反映する形になります。
import React, { useState } from 'react';
import { useApi, configApiRef } from '@backstage/core-plugin-api';

export const RandomGreeting: React.FC = () => {
  const config = useApi(configApiRef);
  const backendUrl = config.getString('backend.baseUrl')
  const [greeting, setGreeting] = useState<string>('');
  const [imageurl, setImageUrl] = useState<string>('');
  const greetingClick = async () => {
    try {
      const response = await fetch(backendUrl + '/api/randomgreeting/greeting', { method: 'GET' });
      if (!response.ok) {
        throw new Error('Failed to fetch data from the backend');
      }
      const data = await response.json();
      setGreeting(data.greeting);
      setImageUrl(data.imageurl)
    } catch (error) {
      console.error('Error fetching data from the backend', error);
    }
  };

  return (
    <div style={{ marginLeft: '20px' }}>
      <h1>三種の挨拶</h1>
      <p>ボタンをクリックするたびに三種類の挨拶から一つ出力されるぞ!</p>
      <div></div>
      <button onClick={greetingClick}>☆挨拶☆</button>
      <div>
      挨拶:{greeting ? greeting : "上のボタンを押してね"}
      </div>
      {imageurl ? (
        <img width="256" height="256" src={imageurl} alt="挨拶の画像" />
      ) : (
        <img width="256" height="256" src="http://urx3.nu/Zlxt" alt="初期画像" />
      )}
    </div>
  );
};
Backend
Backendは「/greeting」宛にリクエストが届いたら、配列の中からランダムで1つjsonを返す実装にしています。
(お試しなのでDB等は無しで簡易的に。。)
import { errorHandler } from '@backstage/backend-common';
import express from 'express';
import Router from 'express-promise-router';
import { Logger } from 'winston';
import { Config } from '@backstage/config';

export interface RouterOptions {
  logger: Logger;
  config?: Config;
}

interface Greeting {
  id: number;
  greeting: string;
  imageurl: string;
}

export async function createRouter(
  options: RouterOptions,
): Promise<express.Router> {
  const { logger } = options;
  const router = Router();
  router.use(express.json());

  router.get('/health', (_, response) => {
    logger.info('PONG!');
    response.json({ status: 'ok' });
  });

  router.get('/greeting', (_, response) => {
    handleGreetingRequest(response);
  });

  router.use(errorHandler());
  return router;
}

function handleGreetingRequest(response: express.Response) {
  const greetings: Greeting[] = [
    { id: 1, greeting: 'Good morning', imageurl: 'https://3.bp.blogspot.com/-OVuA7GeexRo/WM9YAotBRiI/AAAAAAABCu0/NSY8q78nM2gAeGQGEzewiUWJiwhSjI_hQCLcB/s400/nebusoku_tetsuya_ake_man_smile.png' },
    { id: 2, greeting: 'Hello', imageurl: 'https://4.bp.blogspot.com/-6zjo3kUu7ko/VJ6XK2pggVI/AAAAAAAAqGg/skf8wO3bD_w/s400/time2_hiru.png' },
    { id: 3, greeting: 'Good evening', imageurl: 'https://3.bp.blogspot.com/-AtR9JsjOzGw/UchCEu3G3cI/AAAAAAAAVJ0/uDhqCfTbz2Q/s400/nebusoku.png' },
  ];
  const randomGreeting = getRandomElement(greetings);
  response.json(randomGreeting);
}

function getRandomElement<T>(array: T[]): T {
  const randomIndex = Math.floor(Math.random() * array.length);
  return array[randomIndex];
}
Backstage上の表示
作成したプラグインをBackstageに適用した場合は以下のような形で表示されます。
再度になりますが、こちらのプラグインをTDP上にも適用するというのがゴールです。
Wrapperプラグインの作成
続いて、準備したプラグインをTDPに適用するためにWrapperの作成を行います。
基本的には細かい実装を行うというよりは、自身のプラグインのパラメータであったり、サイドバーへの適用等必要な箇所だけ自身で修正する形となります。
なお、こちらに関しましては Mr. vrabbi が非常に多くのWrapperを作成されているため、こちらを元に作成を行うのが良いと思われます。
Mr. vrabbi の Wrapper プラグイン
なお、こちらもイメージが伝わるよう一部中核となる部分のみ記載しますため、全体のソースコードは以下githubを閲覧ください。
Front Wrapper github
Backend Wrapper github
Front Wrapper
FrontのWrapperとして今回はsidebarItemSurfaceというところでサイドバーに追加するようにしています。その他はMr. vrabbiのものを参考にしながら、基本はプラグインの指定等を変更しています。
import { RandomgreetingPage } from '@strawberryjam/plugin-randomgreeting';
import { AppPluginInterface, AppRouteSurface, SidebarItemSurface } from '@vmware-tanzu/core-frontend';
import { SurfaceStoreInterface } from '@vmware-tanzu/core-common';
import { SidebarItem } from '@backstage/core-components';
import AttachFileIcon from '@material-ui/icons/AttachFile';
import React from 'react';
import { Route } from 'react-router';

export const RandomGreetingPlugin: AppPluginInterface =
  () => (context: SurfaceStoreInterface) => {
    context.applyWithDependency(
      AppRouteSurface,
      SidebarItemSurface,
      (_appRouteSurface, sidebarItemSurface) => {
        _appRouteSurface.add(
          <Route path="/randomgreeting" element={<RandomgreetingPage />} />
        )
        sidebarItemSurface.addMainItem(
          <SidebarItem icon={AttachFileIcon} to='randomgreeting' text='greeting' />
        );
      }
    );
  }
Backend Wrapper
Backendも同様にMr. vrabbiのものを参考に、プラグイン名や変数名のみ自身の環境に合わせて変更した形になります。
import {
  BackendPluginInterface,
  BackendPluginSurface,
  PluginEnvironment,
} from '@vmware-tanzu/core-backend';
import { Router } from 'express';
import { createRouter } from '@strawberryjam/plugin-randomgreeting-backend';

const createPlugin = () => {
  return async (env: PluginEnvironment): Promise<Router> => {
    return await createRouter({
      logger: env.logger,
      config: env.config,
    });
  };
};

export const RandomGreetingBackendPlugin: BackendPluginInterface =
  () => surfaces =>
    surfaces.applyTo(BackendPluginSurface, backendPluginSurface => {
      backendPluginSurface.addPlugin({
        name: 'randomgreeting',
        pluginFn: createPlugin(),
      });
    });
プラグインの公開
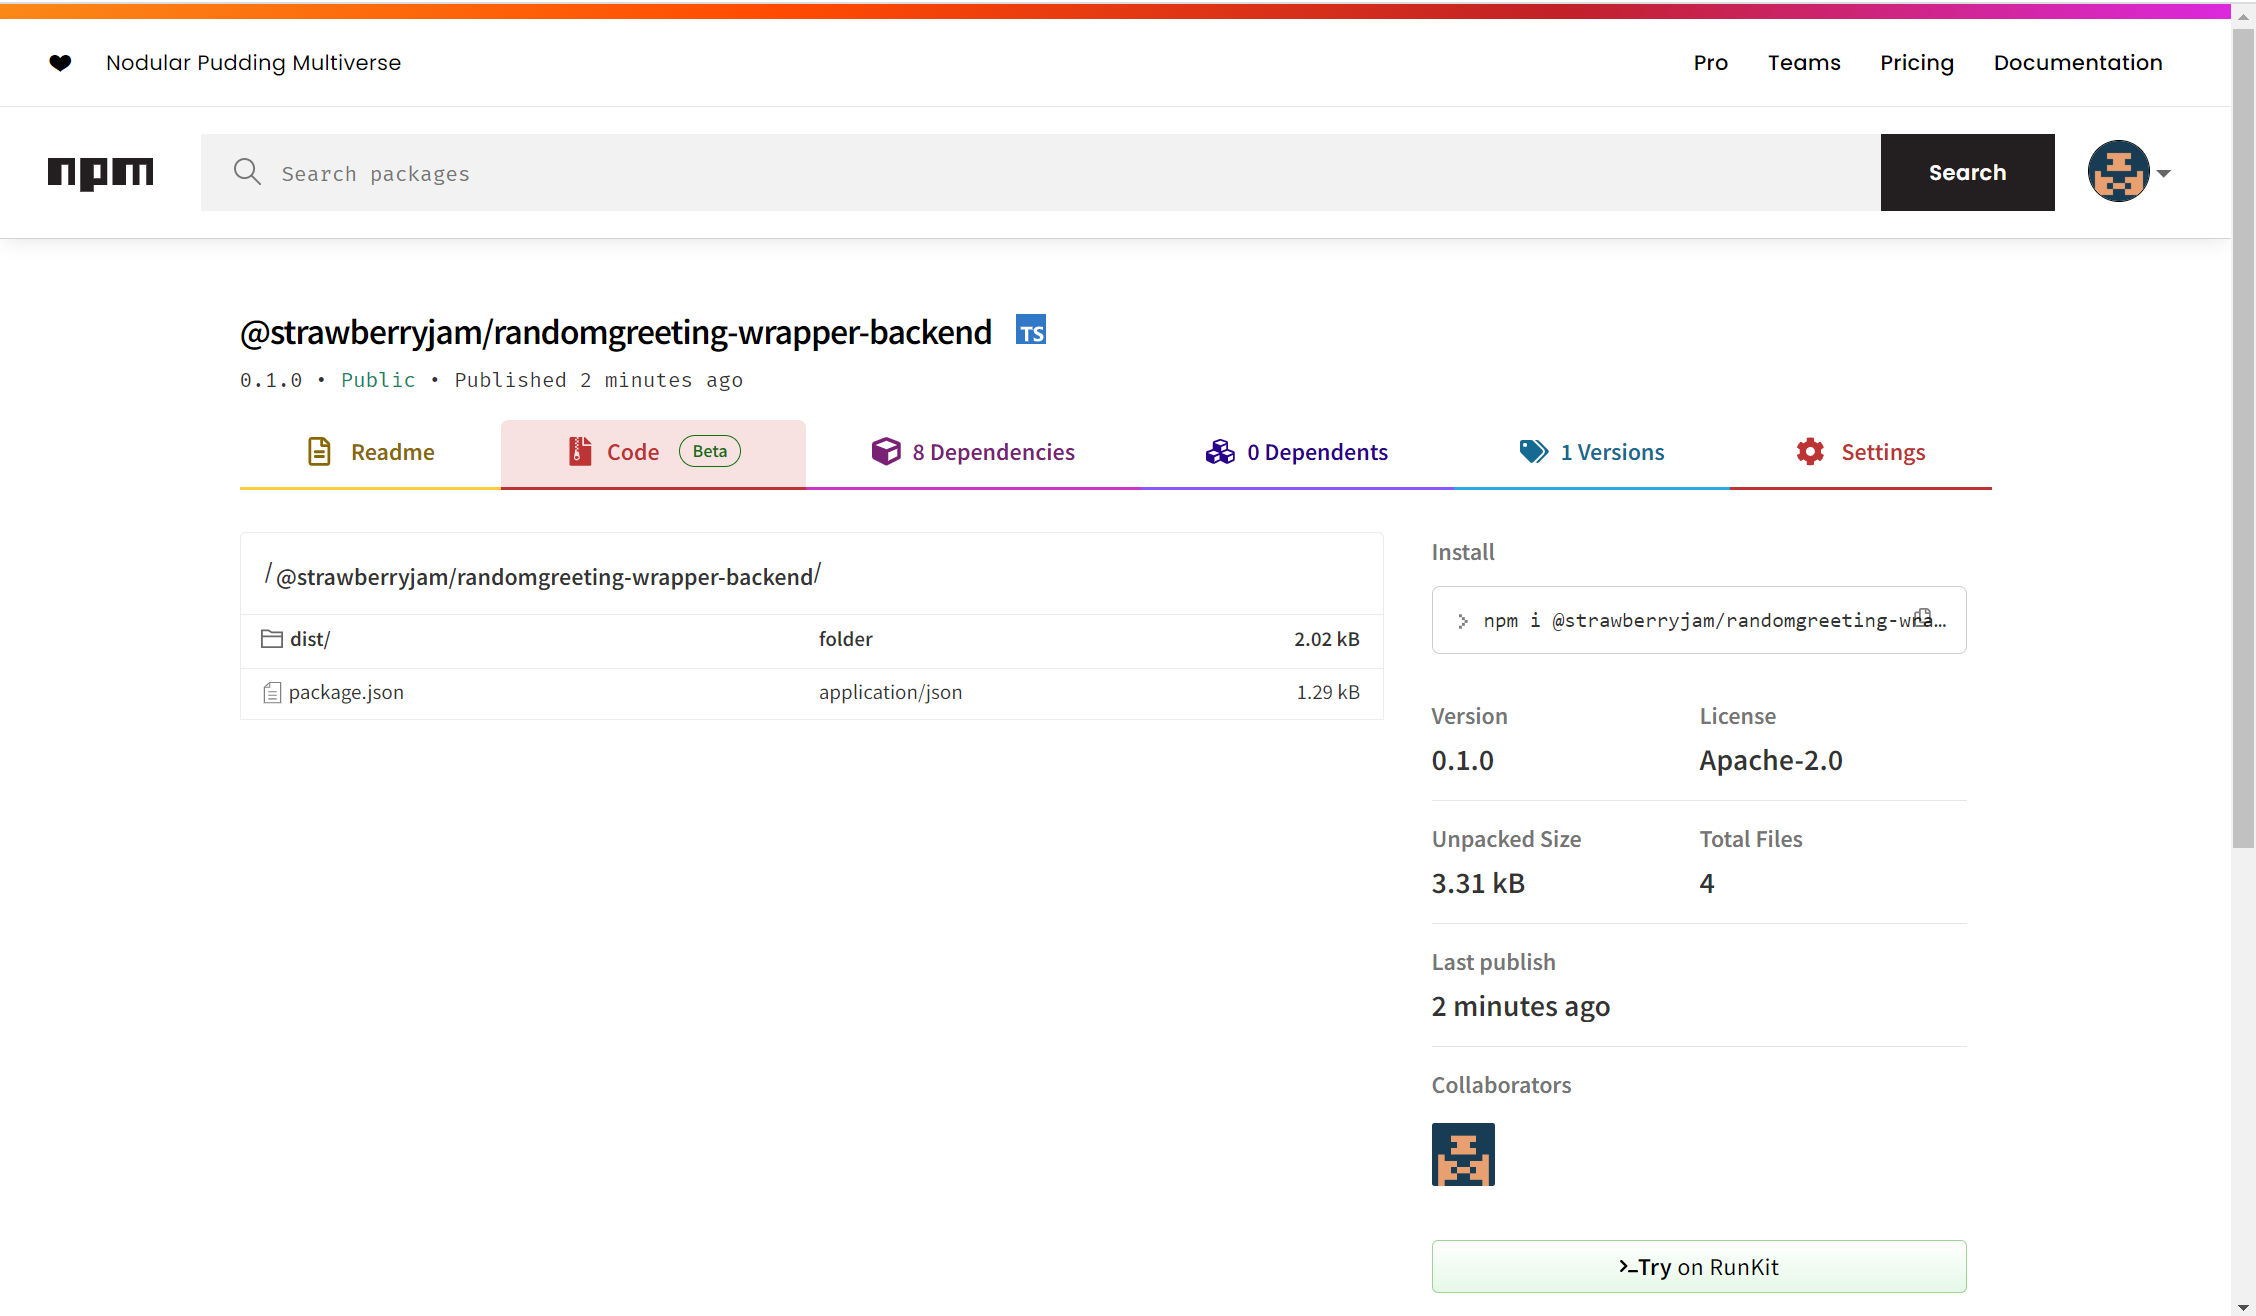
TDPでプラグインを利用するにあたりnpmのリポジトリへ公開を行っておく必要があります。
そのため、以下画像のように外から利用できる形に公開しておきます。
なお、Wrapperだけでなく元となるプラグインも合わせて公開しておく必要があります。
今回公開したものは以下4つとなります。
Backstage プラグイン
https://www.npmjs.com/package/@strawberryjam/plugin-randomgreeting
https://www.npmjs.com/package/@strawberryjam/plugin-randomgreeting-backend
Wrapper プラグイン
https://www.npmjs.com/package/@strawberryjam/randomgreeting-wrapper
https://www.npmjs.com/package/@strawberryjam/randomgreeting-wrapper-backend
TDP ConfiguratorのImage作成
TDPにプラグインを適用するために、Imageの作成が必要なため作成します。
実際にはTAPのWorkloadとして展開する過程で作成されるImageを用います。
まず作成して公開しておいたWrapperプラグインを指定する形で以下のようにyamlを作成します。
Wrapperプラグインの数は何個入れても問題ないです。
app:
  plugins:
    - name: '@strawberryjam/randomgreeting-wrapper'
      version: '0.1.6'
backend:
  plugins:
    - name: '@strawberryjam/randomgreeting-wrapper-backend'
      version: '0.1.8'
作成したファイルをbase64でエンコードして、出力されたものをメモしておきます。
# base64でエンコードして、catで出力
cat tdp-config.yaml | base64 -w0
続いて、以下コマンドにてWorkloadの動作にて用いるConfiguratorのイメージの場所を特定し、メモしておきます。
TAPの作成時にリロケートを行っている場合は、利用しているHarborなどのリポジトリ上のImageの場所が出力されます。
imgpkg describe -b $(kubectl get -n tap-install $(kubectl get package -n tap-install \
--field-selector spec.refName=tpb.tanzu.vmware.com -o name) -o \
jsonpath="{.spec.template.spec.fetch[0].imgpkgBundle.image}") -o yaml --tty=true | grep -A 1 \
"kbld.carvel.dev/id: harbor-repo.vmware.com/esback/configurator" | grep "image: " | sed 's/\simage: //g'
続いて、以下のようなworkloadのyamlを作成します。
先程までのメモをもとに、[TPB_CONFIG_STRING]の[value]にはbase64エンコードしたtdp-config.yamlのパラメータを入力、[source]の[image]には確認しておいたConfiguratorのイメージパスを入力しておきます。
apiVersion: carto.run/v1alpha1
kind: Workload
metadata:
  name: tdp-configurator
  labels:
    apps.tanzu.vmware.com/workload-type: web
    app.kubernetes.io/part-of: tdp-configurator
spec:
  build:
    env:
      - name: BP_NODE_RUN_SCRIPTS
        value: 'set-tpb-config,portal:pack'
      - name: TPB_CONFIG
        value: /tmp/tpb-config.yaml
      - name: TPB_CONFIG_STRING
        value: {base64エンコードしたtdp-config.yaml}
  source:
    image: {Configuratorのイメージパス}
    subPath: builder
yamlの準備ができたらkubectlでapplyを行い、TDPでSupply Chainを確認してImage Providerの処理完了まで待ちます。
無事に処理完了しましたら、Image Providerの右の小さい四角をクリックして、作成されたイメージのリンクをメモしておきます。

おまけ
本手順ではImageを作成するためのWorkloadのtypeとして既存のwebを利用しました。
特に問題は無いのですが、一方でtypeをwebで行った場合ですとWorkload自体は最終的に先の処理が進めずエラーで残る形になります。
そこで再度の登場 Mr. vrabbi がTDP用に利用できるサプライチェーンを公開しています。
https://github.com/vrabbi-tap/tdp-configurator-supply-chain/
こちらは以下画像のようにTDP Configuratorを使うにあたり、必要最低限のものだけに絞られたサプライチェーンとなっています。

また、base64エンコードの手順も不要となり、以下のように直接Workloadのyamlにプラグインを指定することができるため、手順の省略にも繋がります。
一度準備さえ行えば以降は簡単に利用できるため、こちらを利用するのもおすすめという紹介でした。
apiVersion: carto.run/v1alpha1
kind: Workload
metadata:
  labels:
    app.kubernetes.io/part-of: tdp-configurator
    apps.tanzu.vmware.com/workload-type: tdp
  name: tdp-configurator
spec:
  params:
    - name: tpb_plugins
      value: |
        app:
          plugins:
            - name: '@strawberryjam/randomgreeting-wrapper'
              version: '0.1.6'
        backend:
          plugins:
            - name: '@strawberryjam/randomgreeting-wrapper-backend'
              version: '0.1.8'
TAPへの適用
最後の手順として作成したImageをTAPに適用します。
まず以下のようなyamlファイルを作成し、applyしておきます。
※ [containers]の[image]には前手順で作成したImageのパスをいれます
apiVersion: v1
kind: Secret
metadata:
  name: tdp-app-image-overlay-secret
  namespace: tap-install
stringData:
  tpb-app-image-overlay.yaml: |
    #@ load("@ytt:overlay", "overlay")

    #! makes an assumption that tap-gui is deployed in the namespace: "tap-gui"
    #@overlay/match by=overlay.subset({"kind": "Deployment", "metadata": {"name": "server", "namespace": "tap-gui"}}), expects="1+"
    ---
    spec:
      template:
        spec:
          containers:
            #@overlay/match by=overlay.subset({"name": "backstage"}),expects="1+"
            #@overlay/match-child-defaults missing_ok=True
            - image: {Workloadにて作成されたImageのパス}
            #@overlay/replace
              args:
              - -c
              - |
                export KUBERNETES_SERVICE_ACCOUNT_TOKEN="$(cat /var/run/secrets/kubernetes.io/serviceaccount/token)"
                exec /layers/tanzu-buildpacks_node-engine-lite/node/bin/node portal/dist/packages/backend  \
                --config=portal/app-config.yaml \
                --config=portal/runtime-config.yaml \
                --config=/etc/app-config/app-config.yaml
続いて、先程applyしたSercretをTAPに読み込ませる必要があります。
TAPの作成時に用いたtap-values.yamlに以下の項目を追記して、applyで設定を更新します。
package_overlays:
  - name: tap-gui
    secrets:
      - name: tdp-app-image-overlay-secret
TAPにて設定変更を認識するとTDP (tap-gui)の再作成が行われます。
実際には以下のように新しいPodが作成され始める形となります。
$ kubectl get pods -n tap-gui --watch
NAME                      READY   STATUS              RESTARTS   AGE
server-59c7fc4c9-hqzxd    1/1     Running             0          6h29m
server-74cdbbbbc5-mpf86   0/1     ContainerCreating   0          10s
新しいPodの作成完了後TDPにアクセスを行うと、プラグインが追加できていることが確認できます。
ボタンをクリックして、正常に画像も切り替わり、Backend側も問題なく動作していることも確認できます。

まとめ
今回はTDPに任意のプラグインを追加することができるTDP Configuratorを試してみました。
Backstageのプラグイン自体始めて触れたため、中々手こずった部分もありました。
(特にnode.jsの依存関係でエラーでまくり。。。w)
TDP Confgurator自体としては、正直使い勝手が良いかと言われると、う~んという形でした。中々利用のハードルが高く簡単には手を出しづらいかな、という印象です。
一方で現在はまだ試している方もほぼおらず(多分Mr. vrabbiだけ..?)こともあり情報が少ない状態なため、今後活発化したらより良い形に生まれ変わっていくのかなと思いました!
参考にしたサイト
https://docs.vmware.com/en/VMware-Tanzu-Application-Platform/1.7/tap/tap-gui-configurator-building.html
https://github.com/vrabbi-tap/tdp-configurator-supply-chain/
https://github.com/vrabbi-tap/tdp-plugin-wrappers

