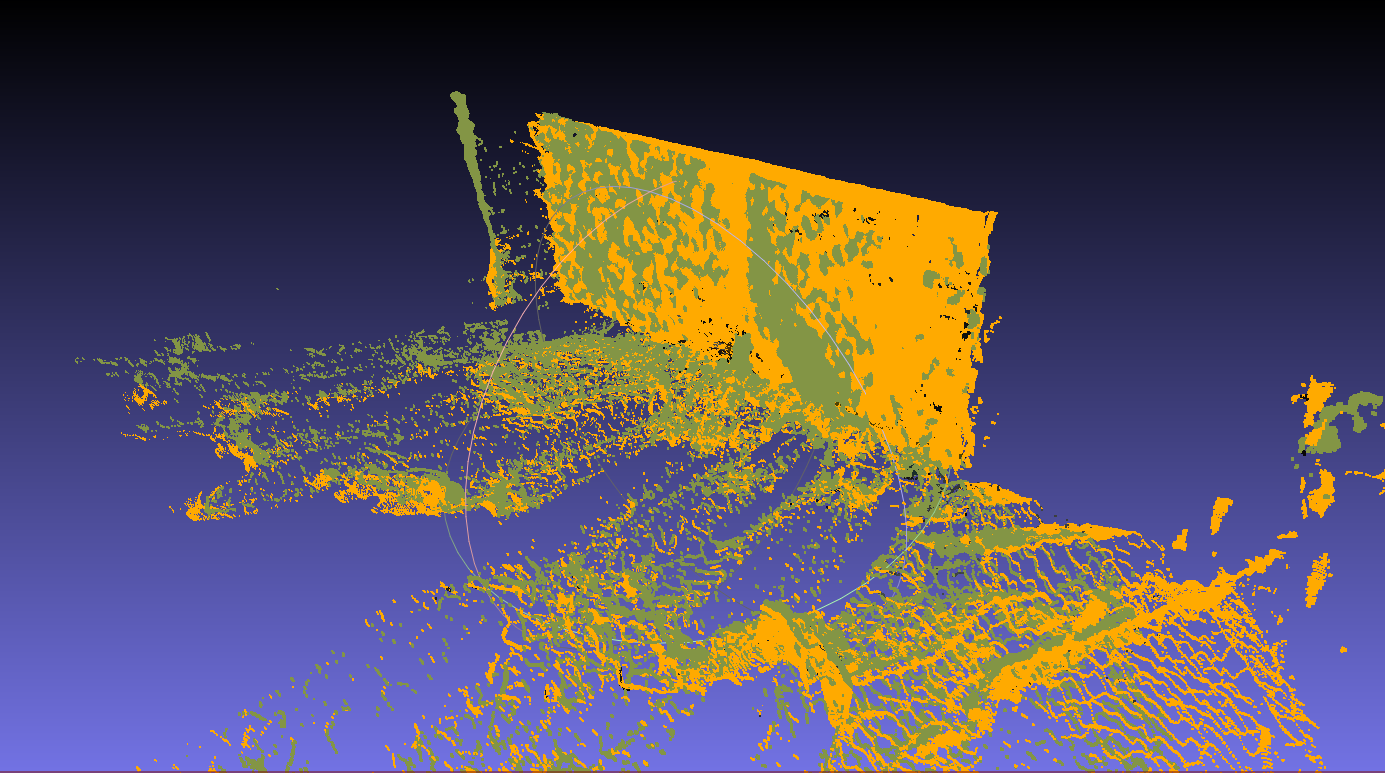
PatchMatchで遊んでみます。
PatchMatchとは?(ざっくり)
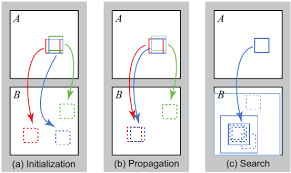
PatchMatchの大雑把な概要としては、
ある画像と別の画像で類似している部分を見つけようぜ!
というアルゴリズムです。
Photoshopでは絵から特定の箇所を消したりするときとかに使われています。
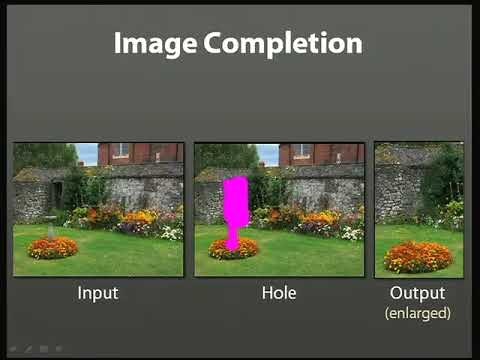
ベースの考え方としては、超ざっくり以下の通り。
1.メインの画像とターゲットの画像の全ピクセルの対応関係をランダムにセット。
  最終的にはこの対応関係の組が類似したピクセルの組となる。

2.隣接するピクセルは同じパーツの部位である確率が高いだろうという考えのもと、
  現在の類似度と隣接するピクセルの類似度を比較し、
  現在設定されている類似度よりも大きい(より類似度が高い)場合、その値に更新する。

3.以下繰り返し
PatchMatchはテンプレートマッチングのような使い方をされる場合がありますが、
ほかにも、隣接する部分は同じようになるという共通的な発想のもとで、
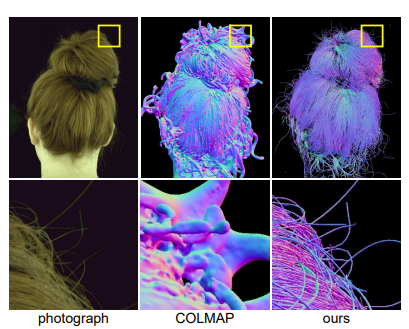
同じ面はデプス同じやろ!という着眼点でColmapではデプスの推定に利用されたりします。
広く応用できそうな理論です。
2つの画像をマッチングさせてみる。
今回の記事で重要なポイントは、
PatchMatchを利用すればある2つの画像に映っている類似した個所が
ピクセルレベルで判定できる、ということです。
SfMをやっていると特徴点マッチングという言葉がたびたび出てきますが、
特徴点マッチングは特徴点ありきの処理なので、
環境に左右されやすく、特徴点の数がすくないと処理に失敗することも難点です。
PatchMatchならマッチング数もっとふやせるんじゃね?
という目的のもと、以下の処理で遊んでみます。
1.2つの画像でPatchMatch実行。SADで全ピクセルに類似するピクセルの組を算出
2.マッチングした2つの組をRansac実行。外れ値を除去する。
PatchMatchでどれくらい正確に、そして件数多くマッチングできるかみてみます。
ついでに、RGBD画像と内部パラメータの情報も使って点群化・位置合わせも行ってみます。
うまくマッチングできていれば、
ノイズの影響も受けずに上手に位置合わせできるかもしれません。
3.抽出したピクセルの組より点群化
4.抽出した点群を位置合わせ
5.4のパラメータを使って大本の点群に対して位置合わせ
コード
コアな処理の部分は上記コードをお借りします。
そのまま使うとマリアの顔がアバターになるコードなので、
PatchMatchの実行結果だけを利用するよう修正します。
def reconstruction(f, A, B,AdepthPath="",BdepthPath=""):
    A_h = np.size(A, 0)
    A_w = np.size(A, 1)
    temp = np.zeros_like(A)

    srcA=[]
    dstB=[]

    colorA=np.zeros_like(A)
    colorB=np.zeros_like(A)

    for i in range(A_h):
        for j in range(A_w):
            colorA[i, j, :] = A[[i],[j],:]
            colorB[i, j, :] = B[f[i, j][0], f[i, j][1], :]

            temp[i, j, :] = B[f[i, j][0], f[i, j][1], :]
            srcA.append([i,j])
            dstB.append([f[i, j][0], f[i, j][1]])

    # ついでにPatchMatchで取得した類似ピクセルを当てはめてみる。
    # 画像Bのピクセルをつかって画像Aを再構成するイメージ
    cv2.imwrite('colorB.jpg', colorB)
    cv2.imwrite('colorA.jpg', colorA)

    src=np.array(srcA)
    dst=np.array(dstB)
    print(src.shape)
    print(dst.shape)

    srcA_pts = src.reshape(-1, 1, 2)
    dstB_pts = dst.reshape(-1, 1, 2)
    # RANSAC
    print(srcA_pts.shape)
    print(dstB_pts.shape)

    M, mask = cv2.findHomography(srcA_pts, dstB_pts, cv2.RANSAC, 5.0)
    matchesMask = mask.ravel().tolist()

    im_h = cv2.hconcat([A,B])
    cv2.imwrite('outputMerge.jpg', im_h)

    outputA = np.zeros_like(A)
    outputB = np.zeros_like(A)

    for i in range(srcA_pts.shape[0]):
        if mask[i] == 0: continue

        srcIm = [srcA_pts[i][0][0],srcA_pts[i][0][1]]
        dstIm = [dstB_pts[i][0][0],dstB_pts[i][0][1]]

        outputA[srcIm[0],srcIm[1],:]=A[srcIm[0],srcIm[1],:]
        outputB[dstIm[0],dstIm[1],:]=B[dstIm[0],dstIm[1],:]

    im_h = cv2.hconcat([outputA, outputB])
    cv2.imwrite('outputMatch.jpg', im_h)D

    im_h = cv2.hconcat([A, B])

    for i in range(srcA_pts.shape[0]):
        if mask[i] == 0: continue

        srcIm = [srcA_pts[i][0][0],srcA_pts[i][0][1]]
        dstIm = [dstB_pts[i][0][0],dstB_pts[i][0][1]]
        cv2.line(im_h,   (srcIm[0], srcIm[1]),
                        (dstIm[0]+int(1280 * 0.3), dstIm[1]),
                        (0, 255, 0), thickness=1, lineType=cv2.LINE_4)

    cv2.imwrite('outputMatchAddLine.jpg', im_h)

    if AdepthPath!="":
        # 画像のデプスデータ・内部パラメータがある場合は、
        # 点群化してマッチング情報で位置合わせもしてみる。
        # PatchMatchだけなア以下の処理は不要

        import open3d as o3d
        def CPD_rejister(source, target):
            from probreg import cpd
            import copy
            type = 'rigid'
            tf_param, _, _ = cpd.registration_cpd(source, target, type)

            result = copy.deepcopy(source)
            result.points = tf_param.transform(result.points)

            return result, tf_param.rot, tf_param.t, tf_param.scale

        def Register(pclMVS_Main, pclMVS_Target):
            # CPD : step1 Run CPD for SfM Data
            result, rot, t, scale = CPD_rejister(pclMVS_Target, pclMVS_Main)

            # CPD : step2 Apply CPD result for MVS Data
            lastRow = np.array([[0, 0, 0, 1]])
            ret_R = np.array(rot)
            ret_t = np.array([t])
            ret_R = scale * ret_R

            transformation = np.concatenate((ret_R, ret_t.T), axis=1)
            transformation = np.concatenate((transformation, lastRow), axis=0)
            return transformation, rot, t, scale

        def getPLYfromNumpy_RGB(nplist, colorList):
            # nplist = np.array(nplist)
            pcd = o3d.geometry.PointCloud()
            pcd.points = o3d.utility.Vector3dVector(nplist)
            pcd.colors = o3d.utility.Vector3dVector(colorList)
            return pcd

        def numpy2Dto1D(arr):
            if type(np.array([])) != type(arr):
                arr = np.array(arr)
            if arr.shape == (3, 1):
                return np.array([arr[0][0], arr[1][0], arr[2][0]])
            if arr.shape == (2, 1):
                return np.array([arr[0][0], arr[1][0]])
            else:
                assert False, "numpy2Dto1D:未対応"

        def TransformPointI2C(pixel2D, K):
            X = float(float(pixel2D[0] - K[0][2]) * pixel2D[2] / K[0][0])
            Y = float(float(pixel2D[1] - K[1][2]) * pixel2D[2] / K[1][1])
            Z = pixel2D[2]
            CameraPos3D = np.array([[X], [Y], [Z]])
            return CameraPos3D

        def getDepthCSPerView(path):
            import csv
            # depthデータ取得
            in_csvPath = path
            with open(in_csvPath) as f:
                reader = csv.reader(f)
                csvlist = [row for row in reader]

            return csvlist

        # depthデータ(CSV)
        Adepthlist = getDepthCSPerView(AdepthPath)
        Bdepthlist = getDepthCSPerView(BdepthPath)
        pclA=[]
        pclB=[]
        colorA=[]
        colorB=[]

        ALLpclA=[]
        ALLpclB=[]
        ALLcolorA=[]
        ALLcolorB=[]

        # デプス値が1.5m範囲を点群に復元
        depth_threshold = 1.5  # メートル
        depth_scale = 0.0002500000118743628
        threshold = depth_threshold / depth_scale

        # RGBカメラの内部パラメータ
        # width: 1280, height: 720, ppx: 648.721, ppy: 365.417, fx: 918.783, fy: 919.136,
        retK = np.array([[918.783, 0, 648.721],
                         [0, 919.136, 365.417],
                         [0, 0, 1]])


        cnt = 0

        for y in range(len(Adepthlist)):
            for x in range(len(Adepthlist[0])):
                ADepth = float(Adepthlist[y][x])
                BDepth = float(Bdepthlist[y][x])

                if (ADepth == 0 or ADepth > threshold) or (BDepth == 0 or BDepth > threshold):
                    continue

                AXYZ = TransformPointI2C([x,y, ADepth], retK)
                BXYZ = TransformPointI2C([x,y, BDepth], retK)

                ALLpclA.append(numpy2Dto1D(AXYZ))
                ALLpclB.append(numpy2Dto1D(BXYZ))
                color = A[int(srcIm[0])][int(srcIm[1])]
                ALLcolorA.append([float(color[0] / 255), float(color[1] / 255), float(color[2] / 255)])

                color = B[int(dstIm[0])][int(dstIm[1])]
                ALLcolorB.append([float(color[0] / 255), float(color[1] / 255), float(color[2] / 255)])

        ALLpclA = getPLYfromNumpy_RGB(ALLpclA,ALLcolorA)
        ALLpclB = getPLYfromNumpy_RGB(ALLpclB,ALLcolorB)
        o3d.io.write_point_cloud("ALL_pclA_Before.ply", ALLpclA)
        o3d.io.write_point_cloud("ALL_pclB_Before.ply", ALLpclB)

        for i in range(srcA_pts.shape[0]):
            if mask[i] == 0: continue

            srcIm = [srcA_pts[i][0][0], srcA_pts[i][0][1]]
            dstIm = [dstB_pts[i][0][0], dstB_pts[i][0][1]]

            ADepth = float(Adepthlist[int(srcIm[0])][int(srcIm[1])])
            BDepth = float(Bdepthlist[int(dstIm[0])][int(dstIm[1])])


            if (ADepth == 0 or ADepth > threshold) or (BDepth == 0 or BDepth > threshold):
                continue

            AXYZ = TransformPointI2C([int(srcIm[1]), int(srcIm[0]), ADepth], retK)
            BXYZ = TransformPointI2C([int(dstIm[1]), int(dstIm[0]), BDepth], retK)

            pclA.append(numpy2Dto1D(AXYZ))
            pclB.append(numpy2Dto1D(BXYZ))
            color = A[int(srcIm[0])][int(srcIm[1])]
            colorA.append([float(color[0] / 255), float(color[1] / 255), float(color[2] / 255)])

            color = B[int(dstIm[0])][int(dstIm[1])]
            colorB.append([float(color[0] / 255), float(color[1] / 255), float(color[2] / 255)])


        pclA = getPLYfromNumpy_RGB(pclA,colorA)
        pclB = getPLYfromNumpy_RGB(pclB,colorB)

        o3d.io.write_point_cloud("pclA_Before.ply", pclA)
        o3d.io.write_point_cloud("pclB_Before.ply", pclB)

        trans, rot, t, scale = Register(pclA, pclB)
        pclB.transform(trans)

        o3d.io.write_point_cloud("pclA_After.ply", pclA)
        o3d.io.write_point_cloud("pclB_After.ply", pclB)

        ALLpclB.transform(trans)
        o3d.io.write_point_cloud("ALL_pclA_After.ply", ALLpclA)
        o3d.io.write_point_cloud("ALL_pclB_After.ply", ALLpclB)
結果:画像マッチング
ということでやってみます。
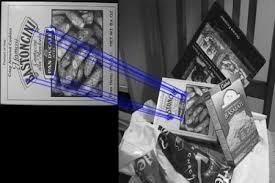
これが
こう。
いやよくわかんねぇな。
マッチングさせてransacで外れ値除去したピクセルを抽出・表示します。
いやよりわかんねぇな。
でもなんとなく形は一致してそうです。
トラッキング、動体検知などに使えそうな気配を感じます。
結果:点群の位置合わせ
さきほどの結果の答え合わせ・・・になるかどうかはわかりませんが、
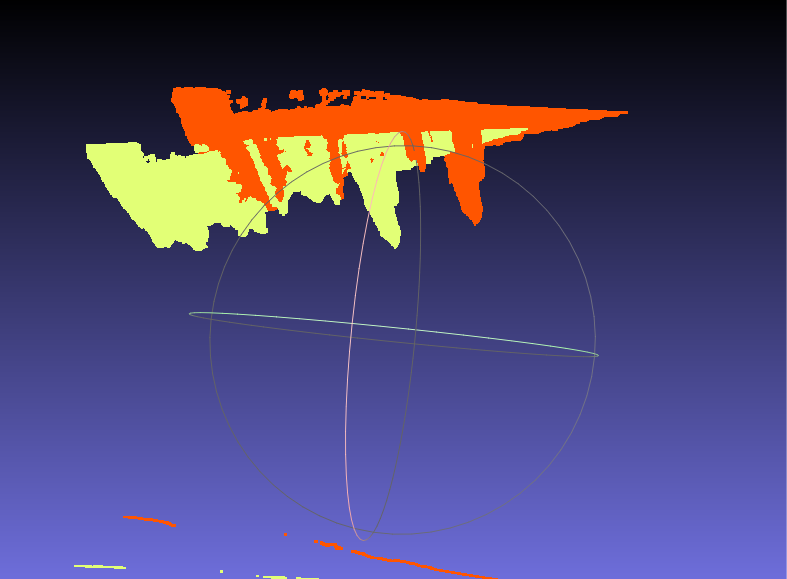
抽出した情報をもとに2つの視点の点群の位置合わせを行ってみます。
3.抽出したピクセルの組より点群化
4.抽出した点群を位置合わせ
5.4のパラメータを使って大本の点群に対して位置合わせ
うーん!微妙だ!
以上です。
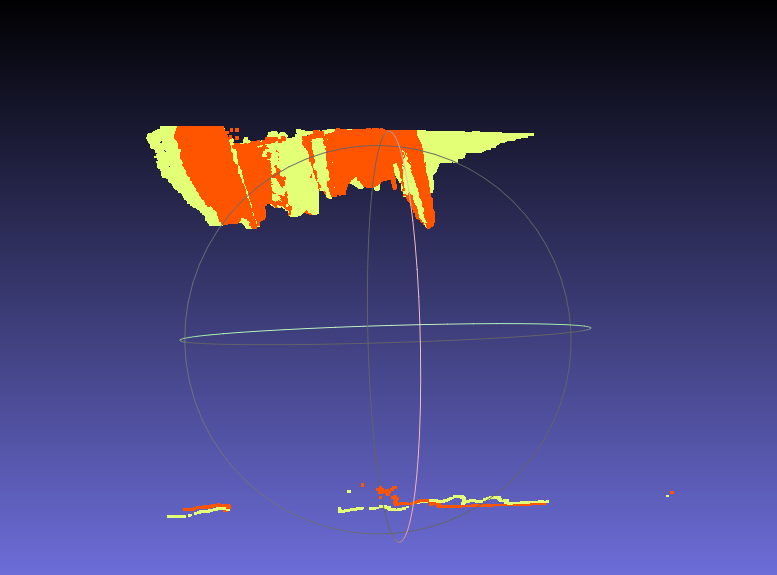
前回の結果はデプスの精度がよくなかったので
別のデータで検証しました。
ノイズだらけの点群ですが、
二次元マッチングがうまくいっているおかげか
割と自然にうまくマッチングできました。
マッチング時の外れ値の除去にRansacのみを利用しましたが、
せっかく点群にしたので、次回はマッチングしたポイントの距離も考慮して
外れ値を除去してみます。
