IBM Cloud Container Service tokyoリージョンのk8sでIstioを試してみる
このエントリは、Kubernetes2 Advent Calendar 2017 20日目の記事です。
(8日遅れでした・・・)
はじめてのIstio
発表された時からずっと気になってたIstio.
OpenShiftや他のk8s製品も皆採用し始めていよいよ無視できない存在になってきました。
IBMもIstioの開発に協働しているようですので、今後サービスに組み込まれたりしないかな、と期待しています。
とはいえもう待ちきれないので今回はIBM Cloudのk8sでIstioを使ってみます。
IBM Cloud Container Serviceを使ってみる
今回のチュートリアルでは、Istioを使って外部へサービス公開を行うため、
k8sクラスタのライトプランでは利用ができません。
今回はPay-As-You-Go planで、最小の2CPUs 4GB RAM(u2c.2x4) 19円/時間の1ノードで恐る恐る試してみます。
リージョンは2017年12月からサービス開始されたTokyoリージョンを使用します。(これも自分は初チャレンジです)
目的として今回はずIstioを入れてみて、すっごーーいって叫ぶトコまでとします。
事前準備
- IBM Cloud pay-as-you-goアカウントの取得
- k8s クラスタ(IBM Cloud Container Service)のデプロイ
今回はクラスタ名"tokyo-istio"としてデプロイしました。
2CPUs 4GB RAM(u2c.2x4) 19円/時間 ノード数1 k8sバージョンは最新の1.8.4_1502を利用 - bx(bluemix)コマンドの導入
- kubectlの導入
実際にやってみる
東京リージョンのk8sへ接続するには2017年12月現在ひと工夫必要です。
MahoTakaraさんのIBM Cloud k8s の東京リージョン切り替え方法
を参考にさせていただきました。
paidクラスタをデプロイするときの注意
IBM CloudのIaaS部分でk8sを仮想インスタンスで稼働するため、globalIPが必要になります。
Portable Public IPの8IPアドレスが自動的に払い出され、月額$16が別途かかるようです。
このあたりは月末あたりだと日割りになるようです。
ログイン
$ bx login -a api.ng.bluemix.net
k8sクラスタへの接続
$ bx cs init --host https://ap-north.containers.bluemix.net
Using user provided API endpoint: https://ap-north.containers.bluemix.net
OK
$ bx cs clusters
OK
Name          ID                                 State    Created       Workers   Datacenter   Version
tokyo-istio   eba98d2f51834bcaac0*****4862d391   normal   9 hours ago   1         tok02        1.8.4_1502
$ bx cs cluster-config tokyo-istio
$ export KUBECONFIG=/Users/sakaigawa/.bluemix/plugins/container-service/clusters/tokyo-istio/kube-config-tok02-tokyo-istio.yml
istioのインストール
istioのデプロイはすごい簡単です。
curlで実行シェルはgit cloneするので、適当なフォルダを作成してその中で実行しましょう。
$ mkdir istio-ibmcloud
$ cd istio-ibmcloud/
$ ls
$ curl -L https://git.io/getLatestIstio | sh -
$ export PATH=$PWD/istio-0.3.0/bin:$PATH
$ cd istio-0.3.0/
$ ~/kubectl apply -f install/kubernetes/istio.yaml
出来上がったPodを確認してみる
$ ~/kubectl get svc -n istio-system
NAME            CLUSTER-IP       EXTERNAL-IP       PORT(S)                                                            AGE
istio-ingress   172.21.13.199    161.202.106.115   80:31859/TCP,443:30568/TCP                                         25s
istio-mixer     172.21.241.240   <none>            9091/TCP,15004/TCP,9093/TCP,9094/TCP,9102/TCP,9125/UDP,42422/TCP   33s
istio-pilot     172.21.53.126    <none>            15003/TCP,443/TCP                                                  26s
$ ~/kubectl get pods -n istio-system
NAME                             READY     STATUS    RESTARTS   AGE
istio-ca-555bbff478-d5hr4        1/1       Running   0          42s
istio-ingress-57b544fd9c-tjpgp   1/1       Running   0          43s
istio-mixer-6c67558b4c-jkph5     3/3       Running   0          51s
istio-pilot-5655764fbb-7nls2     2/2       Running   0          43s
はいっ。これでおしまい。
BookStore Appサンプルアプリケーションのデプロイ
Istioのパッケージにはサンプルアプリケーションが付属しています。
Istioパッケージのインストールに使用した方法からは幾分か手順が変わりますが、
以下コマンドでインストールしてみます。
$ ~/kubectl apply -f <(istioctl kube-inject -f samples/bookinfo/kube/bookinfo.yaml)
$ ~/kubectl get svc
NAME          CLUSTER-IP       EXTERNAL-IP   PORT(S)    AGE
details       172.21.60.75     <none>        9080/TCP   11s
kubernetes    172.21.0.1       <none>        443/TCP    9h
productpage   172.21.184.247   <none>        9080/TCP   10s
ratings       172.21.128.12    <none>        9080/TCP   11s
reviews       172.21.58.62     <none>        9080/TCP   10s
$ ~/kubectl get pods
NAME                             READY     STATUS    RESTARTS   AGE
details-v1-5776b48b4d-q9l2g      2/2       Running   0          1m
productpage-v1-fd64558b8-tstqx   2/2       Running   0          1m
ratings-v1-5f8f9f5db4-cz2bm      2/2       Running   0          1m
reviews-v1-c96f558c6-8l82g       2/2       Running   0          1m
reviews-v2-b5d8745bd-4mgtw       2/2       Running   0          1m
reviews-v3-79d8ff97d8-nv6ts      2/2       Running   0          1m
Istioのサービスアドレスを取得する
ここはk8s Ingressのアドレスを取得して外部公開しているIPアドレスを探します。
$ ~/kubectl get ingress
NAME      HOSTS     ADDRESS           PORTS     AGE
gateway   *         161.xxx.106.115   80        2m
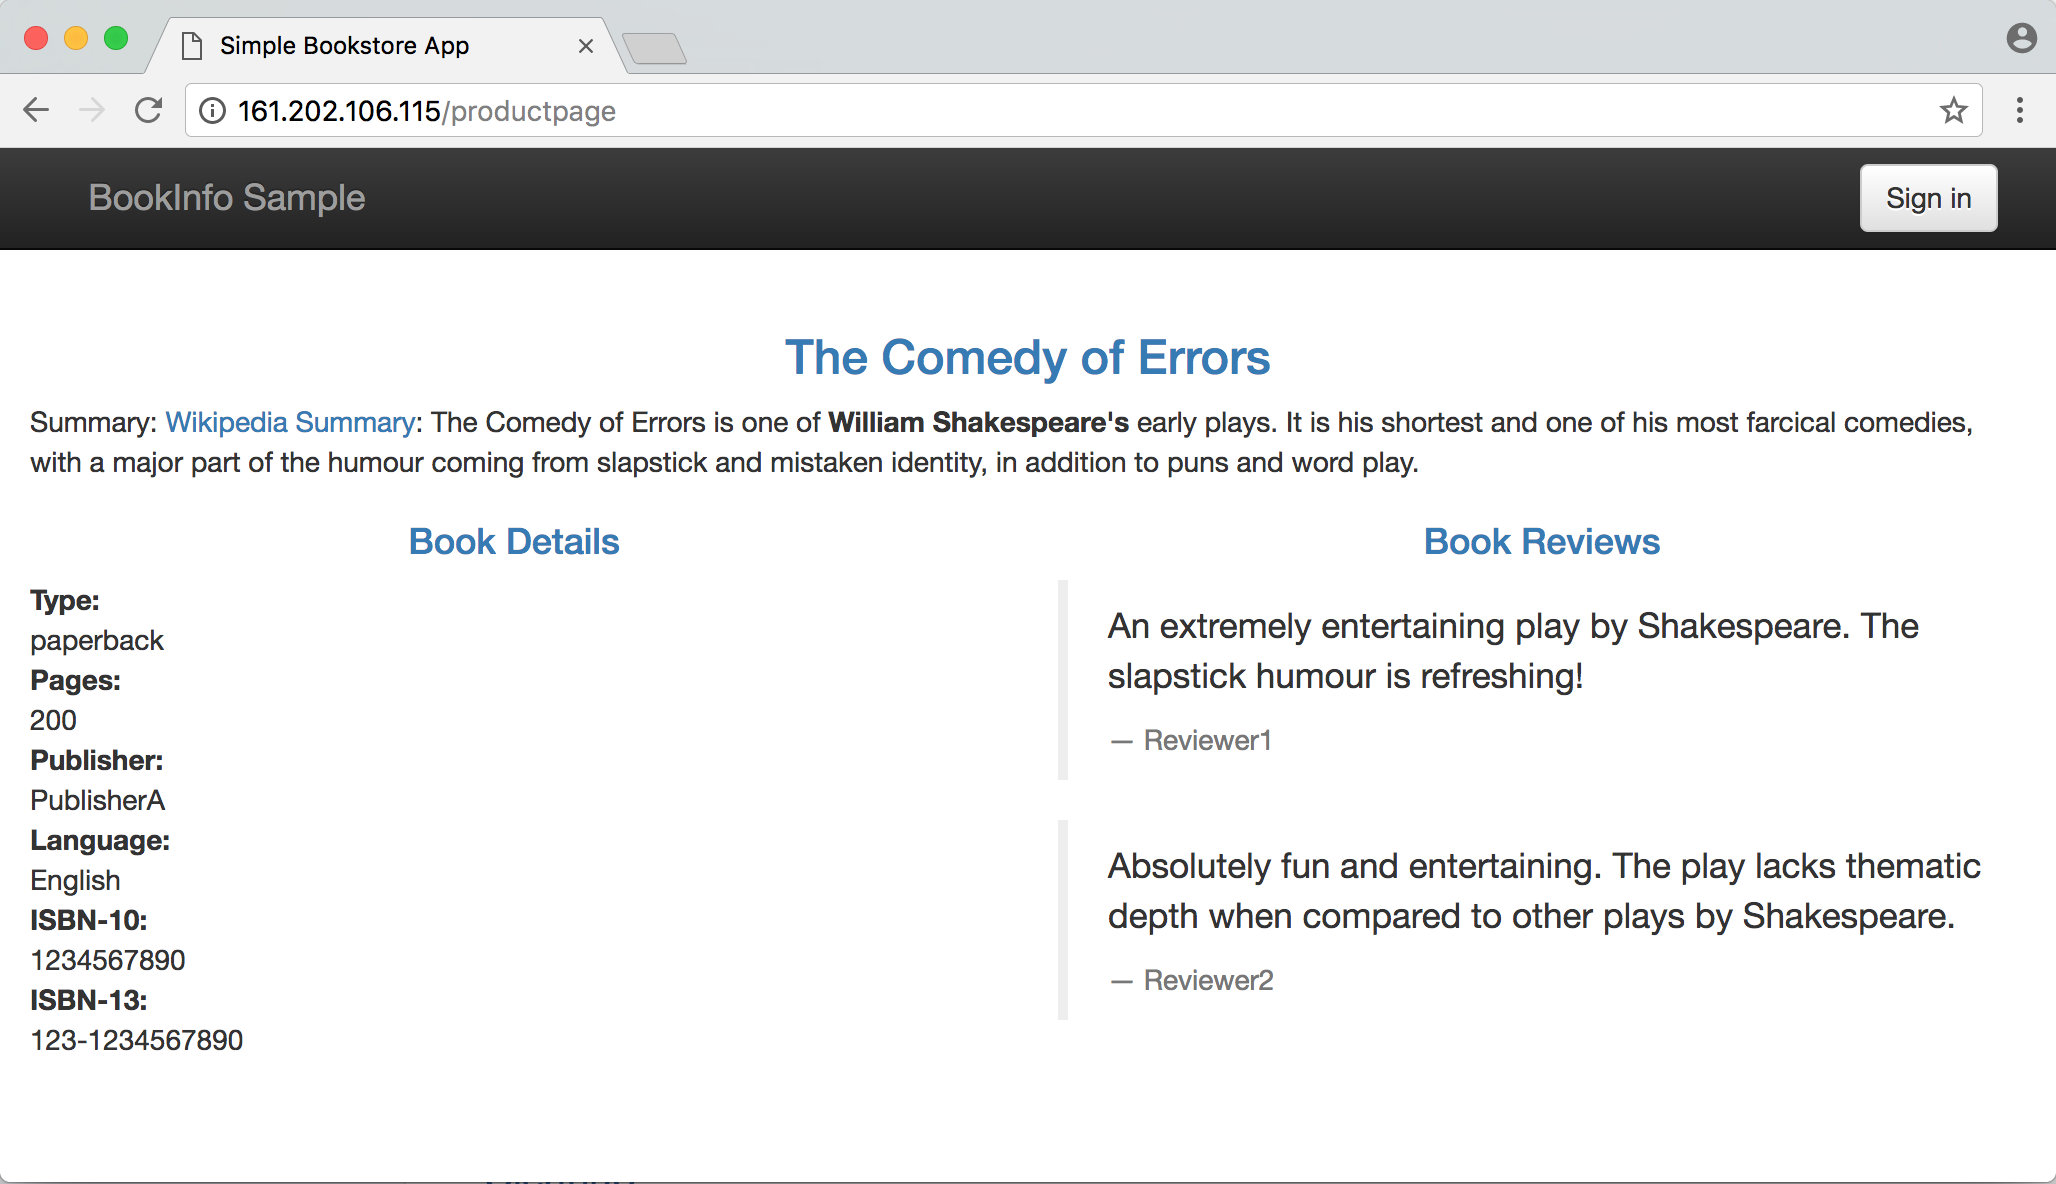
BookStore Appの実行結果
サービスアドレスを確認後、http://{gatewayのアドレス}/productpageが開けたらIstioを利用してアプリケーションが公開されます。ta

Service Graphを導入してみる
istioのaddon-yamlで提供されているService Graphを導入してみます。
このアプリケーションはサービスを呼び出す経路やレスポンスタイムの統計情報を見ることが出来ます。
実運用で色々負荷がかかるともっと面白い表示になると思います。
$ ~/kubectl apply -f install/kubernetes/addons/servicegraph.yaml
deployment "servicegraph" created
service "servicegraph" created
$ ~/kubectl -n istio-system port-forward $(~/kubectl -n istio-system get pod -l app=servicegraph -o jsonpath='{.items[0].metadata.name}') 8088:8088 &
Forwarding from 127.0.0.1:8088 -> 8088
Forwarding from [::1]:8088 -> 8088
servicegraphの実行結果

まとめ
IstioをTokyoリージョンにデプロイしてみることができました。
Istioのエコシステムをこれから勉強しようとしているので、写経的な感じになってしまいましたが、
blue greenデプロイや、zipkin,prometheus,grafana周りをまずは使ってみたいので、今後も勉強していきたいと思います。